
• Skip to primary navigation
  • Skip to main content
  • Skip to primary sidebar
  • Thermomix Recipes
  • Christmas
  • Sweet
    • Slices, Brownies & Bars
    • Cookies & Biscuits
    • Cakes & Cupcakes
    • Chocolate
    • Desserts
    • Breakfast & Brunch
    • Healthy Treats
    • Drinks & Smoothies
    • Sweet Breads & Muffins
    • Easter
    • Celebrations
  • Savoury
    • Savoury Thermomix Lunchbox Recipes
    • Main Dishes
    • Sides & Salads
    • Snacks
    • Soups
    • Savoury Breads & Muffins
  • Lunch Box
    • Kids/Toddlers
  • Family Meals
  • Store
    • Shop All
    • Categories
      • Thermomix Recipe Books
      • Thermomix Recipe eBooks
  • Contact

Thermobliss

menu icon
go to homepage
subscribe
search icon
Homepage link
  • Thermomix Recipes
  • Sweet Recipes
  • Savoury Recipes
  • Family Recipes
  • Cookbook Shop
  • Cookbook Index
    • Facebook
    • Instagram
    • Pinterest
  • ×
    Home » All Posts

    All Posts

    Thermomix Bao Buns

    October 1, 2018

    Our soft and fluffy Thermomix Bao Buns are one of the most popular recipes on our website! Why not try them served with leftover roast pork and crunchy Asian slaw to make the perfect family dinner. 

    Thermomix Bao Buns filled with salad and roast bbq pork on a speckled plate.

    If you're looking for a yummy new dinner to make in your Thermomix, this is it!!! Our Thermomix Bao Buns are always a massive hit with the whole family. I like to make these buns whenever I have leftover roast pork or pulled pork sitting in the fridge. Add some fresh crunchy slaw, some creamy mayo and you've got a delicious meal waiting for you!

    Why you will love this recipe:

    • Simple to make - these Bao Buns require around 20 minutes of prep time.
    • Family friendly - serve these buns alongside your family's favourite fillings and watch them help themselves!
    • Freezer friendly - you can freeze any leftover dough for up to two months.
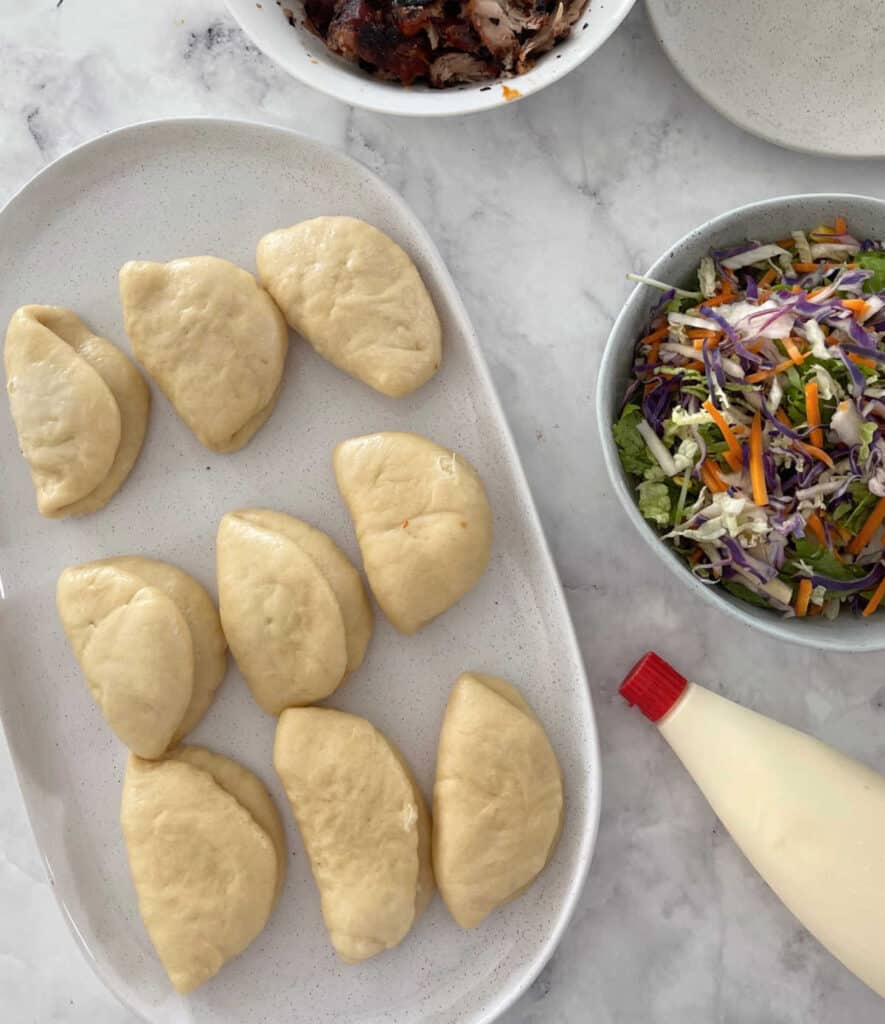
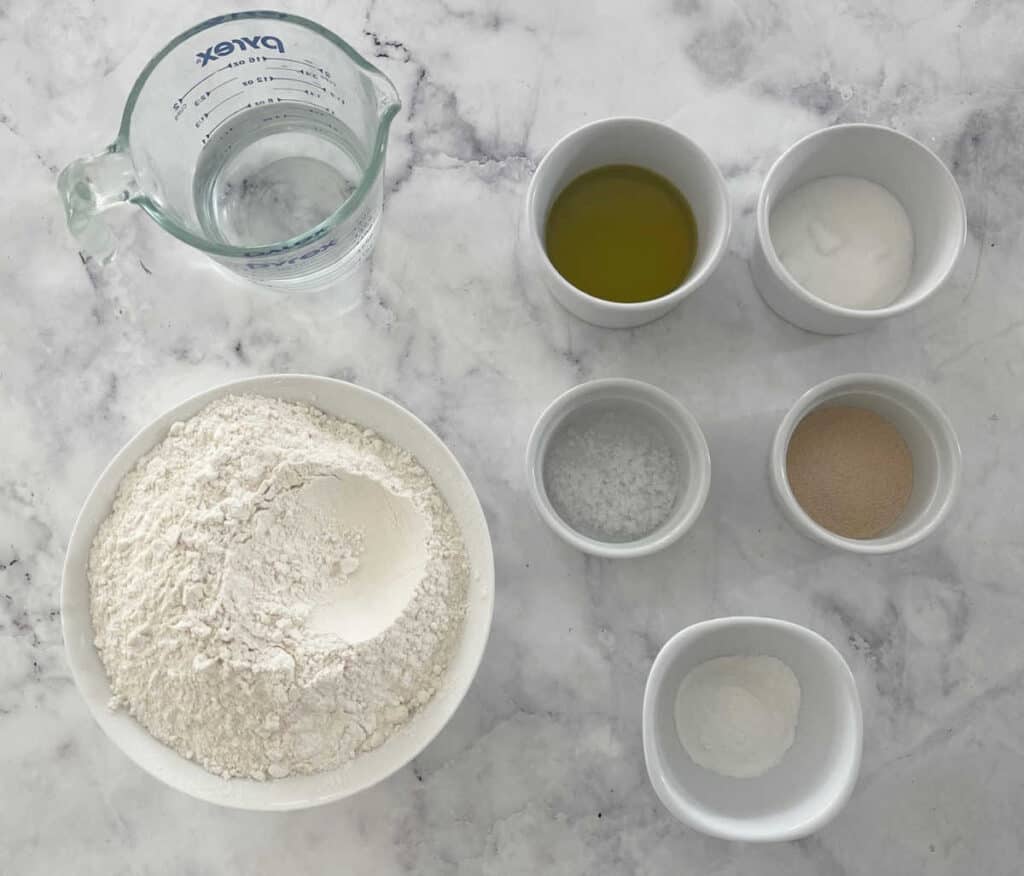
    Thermomix Bao Bun Ingredients:

    Please note you will find the full recipe including ingredient list in the recipe card below.

    • Sugar
    • Yeast
    • Bakers flour
    • Baking Powder
    • Water
    • Extra virgin olive oil
    • Salt
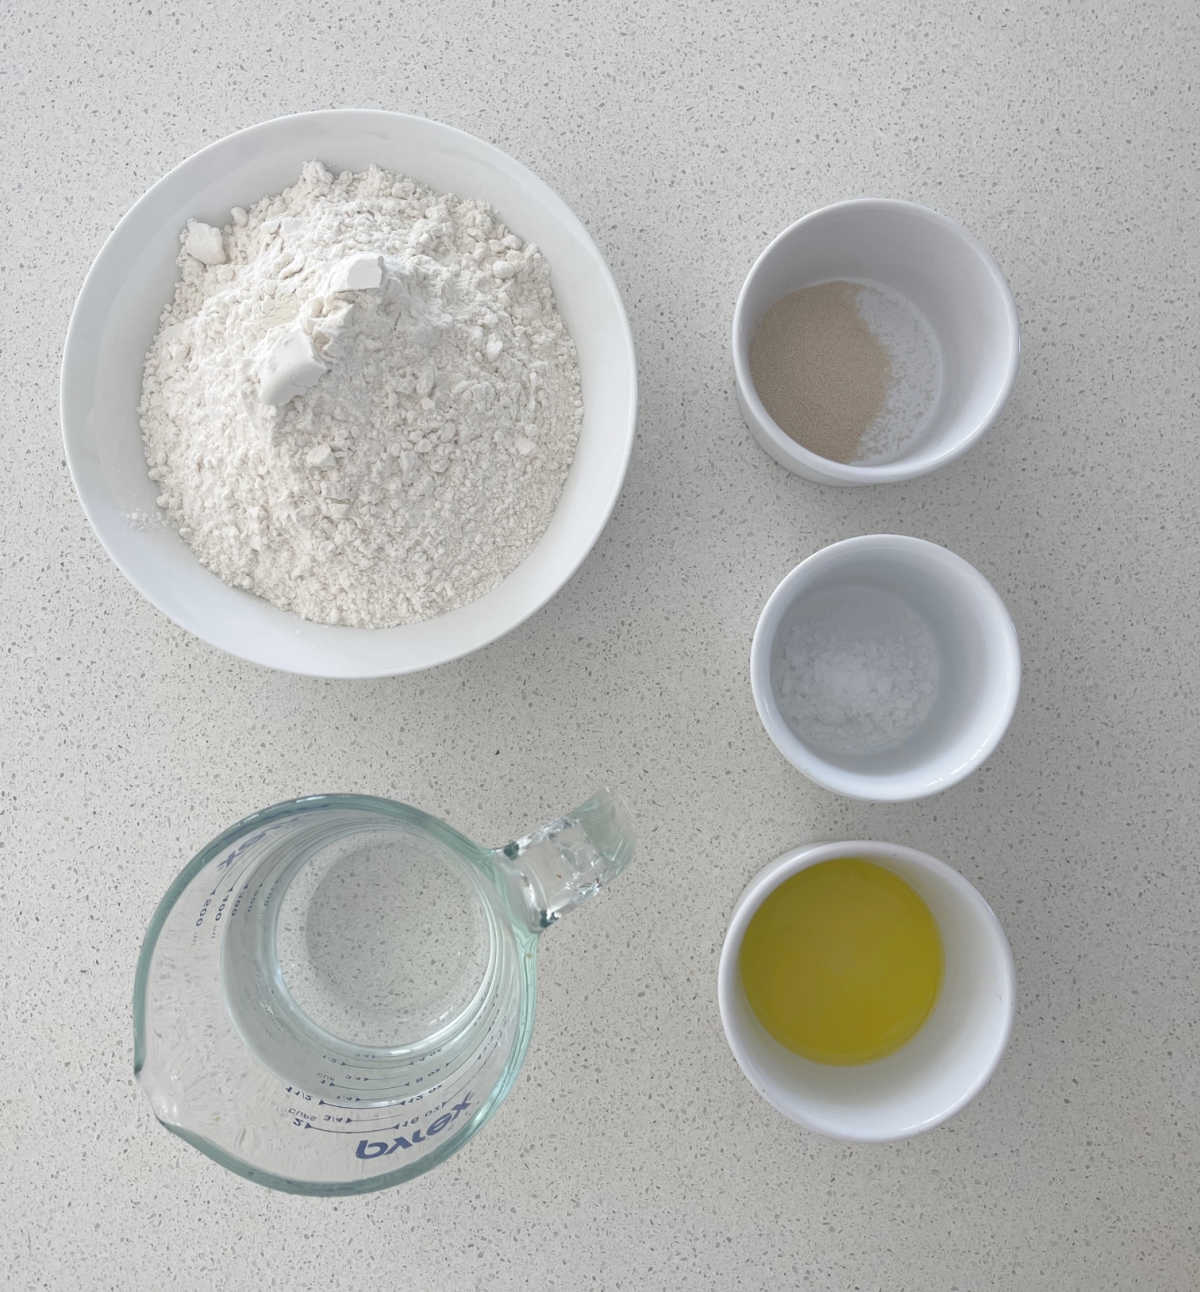
    Thermomix Bao Buns Ingredients.

    How to Make Bao Buns in a Thermomix:

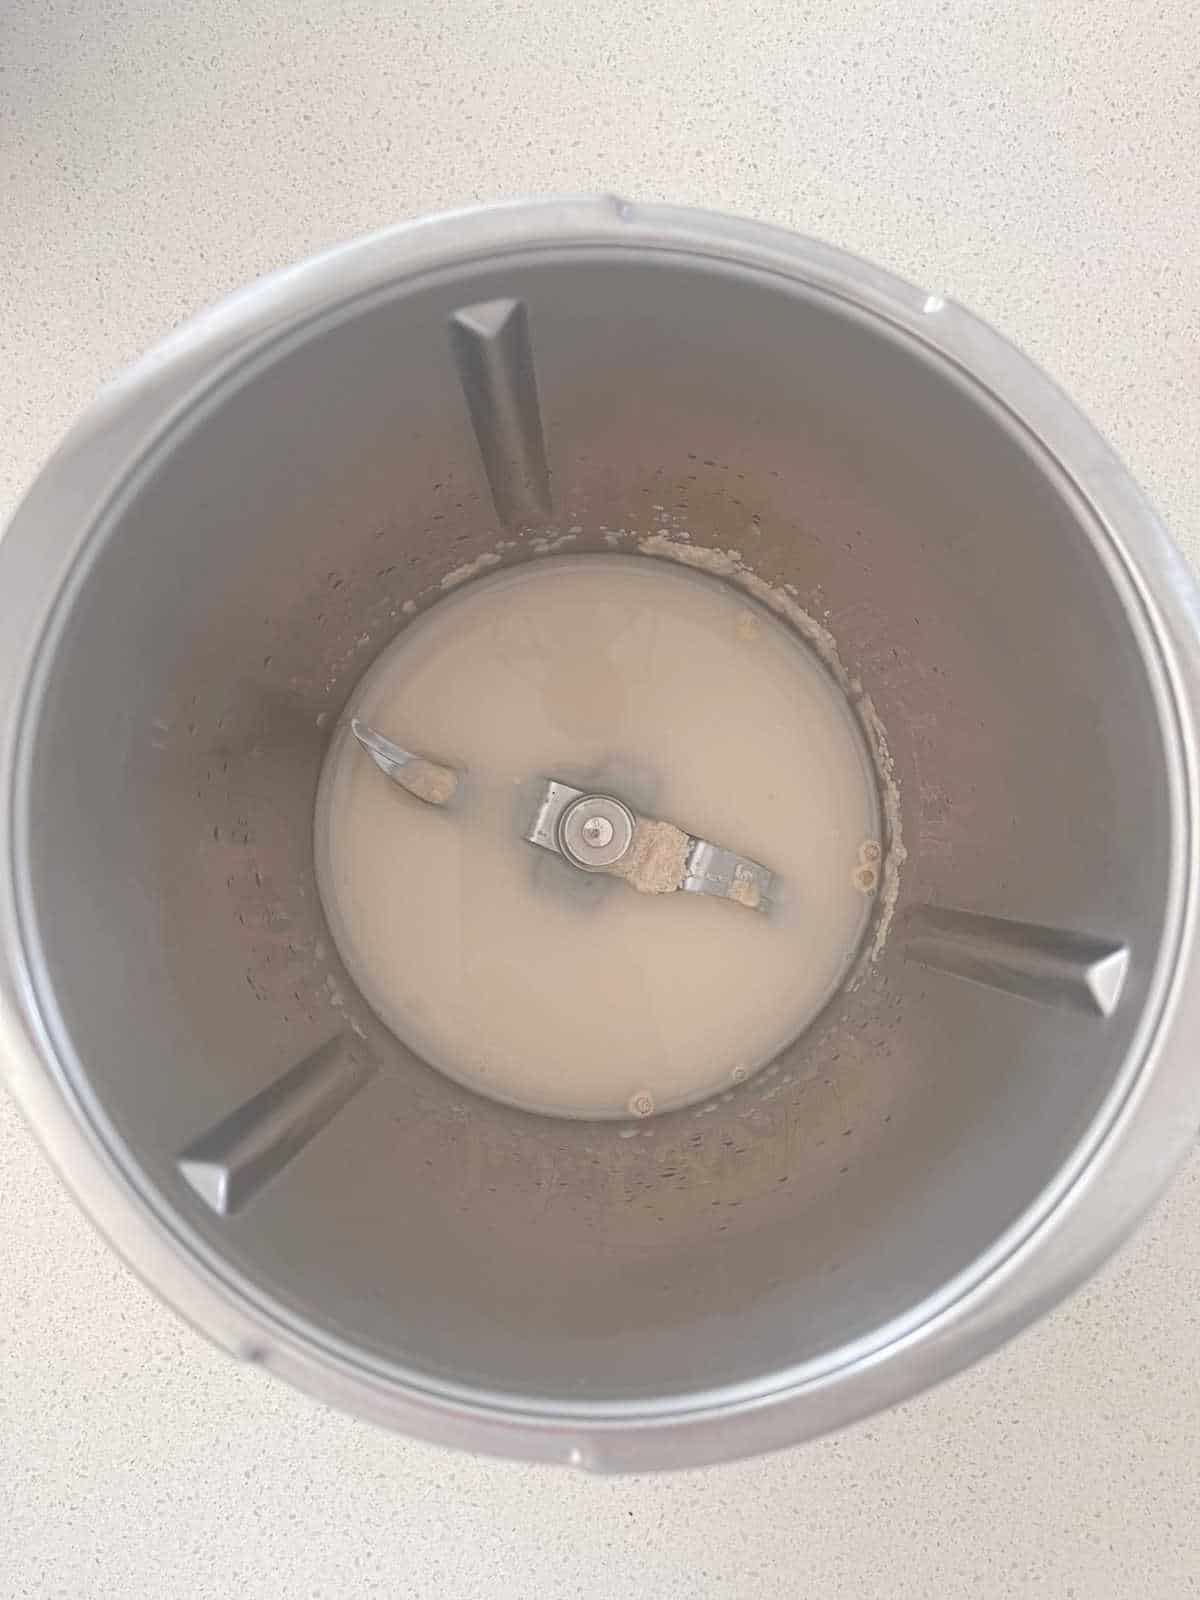
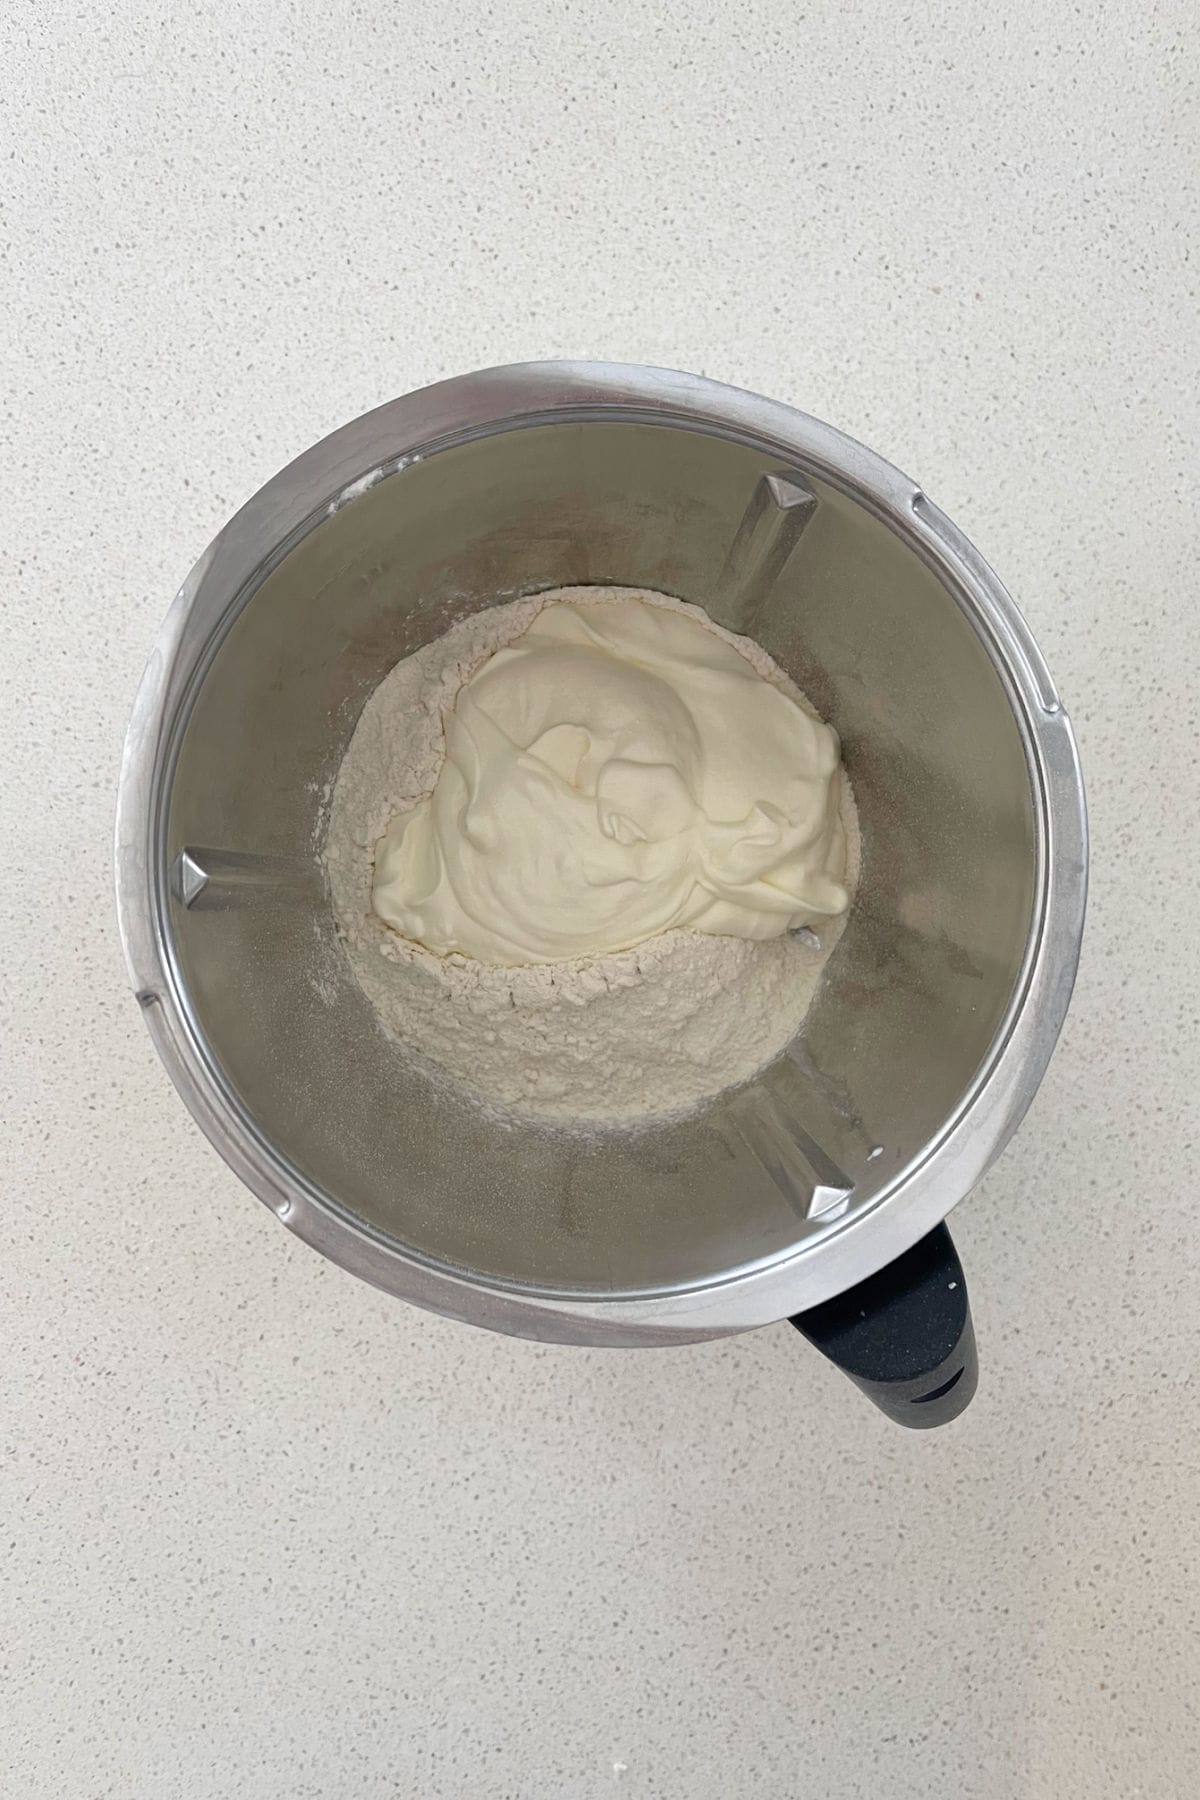
    1. Place the water, sugar and yeast into a Thermomix bowl and mix before allowing to rest.
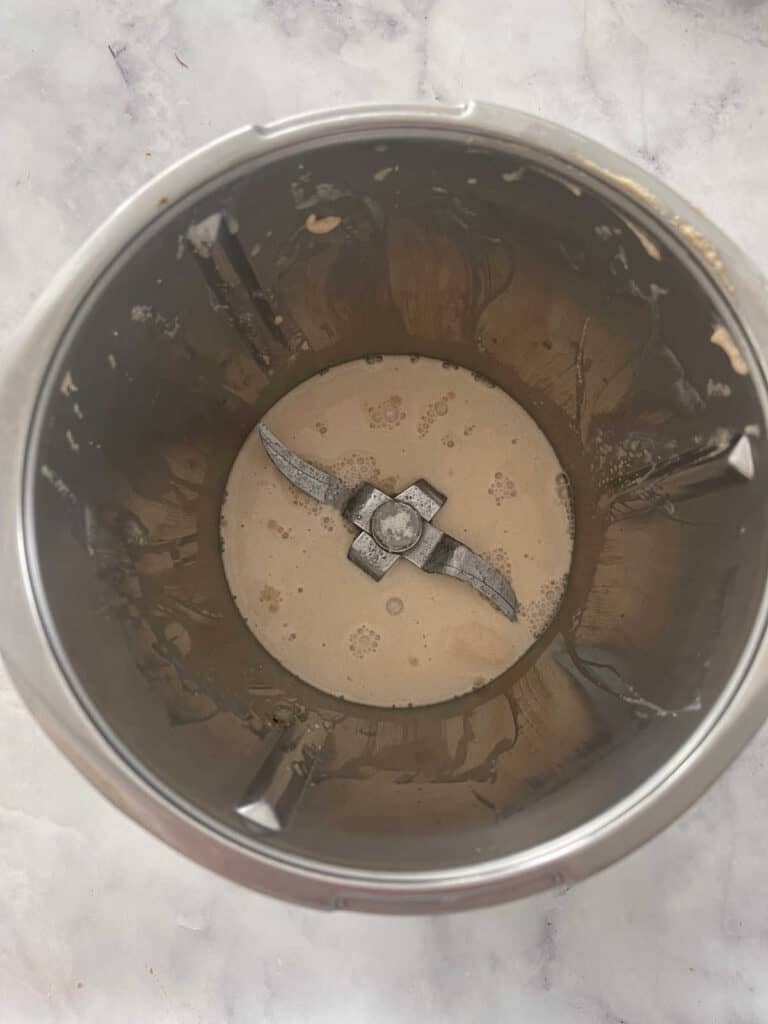
    dough for Thermomix Bao Buns.

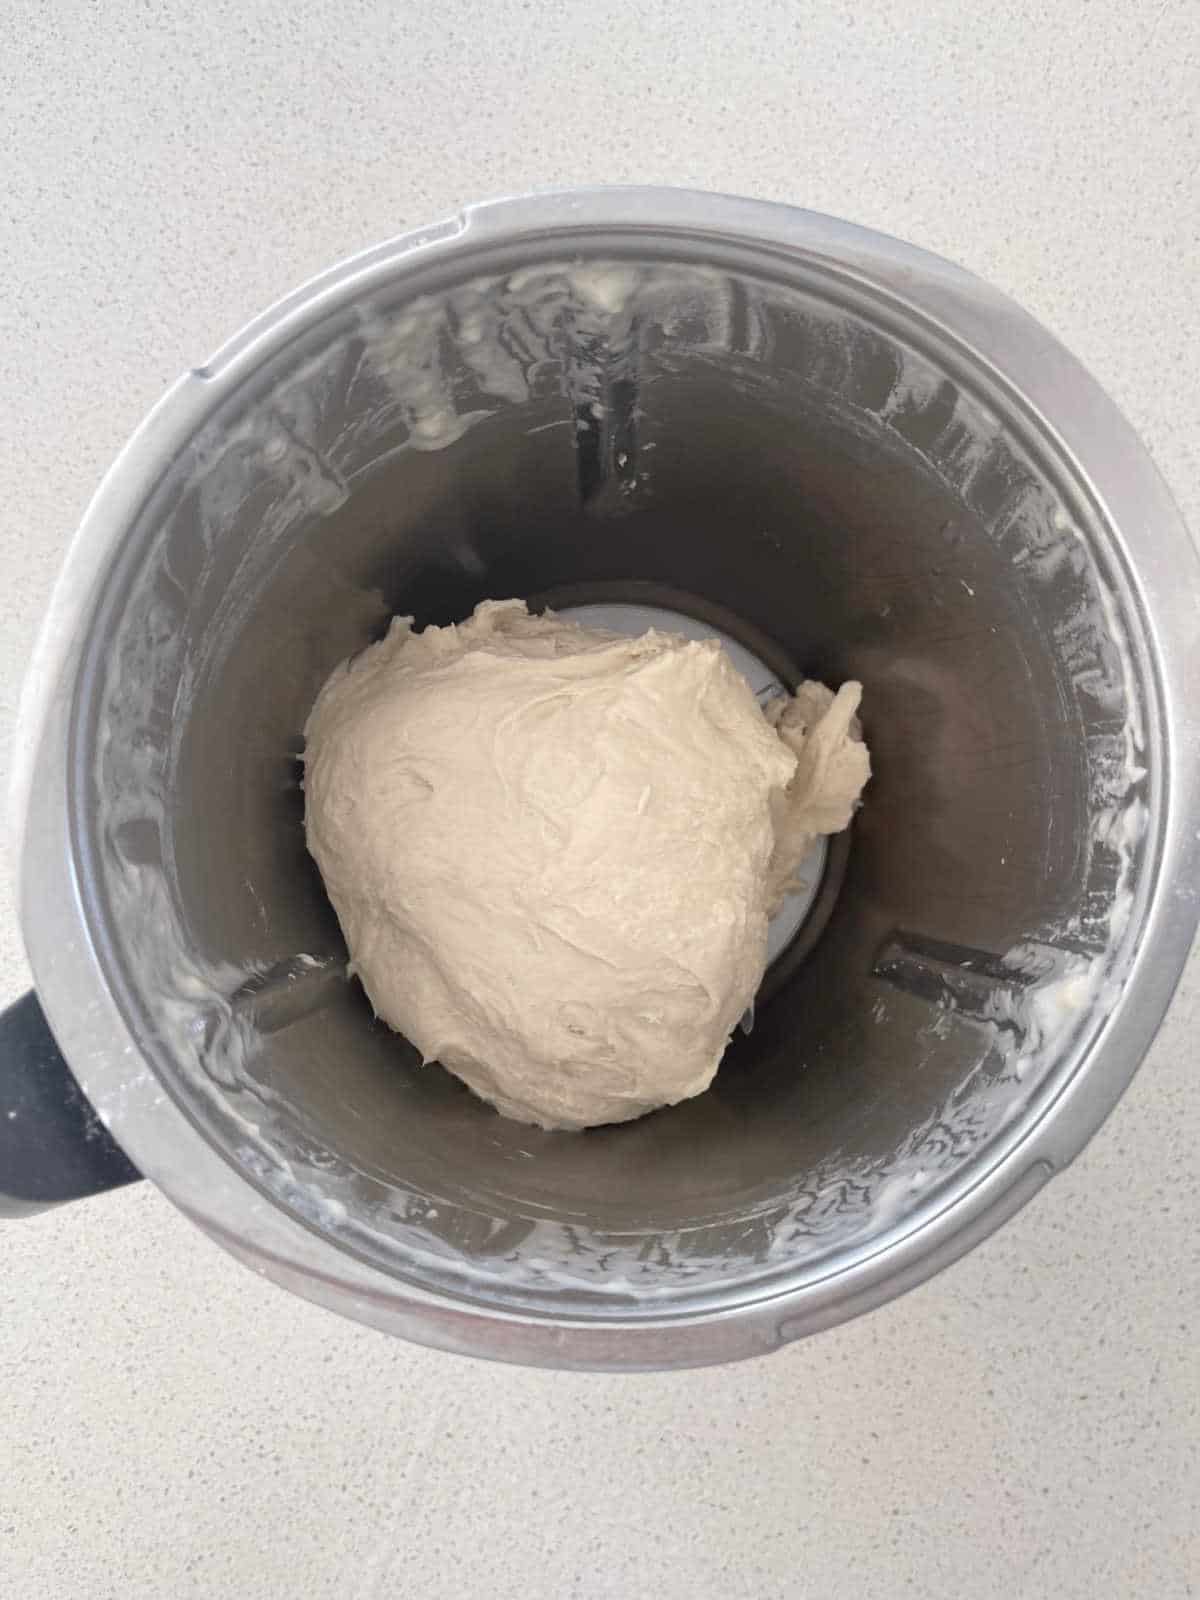
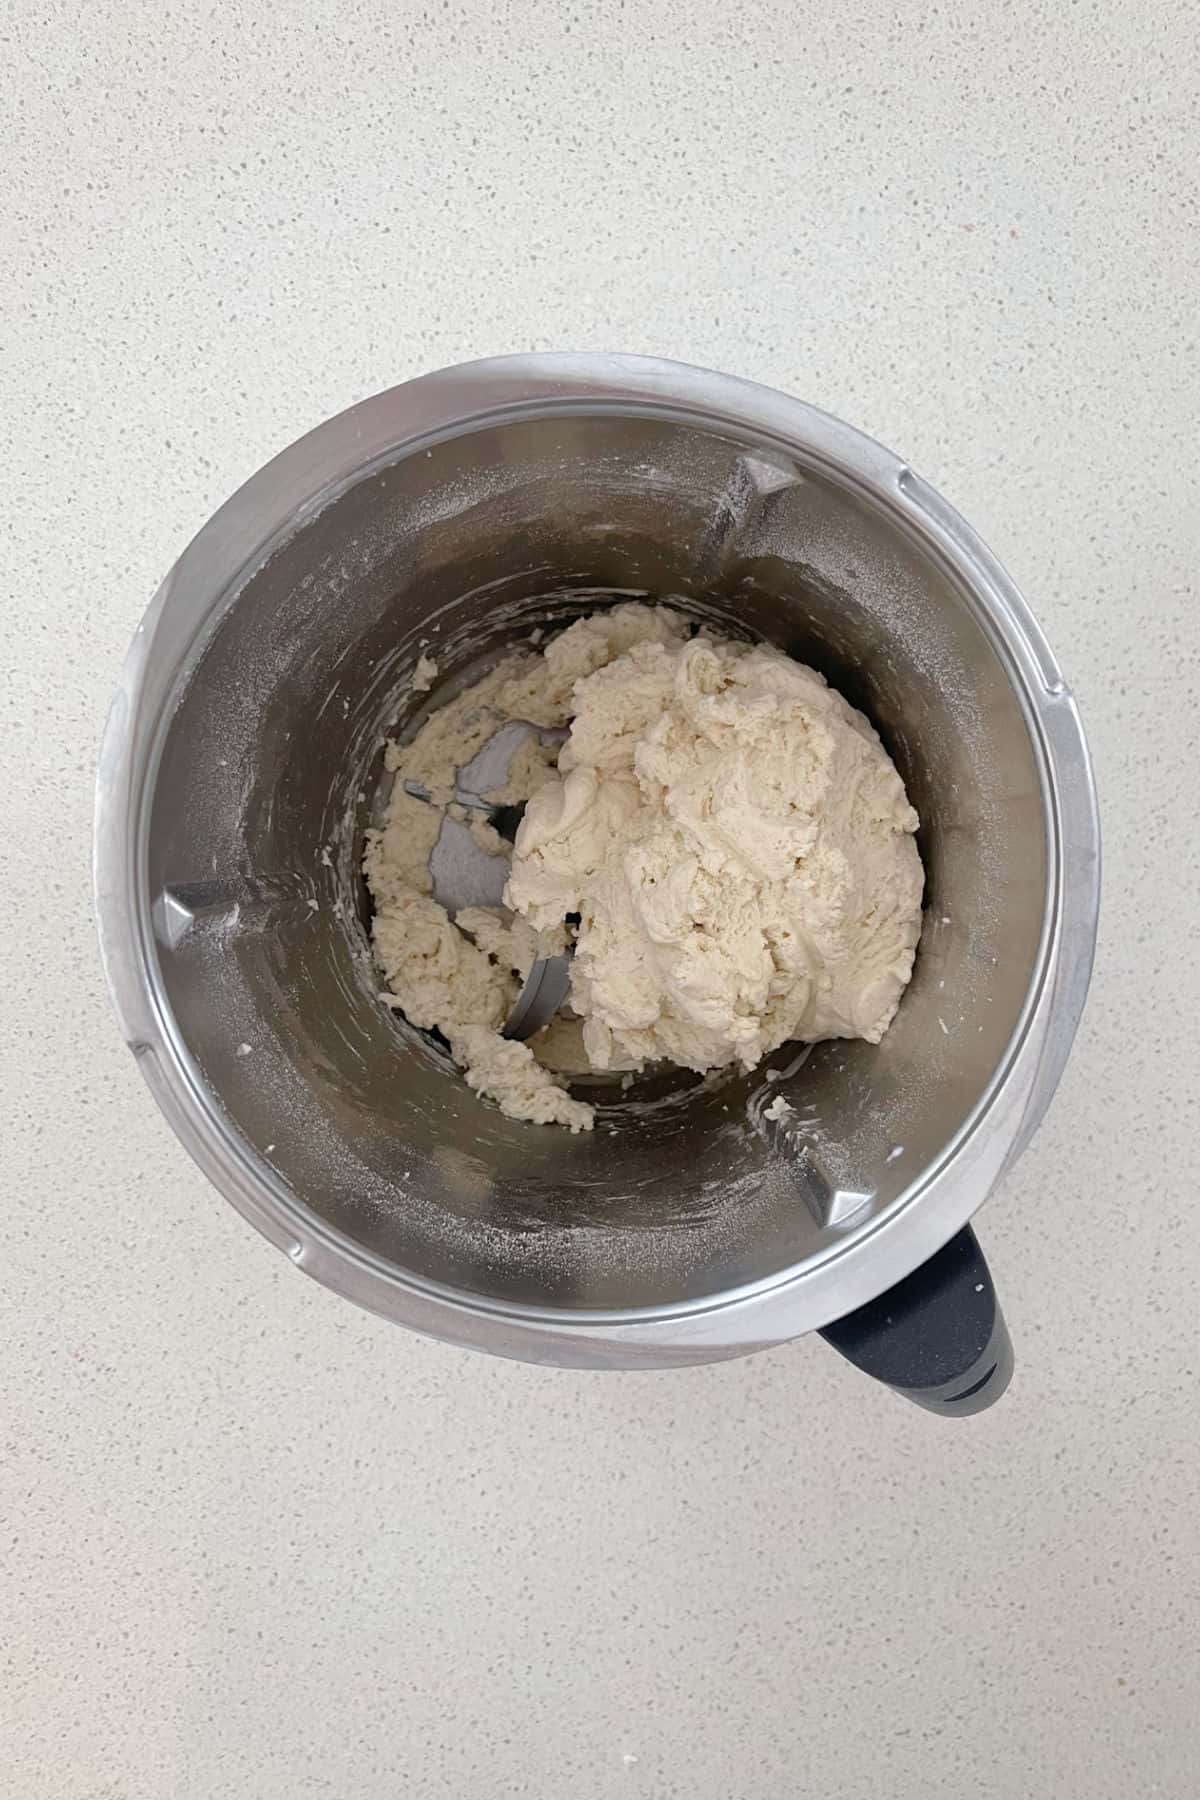
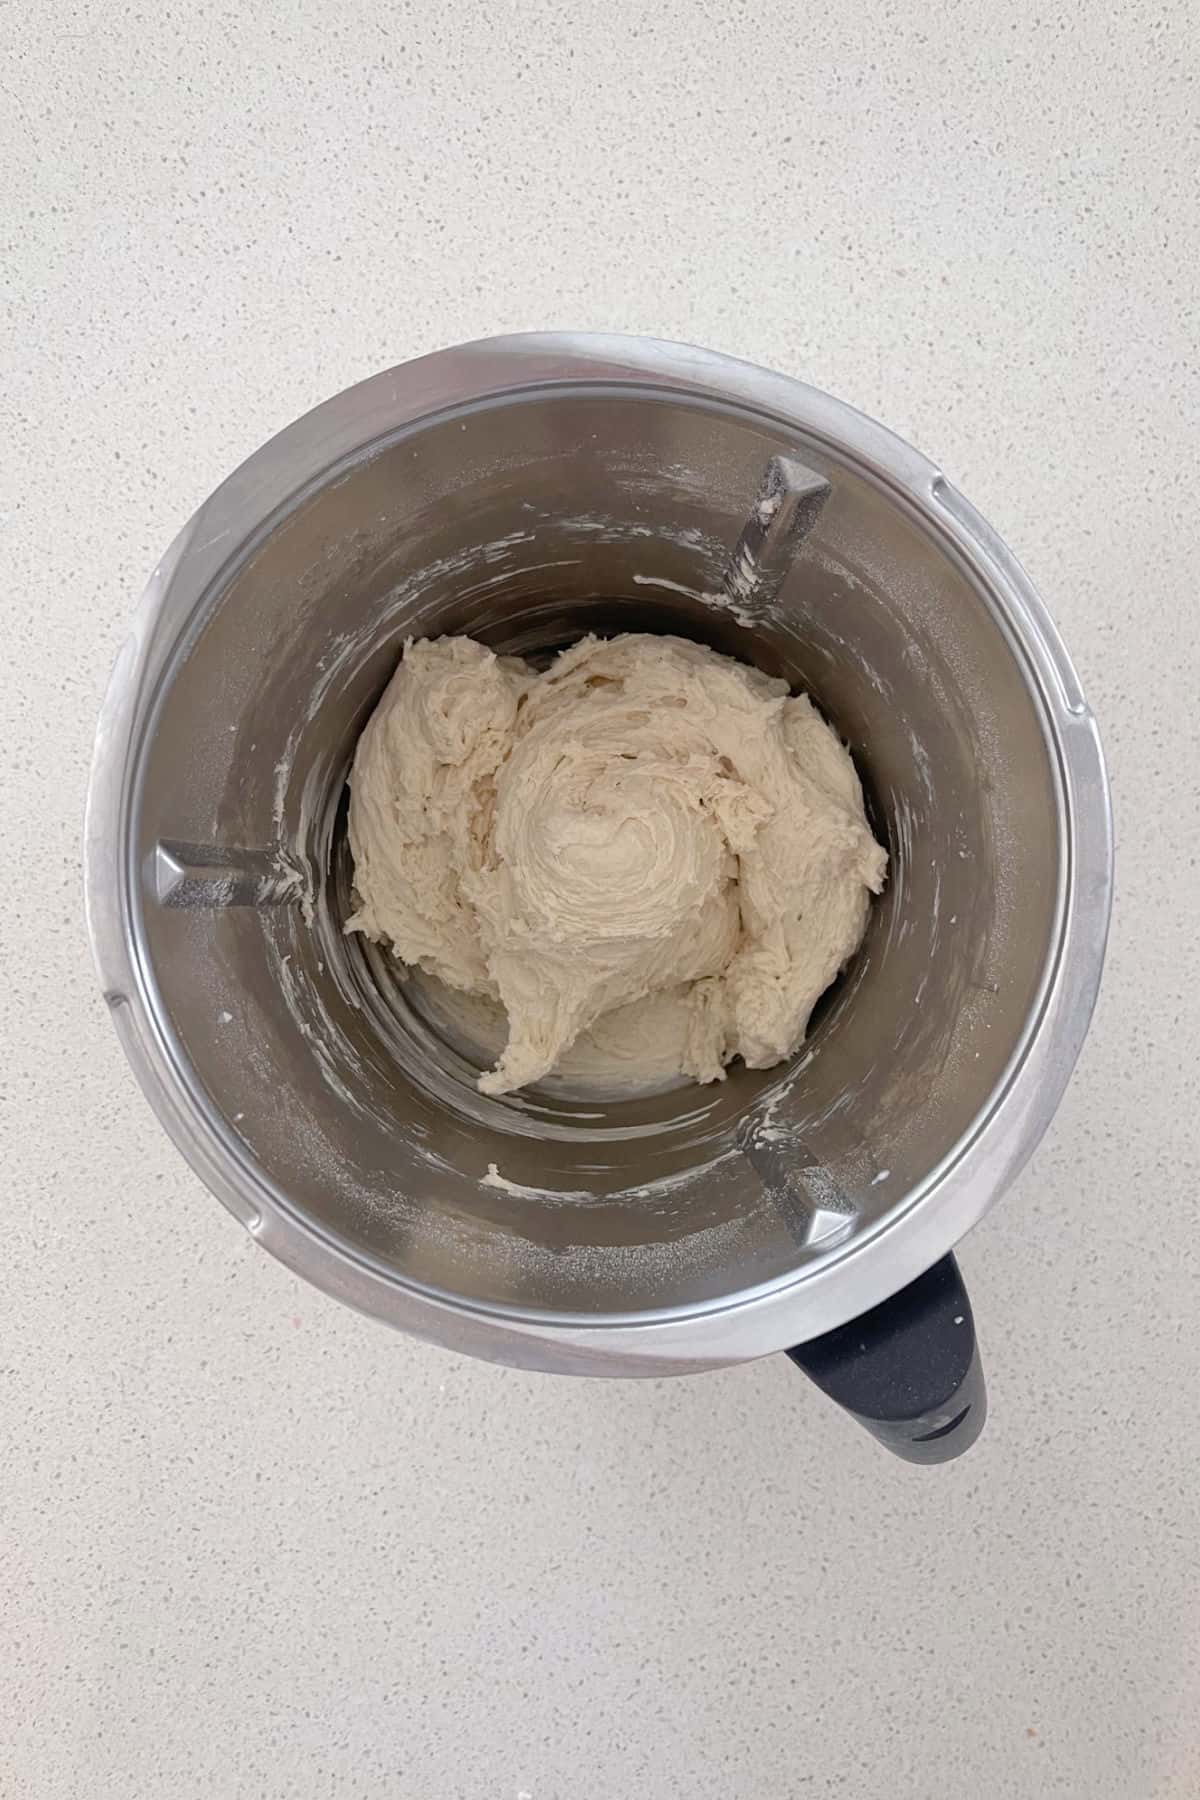
    2. Add the flour, olive oil, salt and baking powder and combine.
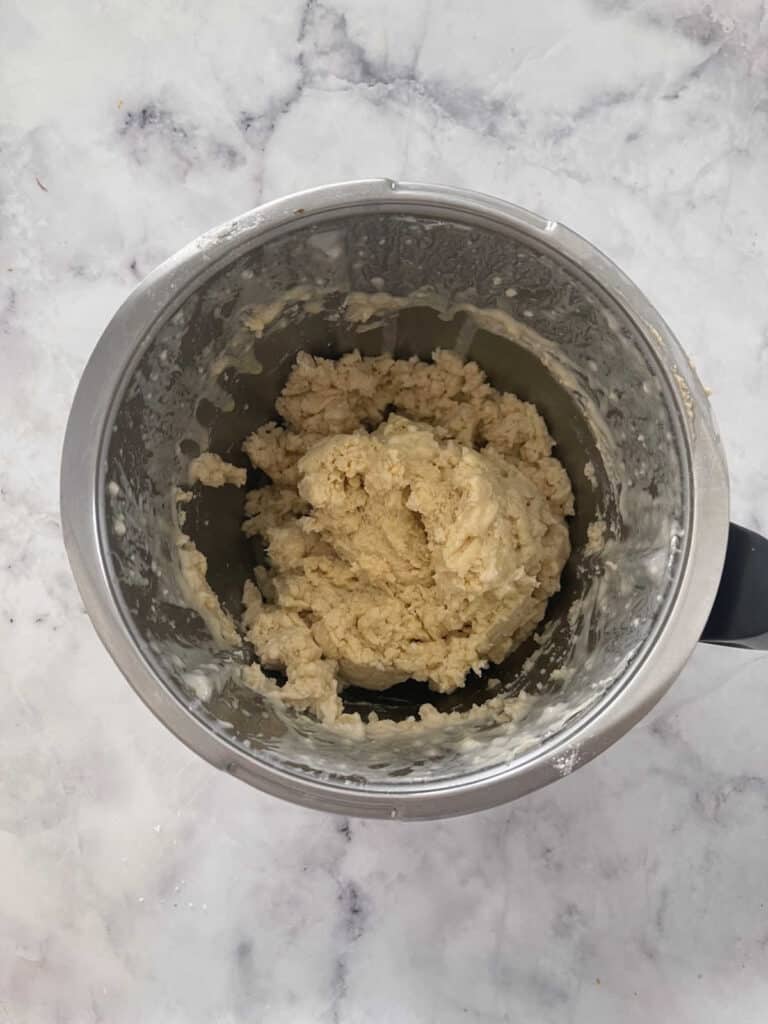
    Thermomix Bao Buns dough.

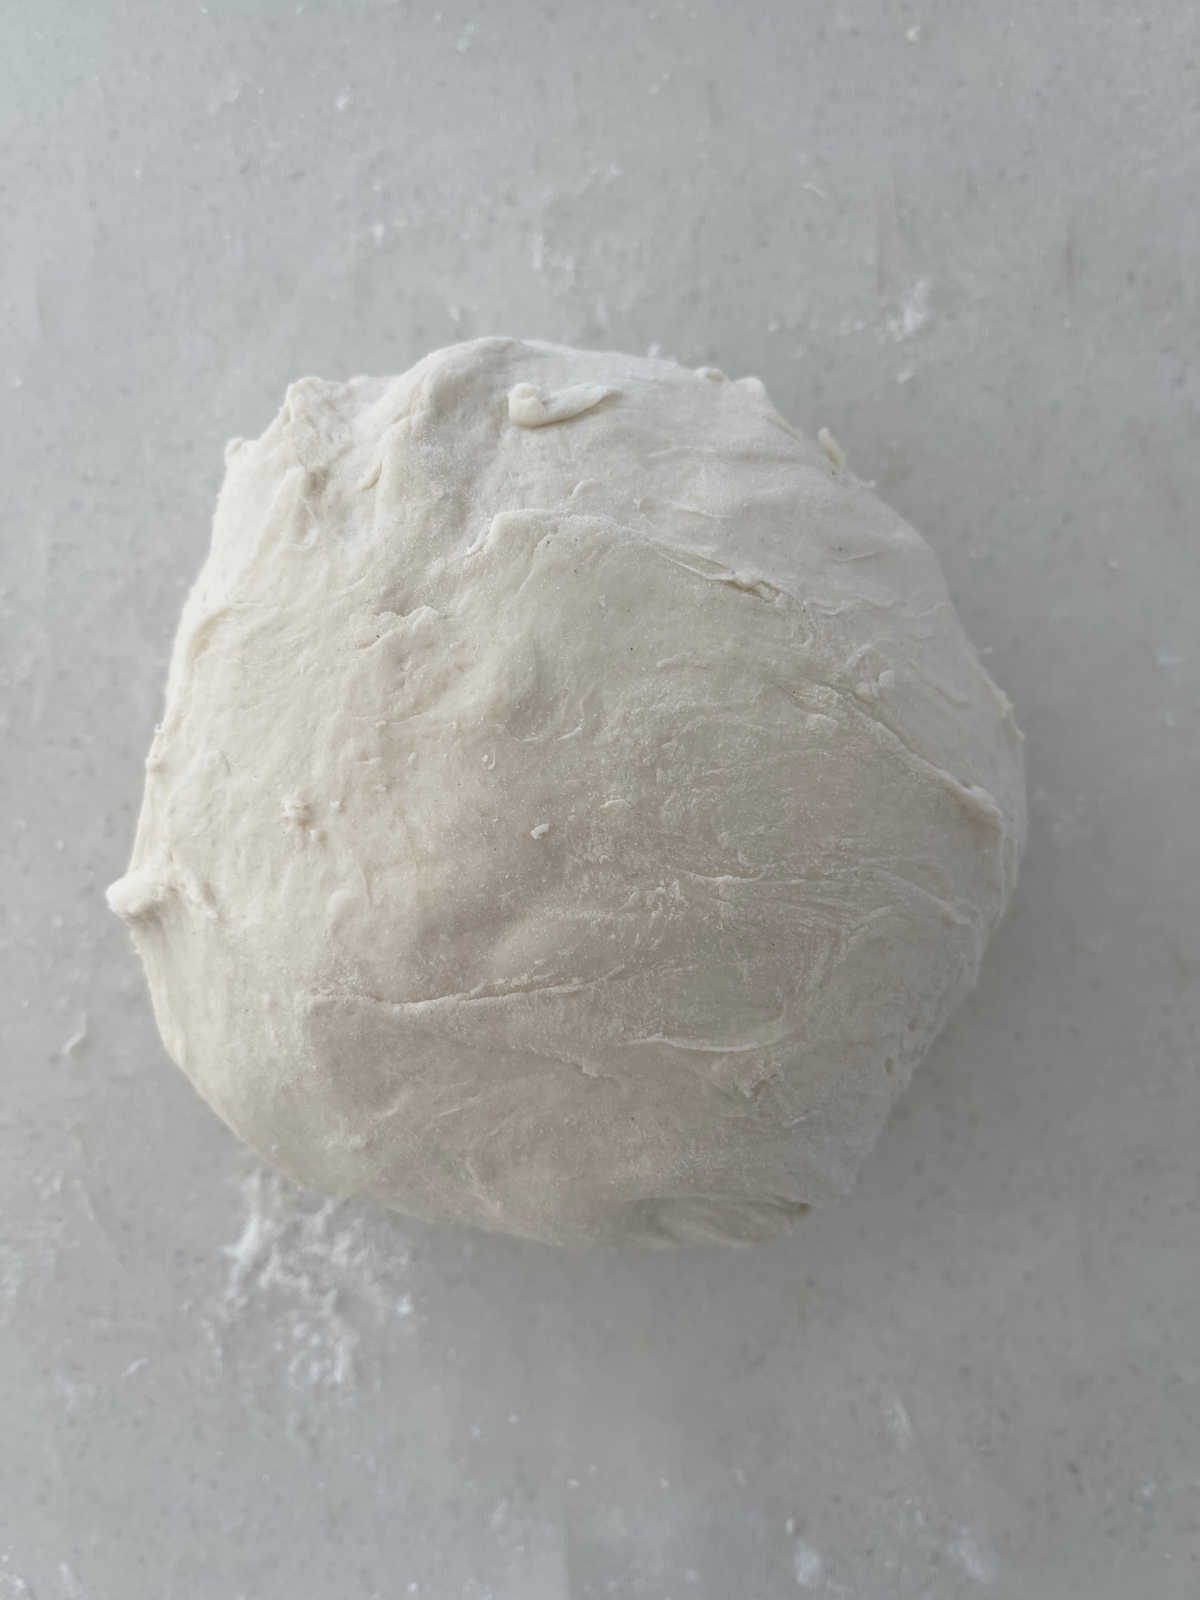
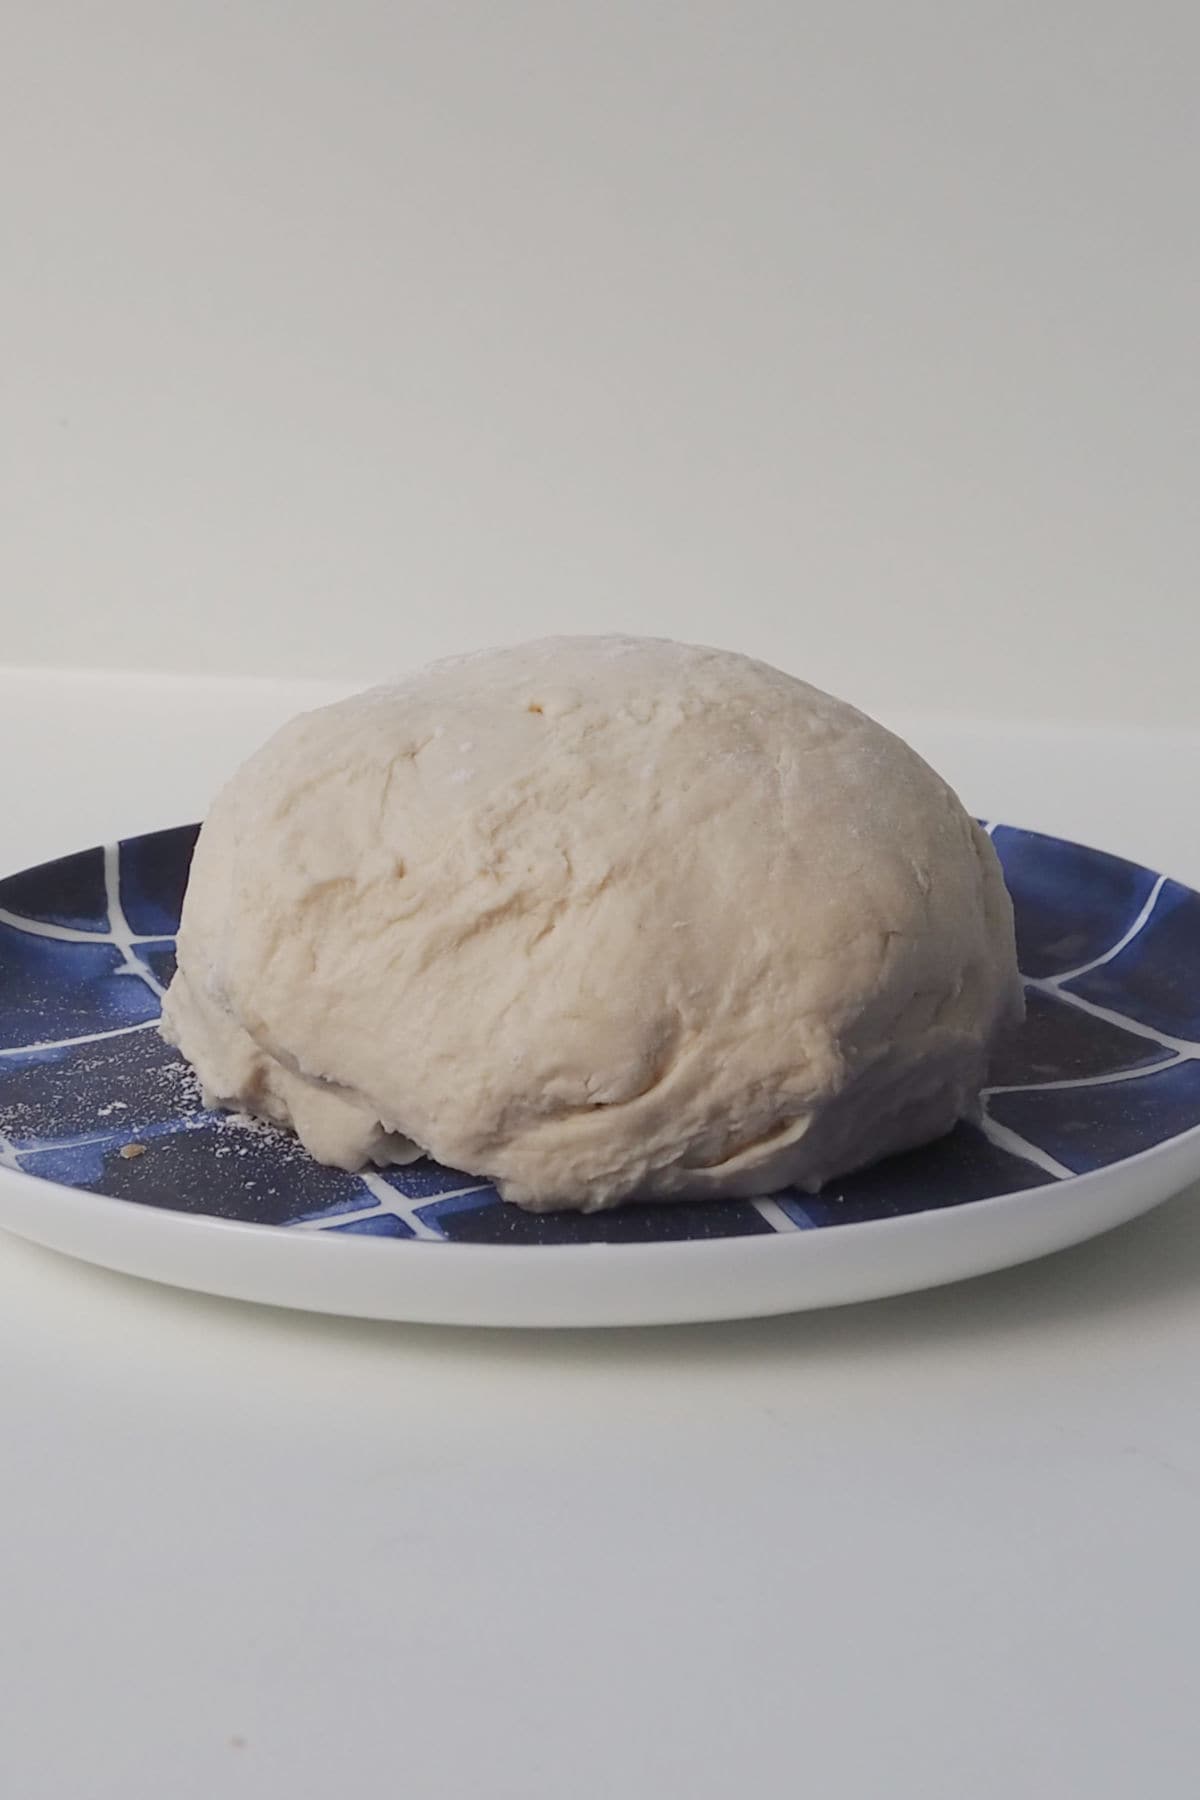
    3. Allow the dough to rest for 45 minutes.

    4. Roll the dough into small circles and place a strip of baking paper in the middle.
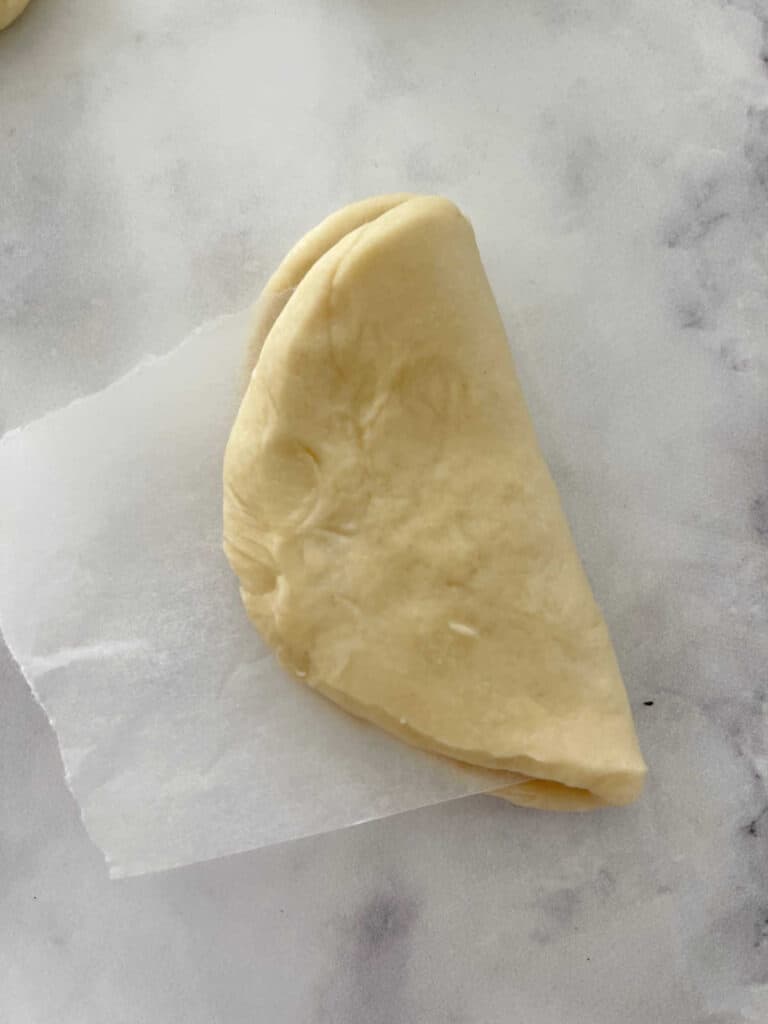
    close up of Thermomix Bao Buns dough.

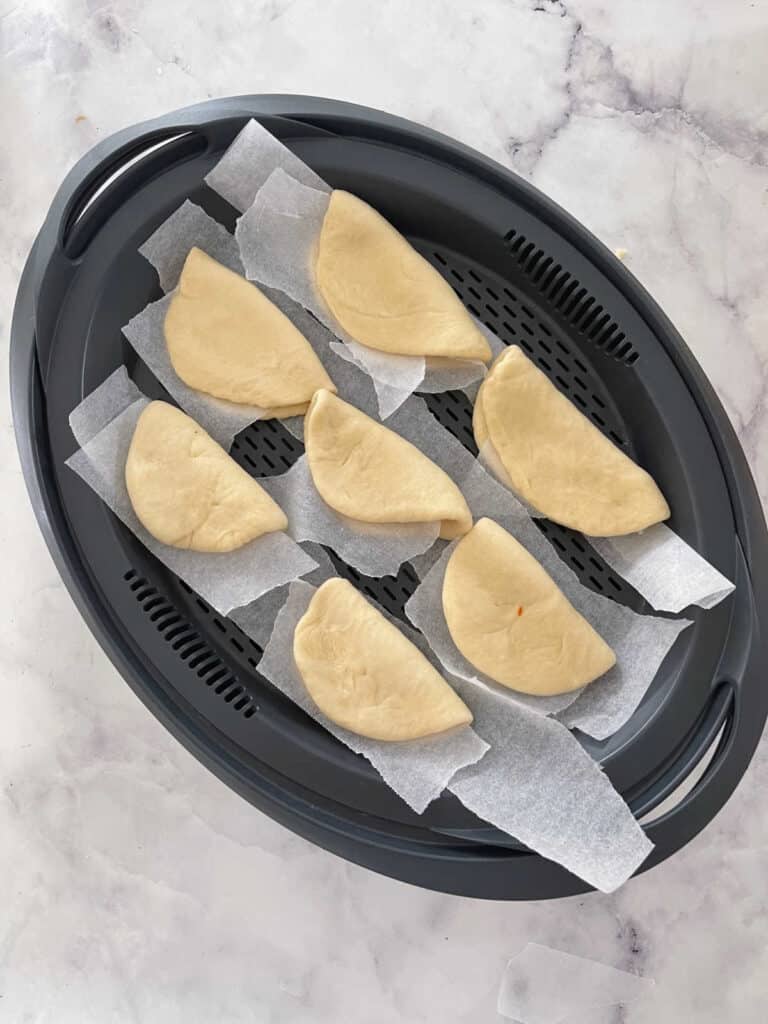
    4. Place into Varoma Tray and cook.

    Thermomix Bao Buns in varoma tray.

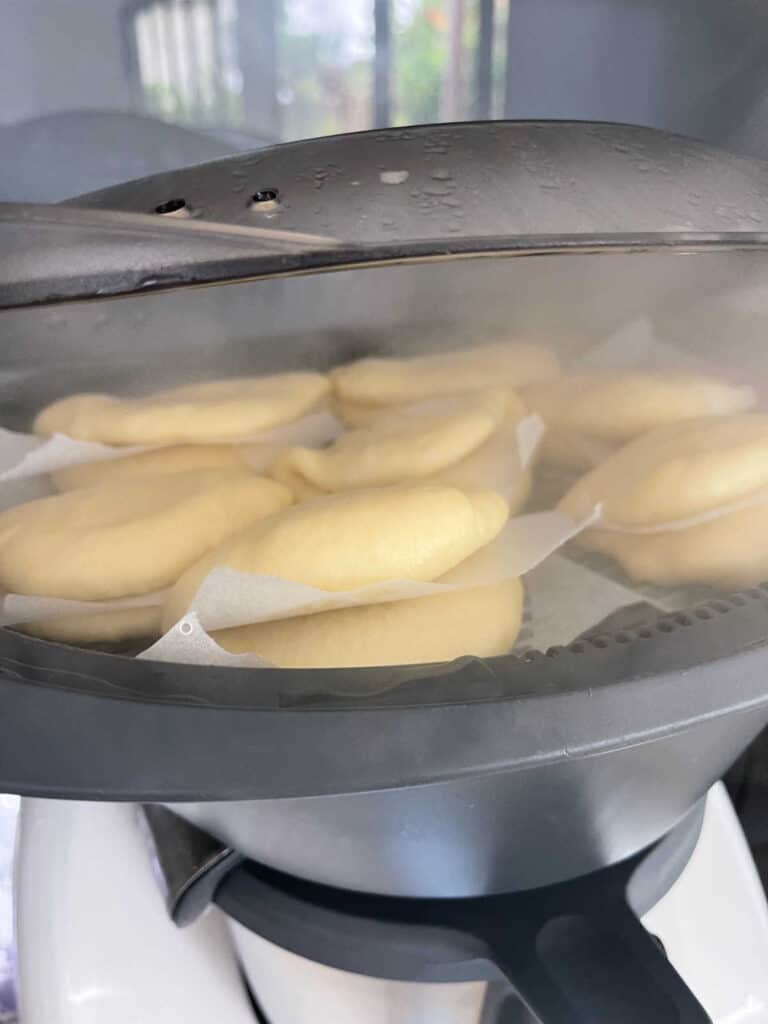
    5. Once cooked, serve immediately.

    Thermomix Bao Buns in steamer.

    Tips for Making Bao Buns in a Thermomix:

    • This recipe makes quite a lot of buns (around 15-18) so if you're only feeding a couple of people, you can freeze the extra dough for another time. We find that 2-3 buns is plenty for an adult (unless you're super hungry of course!!).
    • You can use either plain or bakers flour for this recipe.
    • These buns will be quite damp after cooking, this is normal.
    • You can freeze any leftover dough for up to two months.
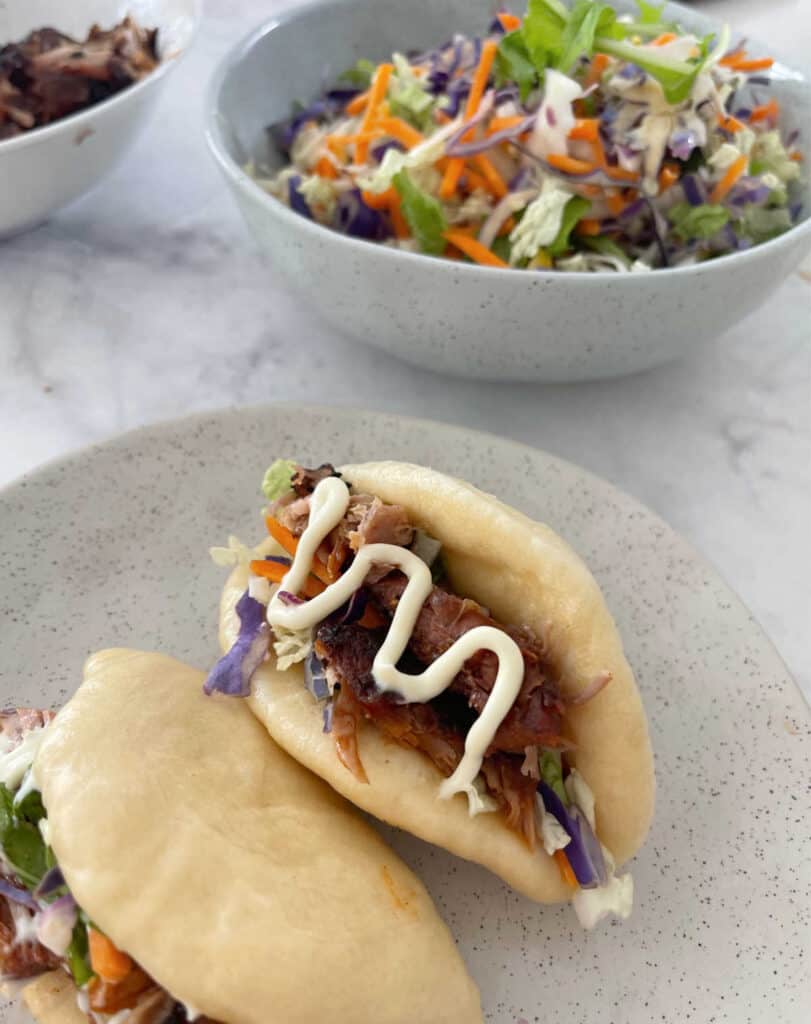
    Thermomix Bao Buns filled with salad and roast bbq pork on a speckled plate.

    More Simple Meal Ideas:

    • Thermomix Egg & Bacon Quiches
    • Chicken Meatballs
    • Thermomix Pesto & Cheese Scrolls
    • Thermomix Sausage Rolls
    • Mexican Beef Bowls
    • Thermomix Arancini Balls
    • Cheese and Zucchini Bites
    • Thermomix Vegetable Fritters
    Print Recipe
    4.85 from 64 votes

    Thermomix Bao Buns

    Our soft and fluffy Thermomix Bao Buns served with leftover roast pork and crunchy Asian slaw make the perfect family dinner. 
    Prep Time20 minutes mins
    Cook Time30 minutes mins
    Proving Time45 minutes mins
    Total Time1 hour hr 35 minutes mins
    Course: Dinner, main meal, thermomix
    Cuisine: asian, bao buns, thermomix
    Servings: 15 Buns
    Calories: 183kcal
    Author: Lucy & Lauren

    Equipment

    • 1 x Thermomix
    • Rolling Pin

    Ingredients

    • 250 grams warm water
    • 60 grams sugar
    • 2 teaspoon dry yeast
    • 520 grams plain flour
    • 60 grams extra virgin olive oil
    • 1 ½ tsps salt
    • 1 tbs baking powder
    • 500 grams extra water

    To serve

    • leftover roast pork (or pulled pork), slaw, Kewpie (Japanese) mayo and sesame seeds, to serve

    Instructions

    • To make the bun dough, place the water, sugar and yeast into the Thermomix bowl and mix for 8 seconds, Speed 3. Allow to rest for 5 minutes or until the mixture has turned frothy. 
    • Add the plain flour, olive oil, salt and baking powder into the Thermomix bowl and mix for 8 seconds, Speed 6 to combine. Knead for 10 minutes, Kneading Function. 
    • Place the dough into a greased ThermoServer or large bowl and set aside in a warm, dry place to rise for 45 minutes. 
    • Rip a piece of baking paper into strips and place over the 2 layers of the Varoma trays (leaving gaps in between to allow the steam to escape). 
    • Knead the dough on an oiled bench or board. Divide the dough into approximately 15 - 18 small pieces. Roll into balls and flatten down into a circle/oval shape. 
      Place small pieces of baking paper onto half of each flattened oval and fold over (so that the baking paper is in between. 
    • Place the bao buns onto the 2 trays of the Varoma. 
    • Fill the Thermomix bowl with 500g of water and put the Varoma (with the 2 trays) in place. Cook for 30 minutes, Varoma temperature, Speed 4. 
    • Take the buns out (they will be quite wet and sticky) and serve immediately with leftover roast pork, slaw, Kewpie (Japanese) mayo and sesame seeds. 

    Notes

    • This recipe makes quite a lot of buns (around 15-18) so if you're only feeding a couple of people, you can freeze the extra dough for another time. We find that 2-3 buns is plenty for an adult (unless you're super hungry of course!!).
    • You can use either plain or bakers flour for this recipe.
    • These buns will be quite damp after cooking, this is normal and they will dry quickly.
    • You can freeze any leftover dough for up to two months.

    Nutrition

    Calories: 183kcal | Carbohydrates: 31g | Protein: 4g | Fat: 4g | Saturated Fat: 1g | Polyunsaturated Fat: 1g | Monounsaturated Fat: 3g | Sodium: 320mg | Potassium: 53mg | Fiber: 1g | Sugar: 4g | Vitamin C: 1mg | Calcium: 53mg | Iron: 2mg

    Looking for even more?

    You will find even more simple and delicious recipes in our books and eBooks - shop the full range here.


    ThermoBliss Cookbook full set.

    Thermomix Focaccia

    September 24, 2018

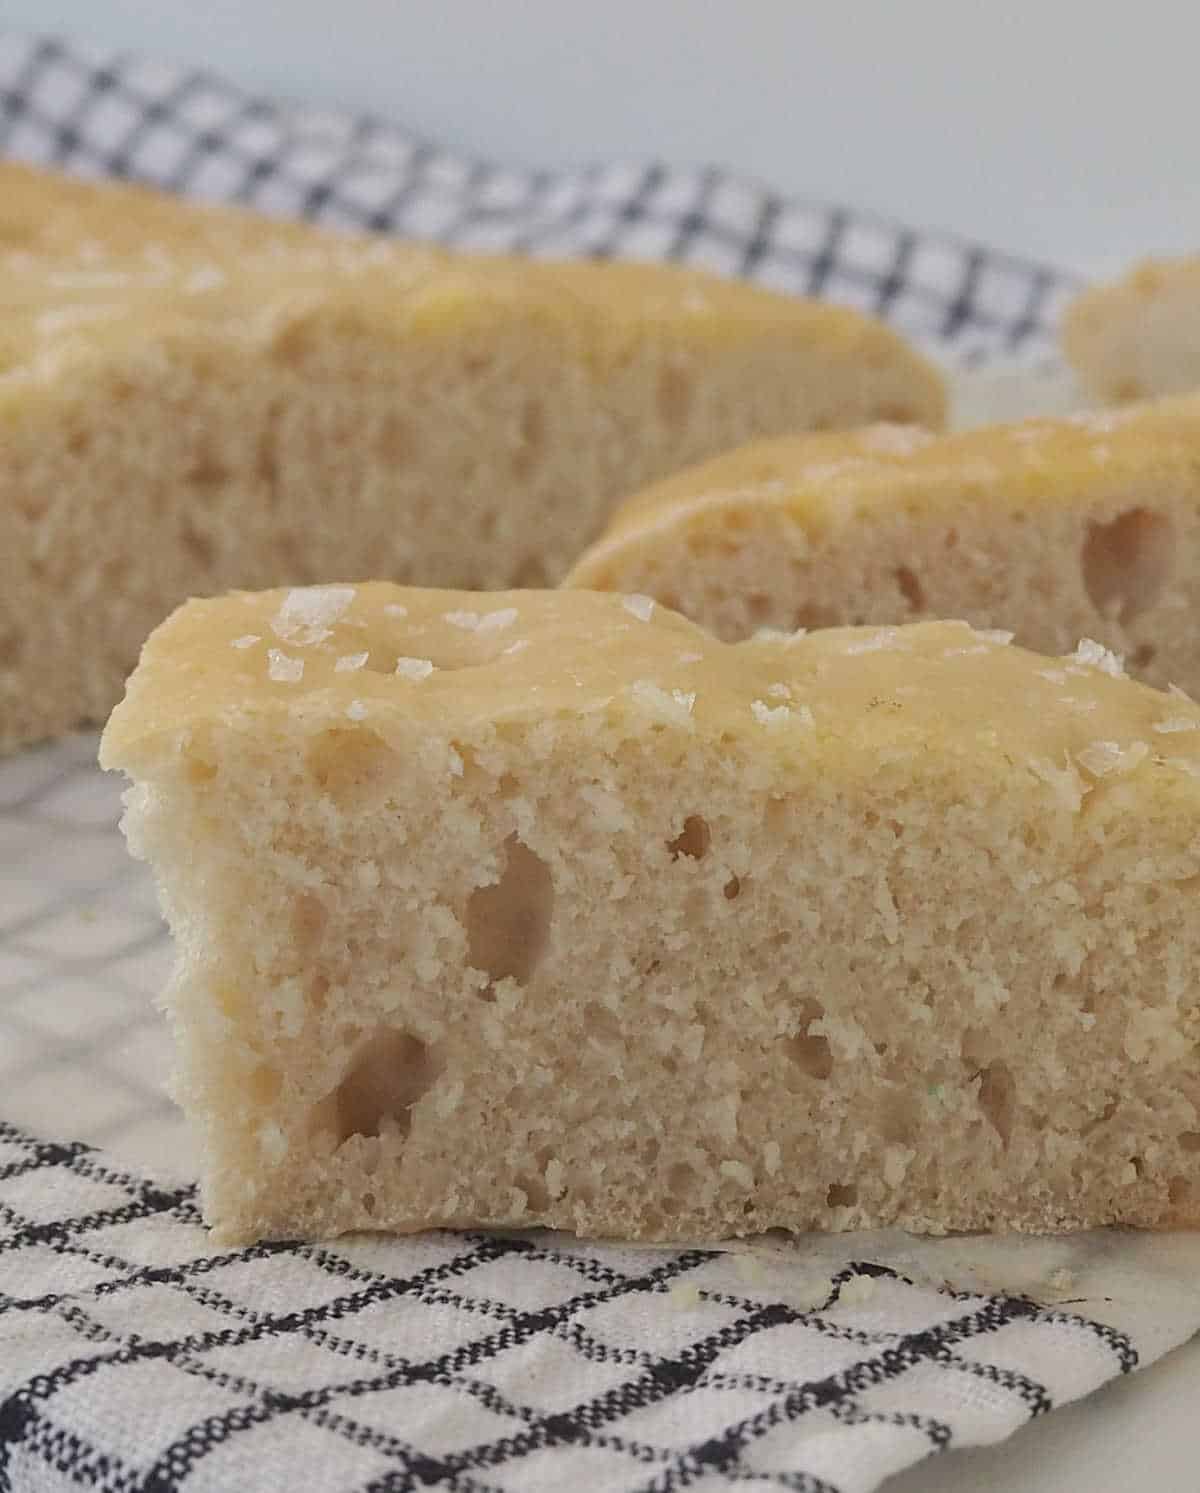
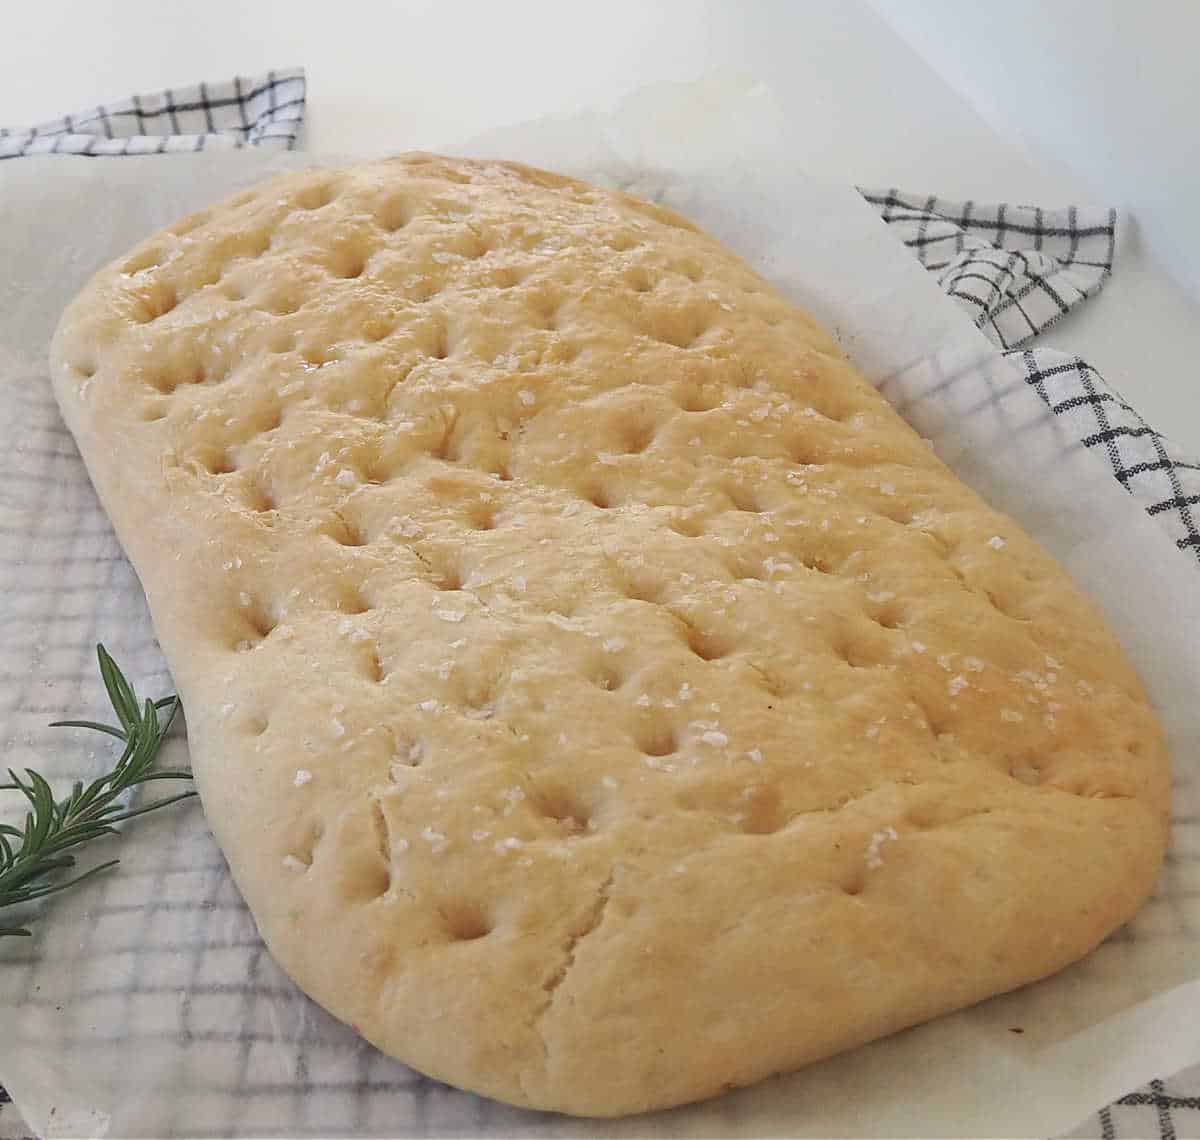
    Loaf of baked Thermomix Focaccia.

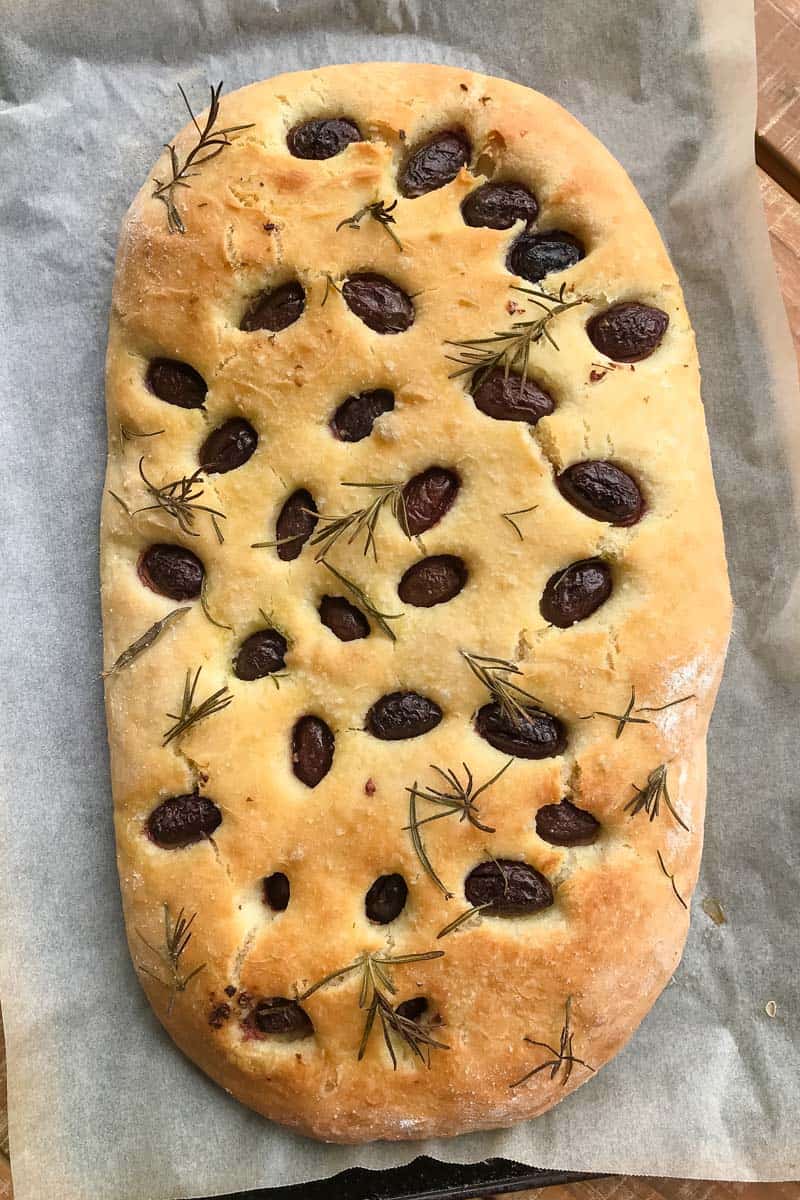
     This Thermomix Focaccia recipe is incredibly versatile, you can add your favourite toppings to the dough (we love Olive and Rosemary) or simply sprinkle with some salt or leave plain.

    Loaf of baked Thermomix Focaccia.

    You will LOVE that this recipe is made using just a few staple ingredients, which you most likely already have in your pantry!

    Why you will love this recipe:

    • Quick to prepare - it takes less than 10 minutes to put this dough together.
    • Versatile - add your favourite toppings to the focaccia dough before baking, we love Olives and Rosemary or sea salt and olive oil.
    • Freezer friendly - you can store this focaccia in your freezer for up to two months.
    baked Thermomix Focaccia on a piece baking paper.

    Thermomix Focaccia Ingredients:

    Please note you will find the full list of ingredients and method in the recipe card below.

    • Water
    • Yeast
    • Baker's Flour - Plain Flour can also be used.
    • Extra virgin olive oil
    • Sea Salt
    Focaccia ingredients

    How to Make Focaccia in a Thermomix

    1. Place the water and yeast into your Thermomix bowl.
    Yeast in Thermomix bowl

    2. Add the flour, olive oil and salt and bring together.

    Focaccia on tray

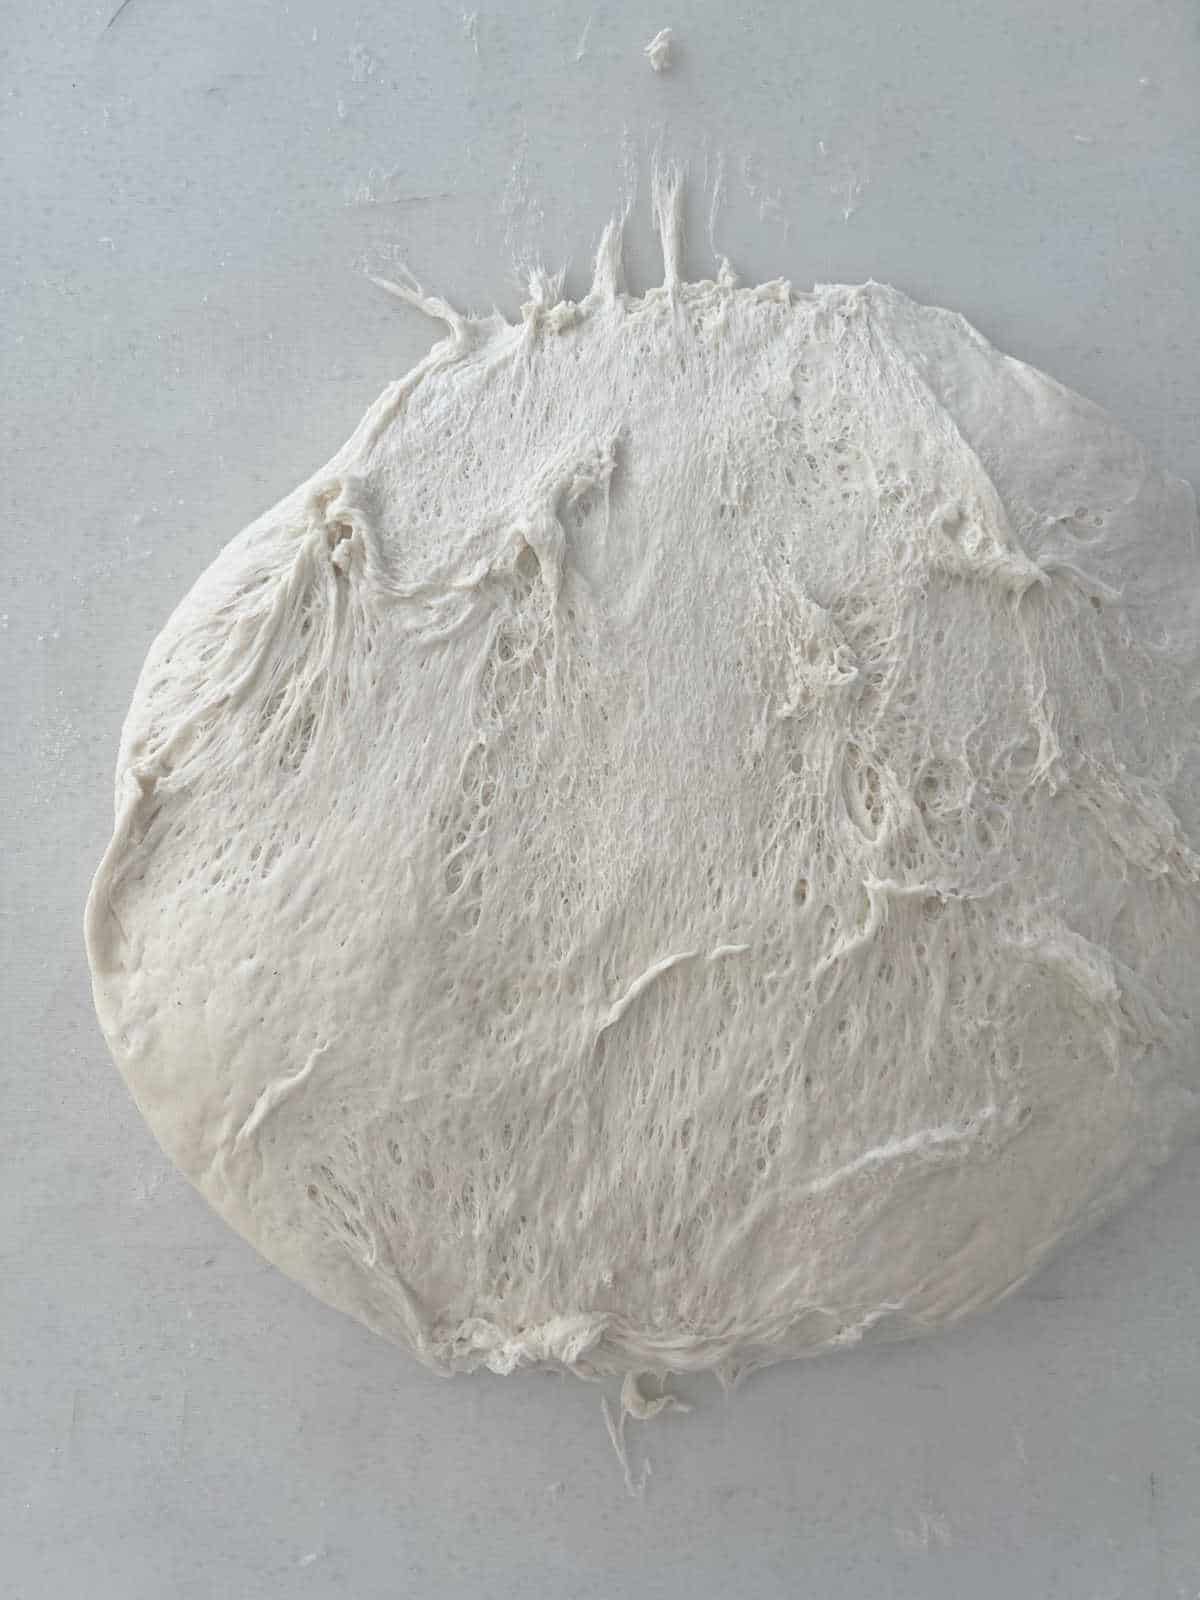
    3. Allow the dough to rest until it has doubled in size.

    Focaccia Dough
    Focaccia Dough

    4. Shape the dough on your baking tray and use the end of a wooden spoon to create indents. Sprinkle with a little extra olive oil and sea salt (if using) and let the dough prove for a further 15 minutes.

    Focaccia on tray

    5. Bake until golden and cooked through.

    Loaf of baked Thermomix Focaccia.

    Focaccia Topping Ideas

    • This Focaccia can be enjoyed plain or sprinkled with olive oil and salt before baking.
    • Olive & Rosemary - You can use any type of olives you like - I generally use kalamata olives, but green olives (with chilli!) are soooo delicious too.
    • Garlic
    • Cheese
    • Zucchini and Cheese
    • Salami
    Our Thermomix Olive & Rosemary Focaccia is the perfect side to a bowl of soup or pasta... or completely delicious all on it's own (with butter, of course!). 

    Expert Tips

    • Plain flour can be used instead of Baker's Flour
    • You can add 1 tablespoon of bread improver for a lighter consistency.
    • The time it takes for the dough to double in size will depend on the climate.
    • The baked focaccia can be frozen for up to two months.
    • Add your toppings before baking and gently press them into the dough.
    Loaf of baked Thermomix Focaccia.
    Print Recipe
    4.93 from 14 votes

    Thermomix Focaccia

    Our Thermomix Focaccia is the perfect side to a bowl of soup or pasta... or completely delicious all on it's own (with butter, of course!). 
    Prep Time10 minutes mins
    Cook Time25 minutes mins
    Proving time1 hour hr
    Total Time1 hour hr 35 minutes mins
    Course: breads
    Cuisine: breads, thermomix
    Servings: 10 pieces
    Calories: 207kcal
    Author: Lucy & Lauren

    Equipment

    • Thermomix
    • 1 x Baking Tray

    Ingredients

    • 350 grams water
    • 2 teaspoon yeast
    • 20 grams extra virgin olive oil
    • 500 grams Baker's flour see notes
    • 1 tsp salt

    Instructions

    • Place the water and yeast into the Thermomix bowl. Mix for two minutes at 37 degrees on speed 1.
    • Add the olive oil, plain flour and salt and mix for 8 seconds on speed 6. Scrape down the sides of the bowl and mix on Interval (knead) function for 2 minutes. 
    • Place the mixture into a greased bowl (or ThermoServer) and leave in a warm place to rise until doubled in size (approximately 1 hour). 
    • Preheat oven to 200 degrees celsius (fan-forced). Line a large flat baking tray with baking paper and set aside. 
    • Punch the dough down and then spread onto the prepared baking tray. Use the end of a wooden spoon to indent the dough.
    • Press the olives and rosemary leaves lightly into the mixture. Allow to prove for a further 15 - 30 minutes. 
    • Sprinkle with extra sea salt and bake for 25-30 minutes or until golden. 

    Notes

    • Plain flour can be used instead of Baker's Flour
    • You can add 1 tablespoon of bread improver for a lighter consistency.
    • The time it takes for the dough to double in size will depend on the climate.
    • The baked focaccia can be frozen for up to two months.
    • Add your toppings before baking and gently press them into the dough.

    Nutrition

    Calories: 207kcal | Carbohydrates: 39g | Protein: 6g | Fat: 3g | Saturated Fat: 0.4g | Polyunsaturated Fat: 0.4g | Monounsaturated Fat: 2g | Sodium: 237mg | Potassium: 76mg | Fiber: 2g | Sugar: 0.1g | Vitamin C: 0.01mg | Calcium: 9mg | Iron: 2mg

    Thermomix Mars Bar Brownies

    September 19, 2018

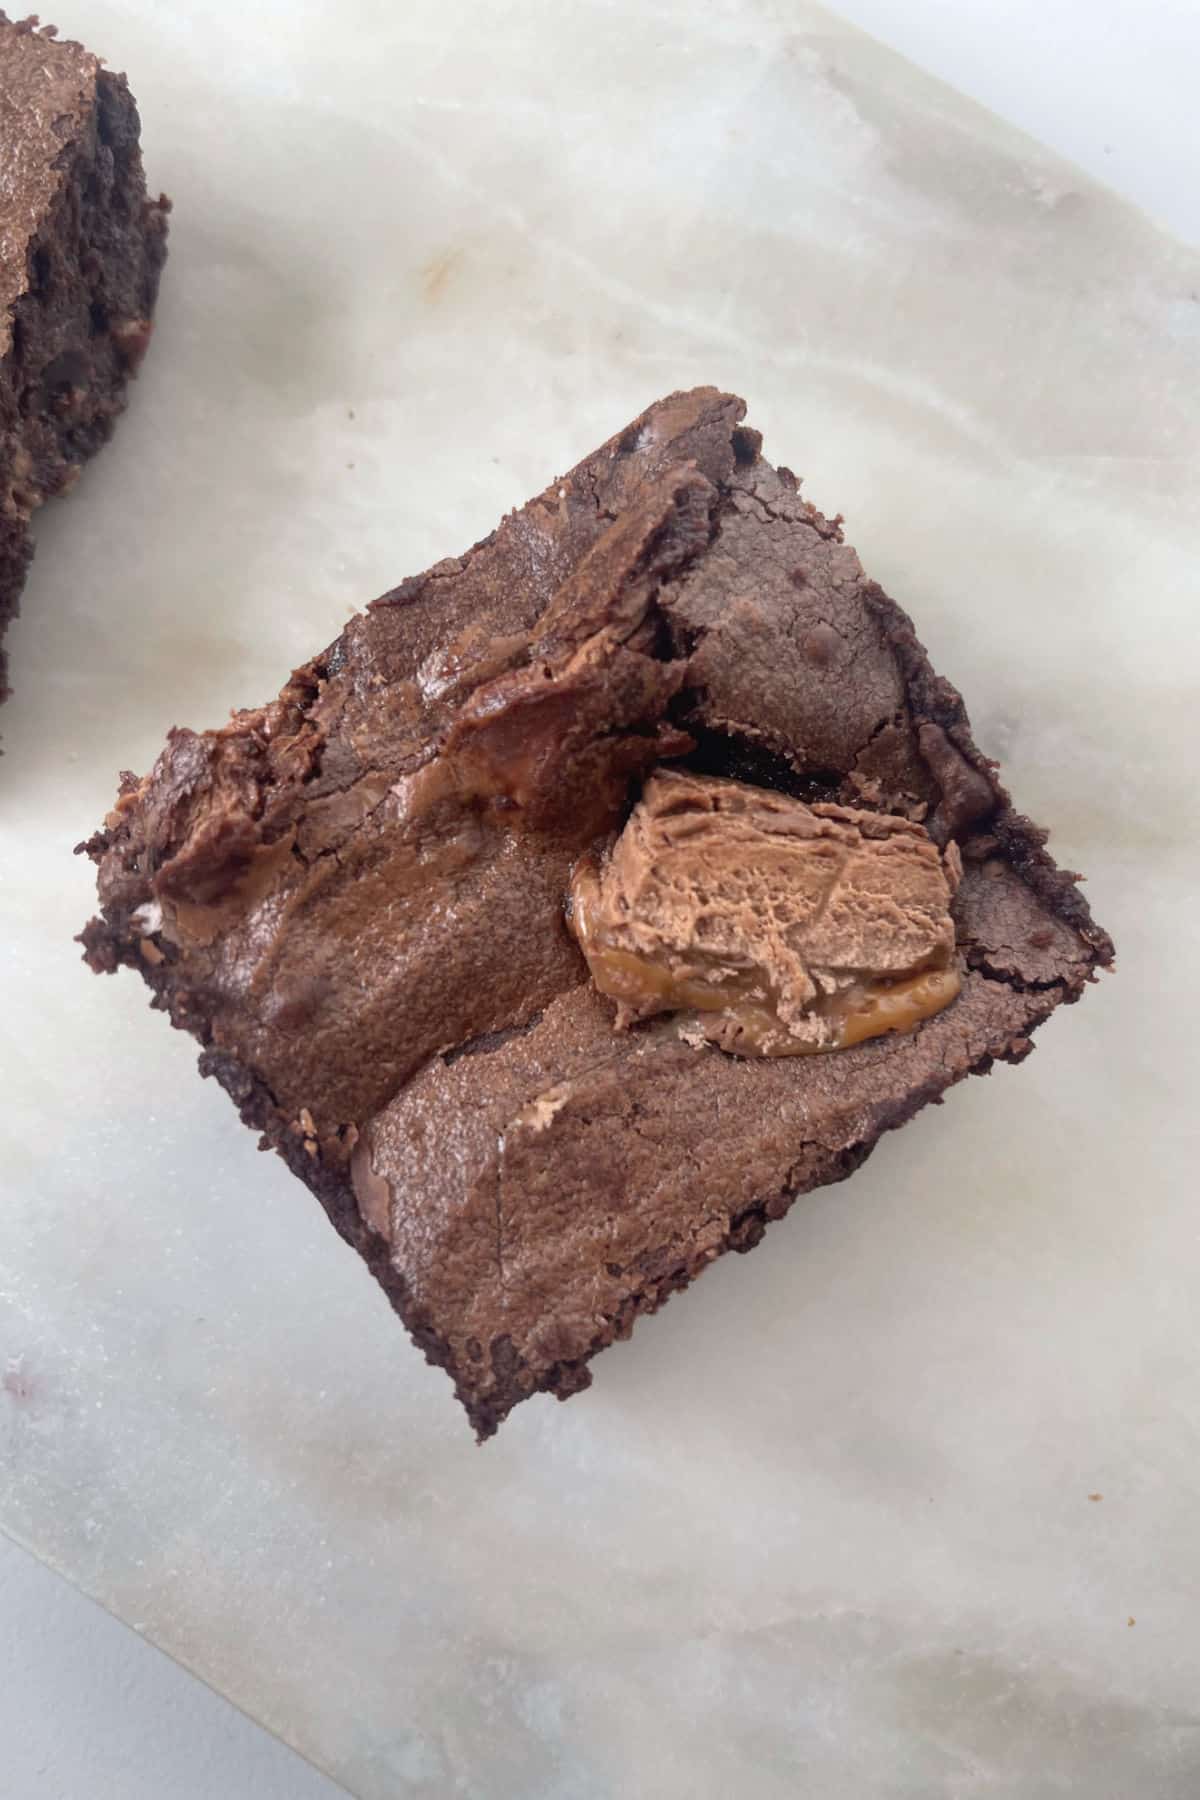
    Overhead view of a piece of Mars Bar Brownie sitting on a stone serving tray.

    Our Thermomix Mars Bar Brownies recipe is simple to make, and even easier to eat! These soft and fudgey brownies can be ready to enjoy in under one hour and make a decadent treat or dessert.

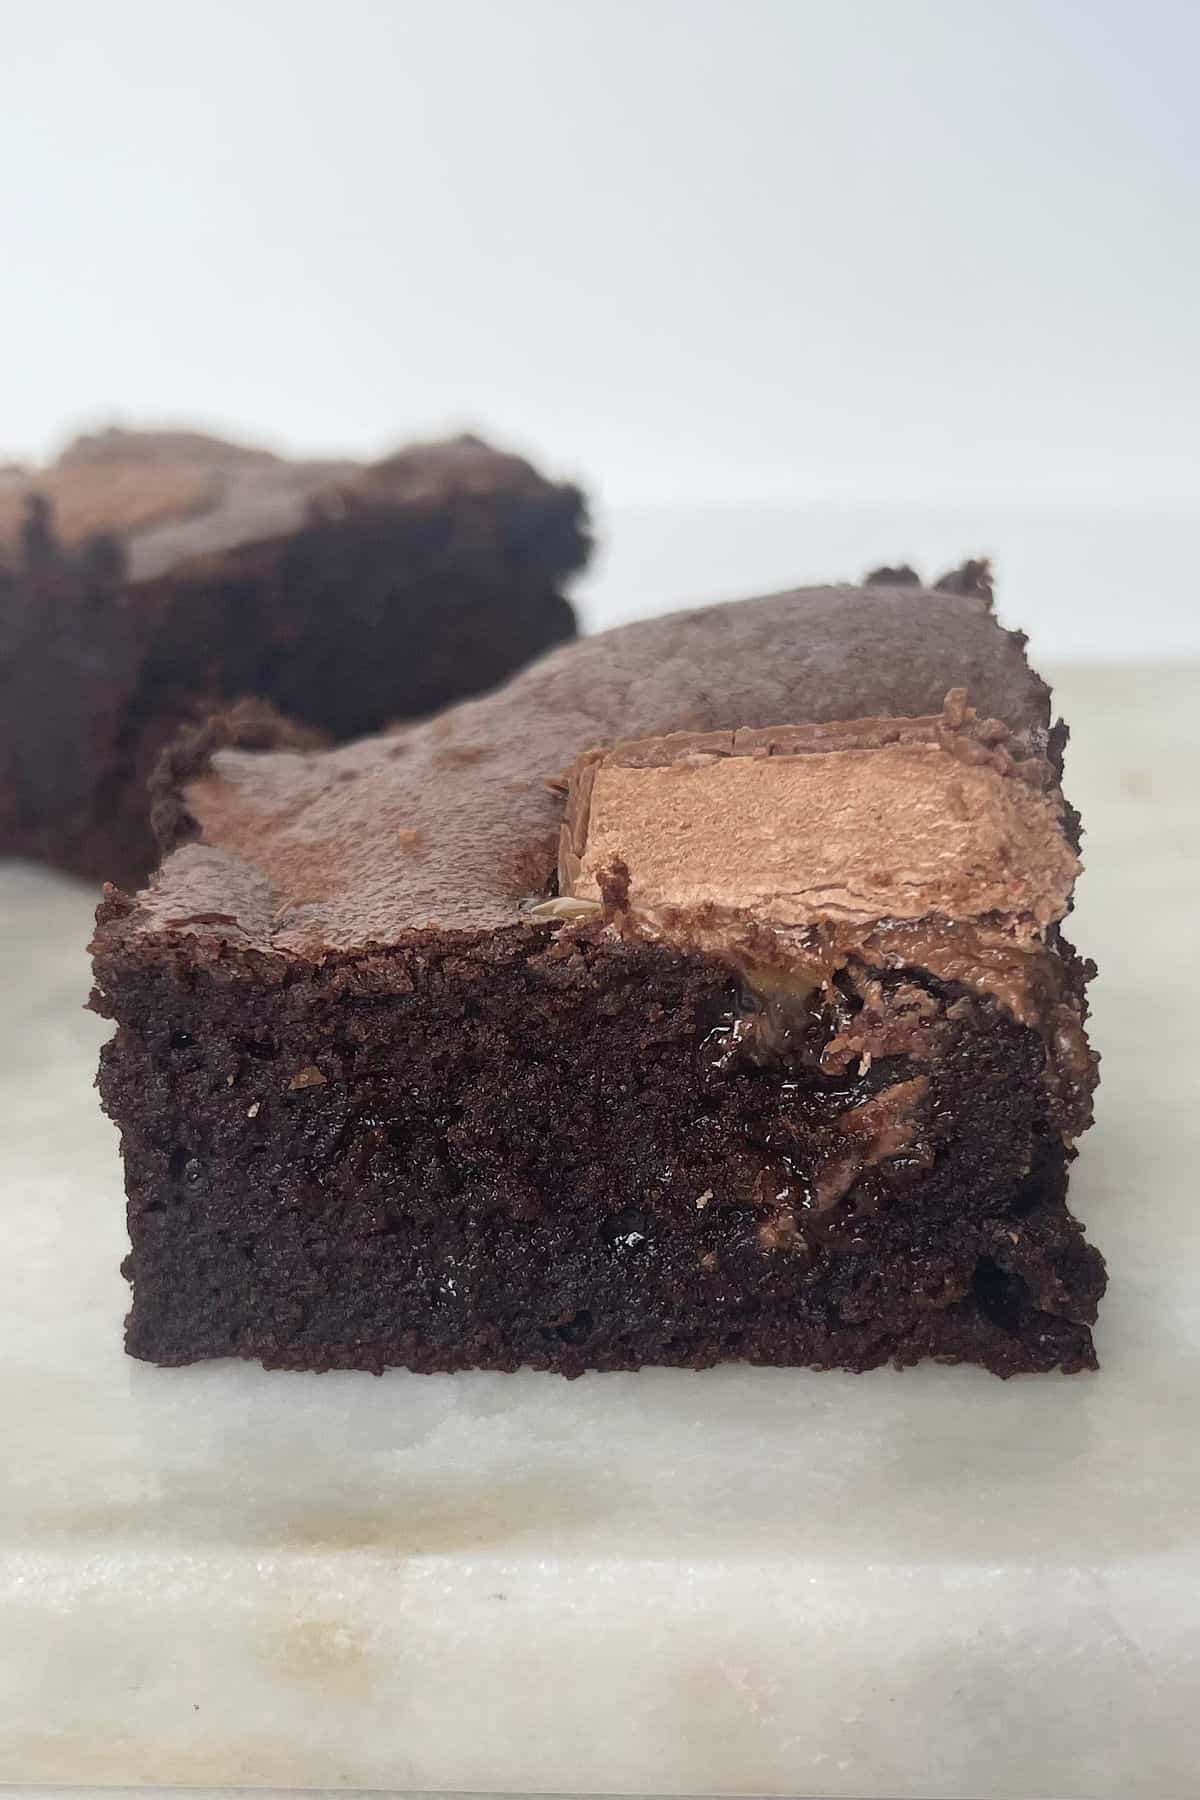
    Side view of a mars bar brownie on a stone serving tray. In the background is another brownie.

    Mars Bar Slice, Mars Bar Muffins, Mars Bar Cheesecake - I really don't think I've ever come across a Mars Bar recipe that I didn't love!!  It's easy to see why our Thermomix Mars Bar recipes are so popular though, this rich, caramel filled chocolate bar can only make ANY recipe taste better right?!

    Why you will love this recipe:

    • Simple ingredients - this recipe uses our famous Thermomix Chocolate Brownies mixture as the base and is made with pantry basics.
    • Quick preparation time - you can have these brownies in the oven in under 10 minutes!
    • Decadent - although not made with chocolate, these brownies are still rich and packed with flavour.
    • Freezer friendly - you can freeze these brownies for up to one month in a freezer safe container.
    Overhead view of a piece of Mars Bar Brownie sitting on a stone serving tray.

    Ingredients

    Please note you will find the full list of ingredients and method in the recipe card below.

    • Butter - unsalted butter was used to make this recipe.
    • Cocoa Powder
    • Caster Sugar
    • Plain Flour - also known as all purpose flour.
    • Eggs - 70 gram eggs were used to make this recipe.
    • Vanilla Extract - you can substitute with vanilla extract OR leave out.
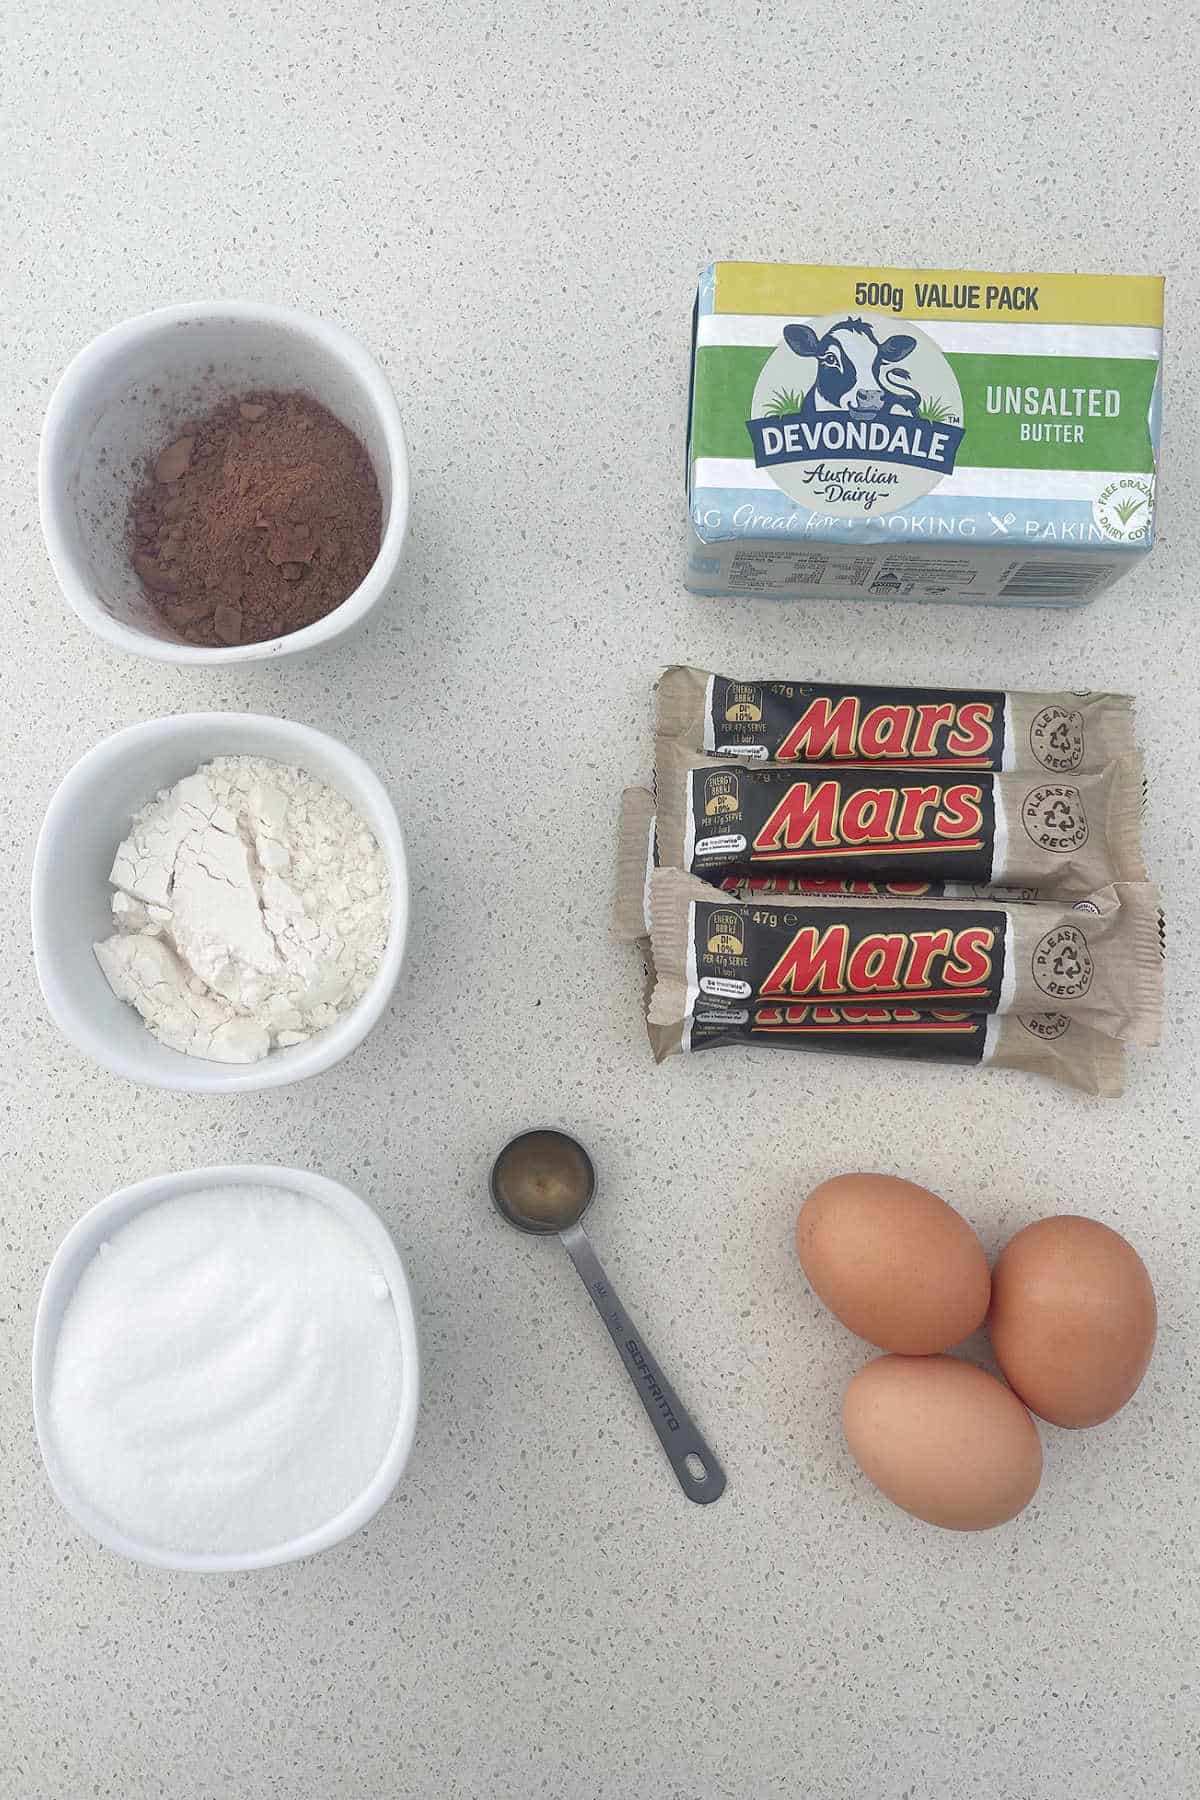
    • Mars Bars 5 x 47gram Mars Bars were used to make this recipe.
    Ingredients to make Mars Bar Brownies.

    Method

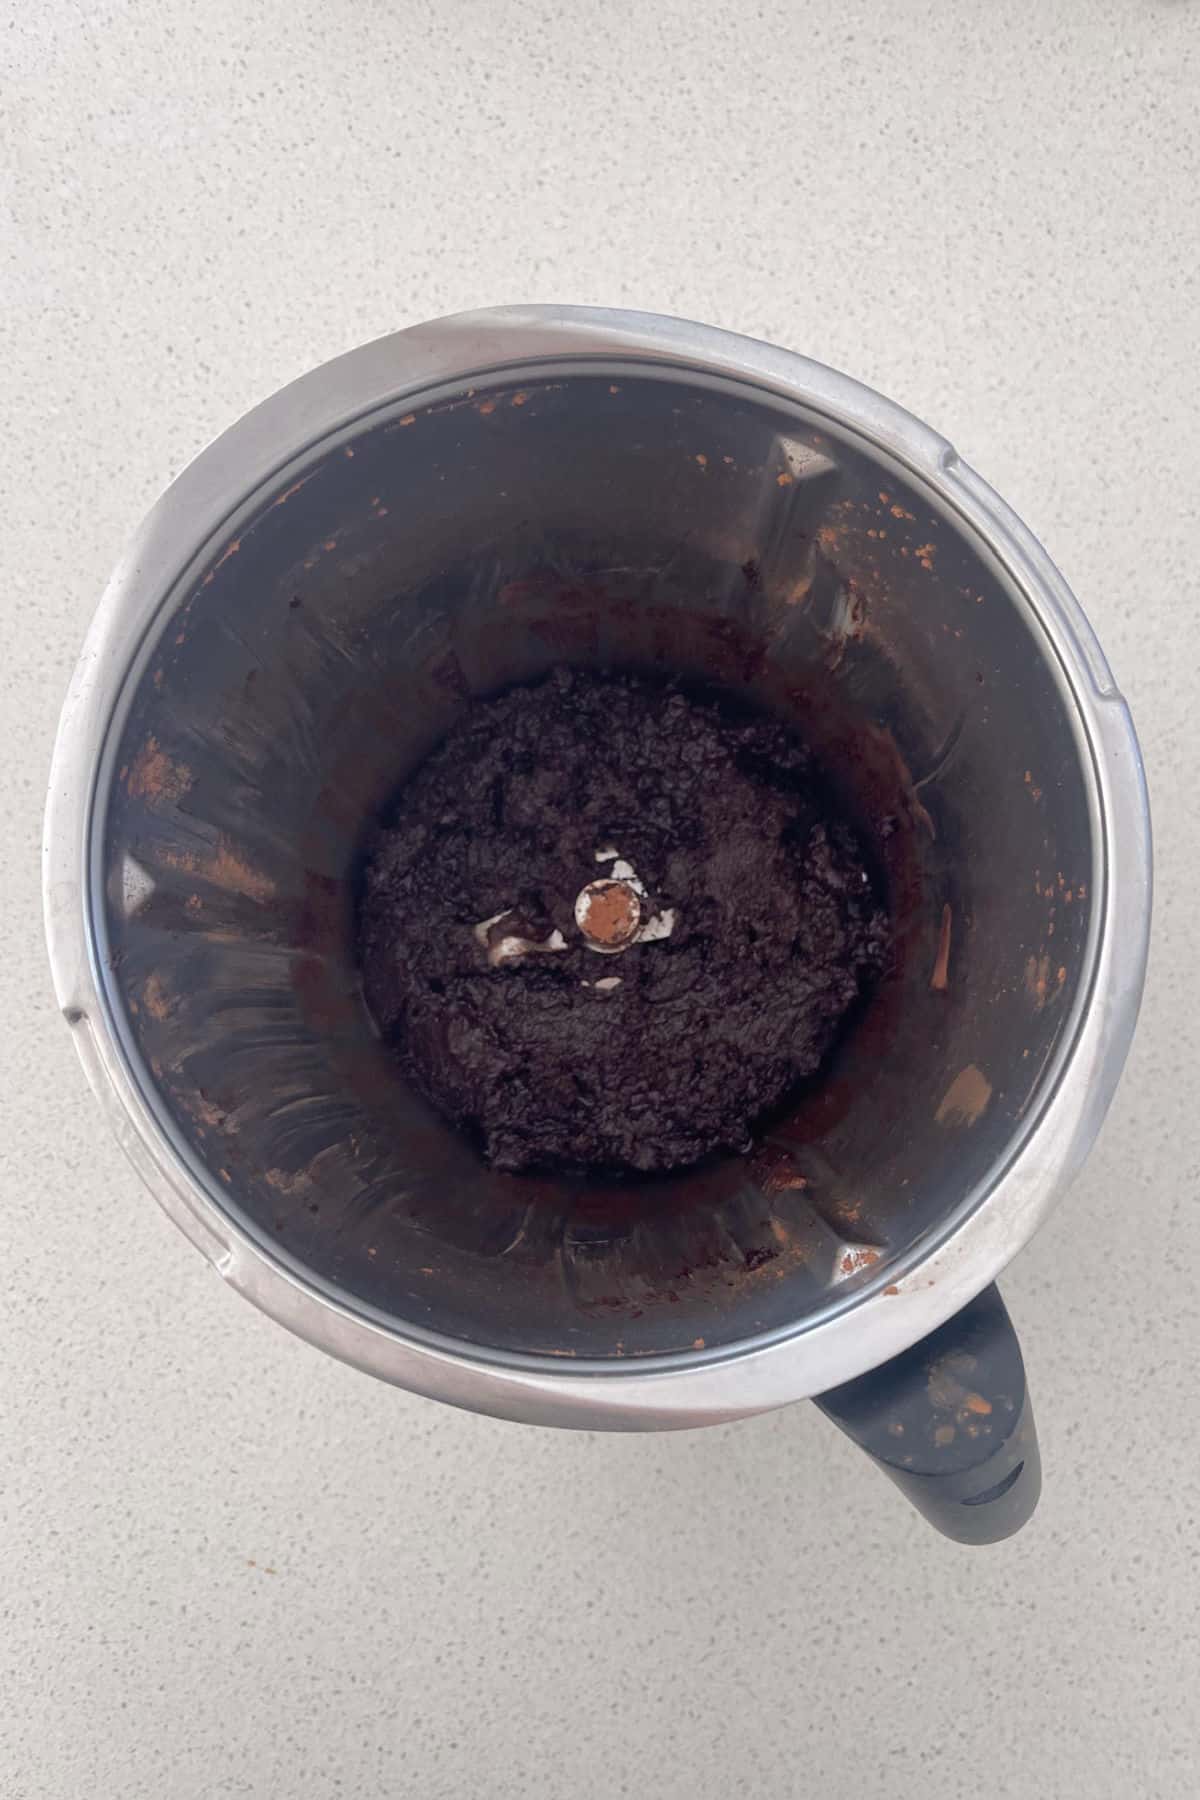
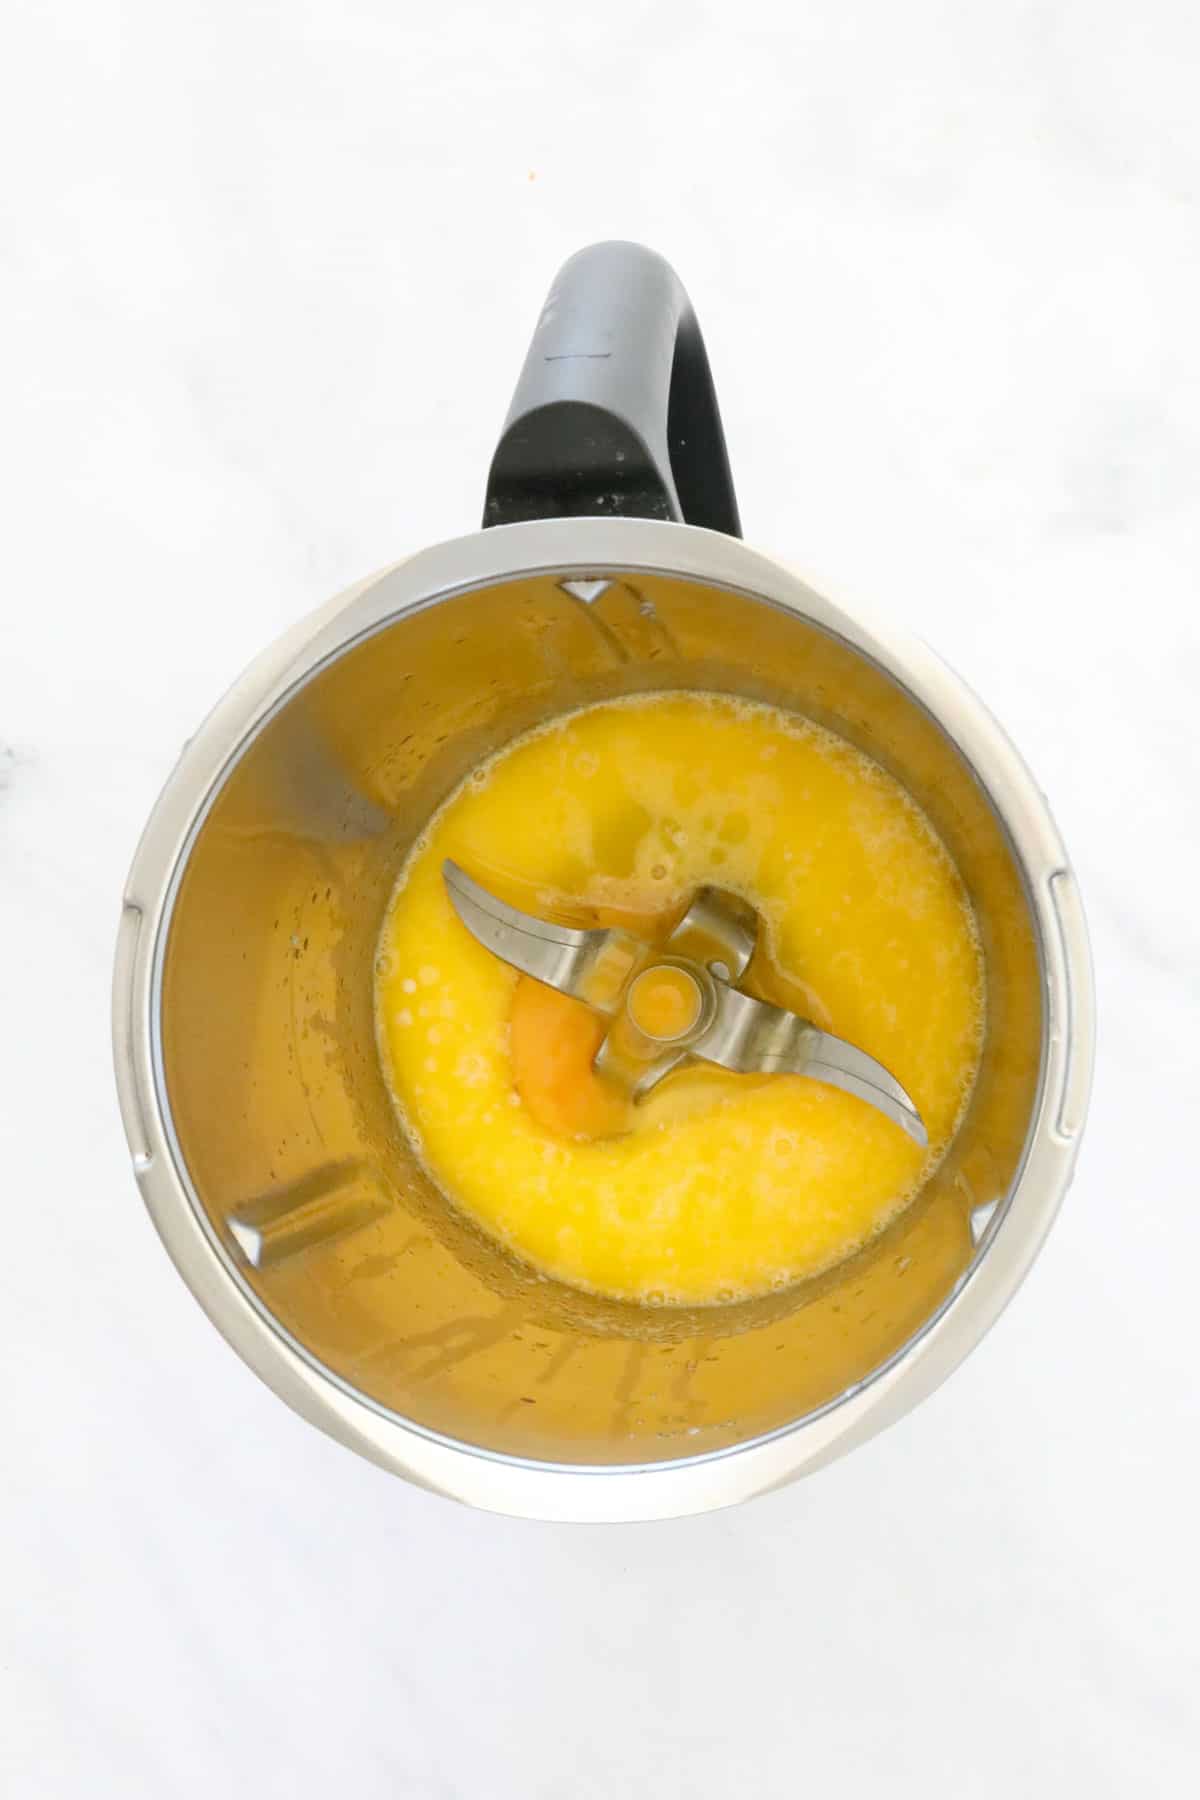
    Step 1. Add the butter, cocoa and caster sugar to your Thermomix bowl and cook until melted.

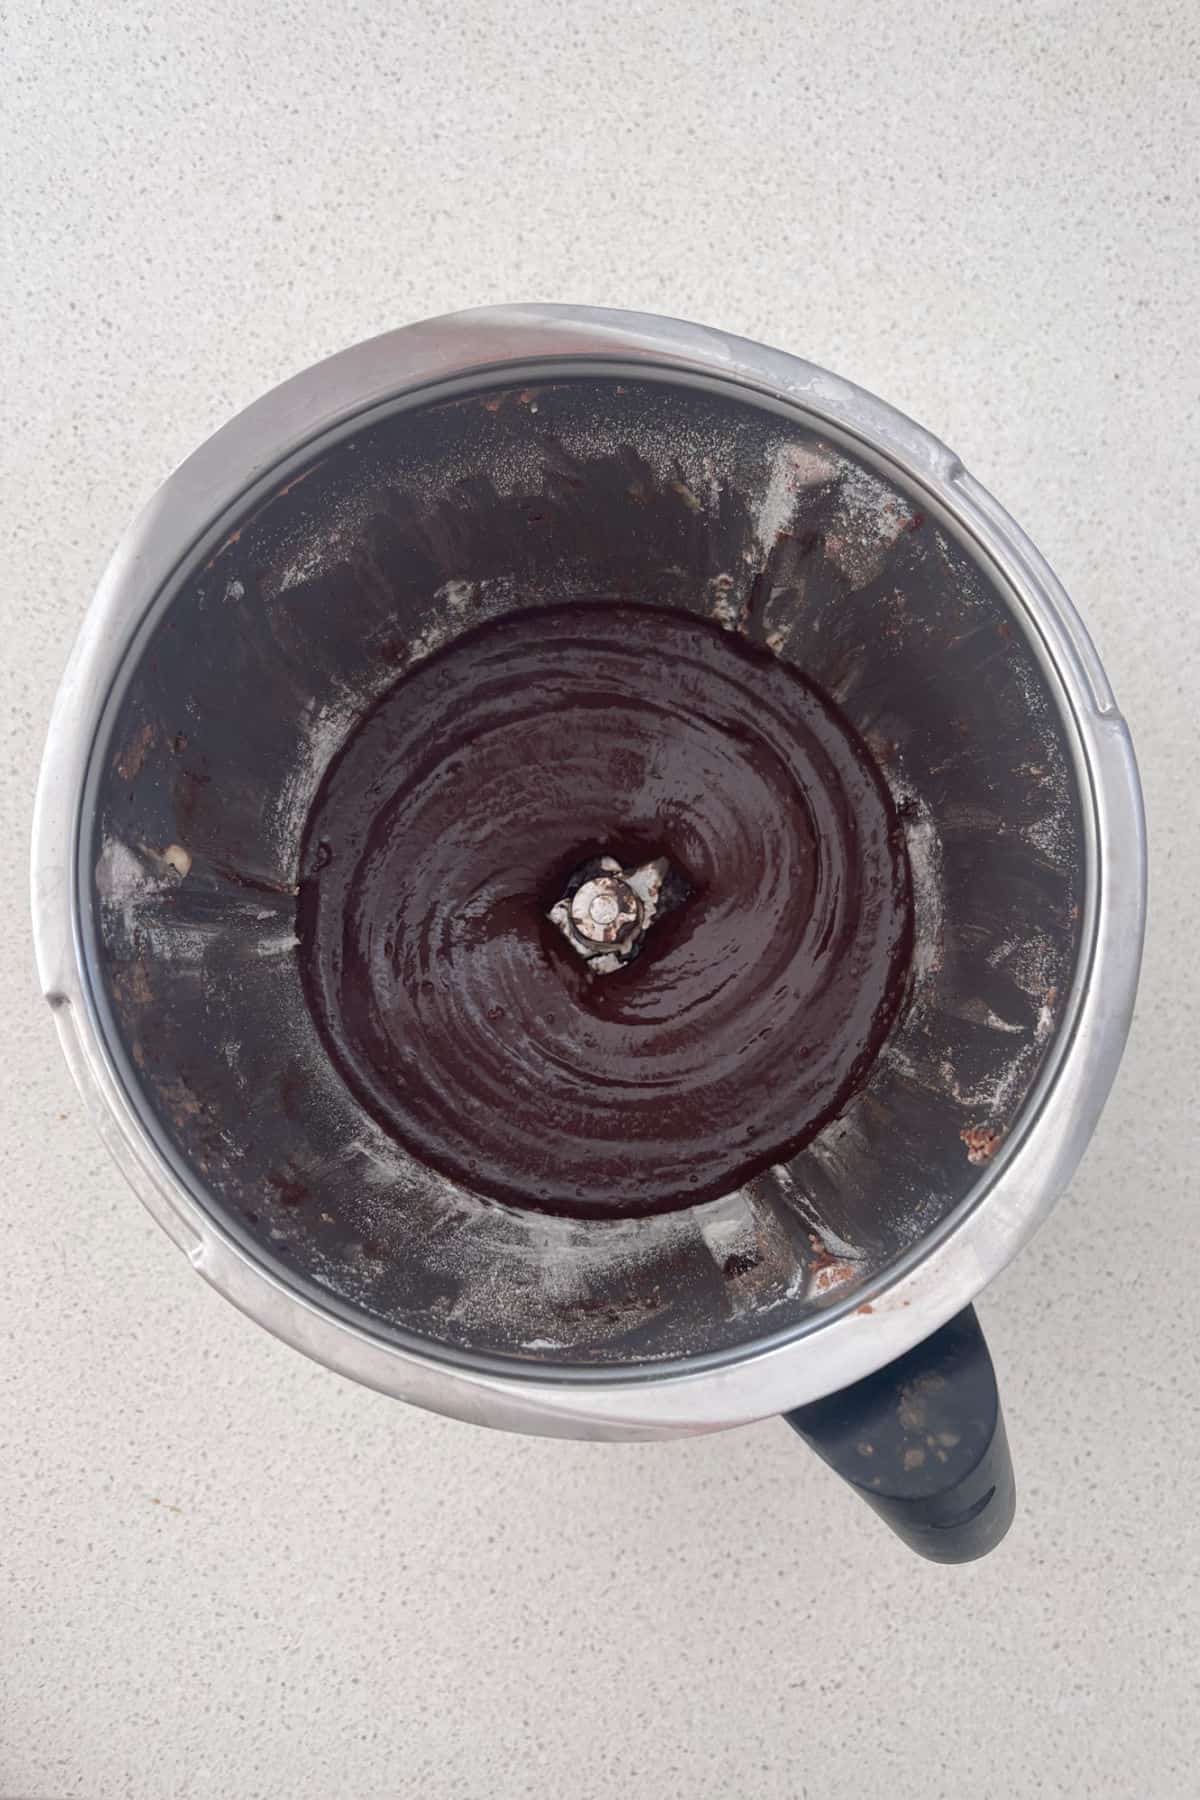
    Melted butter, cocoa and caster sugar in a Thermomix bowl.

    Step 2. Add the plain flour, eggs and vanilla extract and mix to combine.

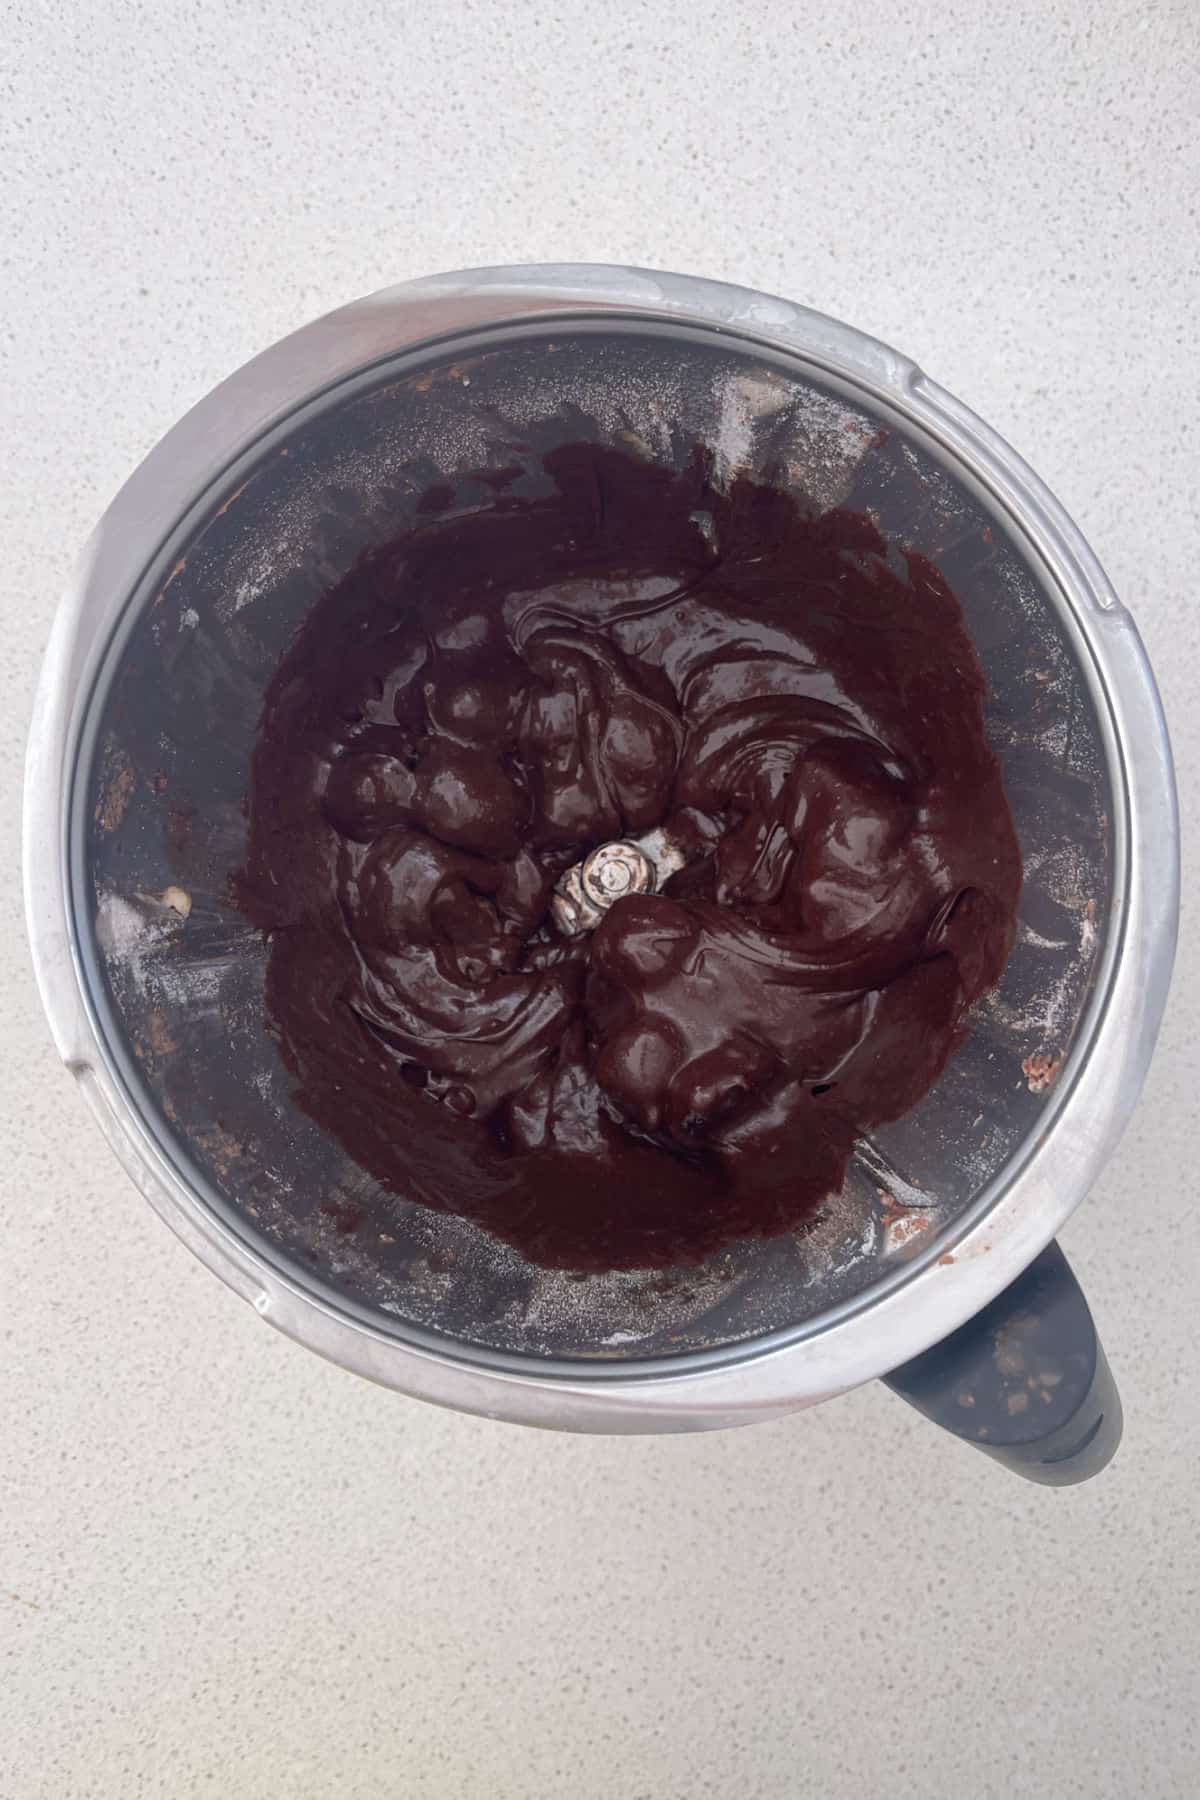
    Step 3. Add chopped Mars Bars and mix through the brownie batter.

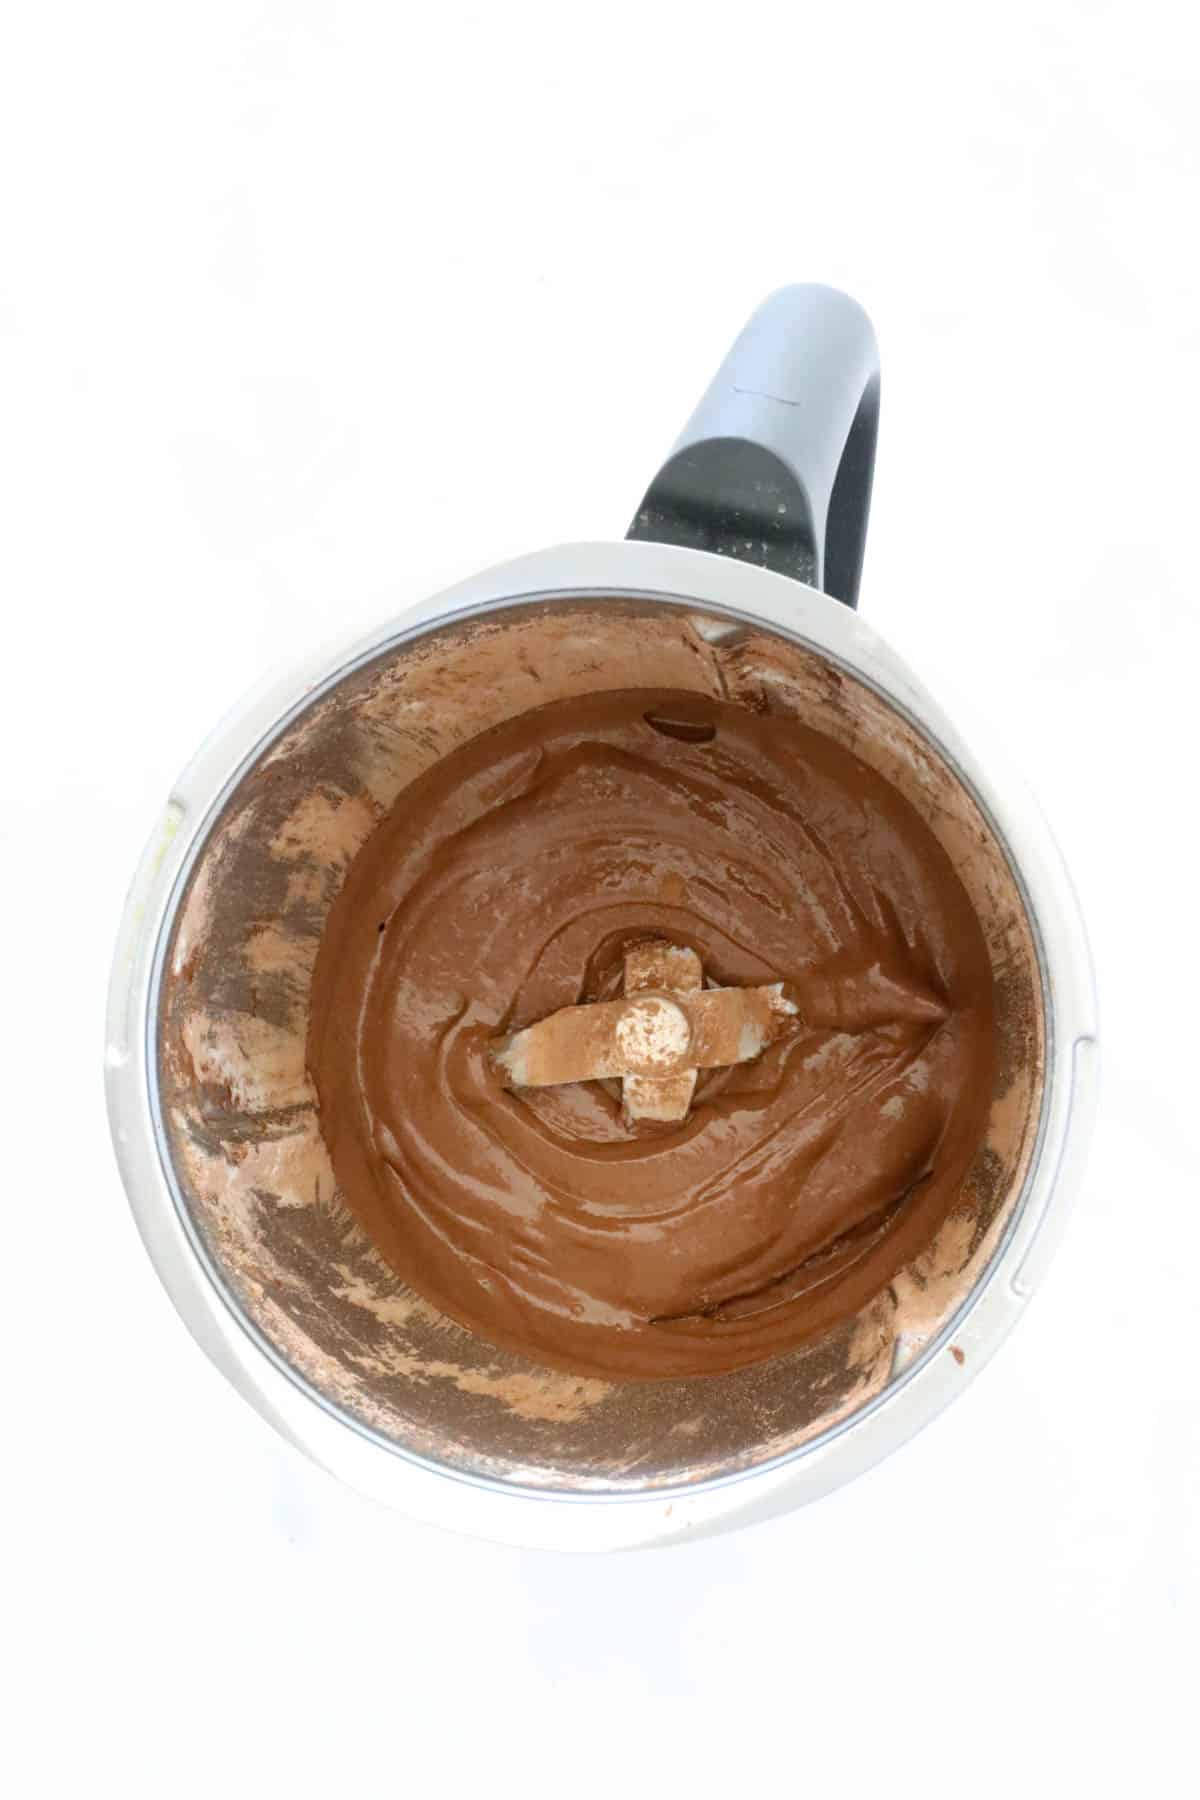
    Brownie batter in a Thermomix bowl.
    Mars Bar Brownie batter in a Thermomix bowl.

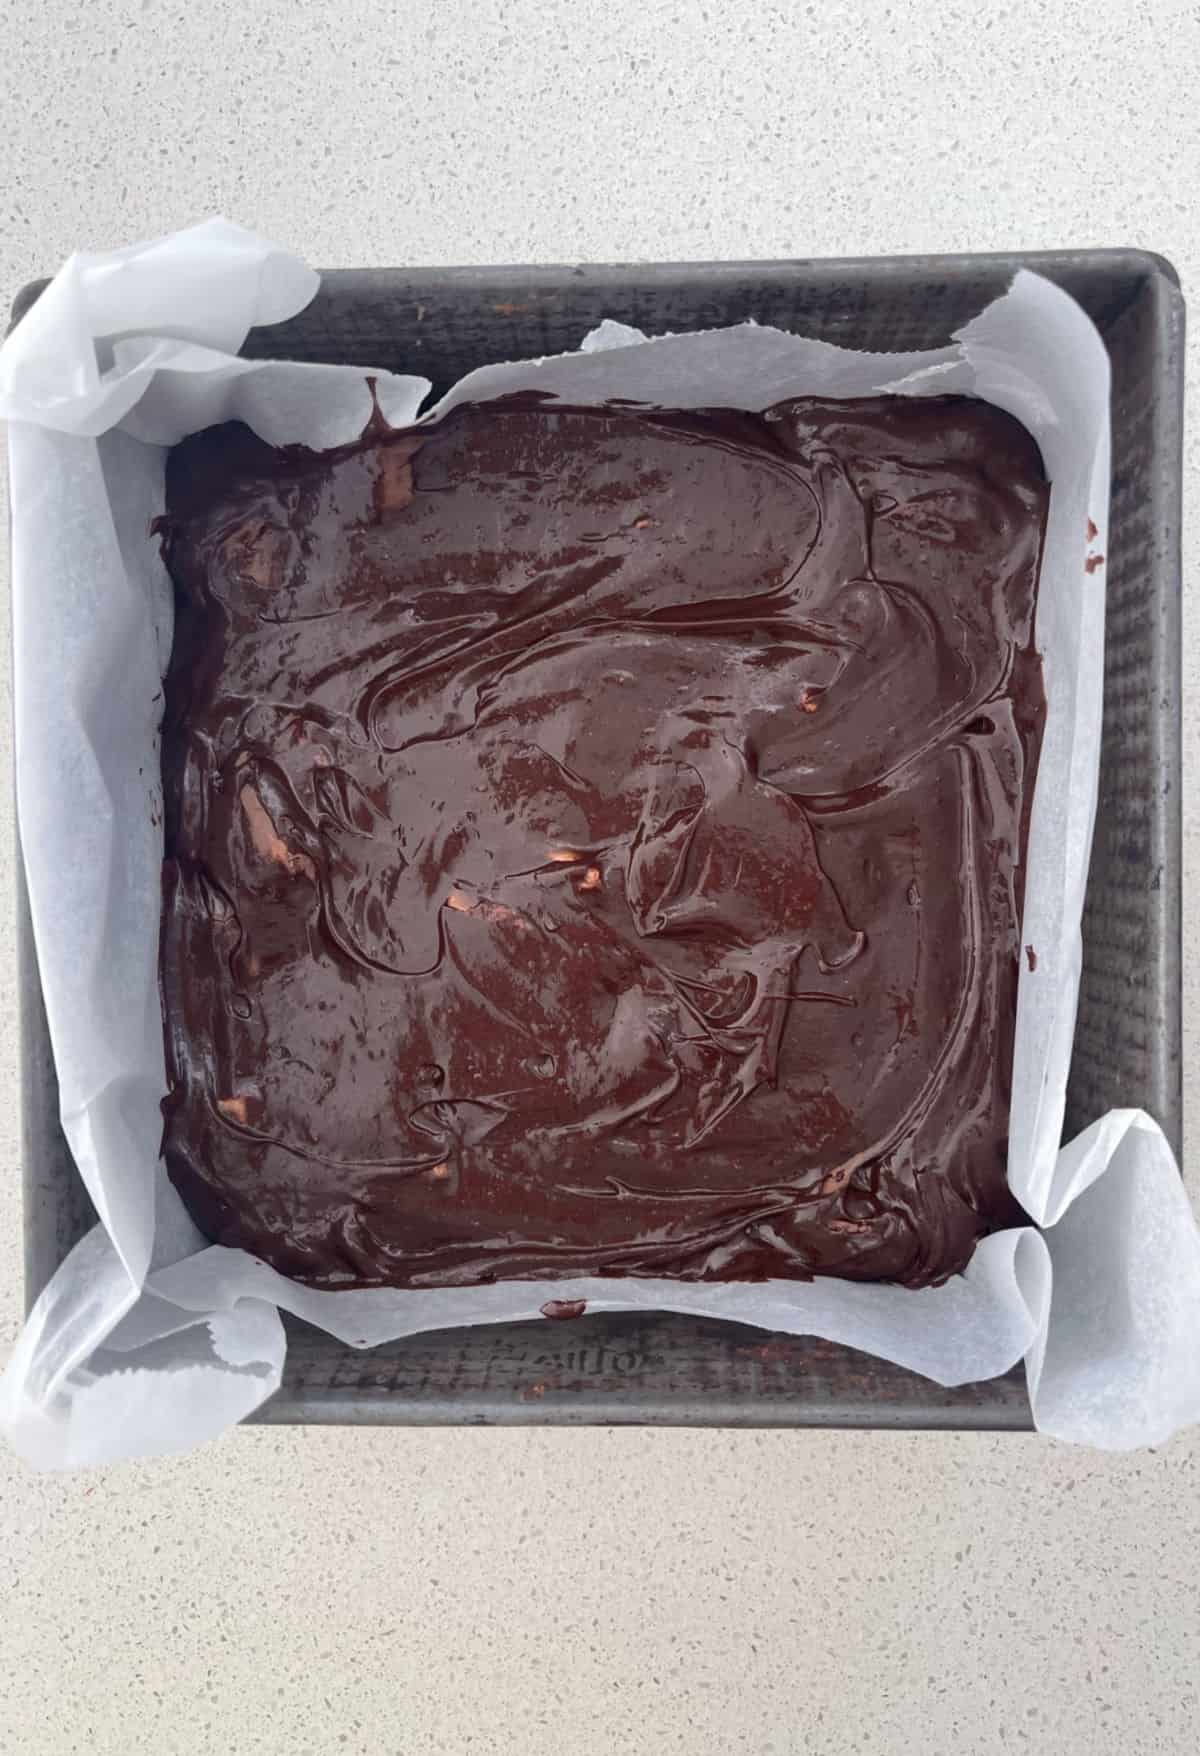
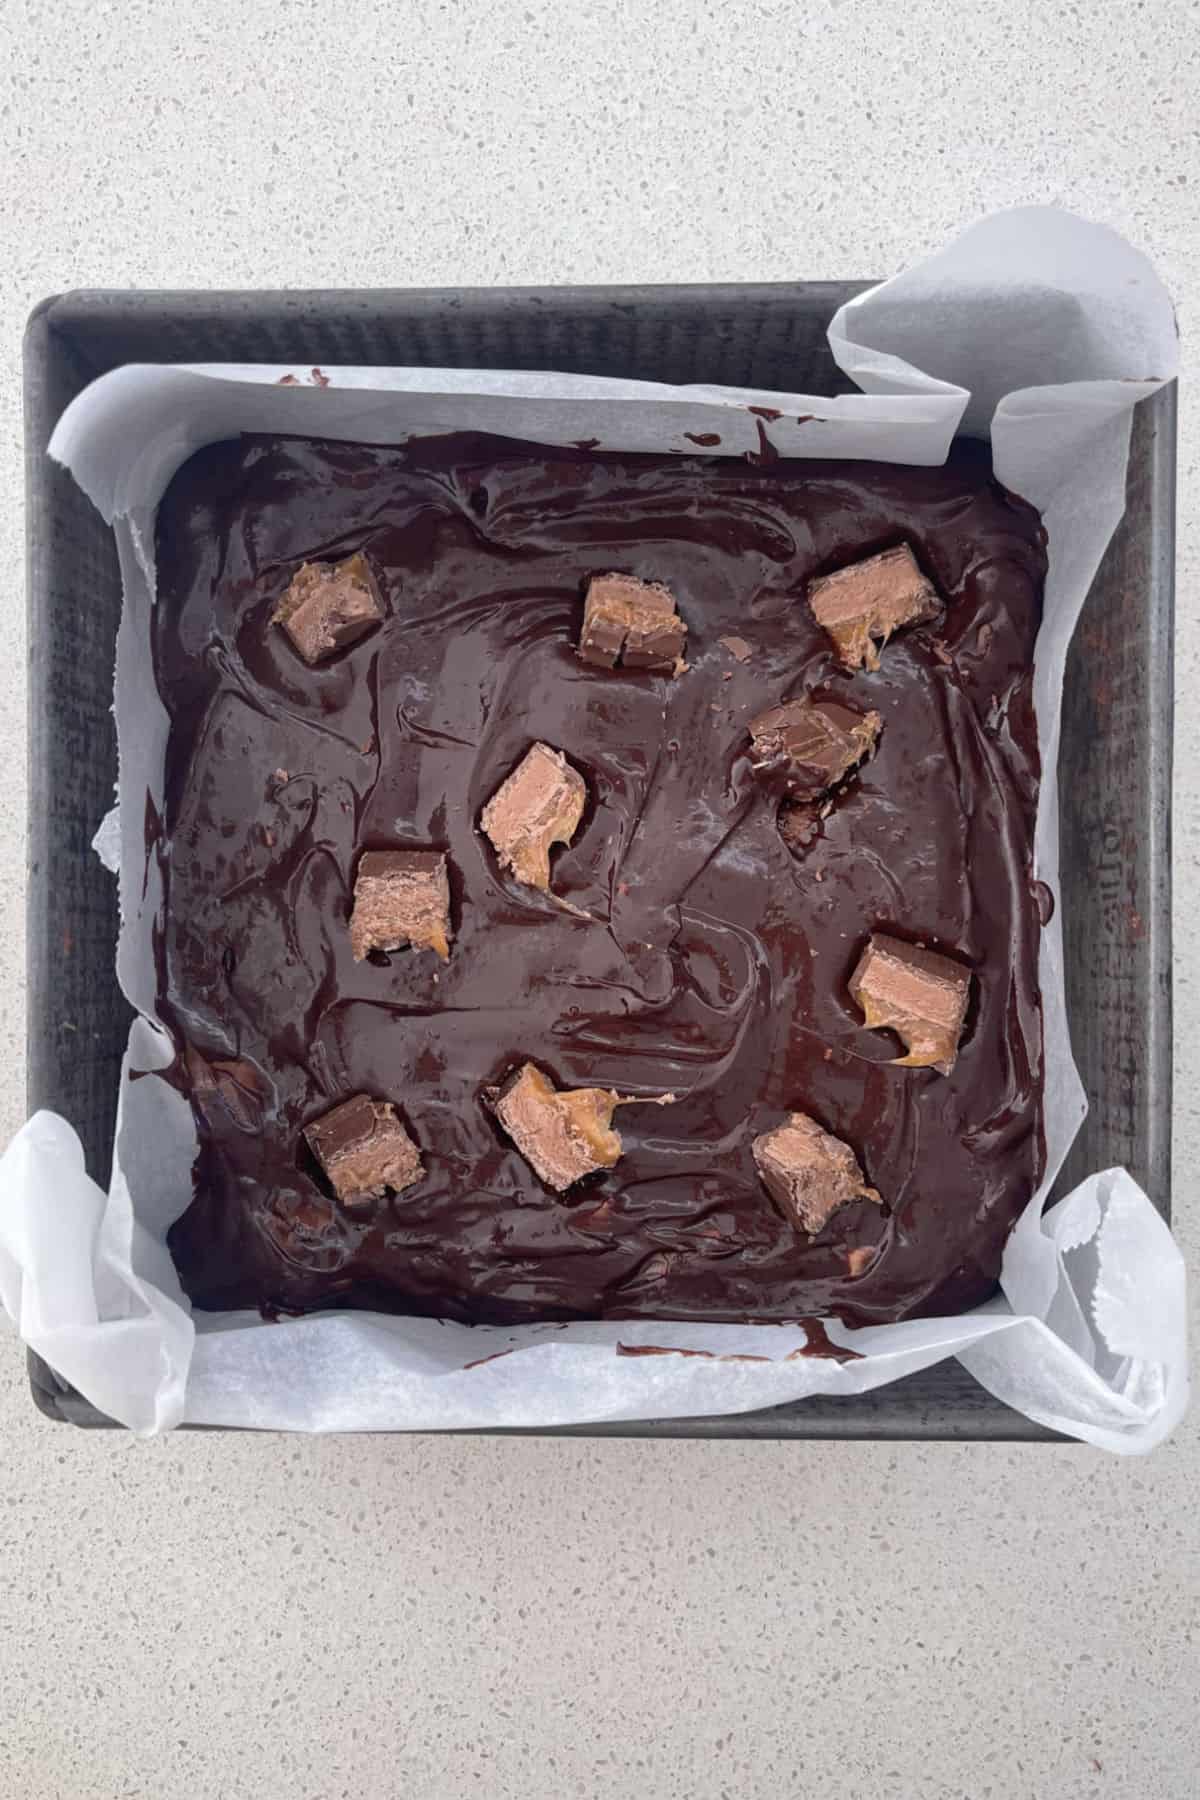
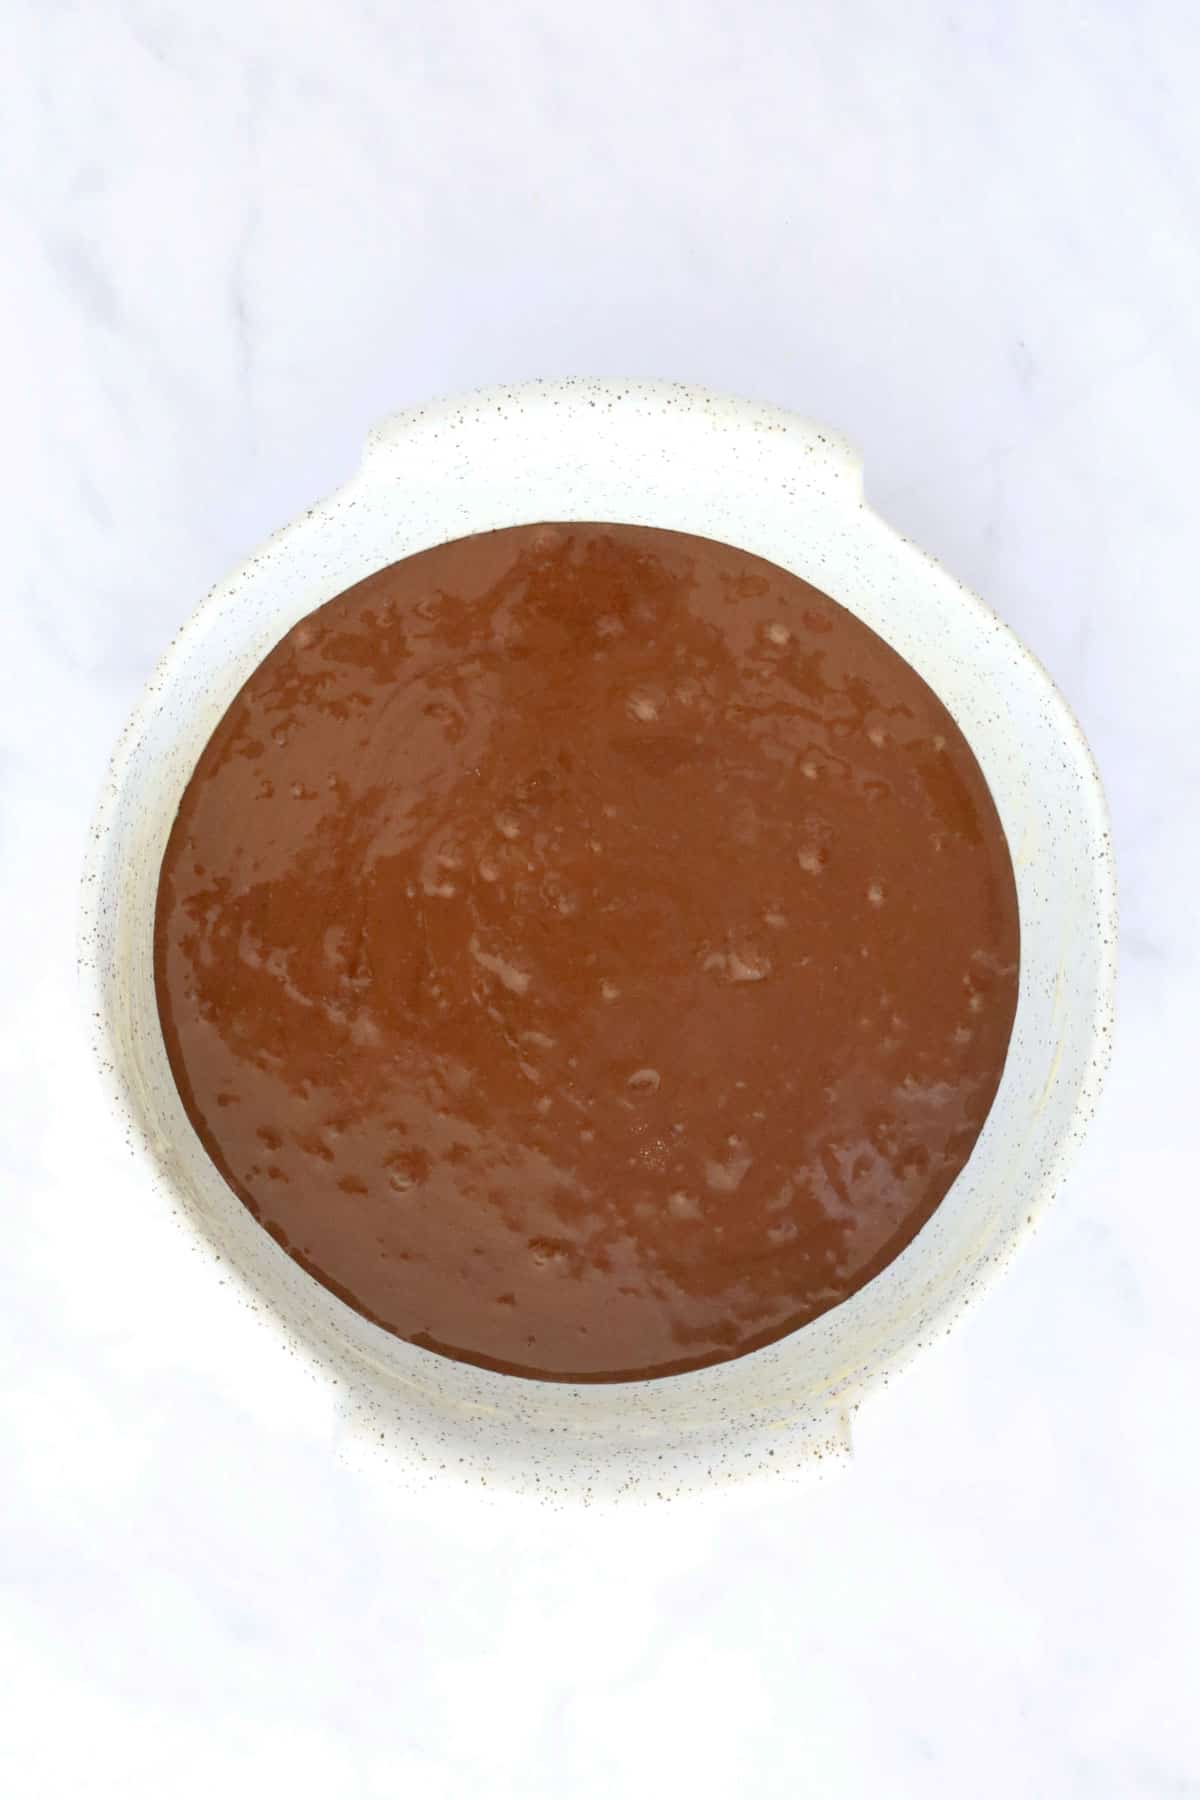
    Step 4. Transfer the brownie mixture to prepared baking dish. Top with Mars Bar pieces.

    Mars Bar Brownie mixture in a baking dish lined with baking paper.
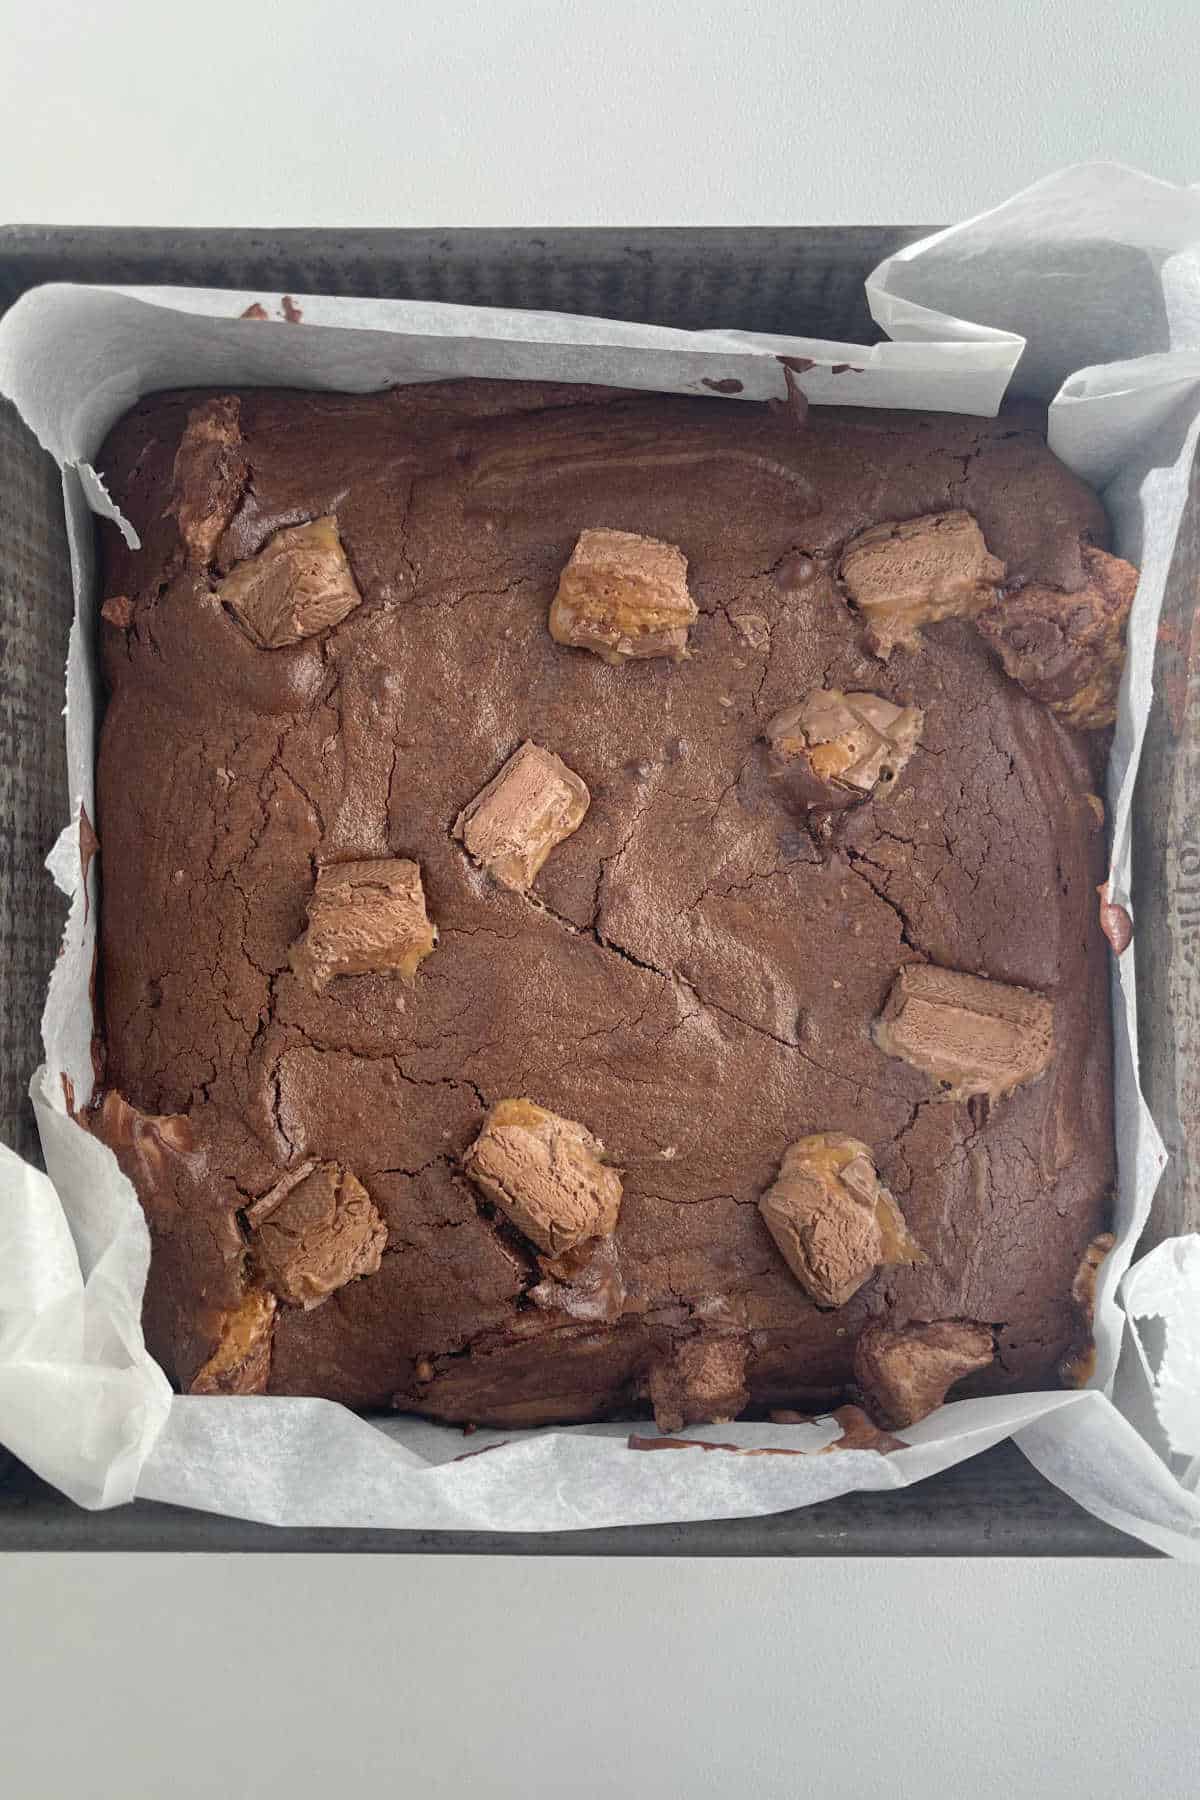
    Mars Bar Brownies in a baking dish ready to go into the oven.

    Step 5. Bake for 35 minutes. Please ensure you don't overcook as the brownie will dry out.

    Baked Mars Bar Brownies in baking dish.

    Step 6. Allow the Mars Bar Brownie to completely cool in the baking dish before carefully transferring to a serving plate and slice into pieces.

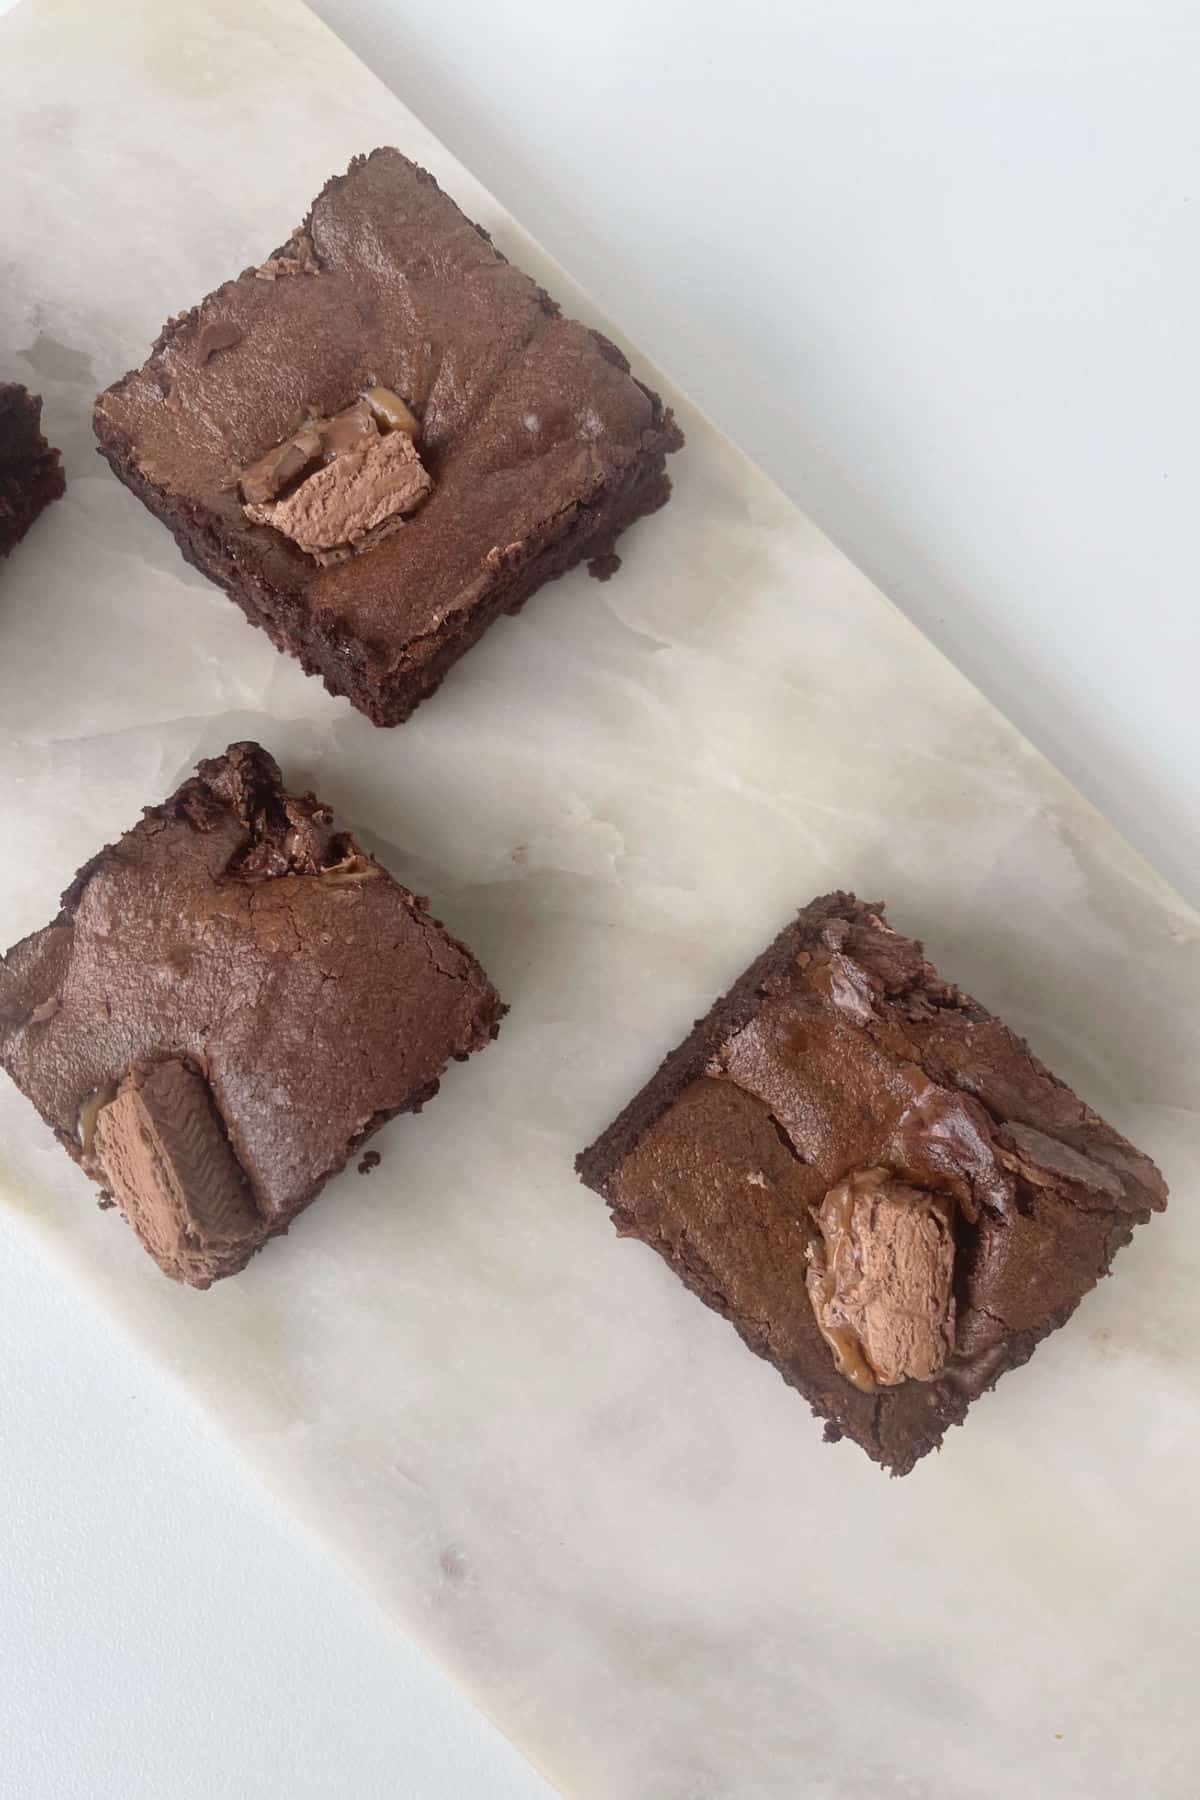
    Overhead view of three Mars Bar Brownies Sitting on a stone serving tray.

    Recipe Hints and Tips

    • You can use 'Fun Size' Mars Bars for this recipe. Please note you will need approximately 250grams.
    • It is REALLY important that you let these Mars Bar Brownies cool completely in the cake tin before removing/slicing into pieces as the cooling time will help the fudgey brownie centre to set.
    • To store, place in an airtight container and store in a cool dry place (pantry) for up to three days. These Brownies can also be stored in the fridge, allow the brownies to come to room temperature before serving.
    • To freeze, place in a freezer safe container and freeze for up to one month.
    • You can serve these Mars Bar Brownies at just about any occasion (and they are also an amazing dessert when heated slightly and served with ice cream or our Chocolate Fudge Sauce), however they also make a really lovely (and very much appreciated!!) homemade gift - simply pop a few pieces of brownie into a cello bag and decorate with a ribbon.
    What makes Brownies Fudgey?

    A higher ratio of fats (butter, chocolate) to flour helps to give brownies their fudge like texture.

    What is the best thing to make Brownies in?

    Baking brownies in a metal container will help you achieve best results. For our Brownie recipes we like to use a 20cm square baking dish.

    Can you freeze Brownies?

    Yes, you can freeze brownies when stored in a freezer safe container or bag for up to one month.

    Side view of a mars bar brownie on a stone serving tray. In the background is another brownie.

    You may also enjoy these recipes:

    • Thermomix Gluten Free Brownies
    • Thermomix Kahlua Brownies
    • Thermomix Easter Egg Brownies
    • Thermomix Chocolate Tim Tam Balls
    • Thermomix Double Chocolate Brownie Bliss Balls
    • Thermomix Mars Bar Slice
    • Thermomix Chocolate Self-Saucing Pudding
    • Thermomix Chocolate Slice
    Overhead view of a piece of Mars Bar Brownie sitting on a stone serving tray.
    Print Recipe
    4.62 from 21 votes

    Thermomix Mars Bar Brownies

    Our easy Thermomix Mars Bar Brownies recipe makes a great dessert, party food or special treat!
    Prep Time10 minutes mins
    Cook Time35 minutes mins
    Total Time45 minutes mins
    Course: Dessert
    Cuisine: Western
    Servings: 16 serves
    Calories: 162kcal
    Author: Lucy & Lauren
    Cost: $10

    Equipment

    • Thermomix
    • Oven

    Ingredients

    • 150 grams butter
    • 220 grams caster sugar
    • 75 grams cocoa
    • 1 teaspoon vanilla extract
    • 3 eggs
    • 75 grams plain flour
    • 5 x 47 gram Mars Bars

    Instructions

    • Preheat your oven to 160 degrees celsius (fan-forced) and line the base and sides of a 20cm square baking tin with baking paper – this will help you to remove the Mars Bar Brownies once they are cooked.
    • Roughly chop the Mars Bars and set aside until needed.
    • Place the butter (which has been cut into 4 pieces, cocoa and caster sugar into your Thermomix bowl and cook for 3 minutes, 60 degrees, speed 2 to melt. If it's not quite melted, cook for a further 1 minute, 60 degrees, speed 2.
    • Add the vanilla extract, eggs and plain flour and mix for 10 seconds, speed 4 to combine.
    • Scrape down the sides of your Thermomix bowl and add the Mars Bar pieces (reserving approximately 1 bar) you set aside earlier and mix for 6 seconds, speed 4 on REVERSE to combine.
    • Pour the brownie mixture into the prepared tin and use a spatula to gently spread it across the tin. Gently press the remaining Mars Bar pieces into the top of the brownie. Place the brownies into the oven to bake for 35 minutes.
    • Carefully remove the cooked brownies from the oven and allow them to cool in the tin before removing, cut into small pieces .

    Notes

    • You can use 'Fun Size' Mars Bars for this recipe. Please note you will need approximately 250grams.
    • It is REALLY important that you let these Mars Bar Brownies cool completely in the cake tin before removing/slicing into pieces as the cooling time will help the fudgey brownie centre to set.
    • To store, place in an airtight container and store in a cool dry place (pantry) for up to three days. These Brownies can also be stored in the fridge, allow the brownies to come to room temperature before serving.
    • To freeze, place in a freezer safe container and freeze for up to one month.
    • You can serve these Mars Bar Brownies at just about any occasion (and they are also an amazing dessert when heated slightly and served with ice cream or our Chocolate Fudge Sauce), however they also make a really lovely (and very much appreciated!!) homemade gift - simply pop a few pieces of brownie into a cello bag and decorate with a ribbon.

    Nutrition

    Calories: 162kcal | Carbohydrates: 20g | Protein: 3g | Fat: 9g | Saturated Fat: 5g | Polyunsaturated Fat: 0.5g | Monounsaturated Fat: 2g | Trans Fat: 0.3g | Cholesterol: 51mg | Sodium: 74mg | Potassium: 91mg | Fiber: 2g | Sugar: 14g | Vitamin A: 279IU | Vitamin C: 0.003mg | Calcium: 14mg | Iron: 1mg

    Looking for even more?

    You can find even more recipes in our books and eBooks, shop the range here.

    ThermoBliss complete set

    How To Whip Cream In A Thermomix

    September 17, 2018

    Want to know how to whip cream in a Thermomix? Our simple tips and recipe have got you covered and will have you on your way to beautifully whipped cream in no time!

    Want to know how to whip cream in a Thermomix? Our simple tips and recipe have got you covered and will have you on your way to beautifully whipped cream in no time!

    A Pinterest image with a bowl of whipped cream and the text overlay 'How To Whip Cream In A Thermomix'

    When it comes to basic recipes that everyone needs to know when using their Thermomix, whipped cream is right up there (along with an amazing buttercream recipe, cream cheese frosting and homemade yoghurt, of course!).

    Follow our foolproof guide and have perfectly whipped cream every single time!

    Whipping Cream In A Thermomix

    When I bought my first Thermomix (which was the TM31), I was so confused when it came to whipping cream. In the Everyday Cookbook, the recipe for whipping cream said that it should take 5-10 seconds. Well I have never, ever whipped cream in my Thermomix in 5-10 seconds! Not even close! It would always take me over a minute (at least!).

    And while the new Everyday Cookbook has an updated recipe for whipping cream (and it no longer refers to 5-10 seconds), there's still a lot of confusion about how to whip cream in the Thermomix, including how much time it actually takes!

    And so, we've put together an entire guide explaining how to perfectly whip cream in your Thermomix!

    A bowl of whipped cream.

    What You Need

    Cream! That's pretty obvious, right!?

    But in all seriousness, this is what you need:

    • cream - choose a cream that is suitable for whipping. This is generally referred to as thickened cream or heavy whipping cream. Do not choose light, skim or cooking cream as it wont whip properly. Most cream containers will have a 'suitable for whipping' symbol on the sticker if they can be whipped.
    • vanilla extract and caster (superfine) sugar - for a sweet whipped cream, add a splash of vanilla extract and a tablespoon or two of caster sugar.
    Scones with a bowl of whipped cream next to it.

    Step By Step Instructions

    It's as easy as 1,2,3 to whip cream in your Thermomix!

    Step 1 - Insert The Butterfly

    Carefully insert the Butterfly into the Thermomix bowl. Check that it is correctly positioned so that it doesn't fall off when the machine starts. You can check this by very lightly pulling on the Butterfly. If it stays in place, it's ready to go.

    Cream in a Thermomix bowl with the Butterfly inserted.

    Step 2 - Add The Cream

    Add the cream to the Thermomix bowl.

    Step 3 - Whip The Cream

    Turn the machine onto Speed 3 and continue to mix until whipped to your liking (keep an eye on it and stop mixing as soon as the cream is whipped). 

    See our tips below.

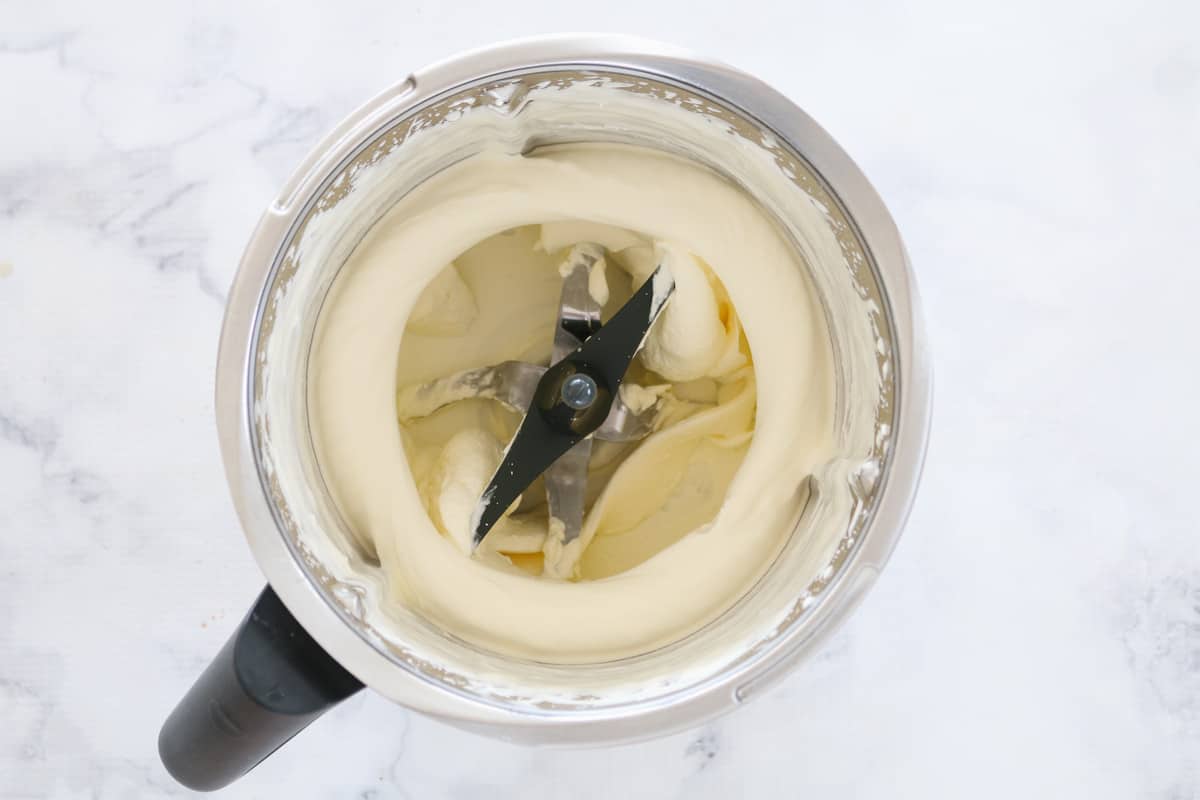
    A Thermomix with whipped cream inside.
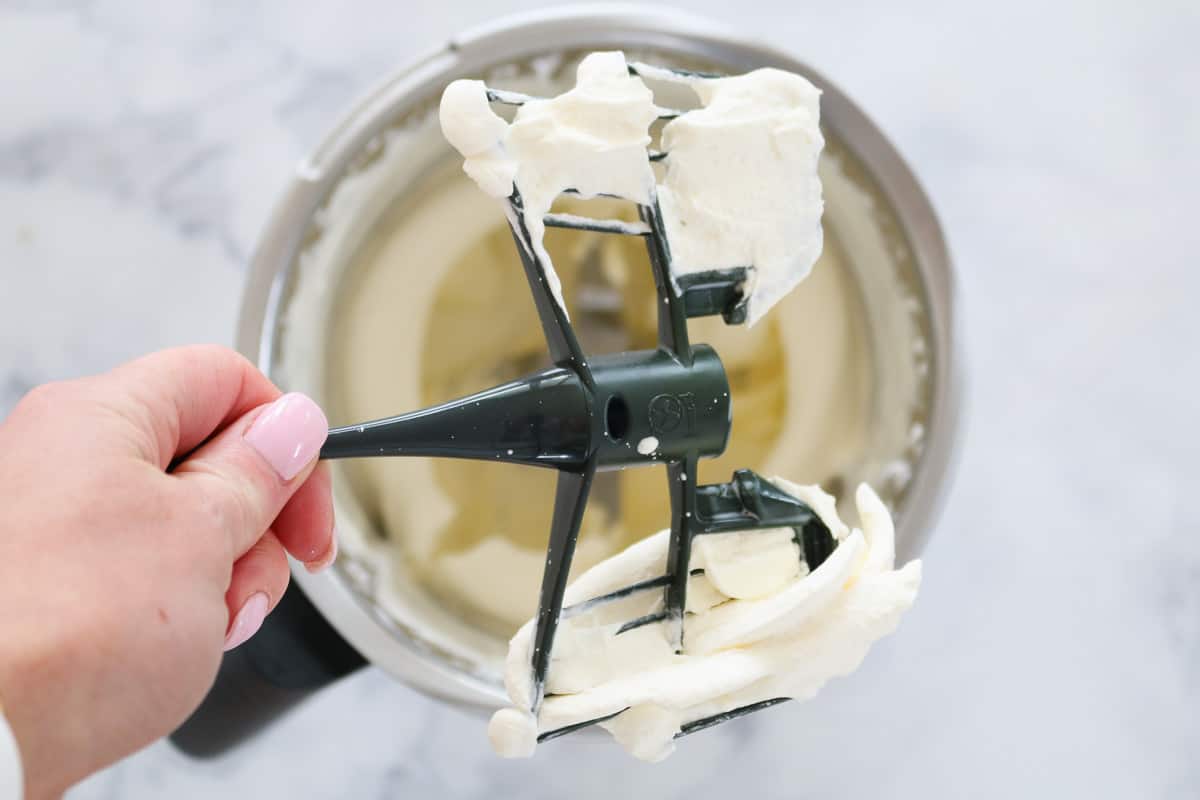
    Whipped cream on a Butterfly attachment from a kitchen machine.

    Expert Tips

    Type of cream

    Choose a cream that is suitable for whipping (most will say 'whipping cream', 'heavy cream' or have a little symbol on the container that says that it's for whipping).

    Time to whip

    The type of cream you choose will determine how quickly it whips (cream with a higher fat content will whip quicker and will be more stable)

    Do not use light, skim or cooking cream

    It just won't ever whip!

    Butterfly Attachment

    Insert the butterfly attachment before whipping for the perfect whipped cream

    Don't over-whip

    It's SO easy to over-whip cream in the Thermomix! Watch it like a hawk and don't go over Speed 3 (as tempting as it may be to do so!). Over-whipped cream will curdle and seperate and we certainly don't want that!

    The colder the better!

    Whip your cream straight from the refrigerator - the colder it is, the quicker and easier it will be to whip
    You can pop your Thermomix bowl into the refrigerator or freezer for 15 minutes before whipping to speed up the process (this is especially helpful on a hot day!)

    Amount of cream suitable for whipping

    Don't try and whip more than 600g of cream in the Thermomix. If you need to whip more than that amount, do it in seperate lots.

    Jam and cream on top of half a scone.

    Related Recipes

    Now that you've got beautifully whipped cream, try adding it to one of these recipes:

    Four Ingredient Scones - serve our most popular scones with whipped cream and jam.

    Butterfly Cakes - these cute little cakes are great for parties or afternoon tea.

    Sponge Cake - our classic fluffy sponge is made even better with the addition of jam and cream!!

    Want to know how to whip cream in a Thermomix? Our simple tips and recipe have got you covered and will have you on your way to beautifully whipped cream in no time!
    Print Recipe
    4.78 from 18 votes

    How To Whip Cream In A Thermomix

    Want to know how to whip cream in a Thermomix? Our simple tips and recipe have got you covered and will have you on your way to beautifully whipped cream in no time!
    Prep Time5 minutes mins
    Total Time5 minutes mins
    Course: basic recipe
    Cuisine: dessert, whipped cream
    Servings: 1 serve
    Calories: 690kcal
    Author: Lucy & Lauren

    Equipment

    • Thermomix
    • Butterfly attachment

    Ingredients

    • 200-600 g cream suitable for whipping

    Instructions

    • Place the butterfly into the Thermomix. 
    • Pour in the cream and mix on Speed 3 until whipped to your liking (keep an eye on it and stop mixing as soon as the cream is whipped). 

    Notes

    RECIPE NOTES & TIPS
    • cream - choose a cream that is suitable for whipping. This is generally referred to as thickened cream or heavy whipping cream. Do not choose light, skim or cooking cream as it wont whip properly. Most cream containers will have a 'suitable for whipping' symbol on the sticker if they can be whipped.
    • vanilla extract and caster (superfine) sugar - for a sweet whipped cream, add a splash of vanilla extract and a tablespoon or two of caster sugar.
    • whip your cream straight from the refrigerator - the colder it is, the quicker and easier it will be to whip
    • keep the speed on the specified Speed 3 - it's so tempting to turn it up... but don't!! Over-whipped cream will curdle and seperate
    • don't try and whip more than 600g of cream in the Thermomix. If you need to whip more than that amount, do it in seperate lots.

    Nutrition

    Calories: 690kcal | Carbohydrates: 6g | Protein: 4g | Fat: 74g | Saturated Fat: 46g | Cholesterol: 274mg | Sodium: 76mg | Potassium: 150mg | Sugar: 1g | Vitamin A: 2940IU | Vitamin C: 1mg | Calcium: 130mg | Iron: 1mg

    Thermomix Bacon & Tomato Risotto

    September 10, 2018

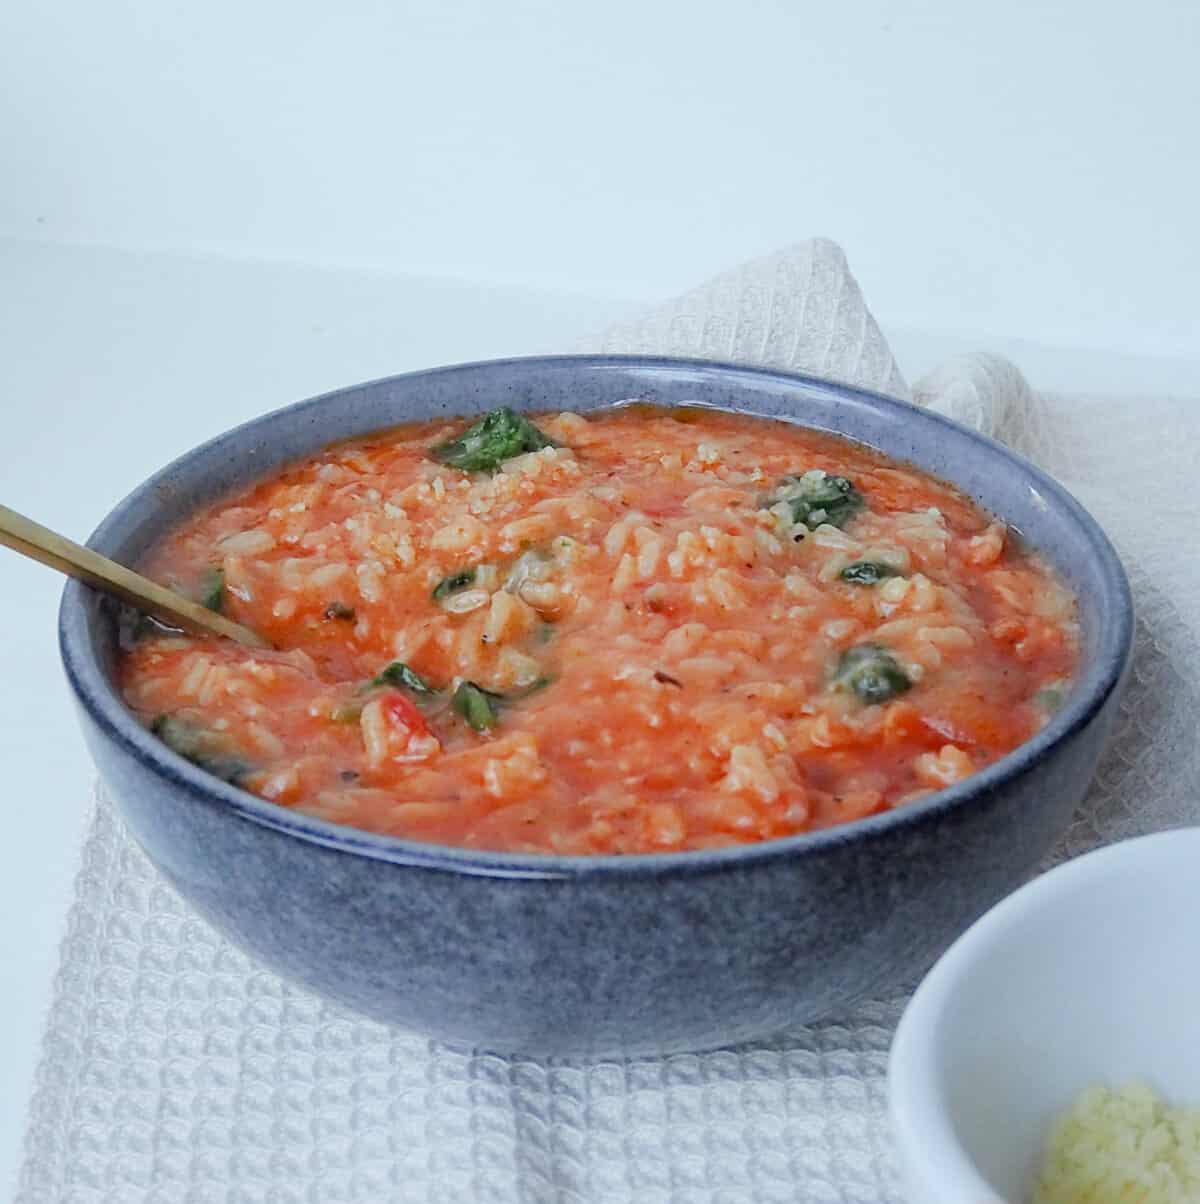
    Overhead side view of Thermomix Bacon and Tomato Risotto.

    Our Thermomix Bacon & Tomato Risotto is the perfect family dinner... quick, easy and totally delicious! 

    Long side view of Thermomix Bacon and Tomato Risotto.

    This Thermomix Bacon & Tomato Risotto is always a family favourite in our house. It gets the tick of approval from everyone. Nothing beats a risotto made in the Thermomix... there's absolutely no stirring involved... just set and forget! I like to add a bit of chilli to my bowl when I'm dishing up too (but if everyone in your family likes chilli, I'd definitely suggest adding it to the tomato sauce when you're making the risotto).

    You will also love:

    Quick to prepare - this family favourite can be ready to enjoy in under 45 minutes.

    Budget friendly - you won't need any expensive or fancy ingredients to make this risotto.

    Freezer friendly - store any leftovers in the freezer for up to three months.

    Overhead view of Thermomix Bacon and Tomato Risotto.

    Ingredients

    Please note you will find the full list of ingredients in the recipe card below.

    • Parmesan Cheese
    • Olive Oil
    • Bacon
    • Garlic
    • Tinned diced tomatoes
    • Dried Italian herbs
    • Brown onion
    • Butter
    • Arborio Rice
    • Vegetable Stock
    • White wine - this can be omitted.
    • Baby spinach leaves
    Ingredients to make Thermomix Bacon and Tomato Risotto on a white background.

    Step by Step Instructions for making Risotto in a Thermomix:

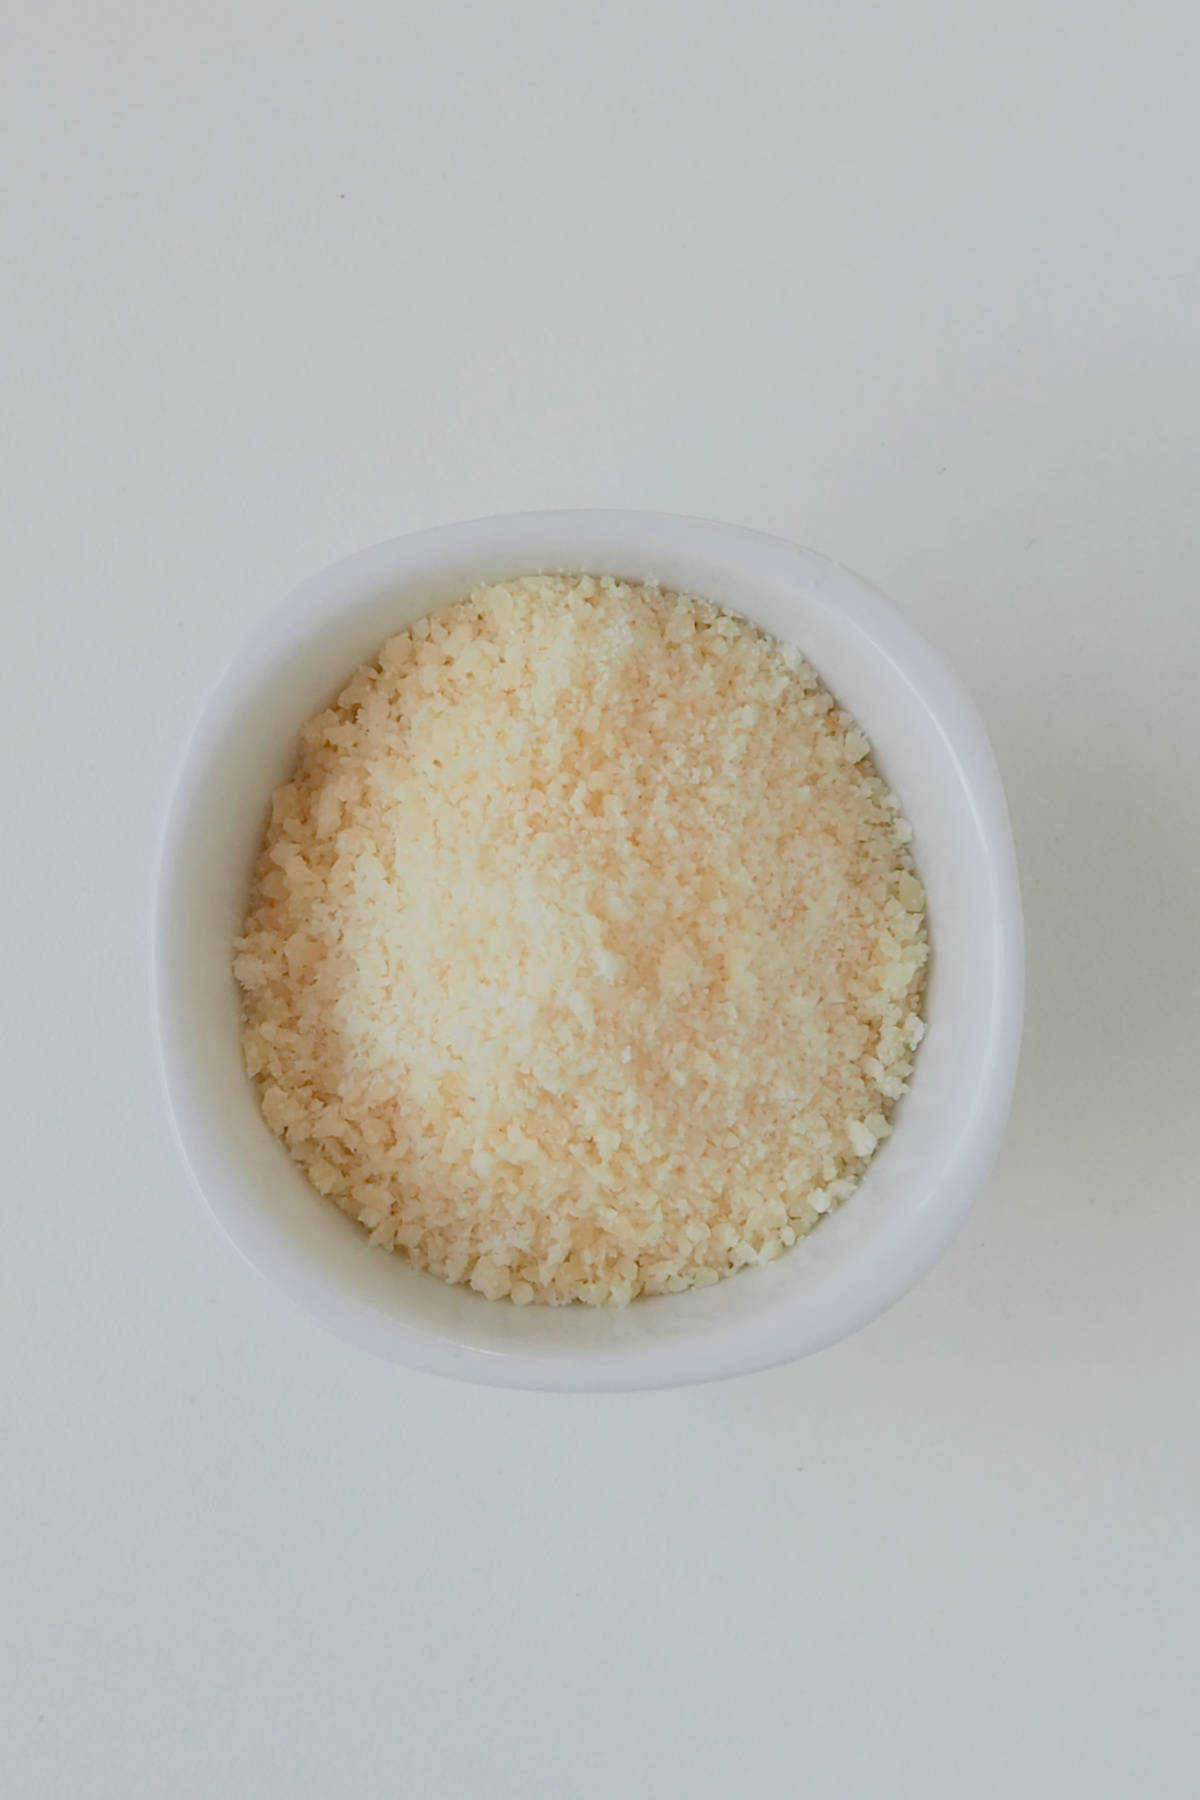
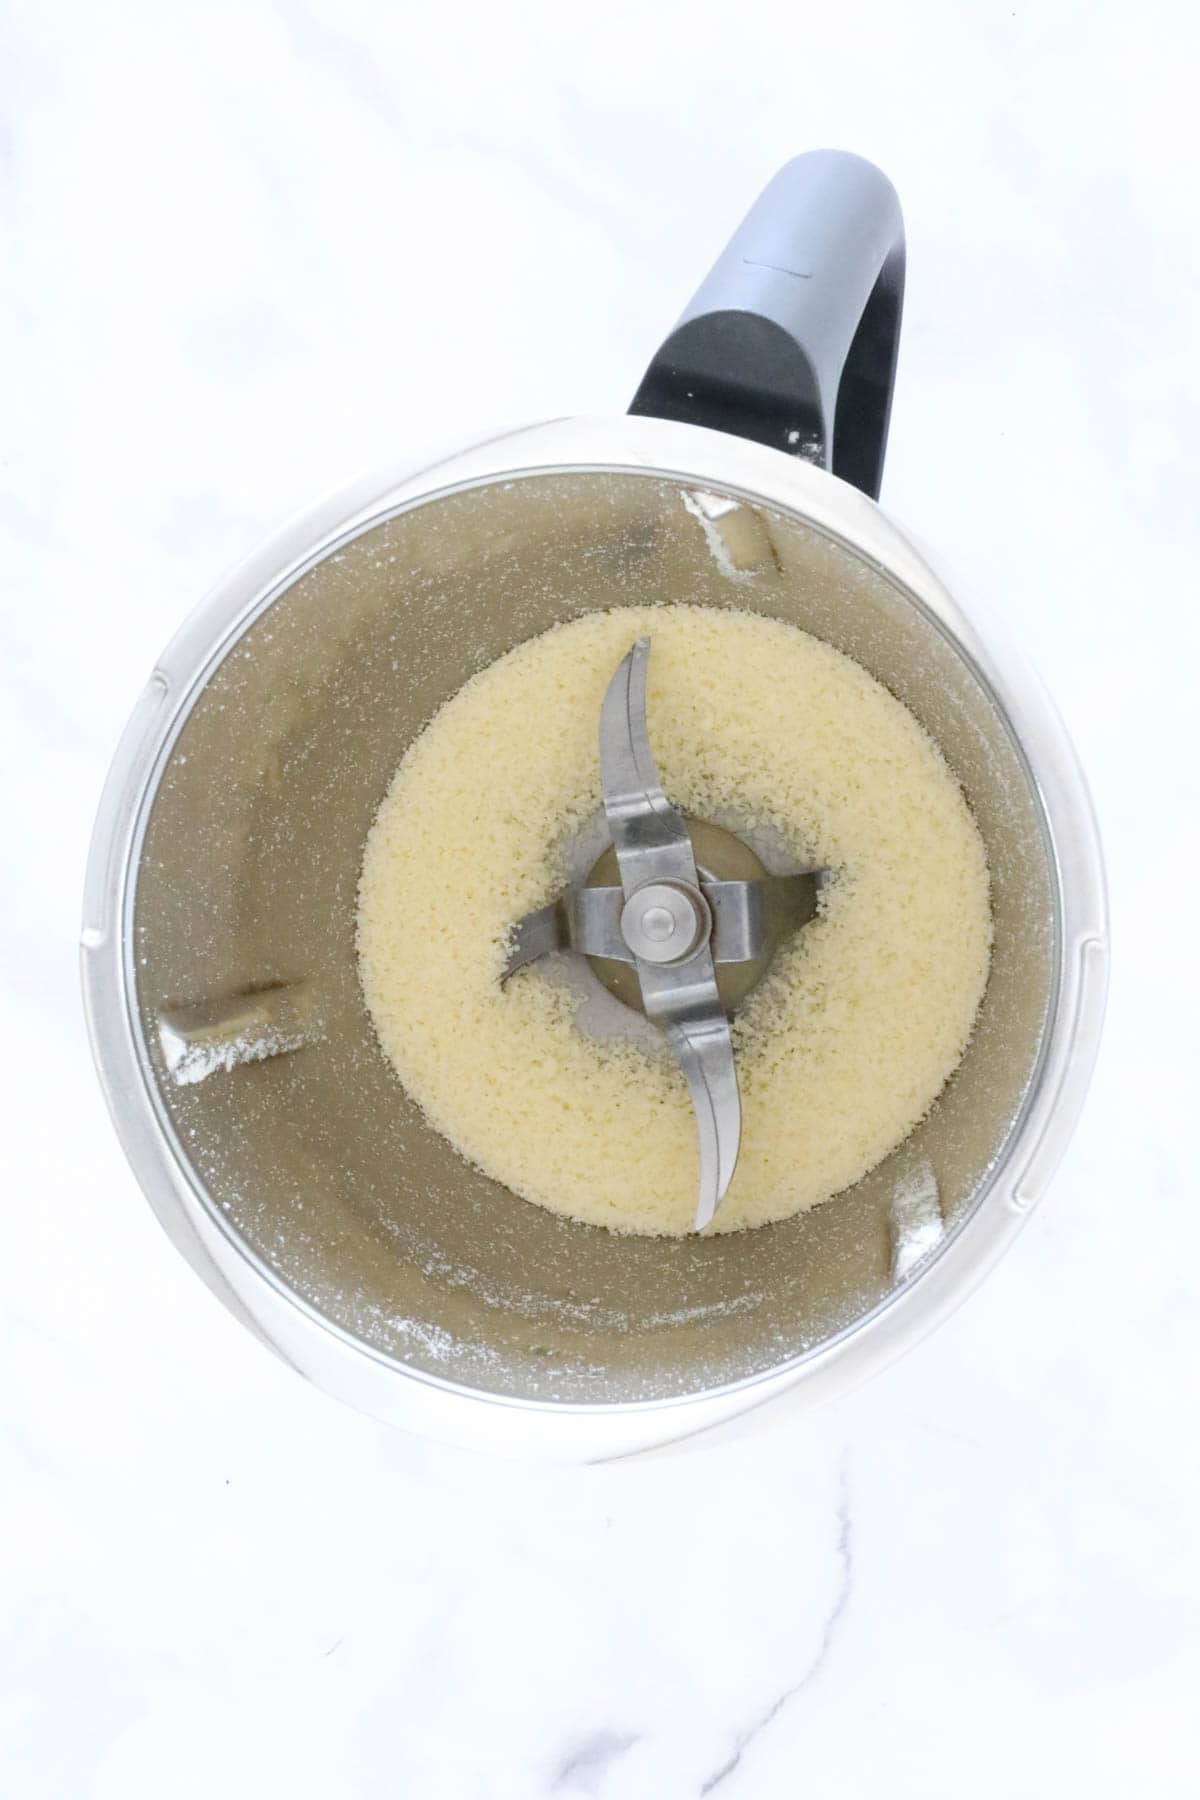
    Step 1. Cut the parmesan cheese into small pieces and mix until grated.

    grated parmesan cheese in a white bowl.

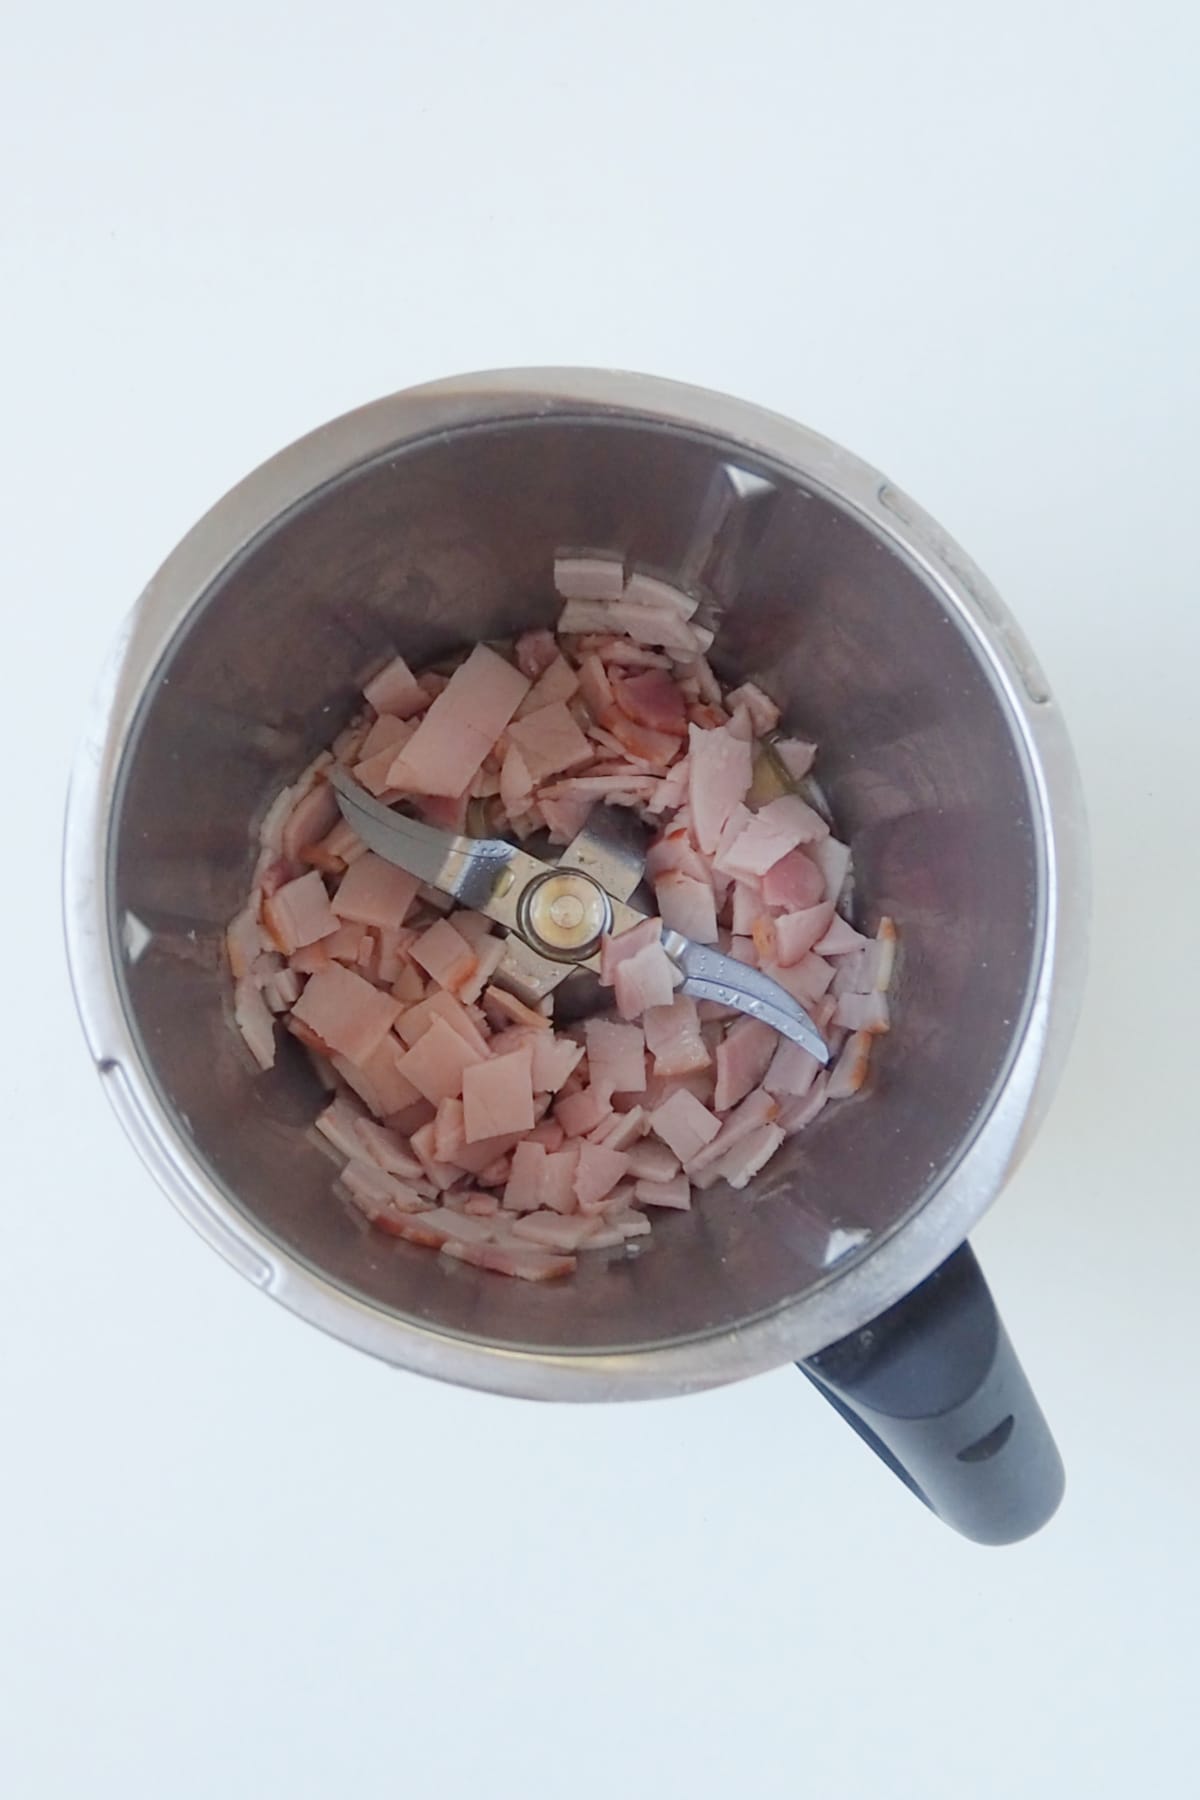
    Step 2. Place the garlic into the Thermomix bowl and mix to grate. Add the bacon and olive oil and cook.

    Cooked bacon and garlic in a thermomix bowl.

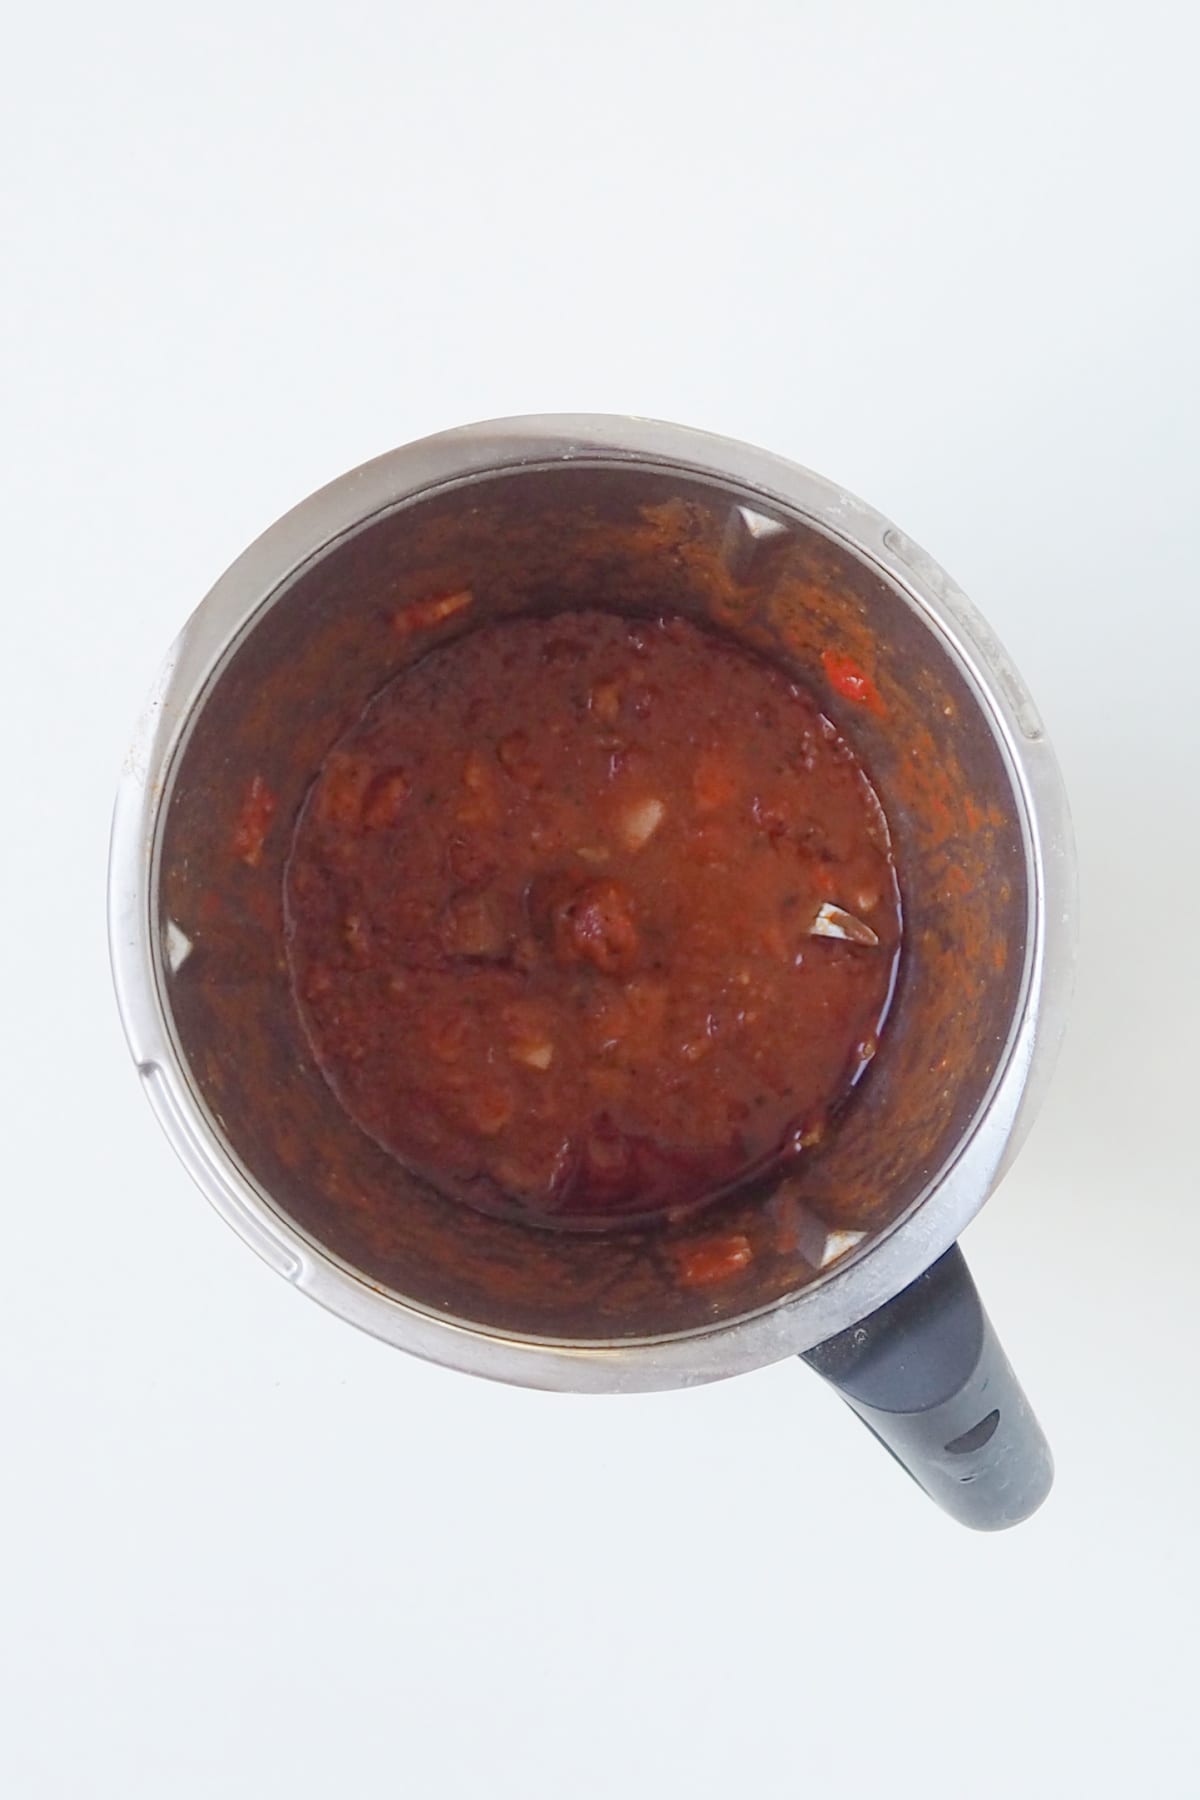
    Step 3. Add the tomatoes, chilli (if using), dried herbs, salt and pepper and cook. Transfer to a ThermoServer.

    Thermomix Bacon and Tomato Risotto sauce in bowl.

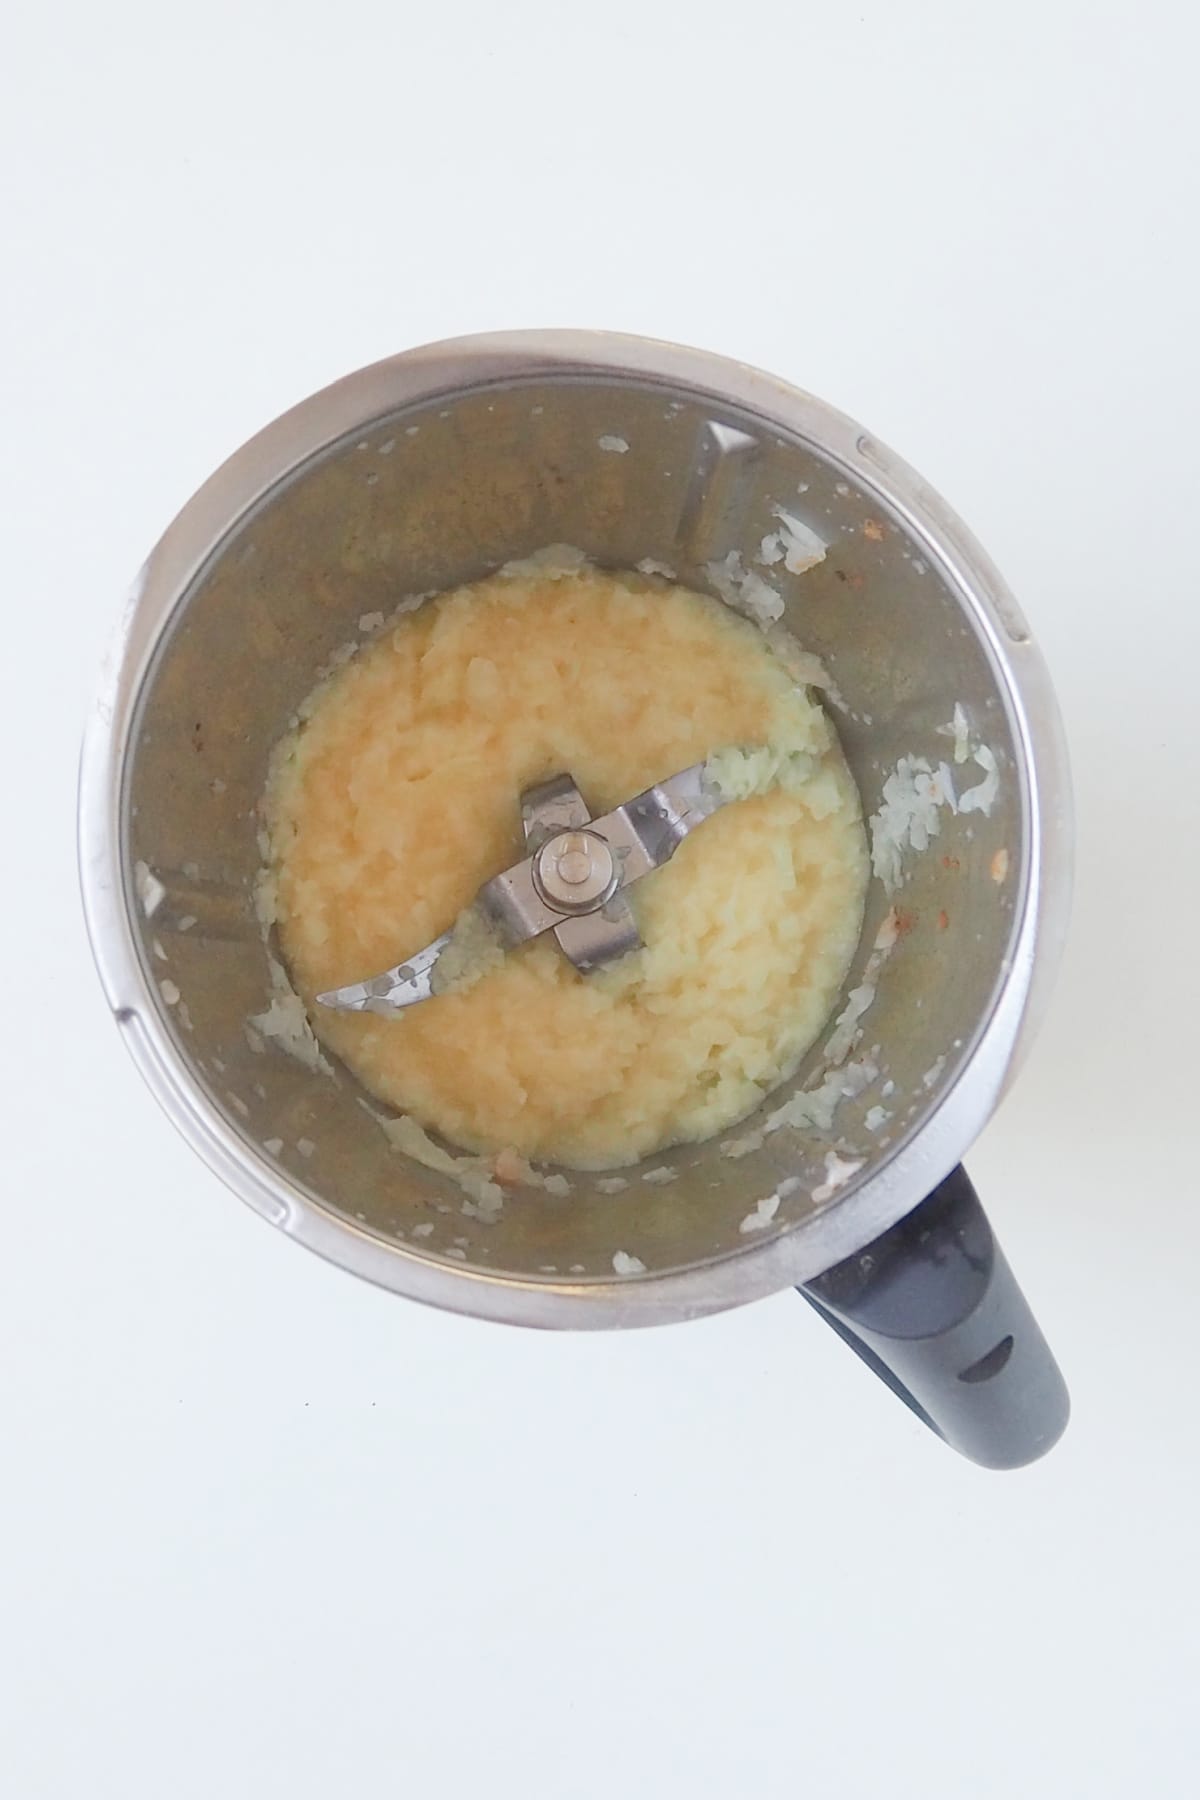
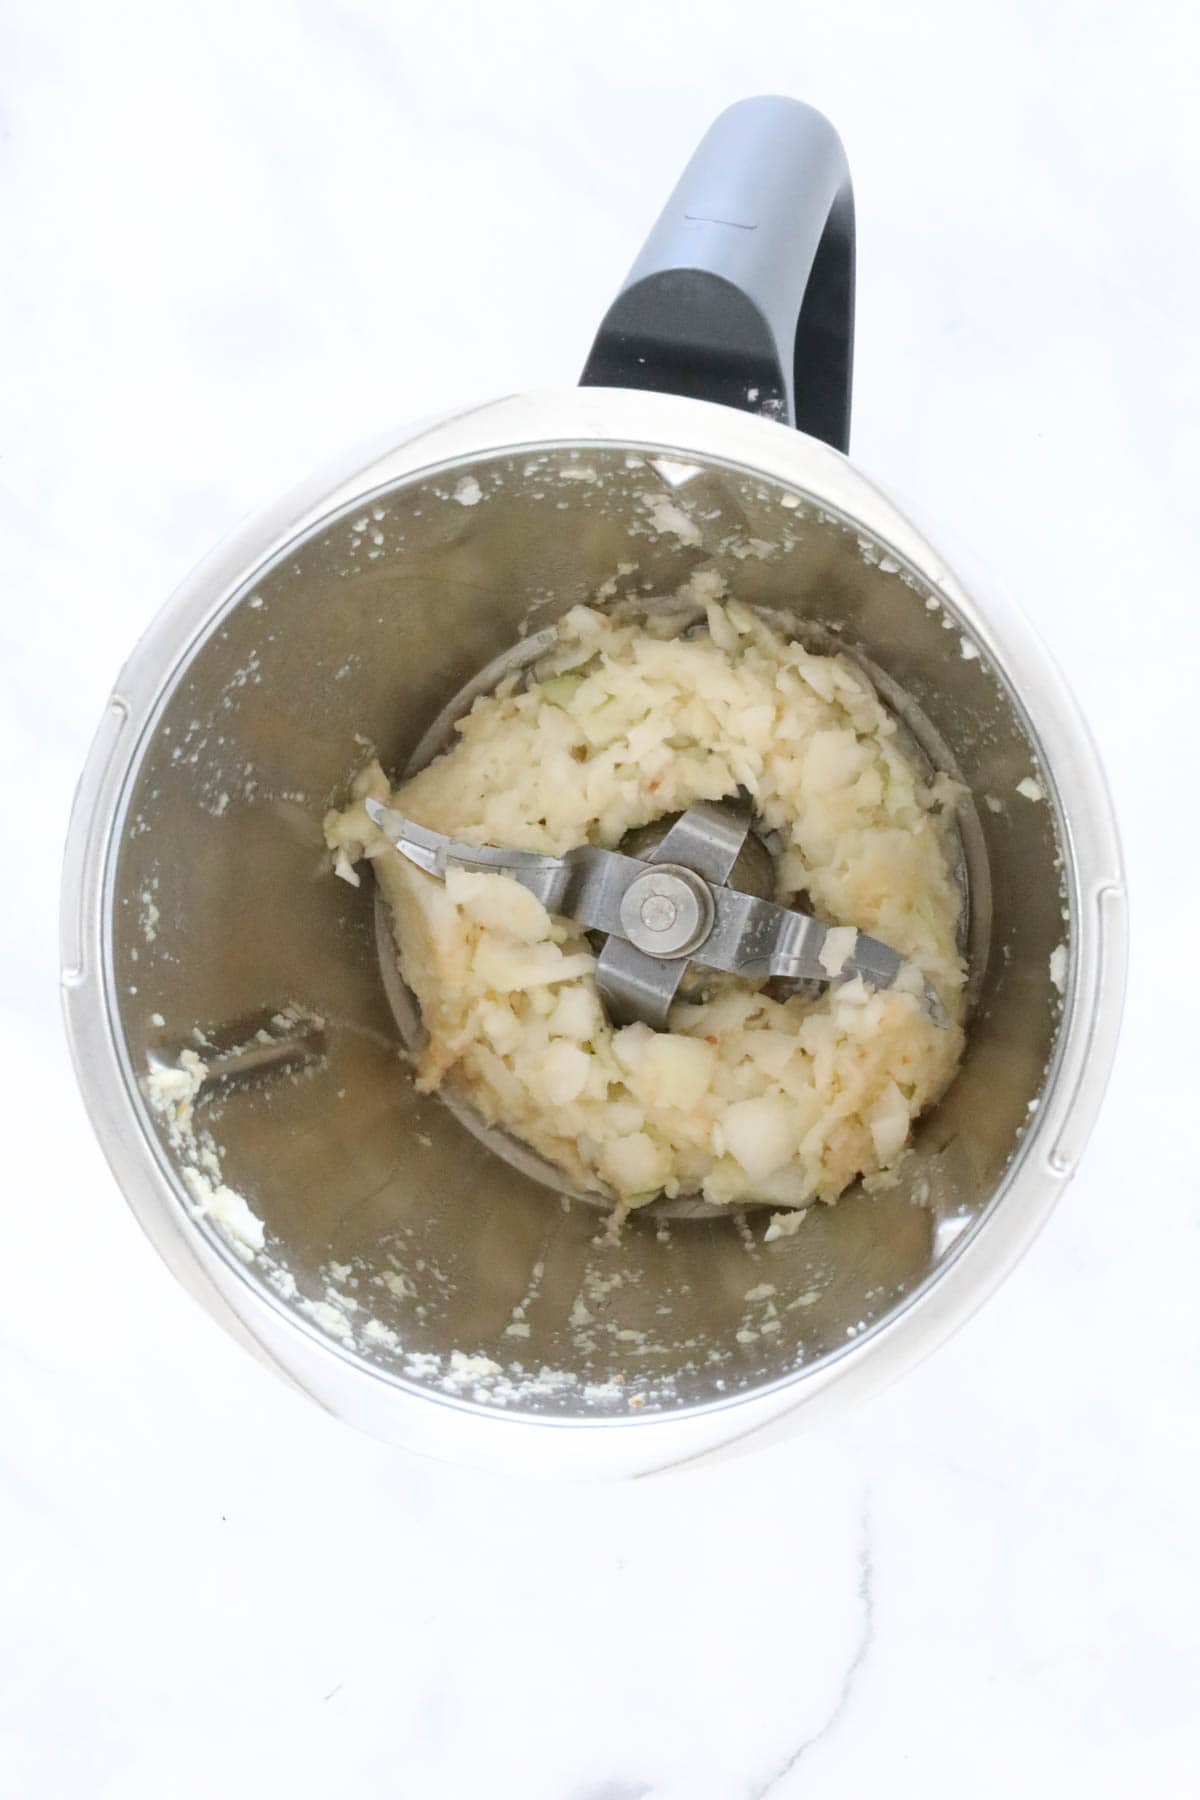
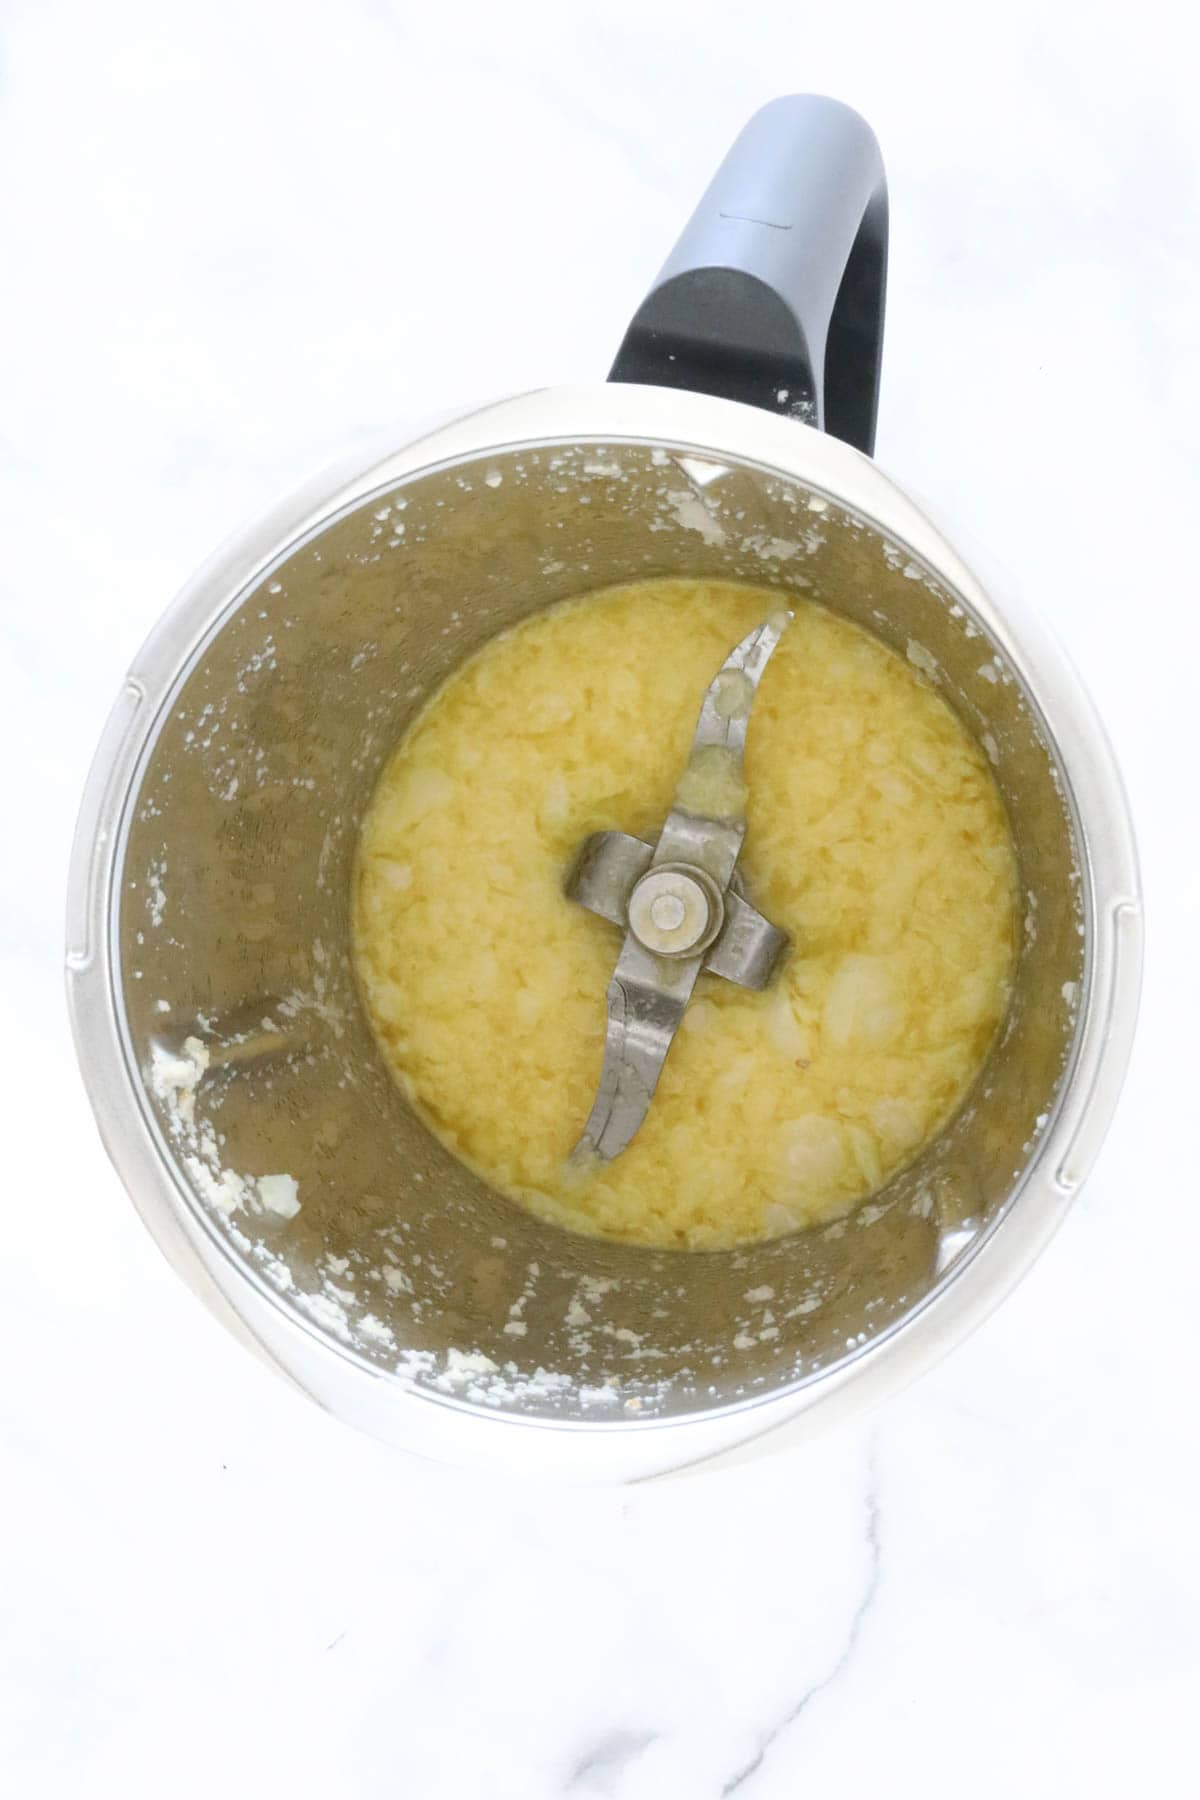
    Step 4. In a clean Thermomix bowl, add the onion and mix to grate. Add the olive oil and butter and cook.

    Cooked onion in a thermomix bowl.

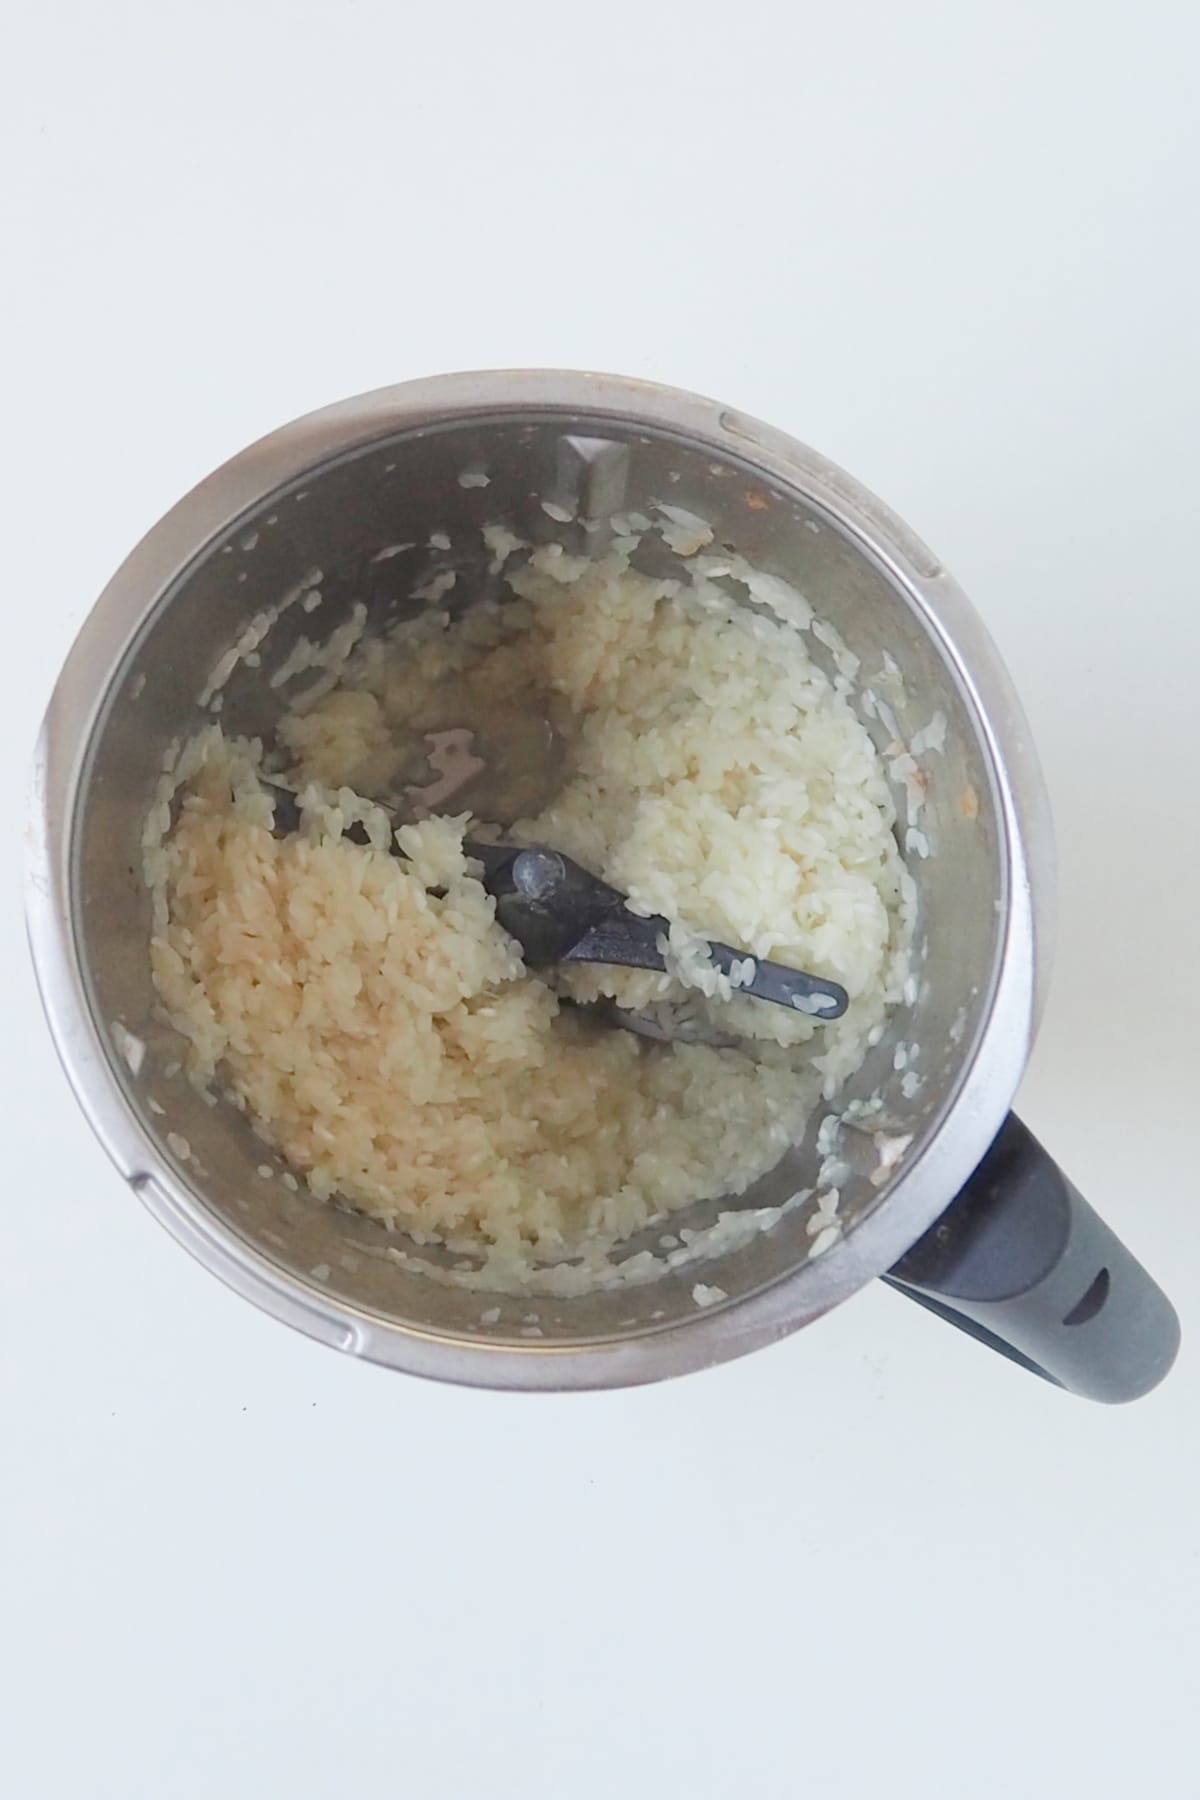
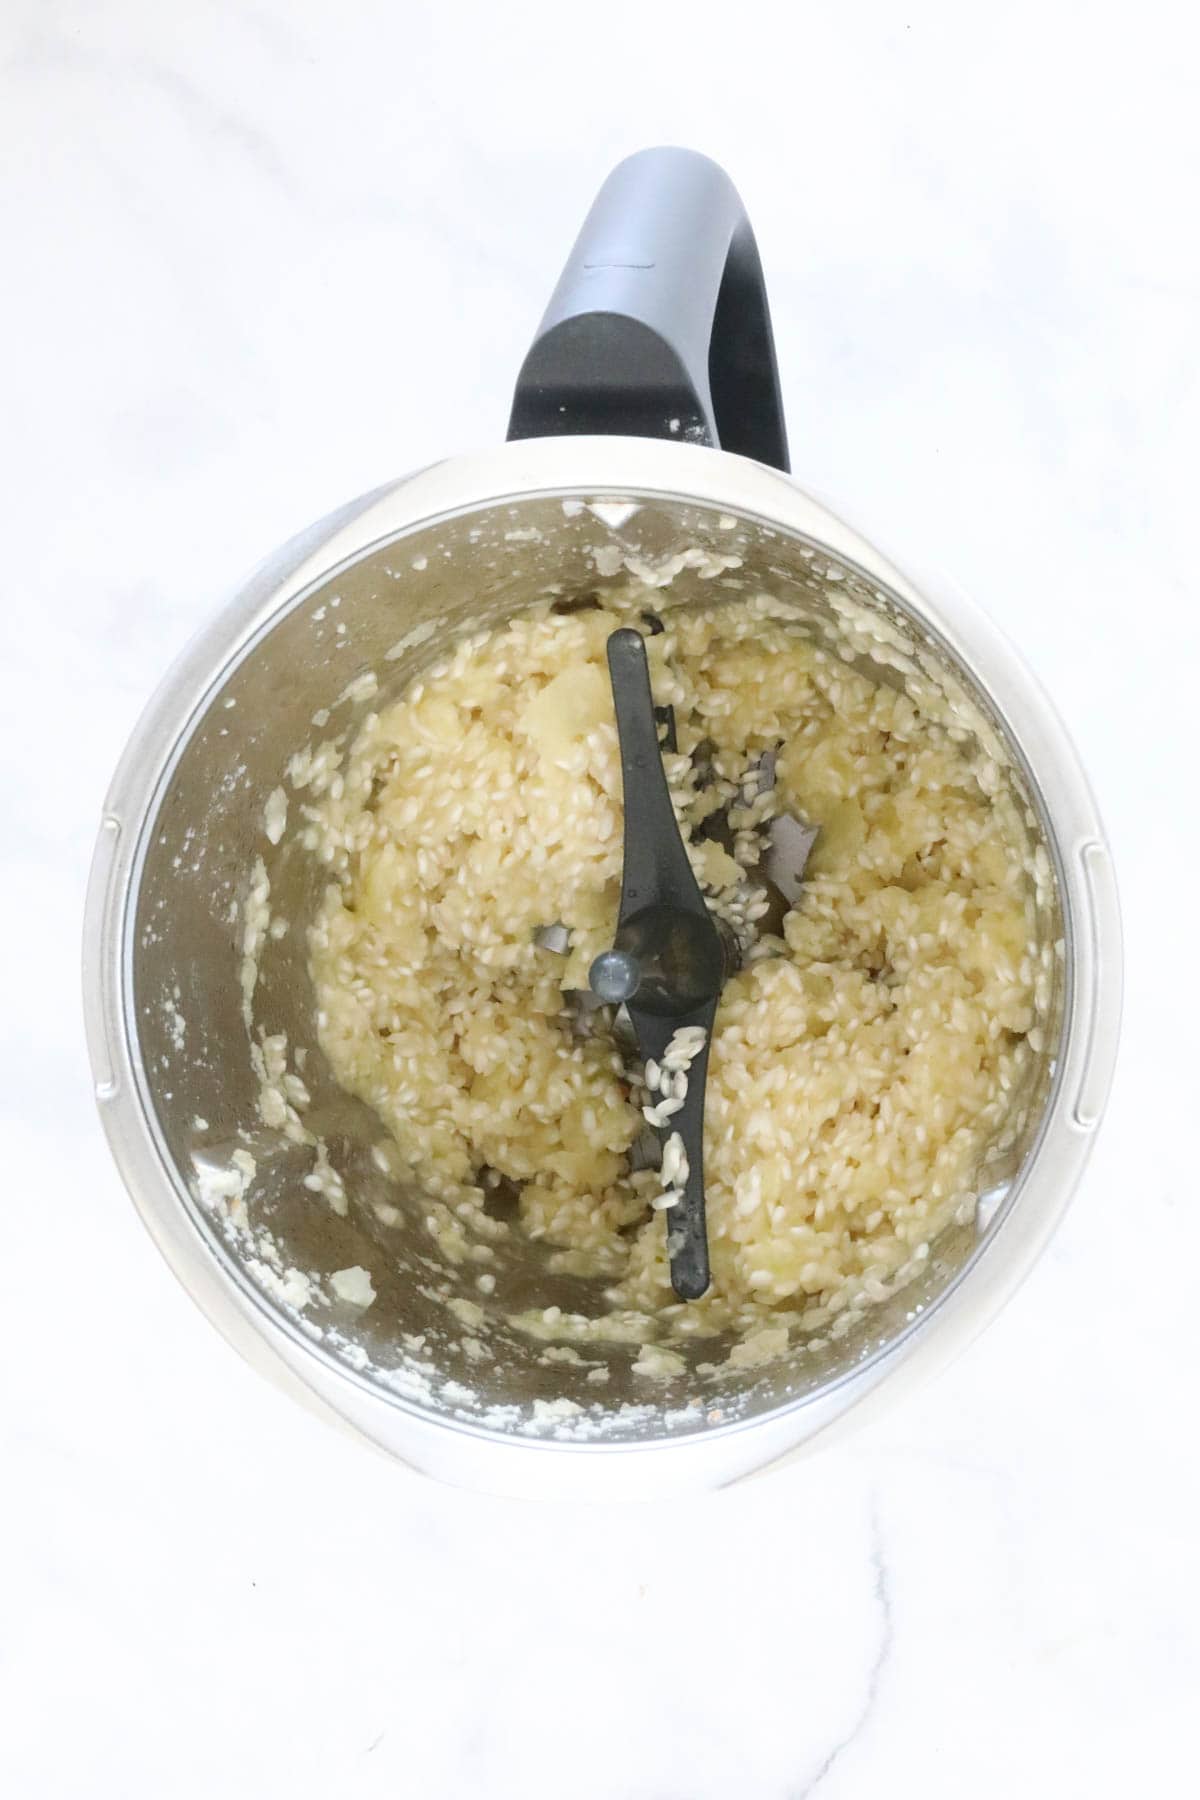
    Step 5. Insert the butterfly attachment and add the rice and wine. Cook.

    aborio rice in a thermomix bowl.

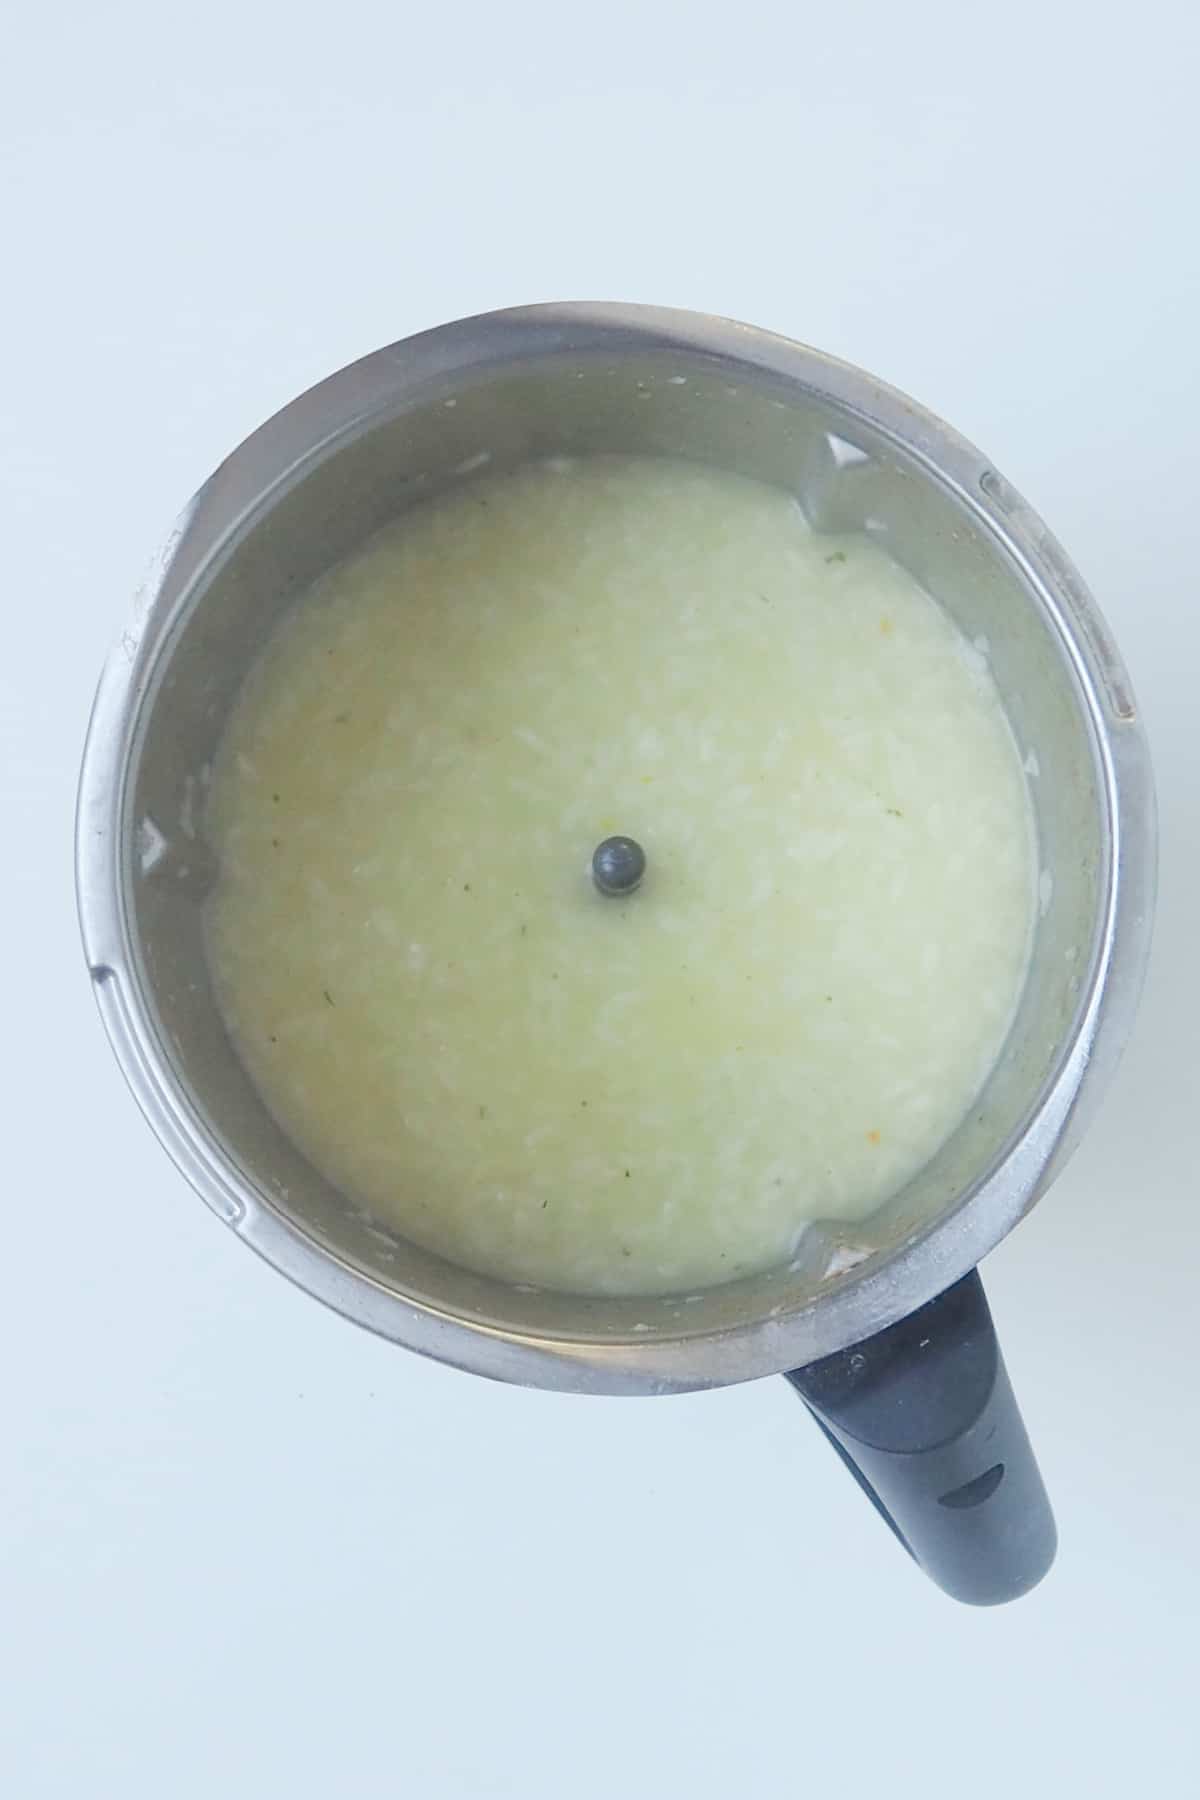
    Step 6. Add the vegetable stock and cook.

    Cooked arborio rice in a thermomix bowl.

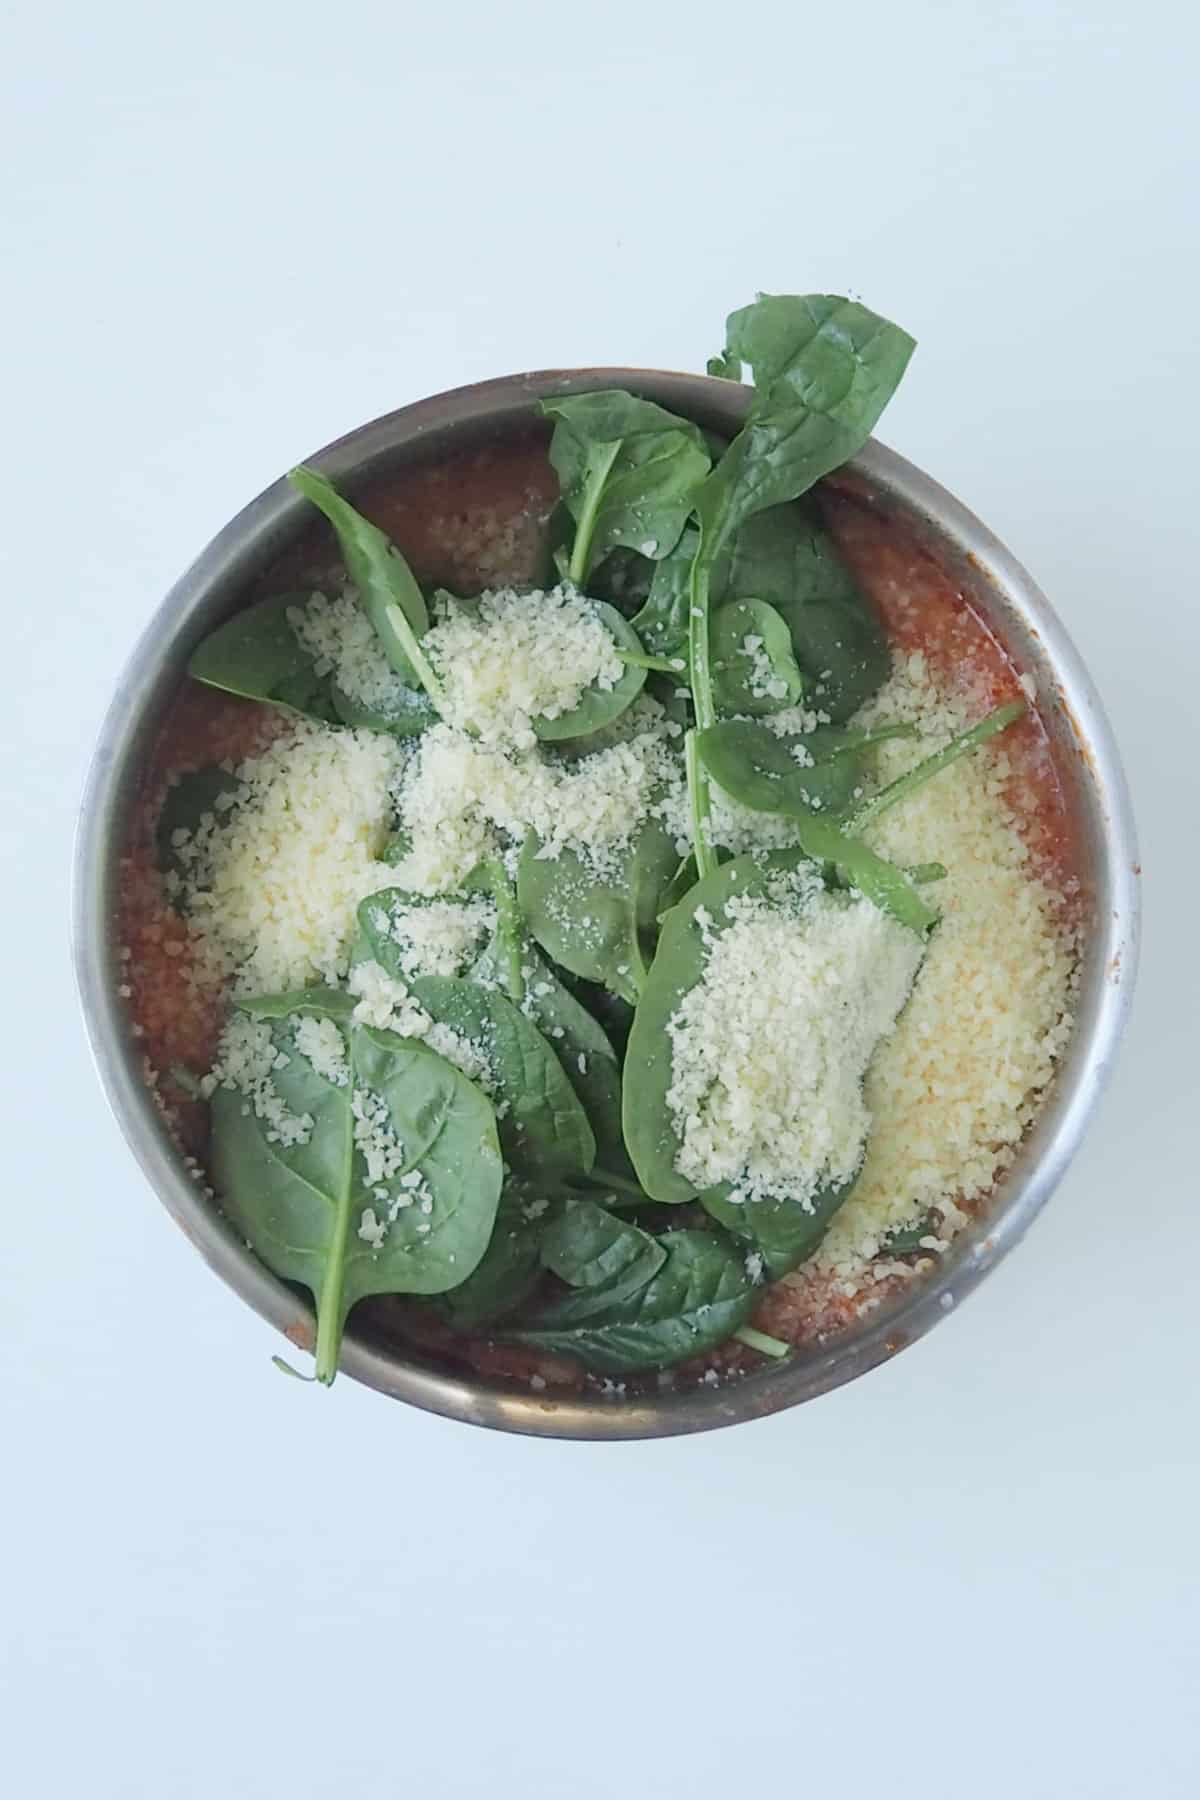
    Step 7. Transfer to the ThermoServer with the sauce and stir through the baby spinach and parmesan cheese. Allow the risotto to rest for 10 minutes before serving.

    Ingredients for Thermomix Bacon and Tomato Risotto in a thermoserver before being mixed together.

    Recipe Tips

    I tend to leave out the chilli flakes if I'm cooking this meal for our family. If your kids like chilli, feel free to leave it in. 

    Substitute the white wine for water if you wish.

    When adding the stock, do not go past the fill line. 

    Store cooked risotto in an airtight container in the fridge, and consume within three days.

    Leftover risotto can be frozen for up to three months.

    Frequently Asked Questions

    Can you reheat Bacon risotto?

    Yes, you can reheat Bacon risotto to enjoy up to three days after preparing. Leftover risotto can also be stored in the freezer for up to three months.

    Why is my risotto crunchy?

    If your risotto is crunchy after the cooking time has finished, we suggest adding some more stock and continue to cook.

    Fork holding up Thermomix Bacon and Tomato Risotto.

    Need some more Thermomix risotto recipes in your life? We’ve totally got you covered! Click here for our fave risotto recipes…

    More Thermomix dinner ideas:

    • Thermomix Chicken Parma Balls
    • Thermomix Pumpkin Risotto
    • Creamy Thermomix Carbonara
    • Thermomix Mexican Beef Bowls
    • Thermomix Hidden Vegetable Pasta Bake

    Looking for even more?

    You can find more easy and delicious recipes in our books and eBooks, view all of our print and eBooks here.

    Complete set o 16 ThermoBliss recipe books.
    Overhead side view of Thermomix Bacon and Tomato Risotto.
    Print Recipe
    4.80 from 25 votes

    Thermomix Bacon & Tomato Risotto

    Our Thermomix Bacon & Tomato Risotto is the perfect family dinner... quick, easy and totally delicious! 
    Prep Time5 minutes mins
    Cook Time36 minutes mins
    Resting Time10 minutes mins
    Total Time51 minutes mins
    Course: Dinner, main meal
    Cuisine: Risotto
    Servings: 4 serves
    Calories: 736kcal
    Author: Lucy & Lauren
    Cost: $10

    Equipment

    • Thermomix
    • Butterfly attachment
    • ThermoServer

    Ingredients

    • 60 grams parmesan cheese
    • 15 grams olive oil
    • 150 grams bacos chopped
    • 2 teaspoon minced garlic
    • 400 grams tin diced tomatoes
    • ¼ teaspoon chilli flakes (optional) - see notes
    • 1 teaspoon dried Italian herbs
    • sea salt and pepper, to season
    • 80 grams brown onion
    • 20 grams olive oil
    • 25 grams butter
    • 350 grams arborio rice
    • 1000 grams liquid vegetable stock
    • 100 grams white wine see notes
    • 100 grams baby spinach leaves

    Instructions

    • Place the parmesan cheese into the Thermomix bowl and grate on Speed 8, 8 seconds. Set aside in a seperate bowl. Wash and dry the Thermomix bowl. 
    • Place the olive oil, garlic and bacon into the Thermomix bowl and cook for 3 minutes, Varoma, Speed 1, Reverse (MC off). 
    • Add the garlic, tomatoes, chilli (optional), dried herbs, salt and pepper and cook for 12 minutes, 100 degrees, Speed 1, Reverse (MC on). Pour the sauce into the ThermoServer and set aside. Wash and dry the Thermomix bowl. 
    • Add the onion to the Thermomix bowl and chop for 5 seconds on Speed 5. Scrape down the sides of the bowl. 
    • Add the olive oil and butter and cook for 3 minutes, 100 degrees, Speed 1. 
    • Put the butterfly into place and add the rice and wine. Cook for 2 minutes, 100 degrees, Reverse, Speed 1. 
    • Add the vegetable stock and cook for a further 16 minutes, 100 degrees, Reverse, Speed 1 (MC off - but place the rice basket over the top of the MC hole to catch any splatters). 
    • Pour into the ThermoServer (with the tomato sauce) and stir through the baby spinach and reserved parmesan cheese. Allow to rest for 5 minutes. 
    • Serve with extra parmesan cheese. 

    Notes

    I tend to leave out the chilli flakes if I'm cooking this meal for our family. If your kids like chilli, feel free to leave it in. 
    Substitute the white wine for water if you wish.
    When adding the stock, do not go past the fill line. 
    Store cooked risotto in an airtight container in the fridge, and consume within three days.
    Leftover risotto can be frozen for up to three months.

    Nutrition

    Calories: 736kcal | Carbohydrates: 86g | Protein: 19g | Fat: 33g | Saturated Fat: 12g | Polyunsaturated Fat: 4g | Monounsaturated Fat: 16g | Trans Fat: 0.3g | Cholesterol: 48mg | Sodium: 1684mg | Potassium: 659mg | Fiber: 6g | Sugar: 8g | Vitamin A: 3388IU | Vitamin C: 19mg | Calcium: 262mg | Iron: 6mg

    Thermomix Chocolate Crackles

    September 5, 2018

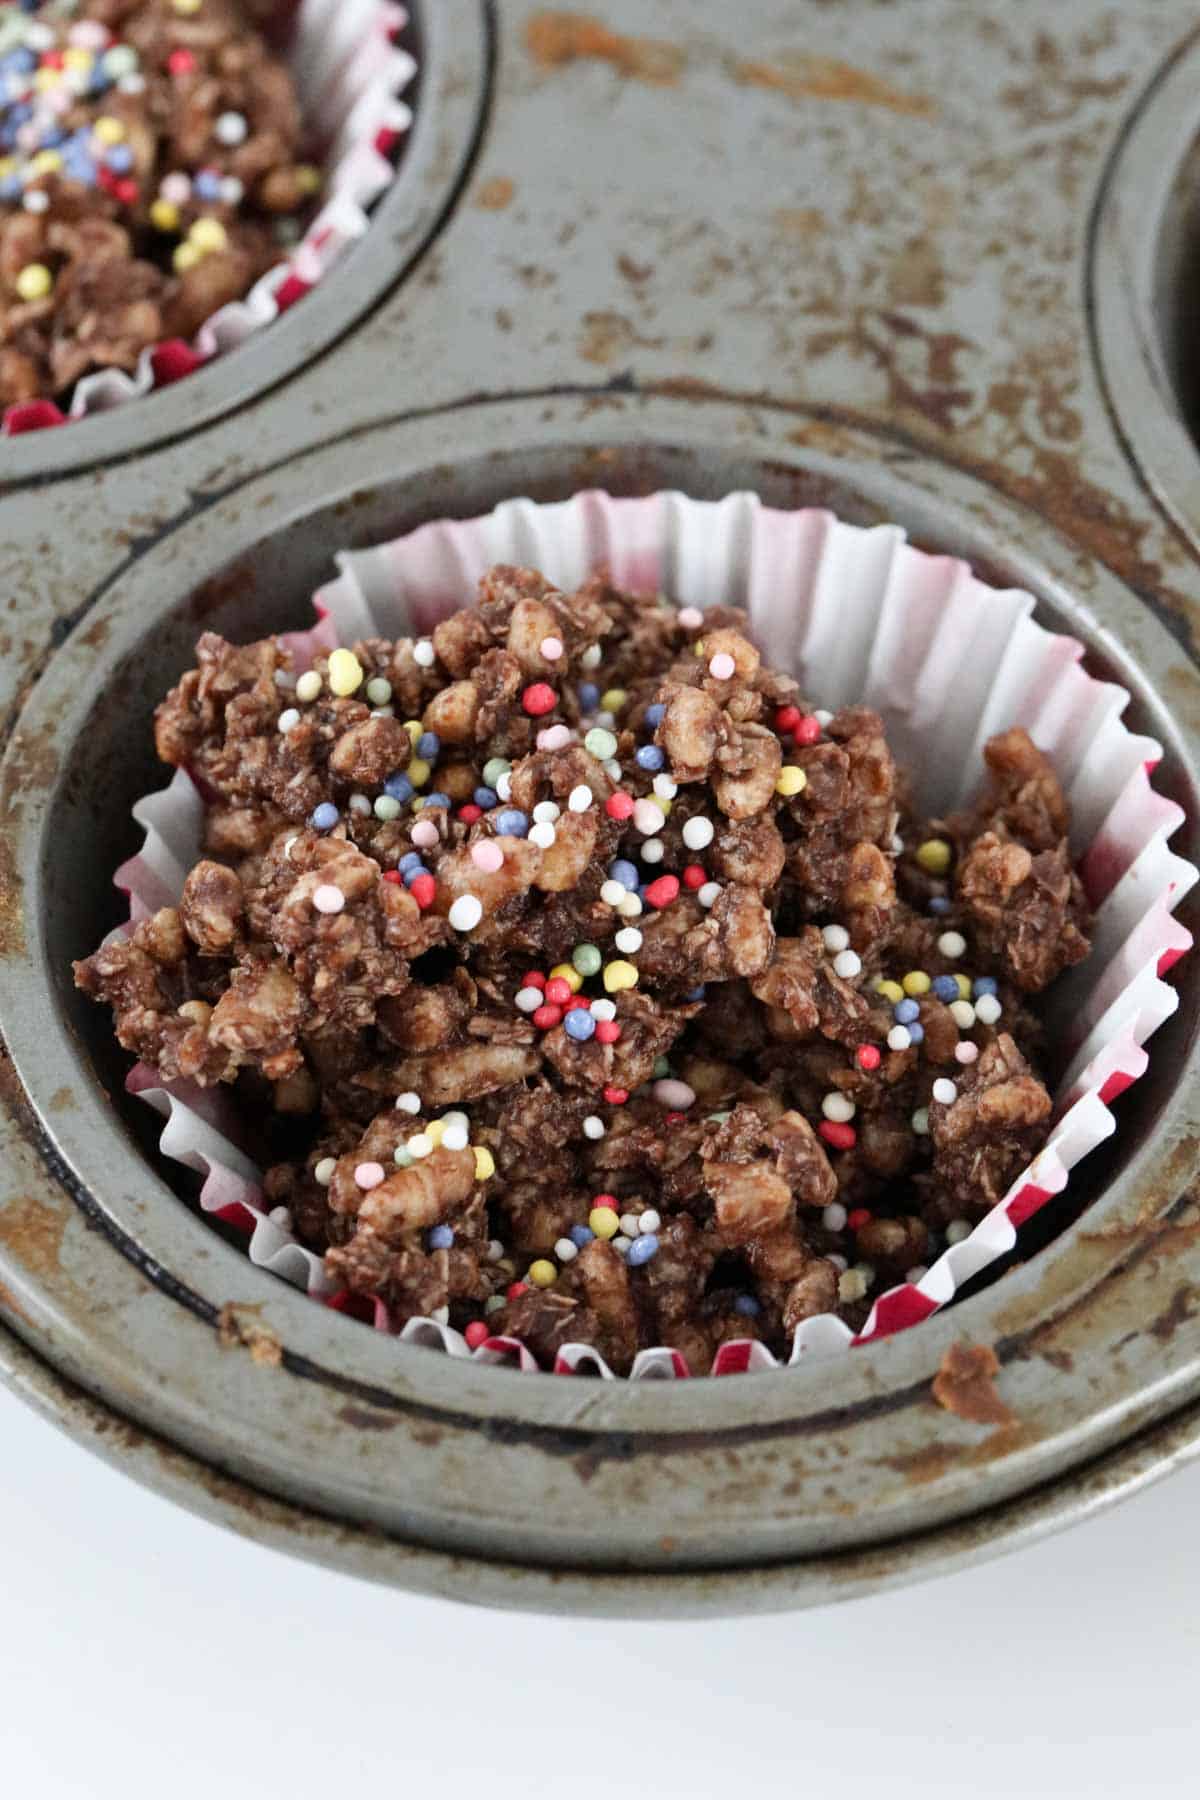
    A chocolate crackle on top of a muffin tin.

    Our crunchy old fashioned Thermomix Chocolate Crackles are made using just 5 basic ingredients and 10 minutes to prepare.

    The perfect party food or lunch box treat.

    A chocolate crackle on top of a muffin tin.

    Chocolate crackles are such a childhood favourite!

    In fact, it's hard to remember a kids birthday party when we were growing up that didn't have chocolate crackles on the party food table.

    Our Thermomix Chocolate Crackles are just as delicious as the old fashioned chocolate crackles, however, they're made with coconut oil rather than copha.

    Just like coconut ice, rice bubble bars and vanilla cupcakes, our chocolate crackles will make any birthday party complete.

    Why You're Going To Love This Recipe

    Our new take on a classic recipe will leave you begging for more!

    • Made with coconut oil - unlike the old fashioned recipes for chocolate crackles, our recipe is made with coconut oil instead of copha - with the same delicious crunch!
    • 5 ingredients - Thermomix chocolate crackles are made using 5 basic ingredients.
    • Great for birthday parties - the ultimate kids party food treat. They're always the first to disappear.
    • No bake recipe - ZERO baking is required. Simply mix and chill in the fridge.
    Sprinkles on top of chocolate crackles in a muffin tin.

    What You Need

    Just 5 basic ingredients are required to make Thermomix Chocolate Crackles!

    Please scroll to the recipe card at the bottom of the post for ingredient quantities and the full detailed method.

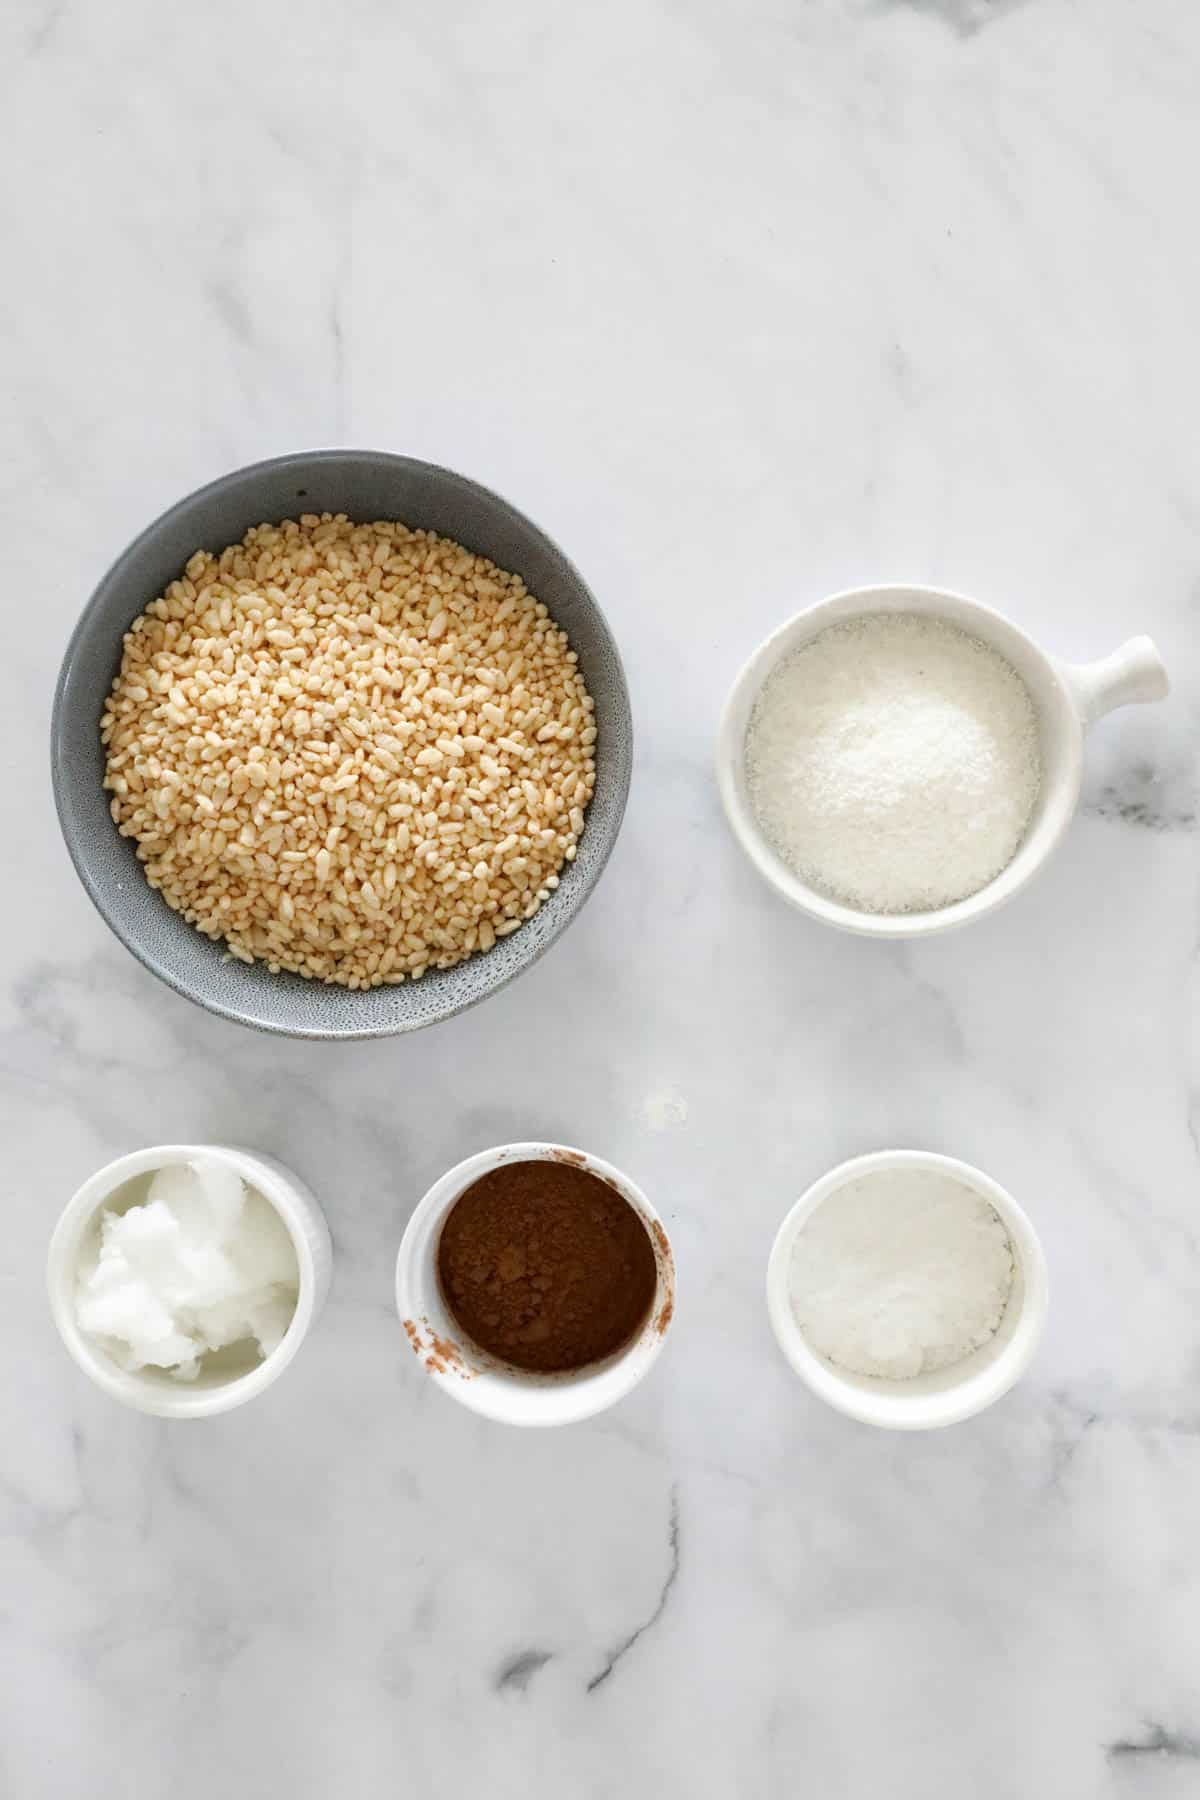
    The ingredients for chocolate crackles.
    • Coconut Oil - this gives the crackles their CRUNCH!! We do not recommend substituting this ingredient
    • Cocoa powder - or substitute for cacao powder
    • Icing Sugar - you can use with pure icing sugar or icing sugar mixture for this recipe
    • Rice Bubbles - use any brand of puffed rice. It's important to use a fresh packet for the ultimate crunchy chocolate crackles
    • Coconut - use fine, dry desiccated coconut

    Step By Step Instructions

    Making chocolate crackles in your Thermomix is as easy as melting, mixing and chilling.

    Please scroll to the recipe card at the bottom of the post for ingredient quantities and the full detailed method.

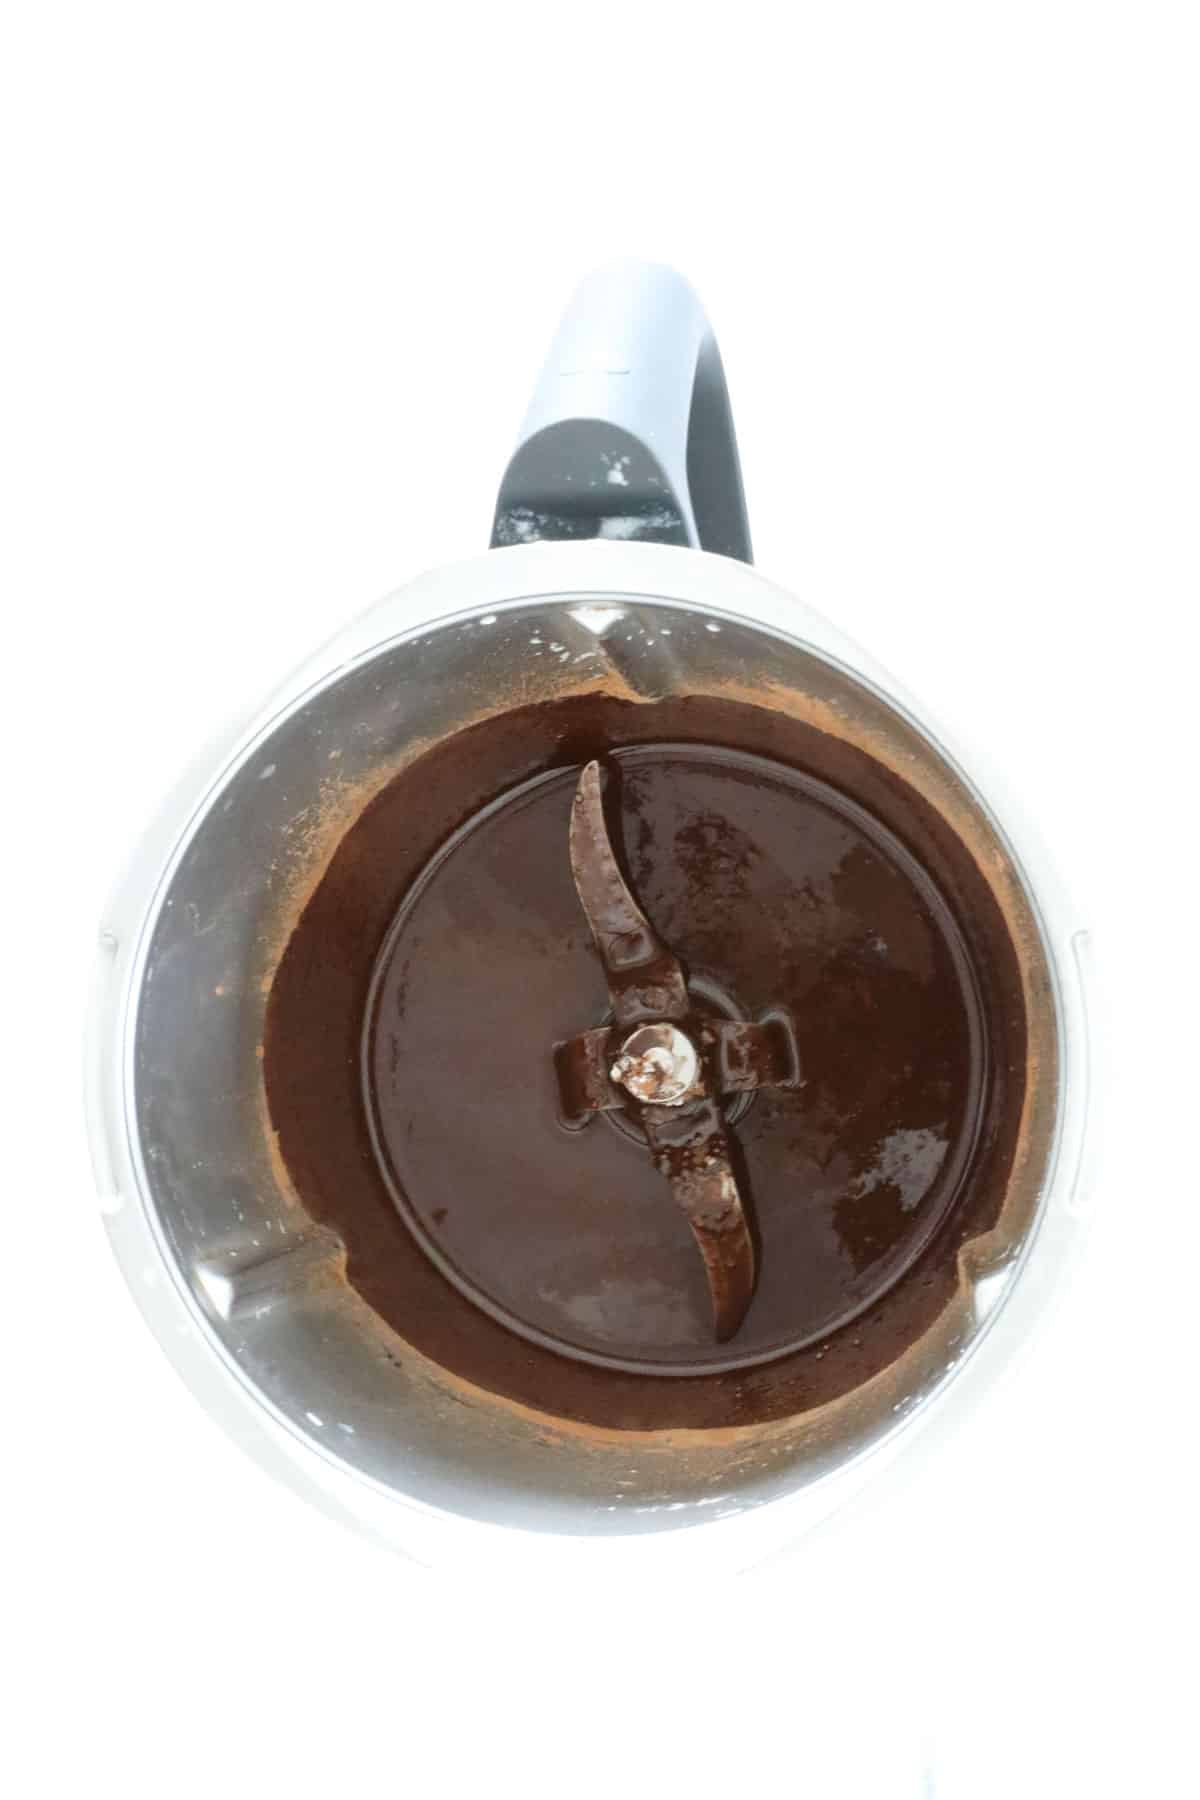
    Step 1 - Melt

    Place the coconut oil, cocoa powder and icing sugar into the Thermomix bowl.

    Mix until melted.

    Melted chocolate mixture in a Thermomix.

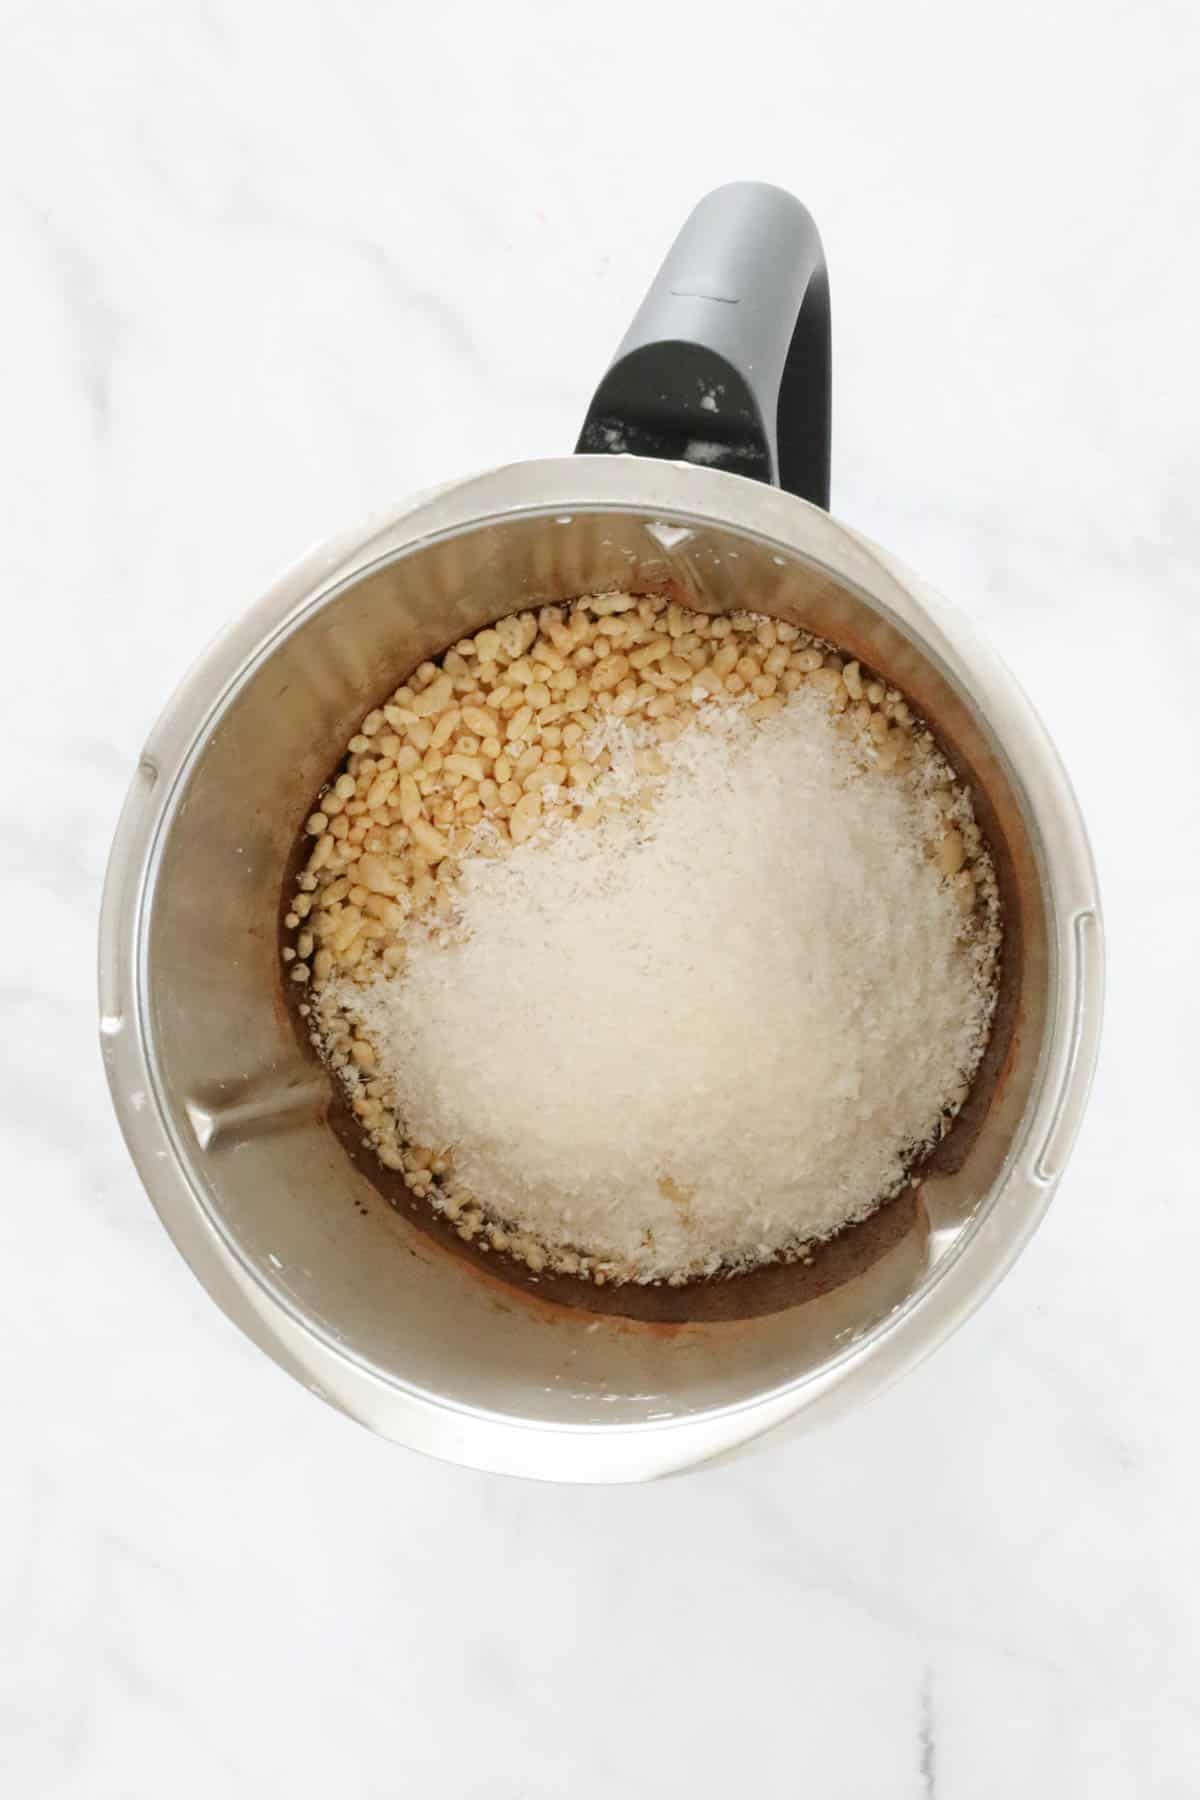
    Step 2 - Mix

    Add the rice bubbles and coconut to the melted chocolate mixture.

    Rice bubbles and coconut in a Thermomix.

    Mix on Reverse to combine.

    Chocolate rice bubble mixture in a Thermomix.

    Step 2 - Chill

    Divide the mixture between cupcake cases and decorate with sprinkles.

    Chill in the fridge until set.

    Chocolate crackles in a muffin tin.

    Expert Tips

    Follow our top tips for the perfect Thermomix chocolate crackles:

    • use a fresh box of rice bubbles (or any puffed rice). This ensures that they are still super crispy.
    • we don't recommend substituting the coconut oil as it gives the chocolate crackles their crunch!
    • Decorate with sprinkles or 100s and 1000s.
    • Once you've added the rice bubbles, mix on Reverse (so as to not crush the rice bubbles).
    • Store in an airtight container in the fridge for up to 1 week.
    • Freeze for up to 1 month. Allow to defrost in the fridge before consuming.
    • This recipe makes 12 large crackles or 24 mini patty pan size crackles.
    A chocolate crackle with sprinkles on top.

    FAQs

    Does making chocolate crackles with coconut oil instead of copha make them less crunchy?

    No! Using coconut oil gives the chocolate crackles a delicious crunch... just like copha does.

    Can I double this recipe?

    Yes you can. You may find that you need to melt and mix for a little bit longer though.

    How many chocolate crackles does this recipe make?

    12 large cupcake sized chocolate crackles or 24 mini patty pan sized crackles.

    A hand holding a classic chocolate crackle.

    Related Recipes

    Planning a birthday party?

    Here's a few more of our most popular party food recipes:

    • Chunks of rocky road on a chopping board.
      Thermomix Clinkers Rocky Road
    • sideview of stack of homemade sausage rolls
      Thermomix Sausage Rolls |Classic Recipe
    • Egg and bacon pastries.
      Thermomix Egg & Bacon Quiches
    • An overhead shot of chocolate cupcakes with frosting.
      Thermomix Chocolate Cupcakes

    OUR RANGE OF THERMOMIX COOKBOOKS

    Browse our collection of hardcopy Thermomix cookbooks here.

    There's everything from family dinners to kids snacks, desserts to cookies, slices to Christmas recipes, cocktails to chocolate recipes and more!

    ThermoBliss complete set
    A chocolate crackle on top of a muffin tin.
    Print Recipe
    4.25 from 4 votes

    Thermomix Chocolate Crackles

    This easy Thermomix Chocolate Crackles recipe couldn't be easier to make - or eat!
    Prep Time10 minutes mins
    Cook Time30 minutes mins
    Chilling Time30 minutes mins
    Total Time40 minutes mins
    Course: Desserts
    Cuisine: Western
    Servings: 12 serves
    Calories: 156kcal
    Author: Lucy & Lauren
    Cost: $5

    Equipment

    • Thermomix

    Ingredients

    • 130 g coconut oil
    • 30 g cocoa
    • 50 g icing sugar
    • 70 g rice bubbles 2 cups
    • 40 g desiccated coconut

    Instructions

    • Place 12 paper cupcake cases into a 12 hole muffin tin and set aside until needed.
    • Place the coconut oil, icing sugar and cocoa into your Thermomix bowl and cook for 3 minutes, 70 degrees, Speed 2, or until melted and combined.
    • Add the coconut and rice bubbles and mix for 5 seconds, Speed 3, Reverse, to combine.
    • Scrape down the sides of your Thermomix bowl and mix for a further 5 seconds, Speed 3, Reverse or until the mixture is well combined.
    • Divide the chocolate crackle mixture between your prepared cupcake cases and gently smooth the surface.
      Decorate with 100s and 1000s if you wish before placing into the fridge for 30 minutes or until set.

    Notes

    RECIPE NOTES & TIPS
    • use a fresh box of rice bubbles (or any puffed rice). This ensures that they are still super crispy.
    • we don't recommend substituting the coconut oil as it gives the chocolate crackles their crunch!
    • Decorate with sprinkles or 100s and 1000s.
    • Once you've added the rice bubbles, mix on Reverse (so as to not crush the rice bubbles).
    • Store in an airtight container in the fridge for up to 1 week.
    • Freeze for up to 1 month. Allow to defrost in the fridge before consuming.
    • This recipe makes 12 large crackles or 24 mini patty pan size crackles.

    Nutrition

    Calories: 156kcal | Carbohydrates: 12g | Protein: 1g | Fat: 13g | Saturated Fat: 11g | Polyunsaturated Fat: 0.2g | Monounsaturated Fat: 1g | Sodium: 2mg | Potassium: 63mg | Fiber: 2g | Sugar: 4g | Vitamin C: 0.05mg | Calcium: 5mg | Iron: 1mg

    Thermomix Caramel Custard

    August 27, 2018

    Our 1 step Thermomix Caramel Custard is the perfect dessert all on it's own... or drizzle it over your favourite pudding or cake for a decadent treat! Made with just six ingredients, this creamy Caramel Custard will quickly become a favourite dessert.

    If you're after a quick and easy custard recipe with a twist that you can make in your Thermie, you've come to the right place! Our Thermomix Caramel Custard is an all-time family favourite in our house. It's so simple to make and is always a massive hit!

    I LOVE to pour this Thermomix Caramel Custard over sticky date pudding, chocolate self-saucing pudding or my favourite chocolate mud cake... sooooo good! But it's equally as good all on it's own.

    You will love:

    Six Ingredients - yes that's right! You will need just six simple ingredients to make this recipe.

    One Step - simply add your Caramel Custard ingredients to your Thermomix bowl and it will do all the work for you!

    Versatile - enjoy this smooth and creamy custard on its own or serve with your favourite pudding or ice-cream.

    Ingredients

    Please note, you will find a full list of ingredients in the recipe card below.

    • Full Cream Milk - we do recommend using full cream vs skim milk for this recipe.
    • Cornflour
    • Brown Sugar
    • Eggs - we use 70 gram eggs.
    • Vanilla extract - vanilla essence can also be used.
    • Salt

    How to make Caramel Custard in a Thermomix

    You will find the full cooking method in the recipe card below.

    Step 1. Place all of the ingredients into the Thermomix bowl.

    Step 2. Cook until the caramel custard has thickened.

    Step 3. Serve immediately.

    Recipe Hints and Tips

    This recipe is best served immediately, however if you do want to make it ahead, place a sheet of cling wrap on top of the custard to help prevent a 'skin' from forming.

    Leftovers can be stored in the fridge for up to two days. Please note the consistency of the custard will change when reheated.

    For a runnier custard, reduce the cornflour to 15 grams. Alternatively for a thicker consistency, use 35 grams of cornflour.

    Place into freezer safe containers or pouches and freeze for up to one month.

    Frequently Asked Questions

    Why is my caramel custard not smooth?

    A lumpy custard can occur if the ingredients have not been correctly stirred or the custard has been overcooked.

    Can you freeze caramel custard?

    Yes, freeze this caramel custard for up to one month.

    VIDEO: HOW TO MAKE THERMOMIX CARAMEL CUSTARD


    You may also enjoy these recipes:

    • Thermomix thick vanilla custard
    • How To Whip Cream In A Thermomix
    • Thermomix Chocolate Custard
    • Thermomix Brandy Custard
    • Thermomix Yogo 
    • Thermomix Christmas Pudding Recipe

    Looking for even more?

    You will find more simple and delicious recipes in our books and eBooks, shop the range here.

    Complete set o 16 ThermoBliss recipe books.
    Print Recipe
    5 from 9 votes

    Thermomix Caramel Custard

    Our 1 step Thermomix Caramel Custard is the perfect dessert all on it's own... or drizzle it over your favourite pudding or cake for a decadent treat!
    Prep Time5 minutes mins
    Cook Time8 minutes mins
    Total Time13 minutes mins
    Course: Dessert, sweets
    Cuisine: custard, dessert, thermomix
    Servings: 6 serves
    Calories: 222kcal
    Author: Lucy & Lauren
    Cost: $5

    Equipment

    • 1 x Thermomix

    Ingredients

    • 3 eggs
    • 600 grams full fat milk
    • 90 grams brown sugar
    • 45 grams butter
    • 2 teaspoon vanilla extract
    • 25 grams cornflour
    • pinch of sea salt

    Instructions

    • Place all ingredients into the Thermomix bowl and cook for 8 minutes, 90 degrees, Speed 4.. 
    • Serve with an extra sprinkling of sea salt (optional). 

    Notes

    This recipe is best served immediately, however if you do want to make it ahead, place a sheet of cling wrap on top of the custard to help prevent a 'skin' from forming.
    Leftovers can be stored in the fridge for up to two days. Please note the consistency of the custard will change when reheated.
    For a runnier custard, reduce the cornflour to 15 grams. Alternatively for a thicker consistency, use 35 grams of cornflour.
    This caramel custard can be frozen for up to one month.

    Nutrition

    Calories: 222kcal | Carbohydrates: 24g | Protein: 6g | Fat: 11g | Saturated Fat: 6g | Polyunsaturated Fat: 1g | Monounsaturated Fat: 3g | Trans Fat: 0.3g | Cholesterol: 110mg | Sodium: 122mg | Potassium: 204mg | Fiber: 0.04g | Sugar: 20g | Vitamin A: 468IU | Calcium: 150mg | Iron: 1mg

    Thermomix Vegetable Fritters

    August 22, 2018

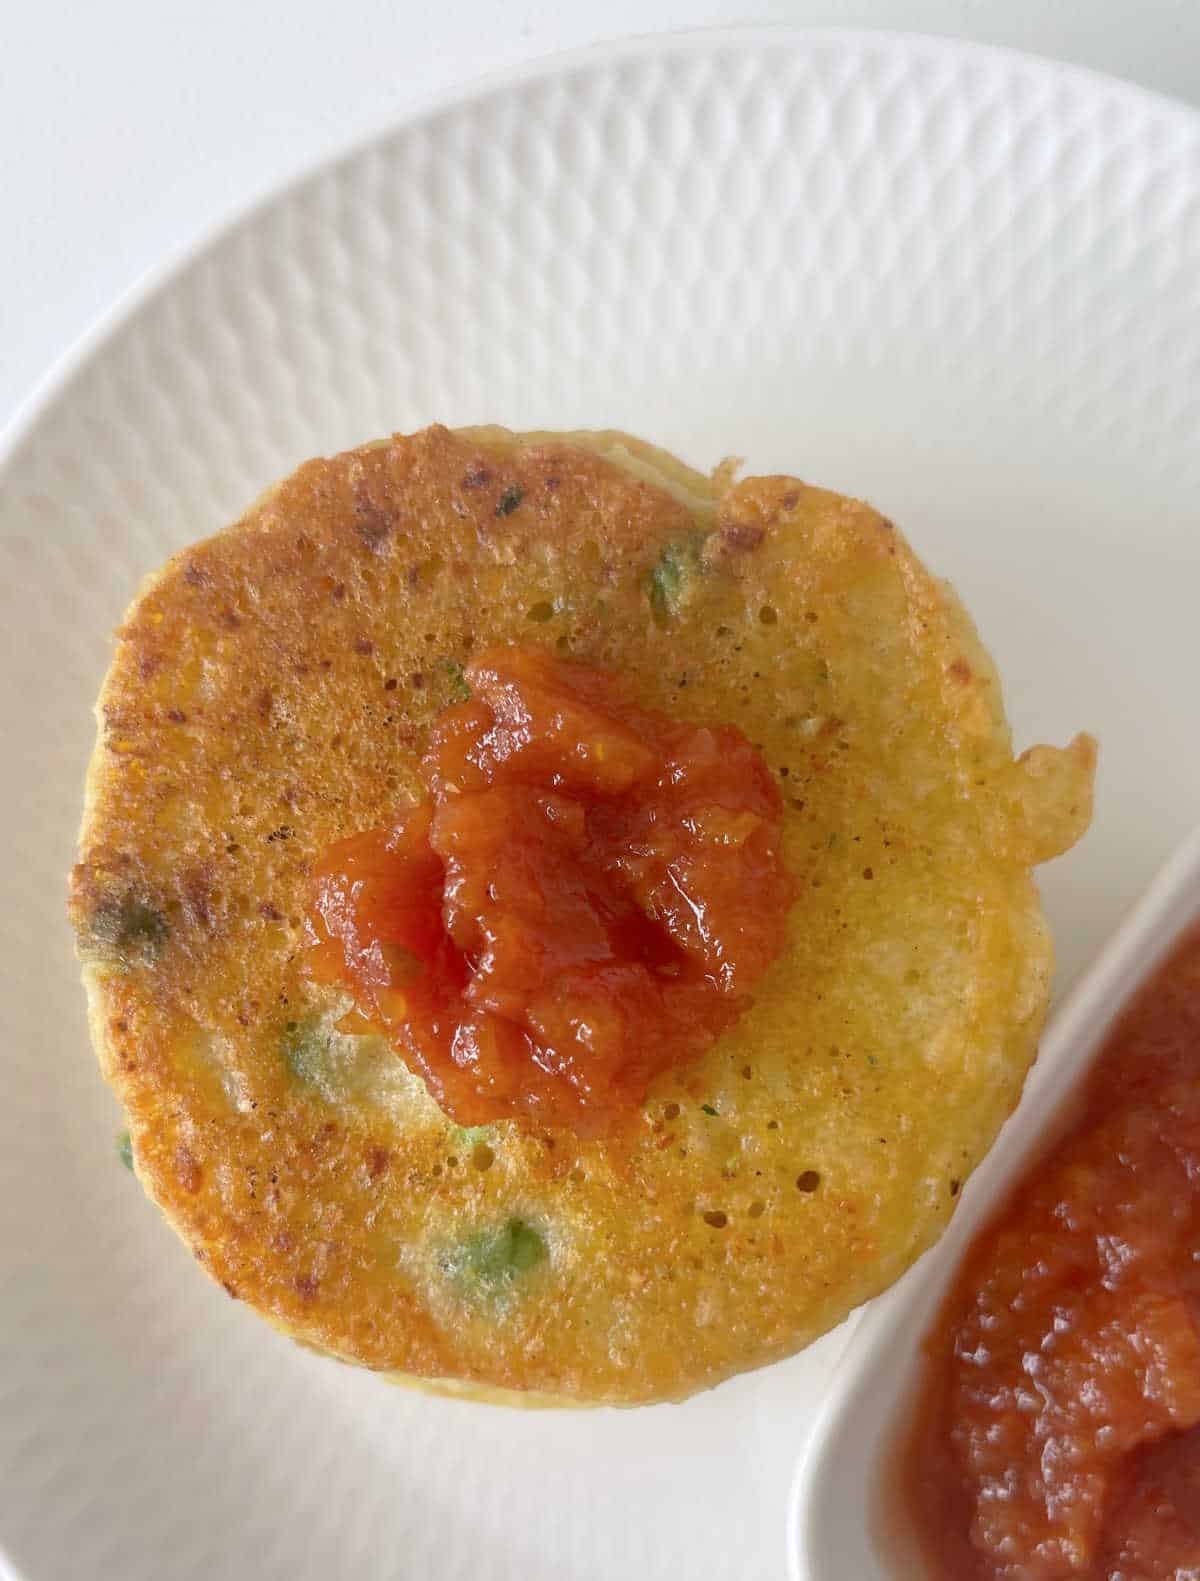
    Three Vegetable fritters topped with tomato relish sitting on a white plate.

    Our Thermomix Vegetable Fritters make a great snack, easy meal or lunchbox treat! These fritters take around 10 minutes to prepare and can easily be adapted to use up any leftover vegetables you may have in the fridge.

    Three Vegetable fritters topped with tomato relish sitting on a white plate.

    Fritters make the ultimate easy meal or snack and you will regularly find them on the menu in our house.

    Why you will love this recipe:

    • Easy to adapt - Have a family member who doesn't like peas? Switch them for tinned corn or add another vegetable (sweet potato, broccoli etc) that they do enjoy.
    • Lunchbox friendly - These fritters can be enjoyed either hot or cold, making them a delicious and filling lunchbox addition.
    • Versatile - Don't have any potatoes? Use sweet potato, carrot, broccoli, zucchini instead.
    • Halve - This recipe will make approximately 24 fritters. Although they are freezer friendly, you can also half this recipe for a smaller batch.
    Overhead view of stack of vegetable fritters topped with tomato relish.

    Ingredients

    Please note you will find the full list of ingredients and the cooking method in the recipe card below.

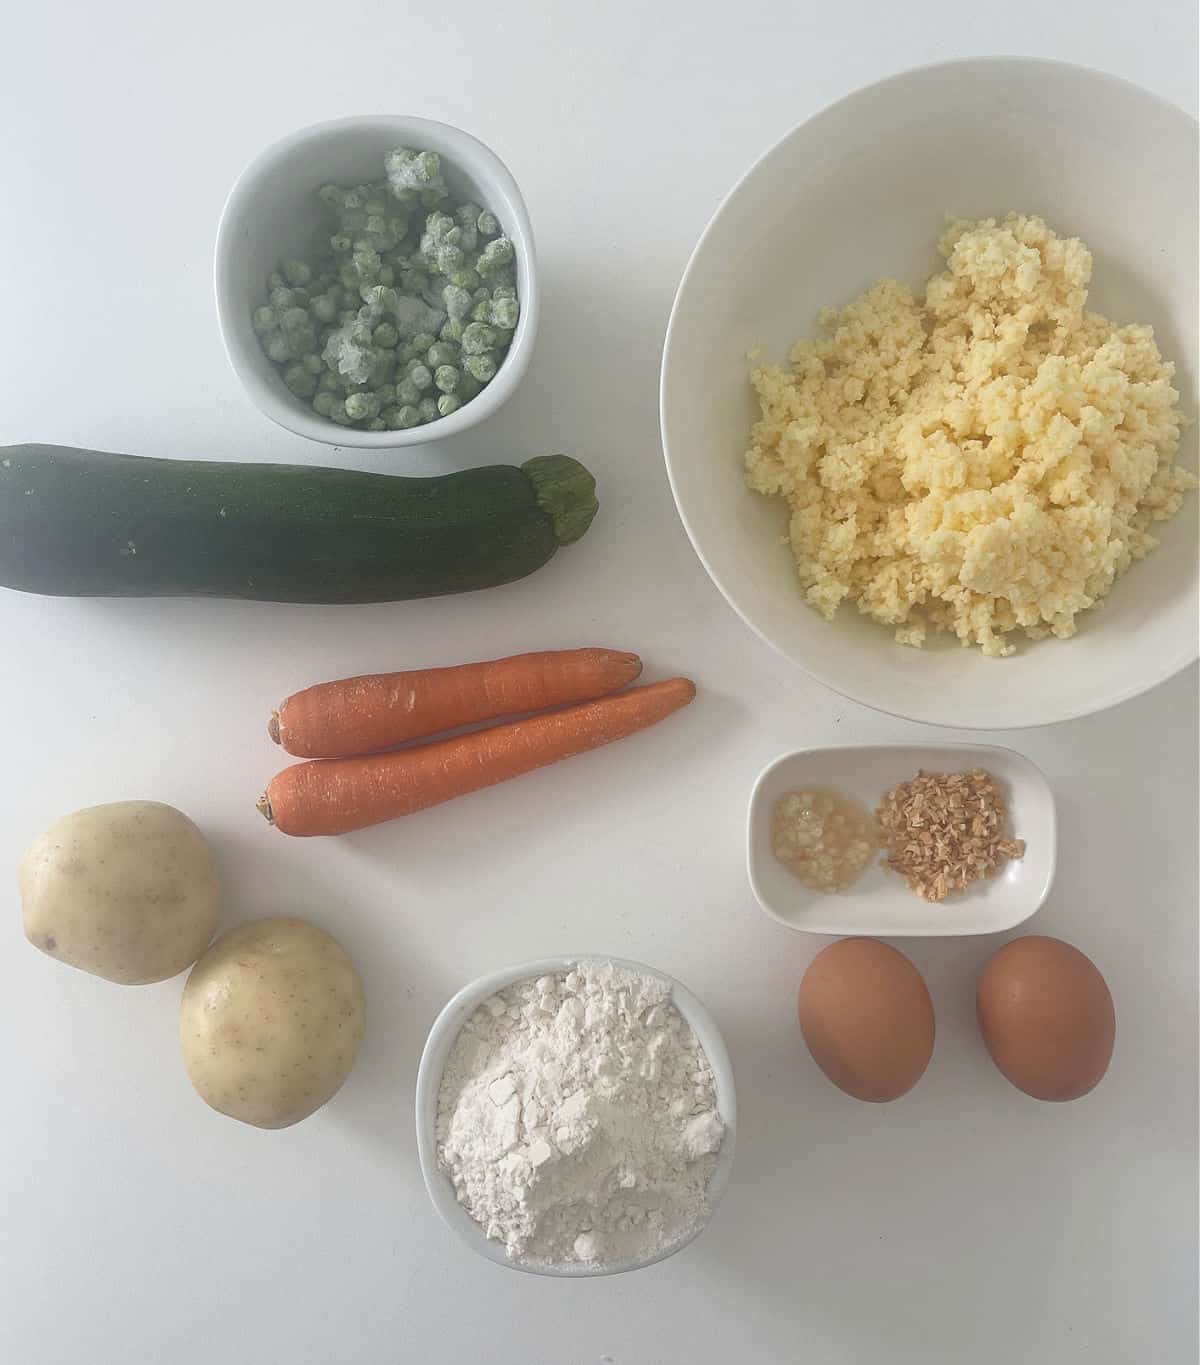
    • Potato - you do not need to peel the potatoes before grating.
    • Carrots - you will need one large carrot.
    • Zucchini - you will need one small zucchini.
    • Peas - it is fine to use frozen peas.
    • Onion Flakes - onion powder or half a grated brown onion can also be used.
    • Garlic - either freshly crushed garlic or minced garlic can be used.
    • Self-raising flour - can be substituted with gluten free flour.
    • Eggs - 70 gram eggs were used to make this recipe.
    • Parmesan and Tasty cheese - you can use a combination of different cheeses.
    • Water - the amount needed to bring the recipe together will vary.
    Ingredients to make vegetable fritters on a white bench top.

    How to make Vegetable Fritters in a Thermomix.

    Step 1. Grate the cheeses and set aside.

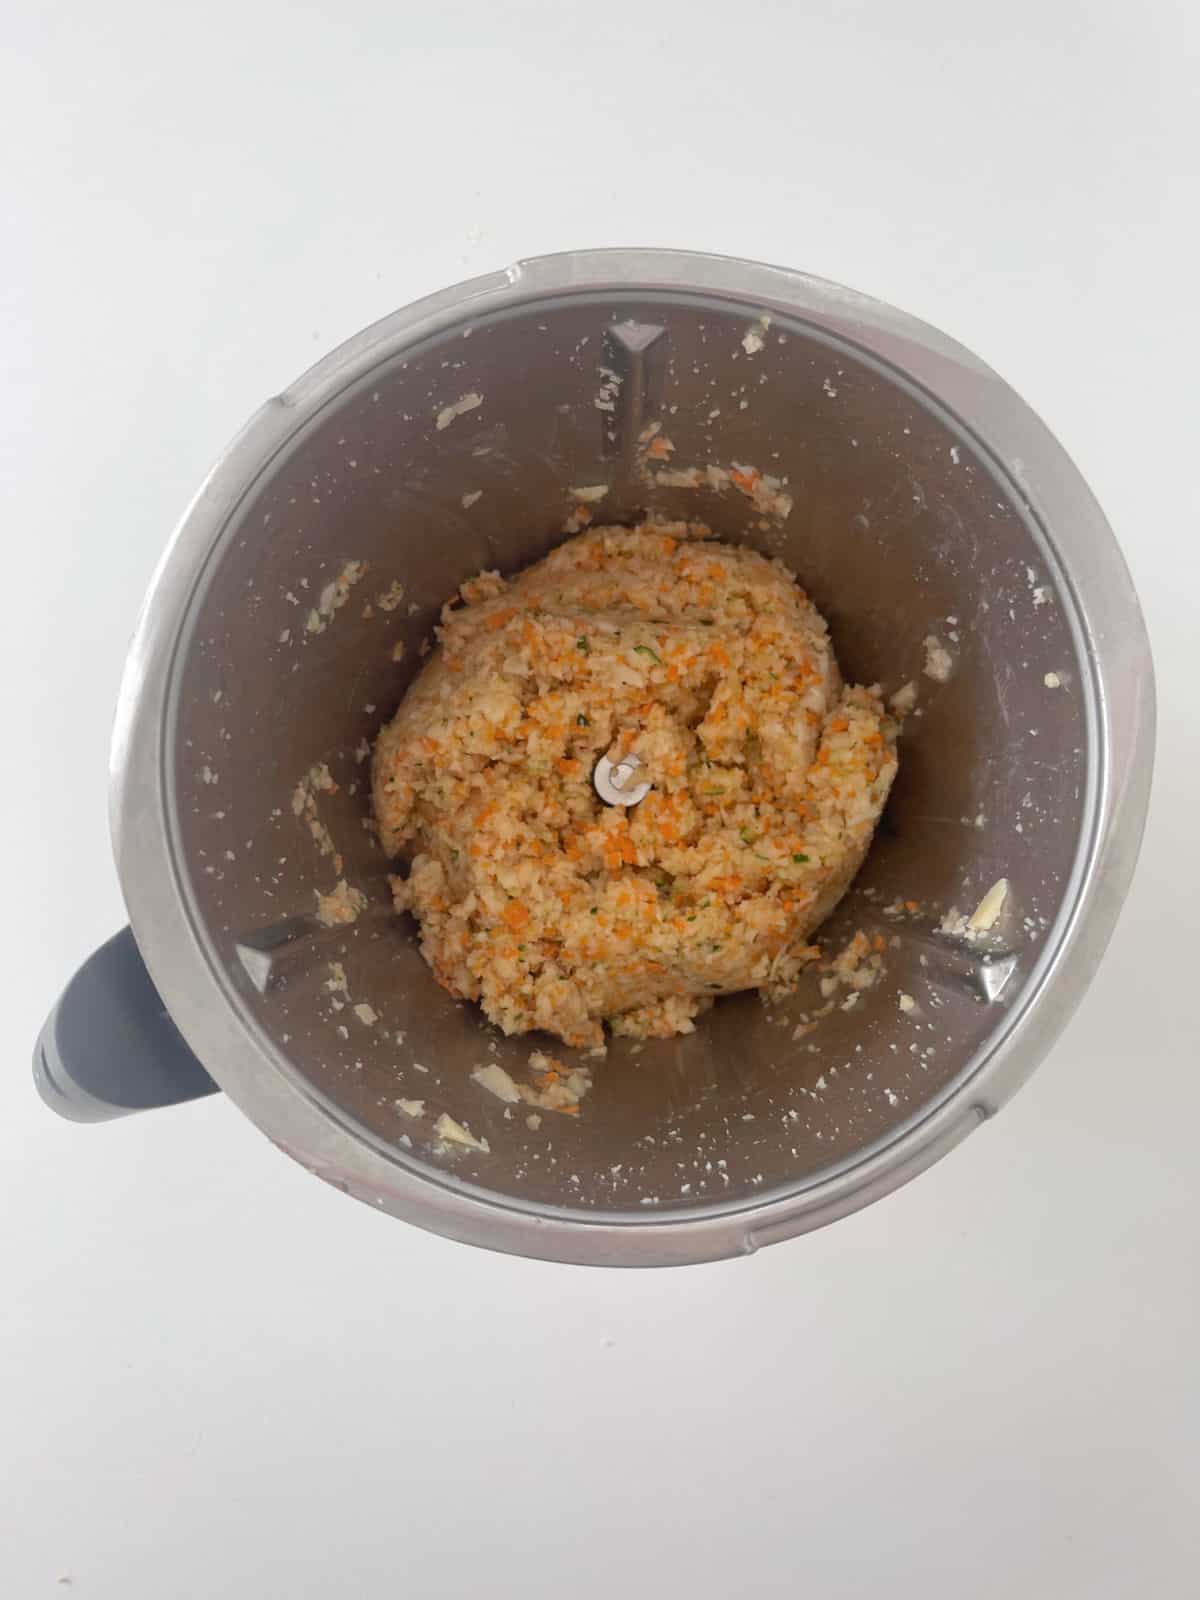
    Step 2. Grate the vegetables.

    Grated vegetables in Thermomix bowl.

    Step 3. Add the self-raising flour, eggs, onion flakes, garlic and cheeses along with a little of the water and combine.

    Step 4. Add the peas and more water (if required) and mix.

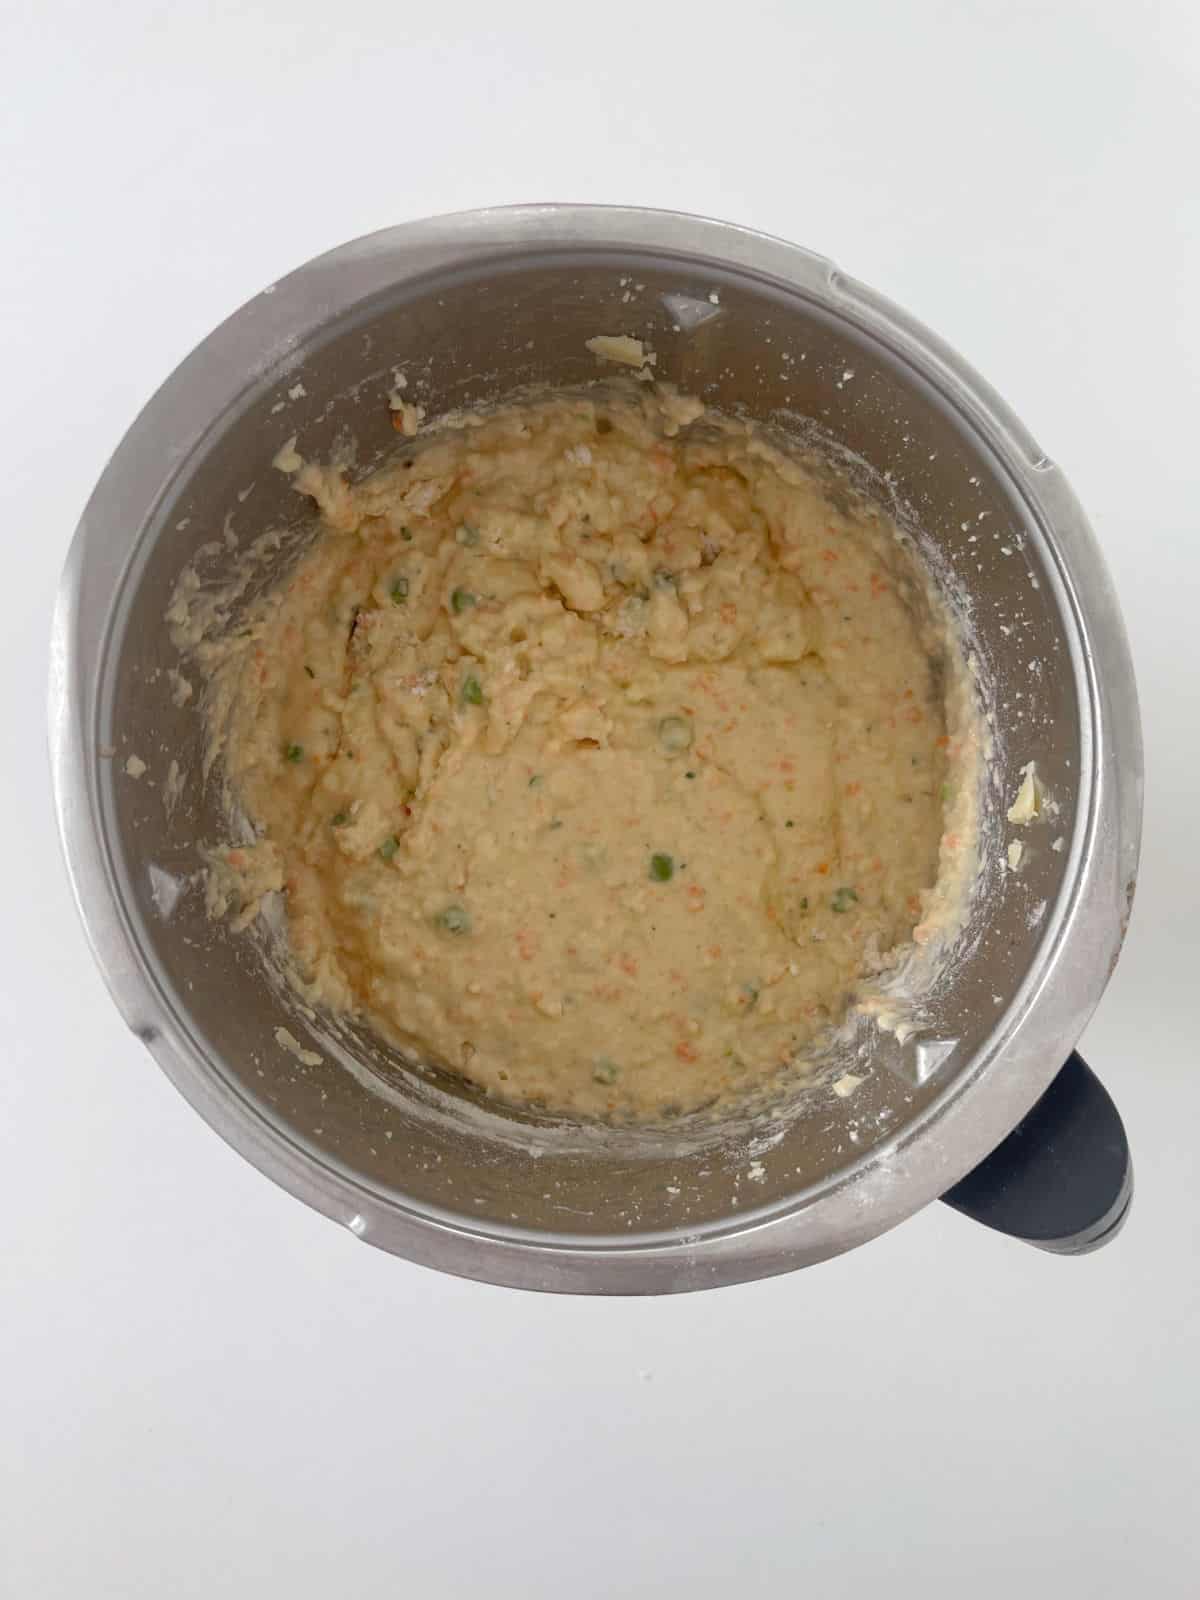
    Grated vegetables with flour and eggs in a Thermomix bowl.
    Vegetable Fritter mixture with peas and water added in a Thermomix bowl.

    Step 5. Use a ¼ cup to scoop up the mixture and add to the frying pan. Cook for 2 -3 minutes on each side or until golden. Repeat until all of the mixture has been used.

    Cooked Vegetable Fritters on a grey plate.

    Tips for Making Thermomix Vegetable Fritters:

    • Any combination of vegetable can be used to make these fritters.
    • There is no need to peel the potatoes or carrots before grating.
    • It is important to cut the vegetables into 3cm pieces before adding to the Thermomix bowl.
    • For finer vegetables, grate for a further 2 seconds, speed 6.
    • The liquid content of the vegetables will impact the amount of water needed. You do not want a 'runny' consistency.
    • If you do add too much water, add an extra 1 - 2 tablespoons of flour.
    • Make these fritters into smaller 'bites' for younger children. Please note the is will increase the overall amount of fritters made using this recipe.
    • You can enjoy these fritters either hot or cold. Store in the fridge for up to five days.
    • To freeze, place in a freezer safe container and freeze for up to two months.

    Why are my vegetable fritters soggy?

    Too much water has been added to the batter. The batter should be easy to scoop and not 'run' when you add to the frying pan. Add an extra 1 - 2 tablespoons of flour to achieve the desired consistency. Additionally, cook the fritters longer to ensure cooked all the way through.

    What are vegetable fritters made of?

    We like to make vegetable fritters with a combination of potatoes, carrot, zucchini and peas. You can use any combination of vegetables including sweet potato, broccoli and corn. Add self-raising flour, eggs, water, onion flakes and garlic to the grated vegetables.

    How to make crispy fritters?

    Add extra virgin olive oil to your frying pan and heat to a medium-high heat. Add extra olive oil between cooking fritter batches.

    Three vegetable fritters on a white plate. A dish of tomato relish is next to them and a plate with more fritters is in the background.

    You may also enjoy these recipes:

    • Thermomix Zucchini Fritters
    • Thermomix Egg & Bacon Quiches
    • Thermomix Pizza Scrolls
    • Thermomix Ham, Cheese & Mayo Scrolls
    • Thermomix Vegetarian Sausage Rolls
    • Thermomix Creamy Chicken Pies | Pie Maker Recipe
    • Thermomix Sausage Rolls
    Three Vegetable fritters topped with tomato relish sitting on a white plate.
    Print Recipe
    4.92 from 37 votes

    Thermomix Vegetable Fritters

    These easy Thermomix Vegetable Fritters take 10 minutes to prepare and are packed with veggies. They make a perfect easy meal or snack and are freezer friendly too.
    Prep Time10 minutes mins
    Cook Time30 minutes mins
    Total Time40 minutes mins
    Course: Dinner
    Cuisine: Australian
    Diet: vegetarian
    Servings: 24 fritters
    Calories: 105kcal
    Author: Lucy & Lauren

    Equipment

    • Frying Pan
    • Thermomix

    Ingredients

    • 1 garlic clove
    • 30 grams parmesan cheese
    • 100 grams tasty cheese cut into 3cm chunks
    • 400 grams potatoes roughly chopped into 4cm pieces
    • 100 grams zucchini roughly chopped into 4cm pieces
    • 80 grams carrot roughly chopped into 4cm pieces
    • 2 eggs 70 gram eggs.
    • 300 grams self raising flour
    • ¼ teaspoon salt
    • 1 tablespoon onion flakes
    • 250 grams water
    • 50 grams peas fresh or frozen
    • 40 grams extra virgin olive oil for frying

    Instructions

    • Place the garlic clove, parmesan and tasty cheese into your Thermomix bowl and grate for 7 seconds Speed 9. Transfer to a separate bowl until needed.
    • Without washing the bowl, add the potatoes, zucchini and carrots and mix for 4 seconds, Speed 6 to grate.
      For finer pieces, mix for a further 2 seconds, Speed 6. 
    • Scrape down the sides of the bowl and the garlic and cheeses.
    • In this order, add the eggs, self raising flour, pinch of salt and pepper, onion flakes and 125g of water to your Thermomix bowl. (NOTE: you may not need all of the water depending on the moisture content/size of vegetables used)
    • Mix for 15 seconds, REVERSE, Speed 4.
    • Scrape down the sides of the bowl, and if your mixture is still a little dry, add a further 75 grams of water along with the peas. Mix for a further 15 seconds, REVERSE, Speed 4 or until combined.
    • Heat a tablespoon of olive oil in a large frying pan over a medium to high heat. Use a ¼ cup measuring cup to scoop up the batter and place the fritter mixture into your pan.
    • Use a spoon to gently spread the mixture into a circle between ½ – 1cm thick. You should be able to fit approximately six fritters (or even more depending on the size of your pan) into your frying pan. 
    • Cook the fritters for approximately 2-3 minutes on each side, until they are crisp and golden brown. Transfer the cooked fritters to a plate. Repeat until all the mixture has been used.

    Notes

    • Any combination of vegetable can be used to make these fritters.
    • There is no need to peel the potatoes or carrots before grating.
    • It is important to cut the vegetables into 3cm pieces before adding to the Thermomix bowl.
    • For finer vegetables, grate for a further 2 seconds, speed 6.
    • The liquid content of the vegetables will impact the amount of water needed. You do not want a 'runny' consistency.
    • If you do add too much water, add an extra 1 - 2 tablespoons of flour.
    • These fritters can be made into smaller 'bites' for younger children. Please note the is will increase the overall amount of fritters made using this recipe.
    • You can enjoy these fritters either hot or cold. Store in the fridge for up to five days.
    • To freeze, place in a freezer safe container and freeze for up to two months.

    Nutrition

    Calories: 105kcal | Carbohydrates: 13g | Protein: 4g | Fat: 4g | Saturated Fat: 1g | Polyunsaturated Fat: 0.4g | Monounsaturated Fat: 2g | Trans Fat: 0.001g | Cholesterol: 19mg | Sodium: 81mg | Potassium: 123mg | Fiber: 1g | Sugar: 1g | Vitamin A: 653IU | Vitamin C: 5mg | Calcium: 54mg | Iron: 0.4mg

    Looking for more?

    You can find even more delicious and easy recipes in our books and eBooks - shop the full range here.

    ThermoBliss complete set

    Thermomix Chocolate Chip Cookies

    August 20, 2018

    Our Thermomix Chocolate Chip Cookies are a classic favourite... simple and delicious! You just can't beat these cookies when it comes to a yummy lunch box treat.

    A chocolate chip biscuit on a plate.

    When it comes to cookies and biscuits, there's nothing better than a classic chocolate chip cookie. And this recipe is exactly that!

    A slightly chewy filling, a crunchy outside, and of course, lots of chocolate chips! This is my go-to recipe whenever I make a batch of choc chip bikkies!

    Just like our ANZAC biscuits, jam drops and condensed milk cookies, these classic chocolate chip cookies are the best of the best!

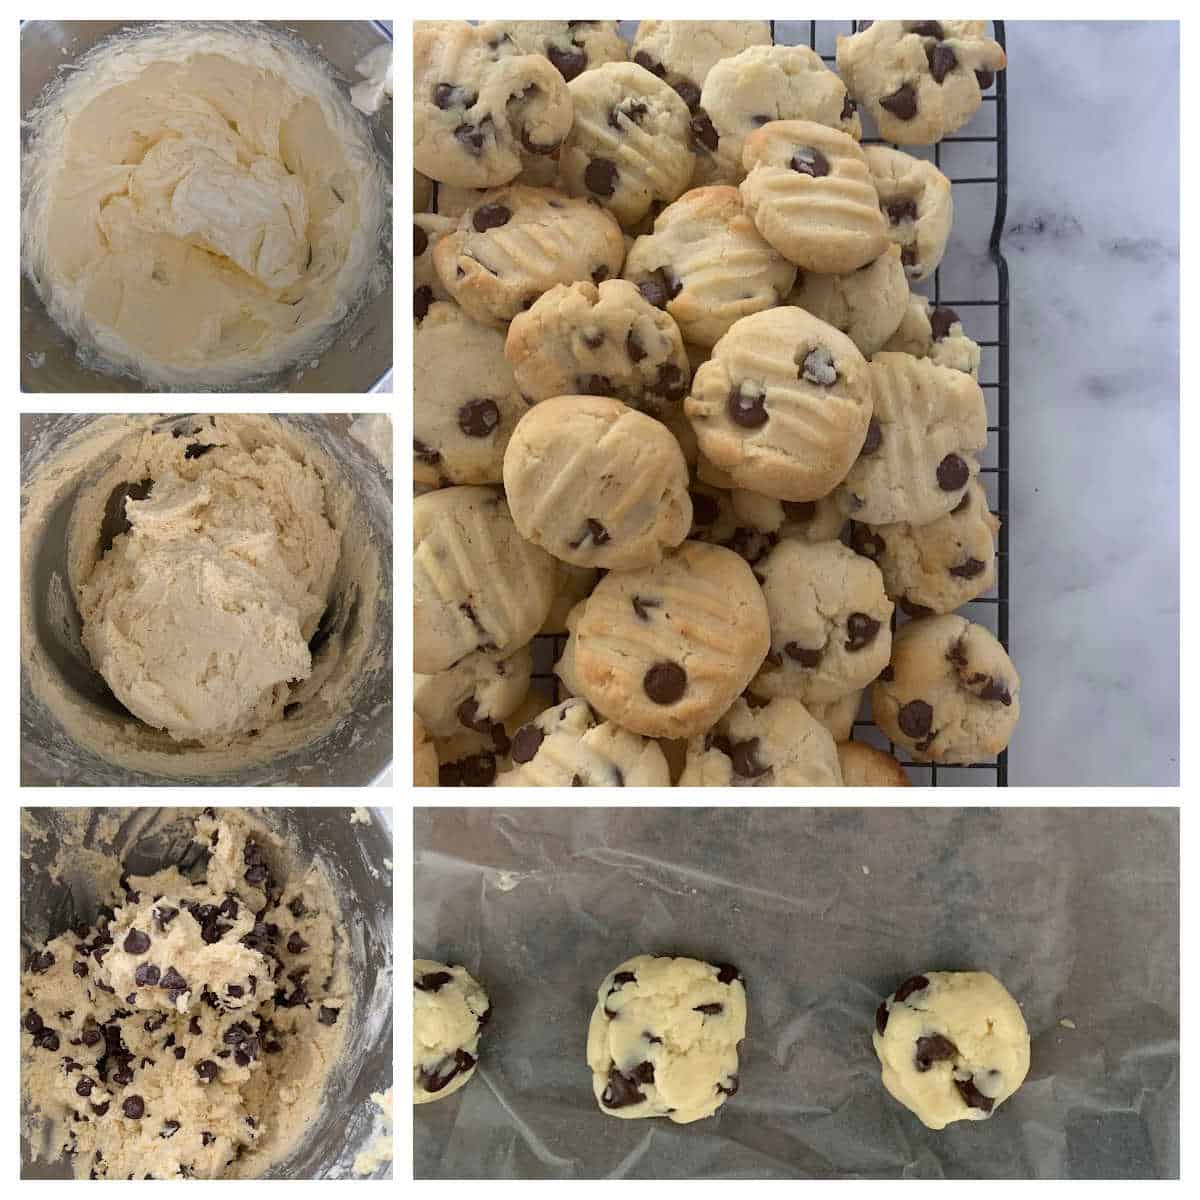
    Cookies cooling on a wire rack.

    Why You're Going To Love This Recipe

    Who can resist a batch of Thermomix Chocolate Chip Cookies!?

    • Quick & Easy - Our Thermomix Chocolate Chip Cookies take only a couple of minutes to whip up. In fact, the hardest part about making these is waiting for them to cook in the oven (luckily you only have to wait around 8 minutes!).
    • Great For Lunch Boxes - The kids will absolutely love finding one of these sweet little cookies in their lunch box.
    • Basic Ingredients - The best part about making chocolate chip biscuits is that you probably already have the ingredients at home! This entire recipe is made from pantry and fridge staples.
    • Freezer-Friendly - You can freeze the unbaked dough or the cookies once baked! Perfect for getting organised ahead of time.
    A white cake stand topped with chocolate chip biscuits.

    What You Need

    Just a few basic ingredients!

    Please scroll to the recipe card below for the ingredient quantities and the detailed method.

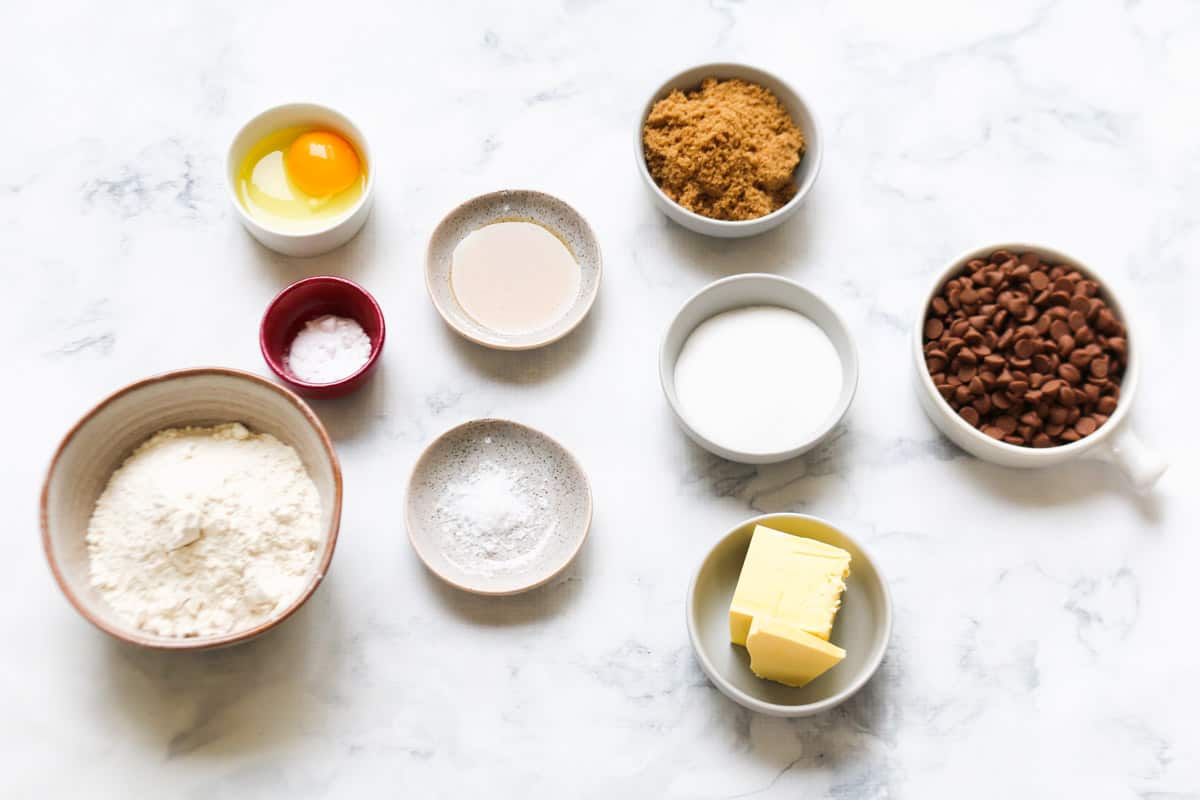
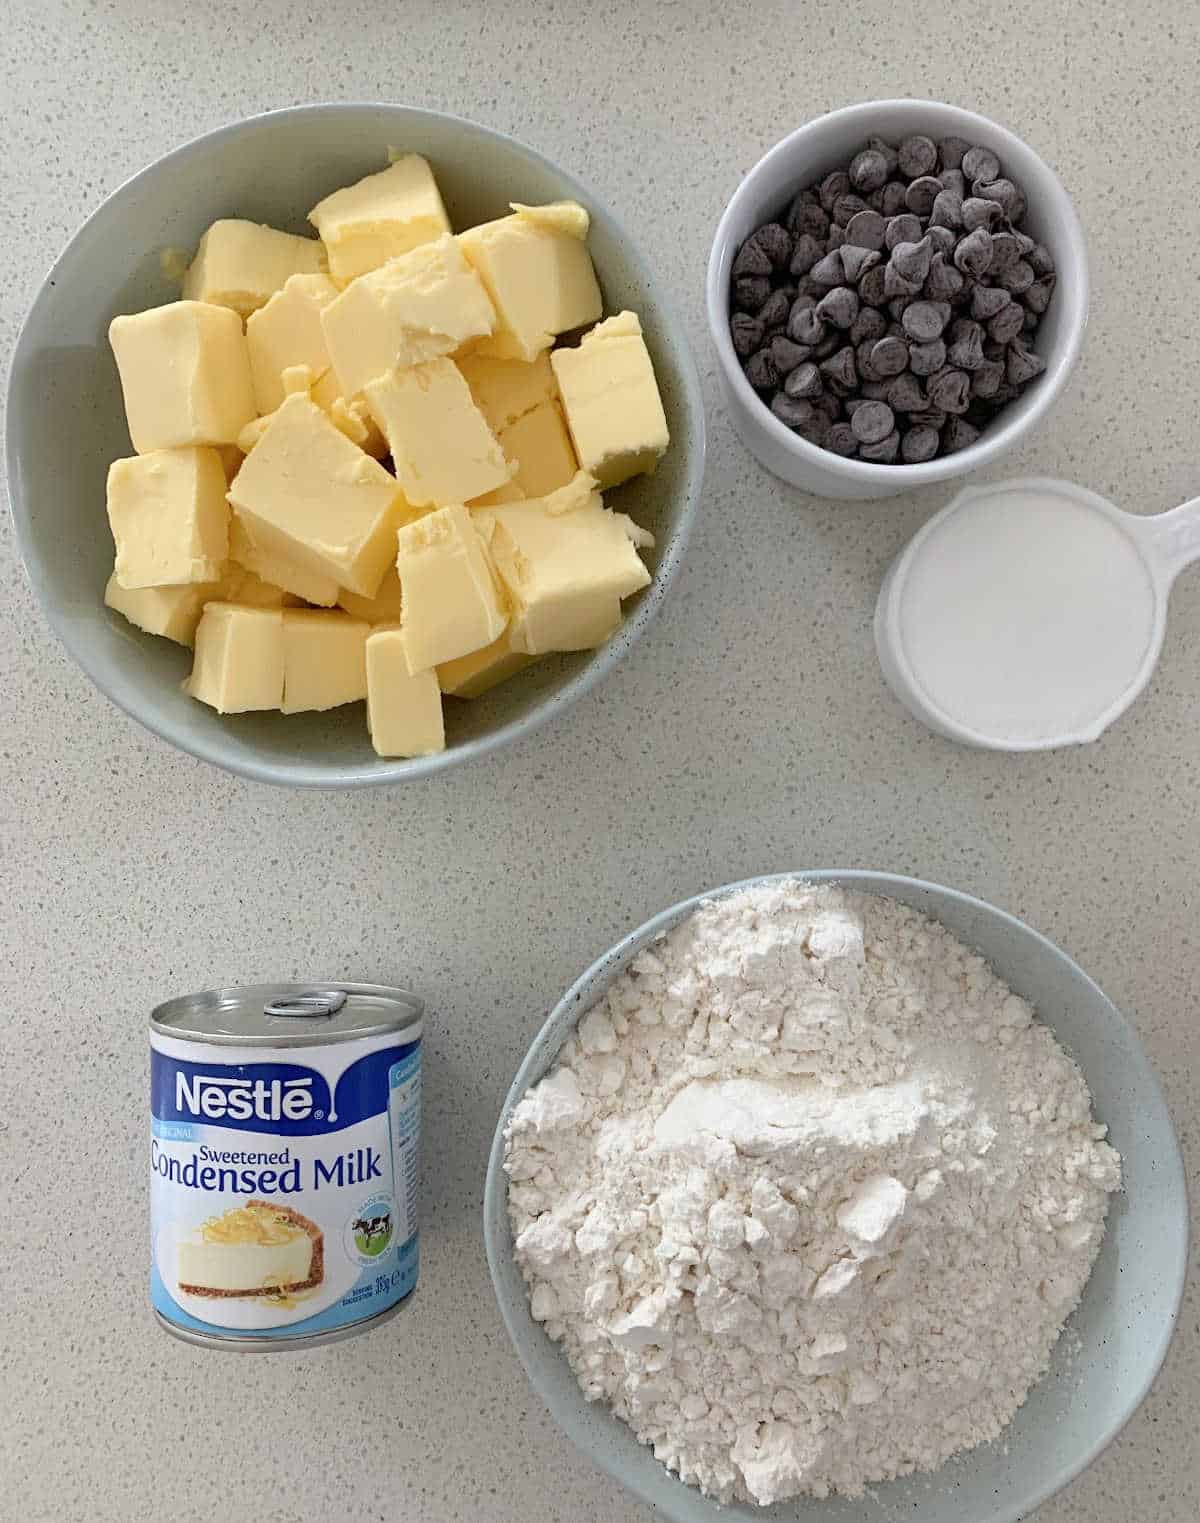
    The ingredients for chocolate chip cookies.
    • butter - you can use either salted or unsalted butter in this recipe.
    • sugars - a combination of caster sugar (superfine sugar) and brown sugar is used. This gives the cookies the perfect combination of 'crunchy on the outside and soft on the inside'.
    • egg
    • vanilla - choose vanilla extract, vanilla essence or vanilla bean paste.
    • salt - a pinch of salt helps to balance the sweetness of these Thermomix chocolate chip cookies.
    • bicarbonate of soda - also known as baking soda.
    • plain flour - also known as all purpose flour.
    • chocolate chips - or chocolate bits. Alternatively you can substitute for Smarties, M&Ms or any similar small chocolates.

    Step By Step Thermomix Instructions

    It takes just a few minutes to make these classic Thermomix Chocolate Chip Cookies.

    Please scroll to the recipe card below for the ingredient quantities and the detailed method.

    Step 1 - Cream The Butter & Sugars

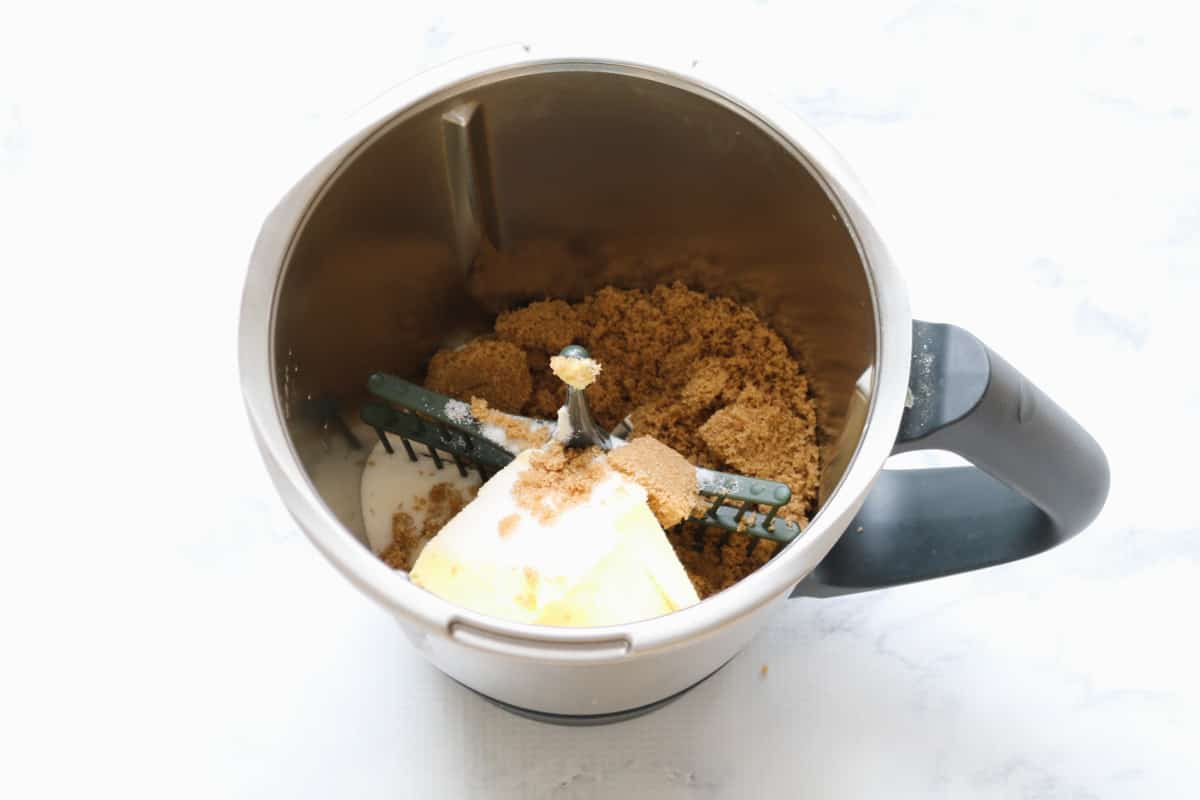
    Insert the Butterfly attachment and cream the butter and sugars until smooth, pale and creamy.

    Butter and sugar in a Thermomix bowl.

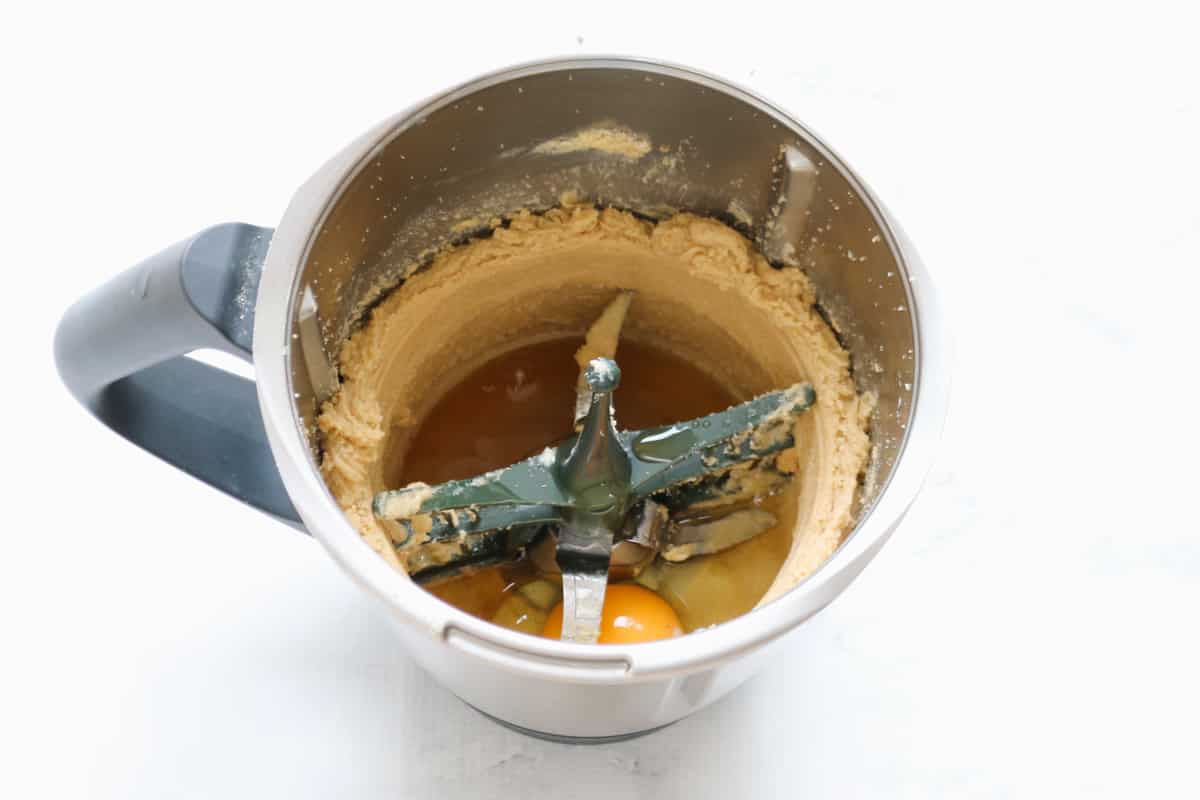
    Step 2 - Add The Egg & Vanilla

    Add the egg and vanilla and mix to combine.

    An egg in a Thermomix bowl surrounded by creamed butter.

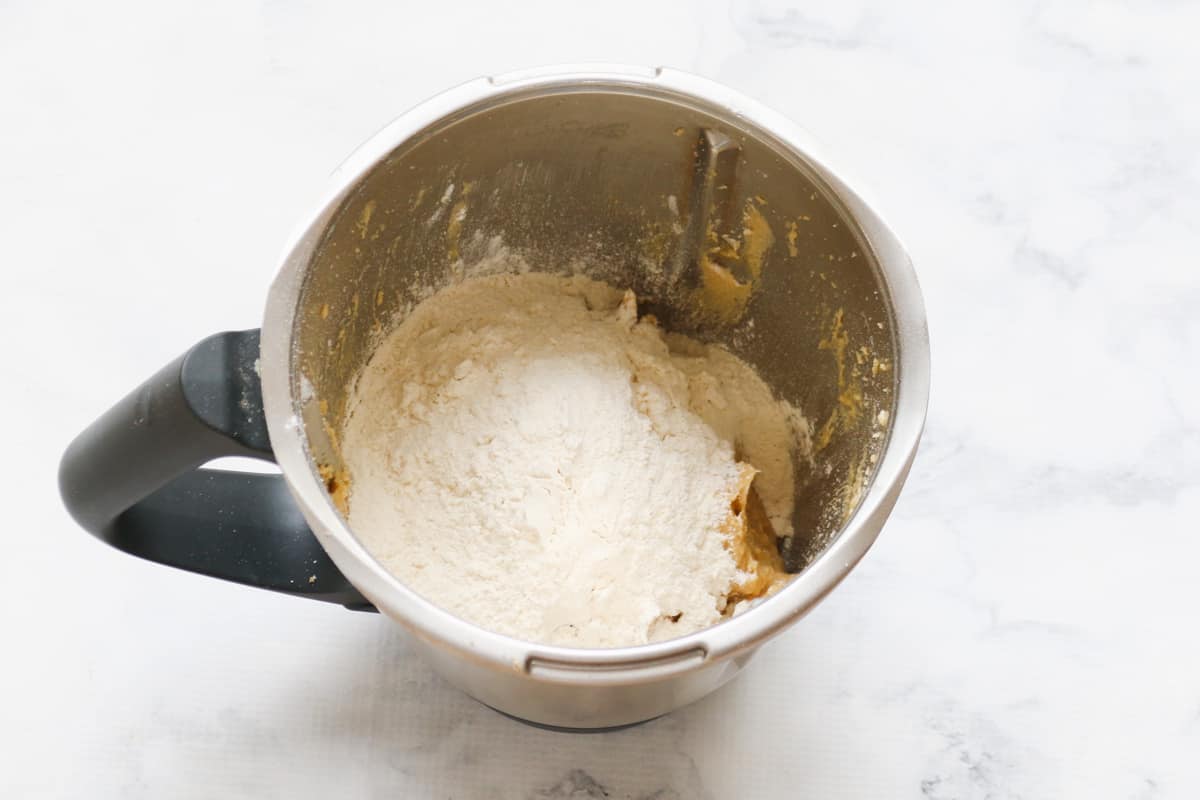
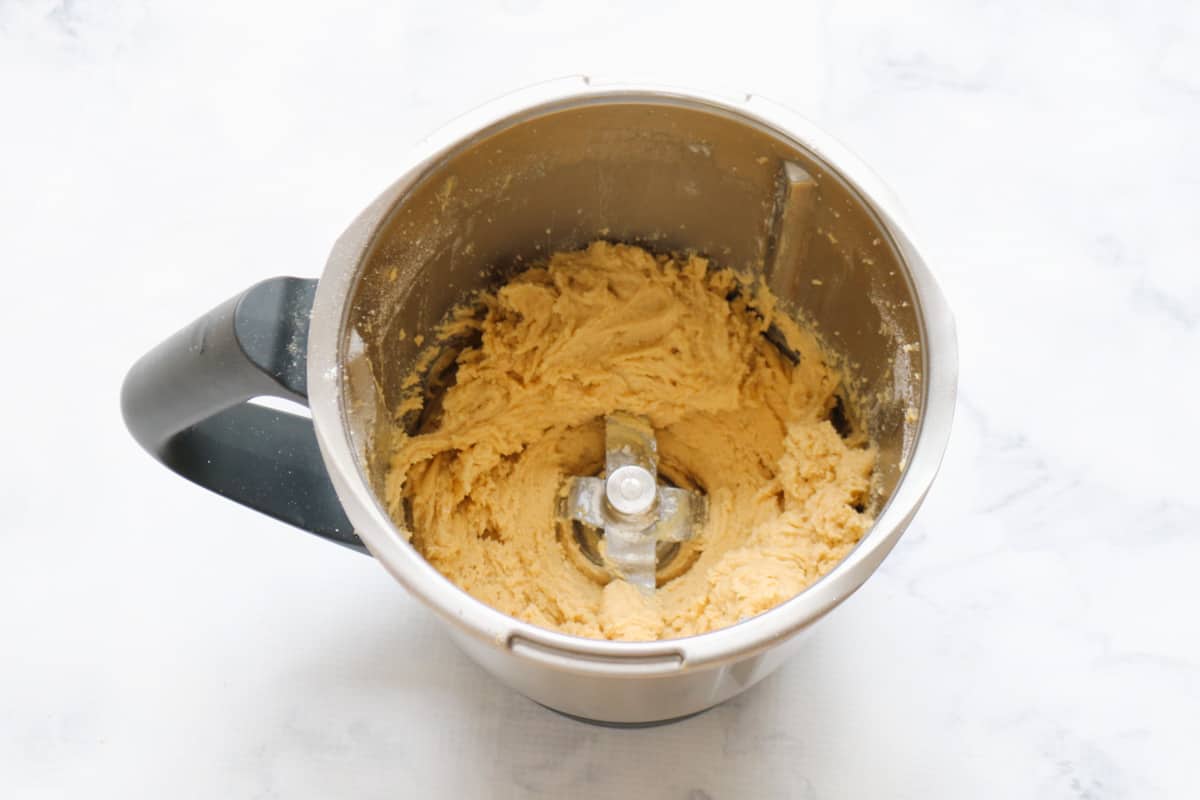
    Step 3 - Mix

    Add the dry ingredients (except for the chocolate chips) and mix to combine.

    Flour in a stainless jug.
    A stainless jug filled with cookie dough.

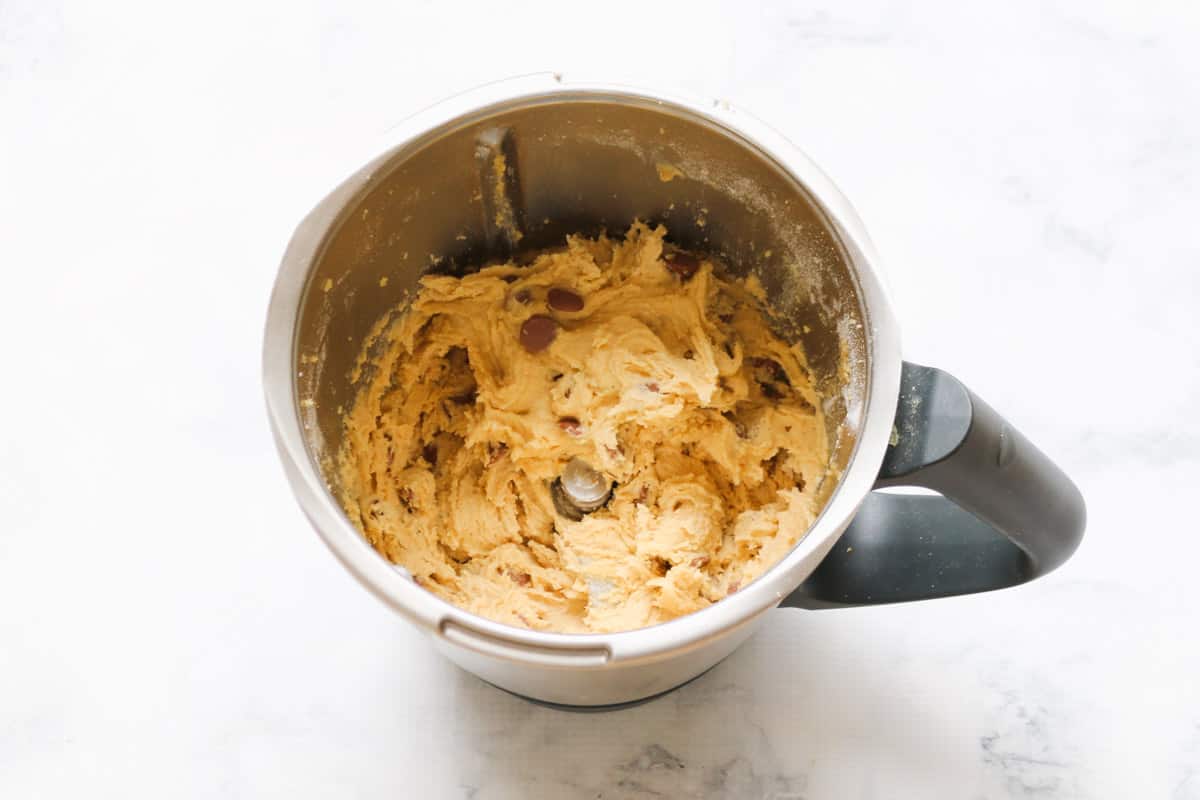
    Add the chocolate chips and mix on REVERSE until evenly dispersed.

    Note: You may need to use the spatula to help mix.

    Cookie mixture in a Thermomix bowl.

    Step 4 - Chill & Bake

    Chill the dough for at least 15 minutes to avoid over-spreading when baked.

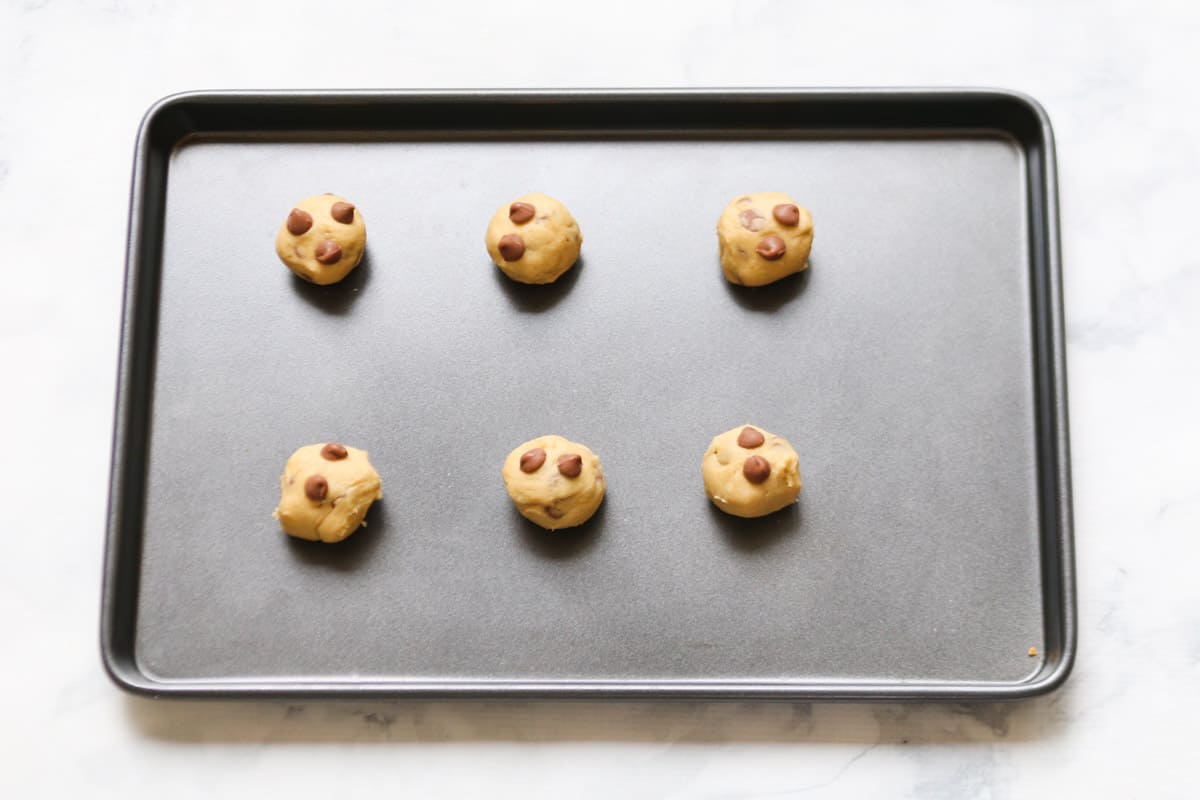
    Roll into heaped teaspoon-sized balls and bake.

    Allow to cool on the trays for 10 minutes before transferring to a wire rack to cool completely.

    Chocolate chip cookies on a baking tray.

    Recipe Tips & FAQ

    Chilling The Dough

    While not 'essential', we highly recommend chilling the dough for at least 15 minutes before baking. This will stop the dough from over-spreading when baked.

    Storing

    Store the cookies in an airtight container at room temperature for up to 1 week.

    Freezing

    Freeze the unbaked dough in a ball wrapped in plastic wrap for up to 3 months.
    Alternatively, freeze the baked cookies in an airtight container for up to 1 month. Allow to defrost at room temperature before consuming.

    A white cake stand topped with chocolate chip cookies.

    More Thermomix Cookie Recipes

    If you love making biscuits and cookies in your Thermomix (just like we do!), then check out a few more of our favourite recipes:

    • Thermomix Gingerbread - Not just to be enjoyed at Christmas, our gingerbread recipe is perfect all year round!
    • Thermomix Shortbread - The easiest and most delicious shortbread recipe you could ever make!
    • Thermomix Fairy Cookies - the kids absolutely love these sweet little biscuits.
    • Thermomix Coconut Biscuits - an old fashioned favourite that everyone loves.
    A pile of cookies on a white plate with the top one half eaten.

    Thermomix Recipe Cookbooks

    Browse our collection of printed Thermomix cookbooks including our value bundles!

    Front Cover of 11 ThermoBliss Books
    Print Recipe
    4.88 from 91 votes

    Thermomix Chocolate Chip Cookies

    Our Thermomix Chocolate Chip Cookies are a classic favourite... simple and delicious! You just can't beat these cookies when it comes to a yummy treat!
    Prep Time5 minutes mins
    Cook Time8 minutes mins
    Total Time13 minutes mins
    Course: Snacks
    Cuisine: cookies
    Servings: 24 cookies
    Calories: 131kcal
    Author: Lucy & Lauren

    Equipment

    • Thermomix
    • Oven

    Ingredients

    • 150 g butter room temperature
    • 80 g caster sugar
    • 80 g brown sugar
    • 1 egg
    • 2 teaspoon vanilla extract
    • pinch of salt
    • ½ teaspoon bi-carbonate soda baking soda
    • 225 g plain flour all purpose flour
    • 220 g chocolate chips chocolate bits

    Instructions

    • Preheat oven to 170 degrees celsius (fan-forced). 
    • Insert the butterfly into the Thermomix bowl and add the room temperature butter, caster sugar and brown sugar. Mix on Speed 4, 20 seconds.
    • Scrape down the sides of the bowl and mix on Speed 4, 40 seconds (or until pale and creamy). 
    • Reduce to Speed 2, and add the eggs and vanilla extract through the MC hole. Increase to Speed 4, 15 seconds. Remove the butterfly. 
    • Add the salt, bi-carbonate soda and plain flour and mix on Speed 4, 10 seconds. Scrape down the sides of the bowl and mix for a further 5 seconds. 
    • Mix the chocolate chips through for 10 seconds, REVERSE, Speed 2.
    • Roll heaped teaspoon-sized balls of the mixture and place onto 2 flat baking trays. Leave a gap to allow for spreading. 
    • Cook for 8-10 minutes or until just lightly golden.
    • Allow to cool on the baking trays for 10 minutes before transferring to a wire rack to cool completely.

    Notes

    RECIPE NOTES
    Chilling The Dough - We recommend chilling the dough for 15 minutes in the fridge before rolling into balls as this helps the cookies to keep their shape better when cooked. 


    Nutrition

    Calories: 131kcal | Carbohydrates: 17g | Protein: 1g | Fat: 7g | Saturated Fat: 4g | Polyunsaturated Fat: 1g | Monounsaturated Fat: 1g | Trans Fat: 1g | Cholesterol: 22mg | Sodium: 73mg | Potassium: 19mg | Fiber: 1g | Sugar: 9g | Vitamin A: 166IU | Calcium: 7mg | Iron: 1mg

    Thermomix Garlic Prawn Risotto

    August 13, 2018

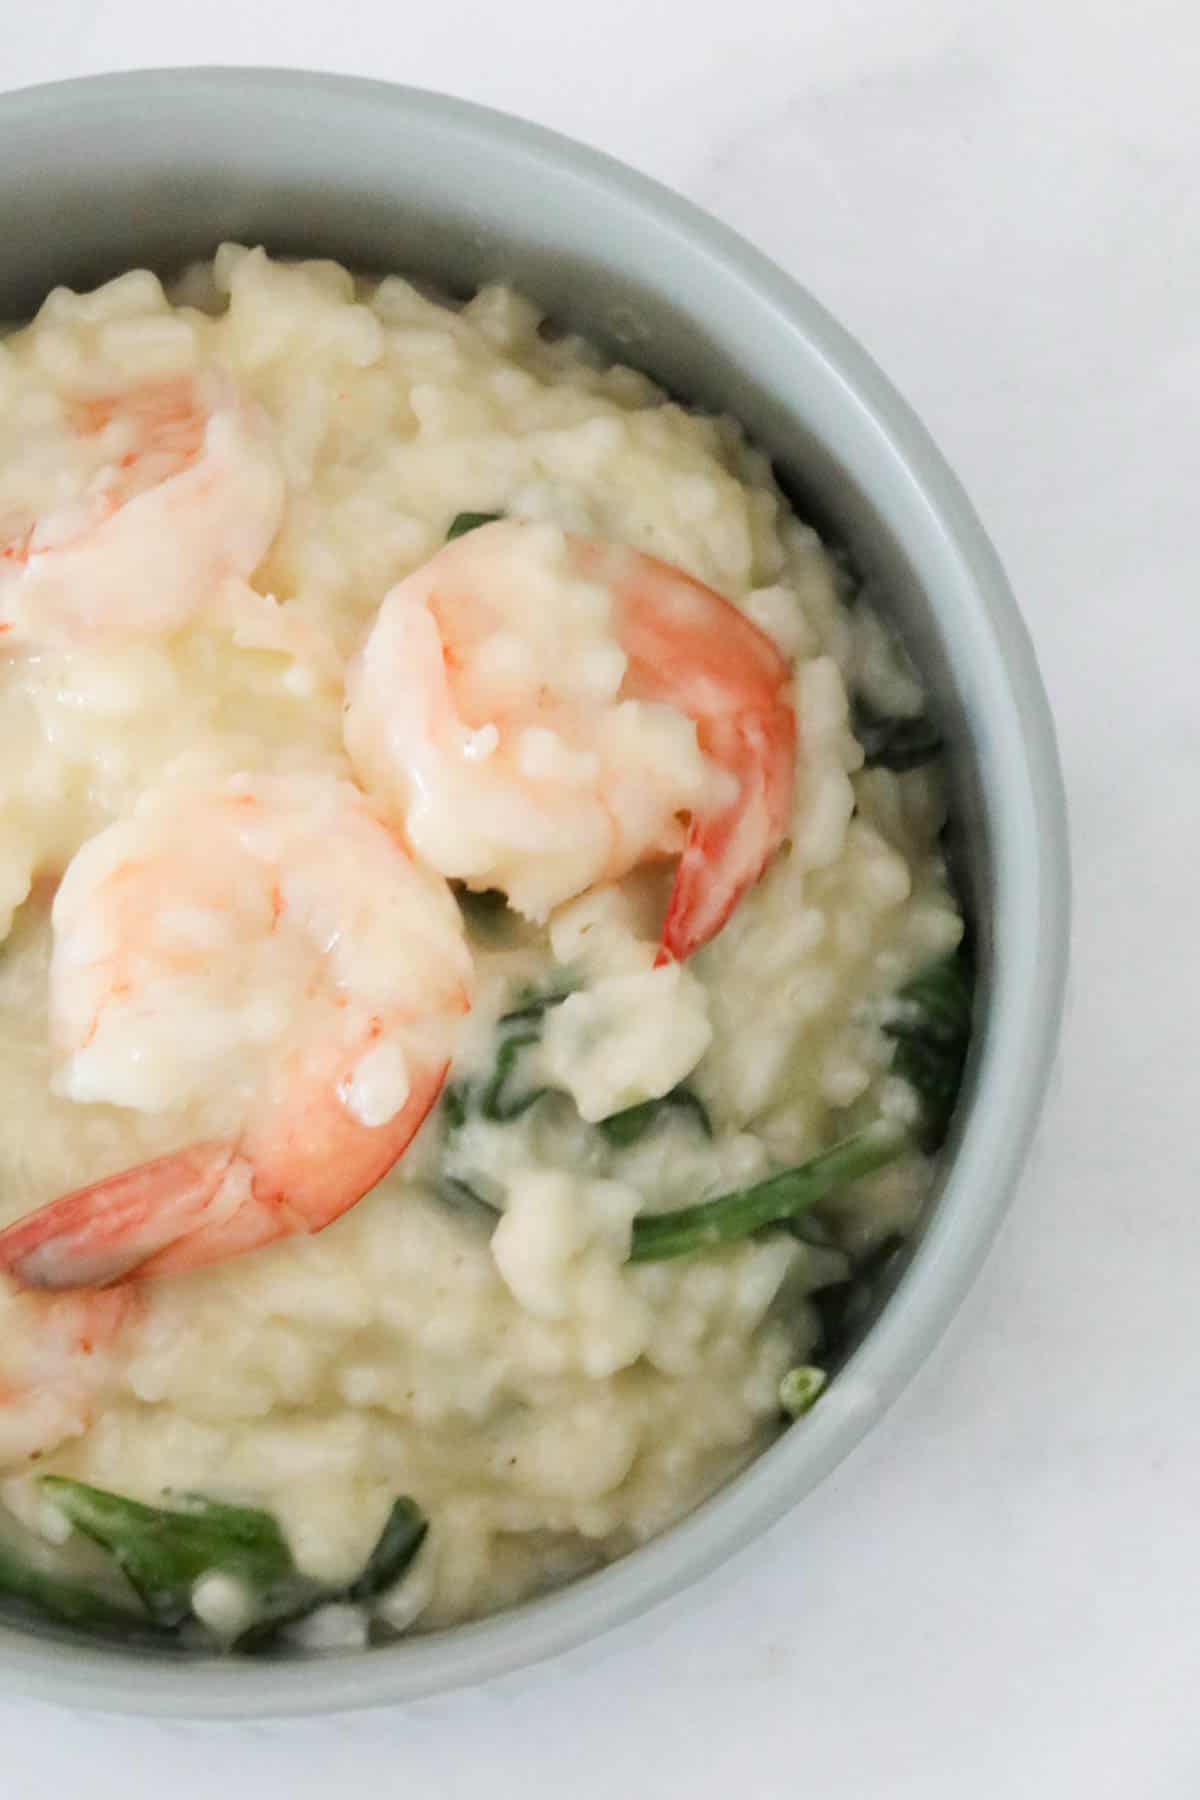
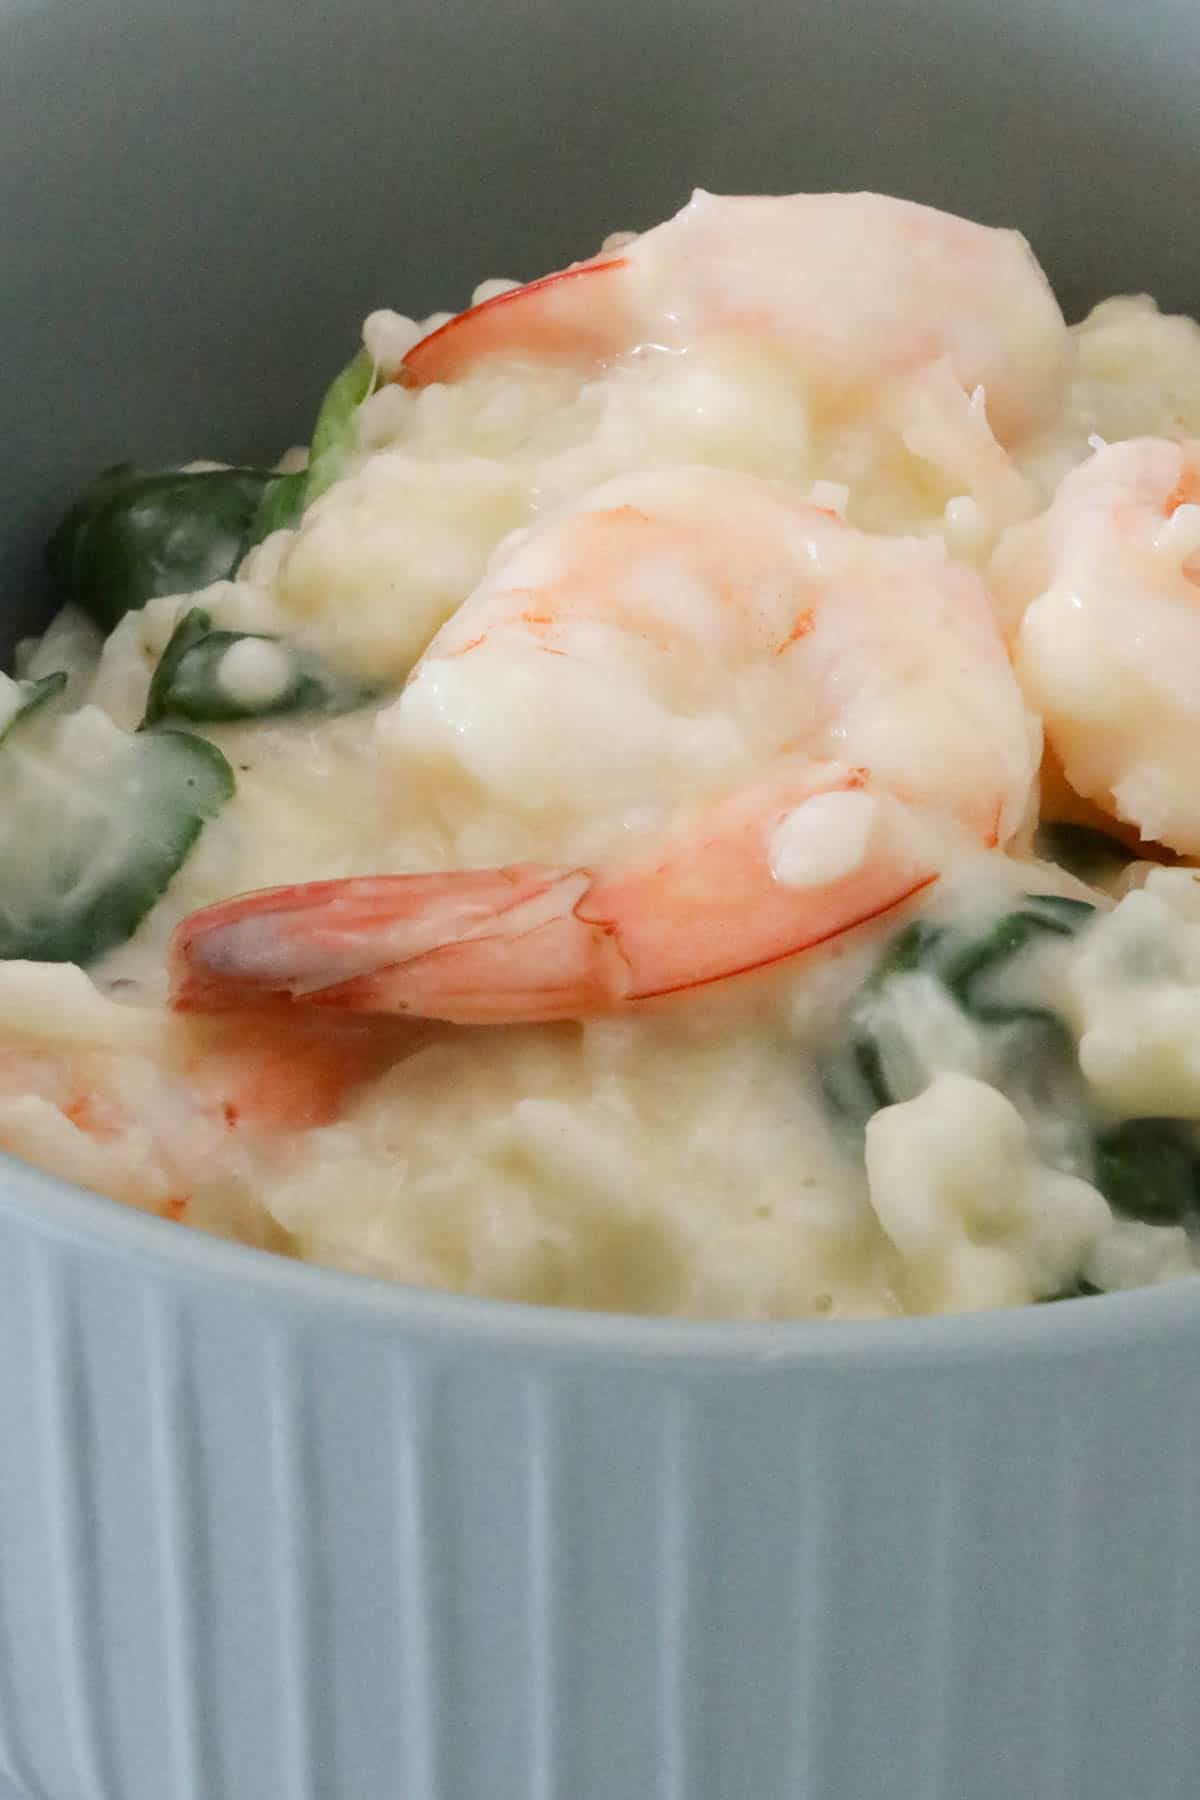
    A bowl of garlic prawn and spinach risotto.

    Our Thermomix Garlic Prawn Risotto is a firm family favourite! A rich creamy risotto, with fresh prawns, parmesan cheese and baby spinach!

    An overhead shot of a bowl of prawn risotto.

    If you've been visiting ThermoBliss for a while, you'll know that we're massive fans of making risotto in the Thermomix for easy family dinners.

    It's quick, it's easy and the results are oh-so-good!

    And our Thermomix Garlic Prawn Risotto is all of those things and so much more!

    Why You're Going To Love This Recipe

    This decadent risotto is a restaurant quality meal at home!

    • Rich & Creamy - it's hard to beat this creamy lemon risotto filled with tender prawns, baby spinach and parmesan cheese. It's rich, decadent and simply delicious!
    • Vegetarian - this is a tasty meat-free dinner that the whole family will enjoy! If you have fussy kids that don't like prawns (like I do!), simply serve them the risotto minus the prawns!
    • Quick & Easy - have this hands-free dinner on the table in under 40 minutes!
    A bowl of risotto with prawns and spinach.

    What You Need

    Our Thermomix Garlic Prawn Risotto is packed full of flavour thanks to these delicious ingredients...

    Please scroll to the recipe card at the bottom of the post for ingredient quantities and the full detailed method.

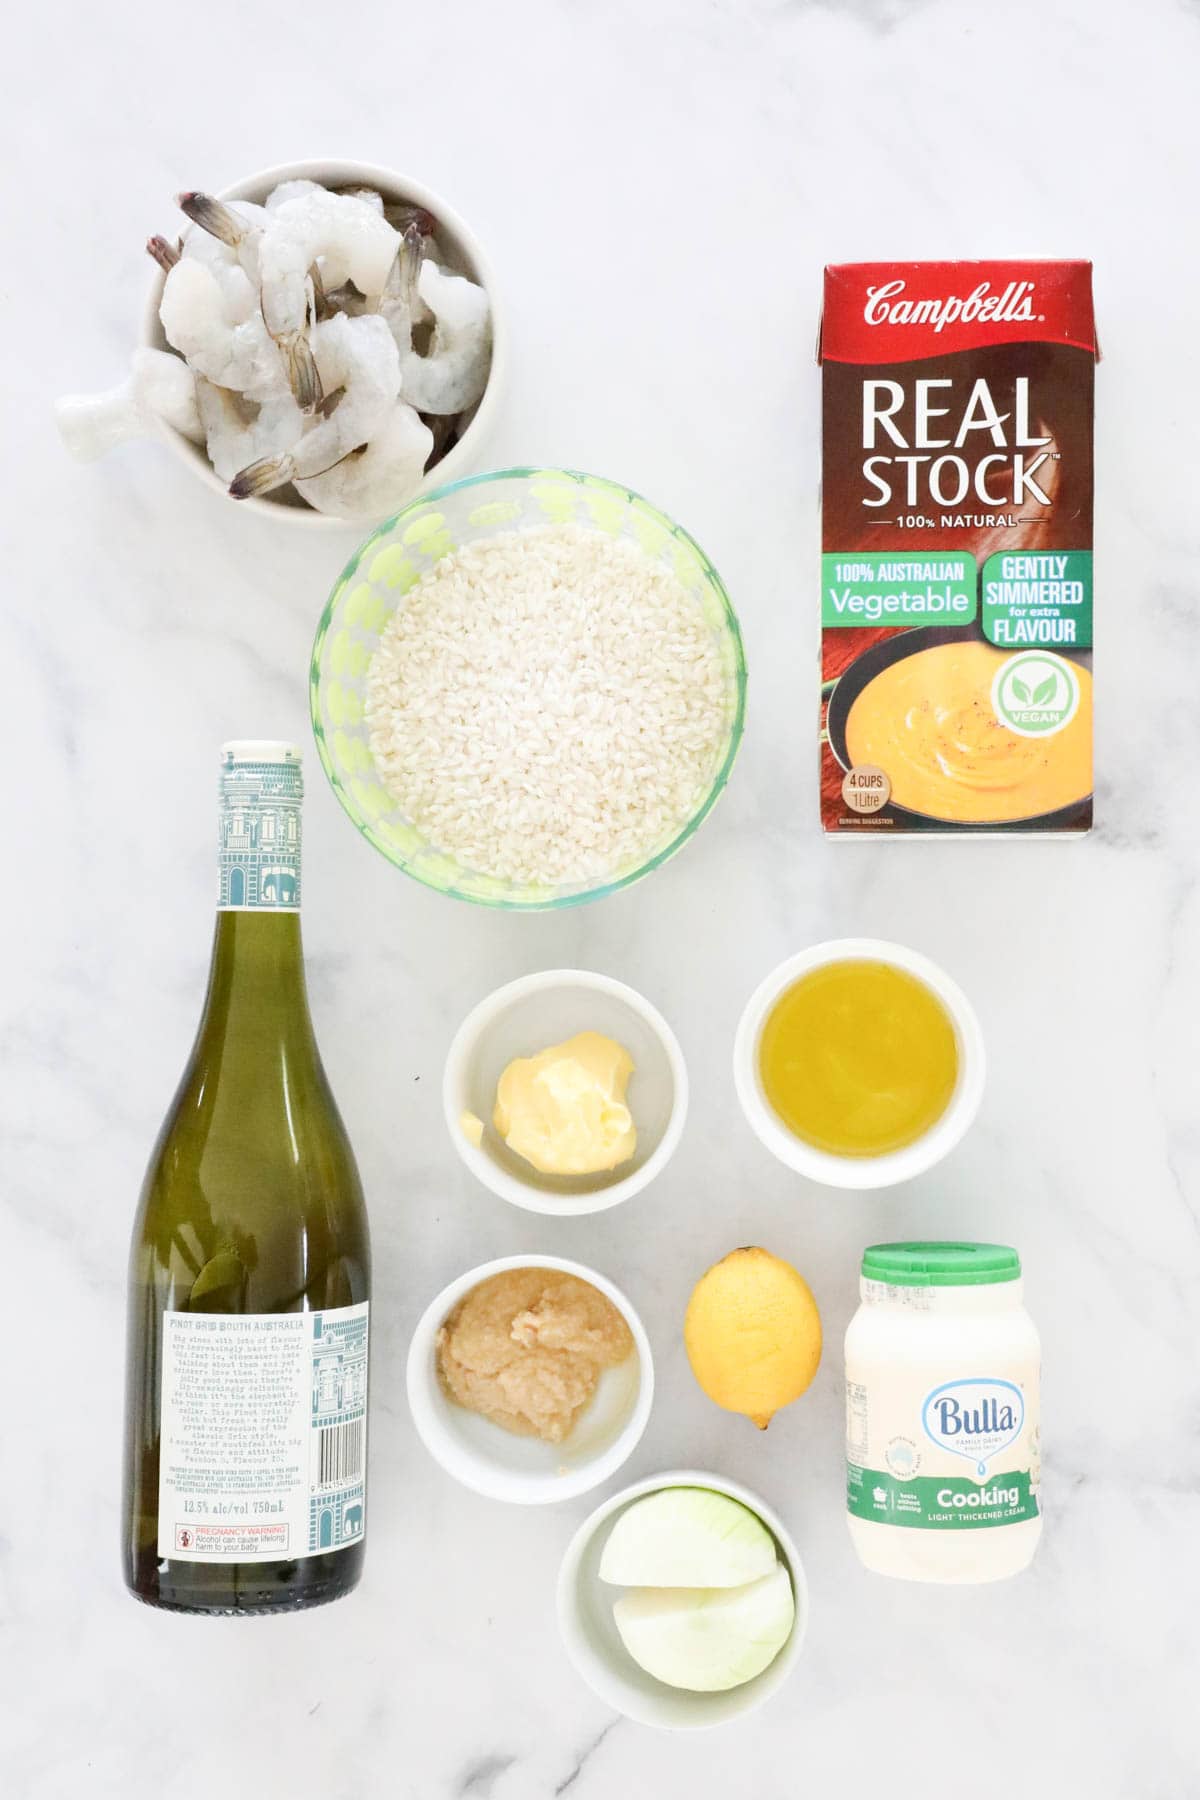
    The ingredients for a garlic prawn risotto.
    • Parmesan Cheese - when it comes to risotto, the more parmesan cheese... the better! Stir it through the risotto while it's resting in the ThermoServer and then grate over plenty of extra when serving!
    • Onion - use a medium sized brown onion
    • Garlic - fresh cloves or jarred minced garlic can be used
    • Butter - salted or unsalted butter can be used in this recipe
    • Olive Oil - use a good quality extra virgin olive oil
    • Arborio Rice - this variety of rice is perfect for risottos as it's deliciously creamy. Unlike other rice varieties, do NOT wash the rice before making risotto - the starch is what makes your risotto creamy
    • White Wine - use a dry white wine such as pinot grigio or sav blanc or omit the wine and replace it with extra liquid vegetable stock if you prefer. Please note that the alcohol in the wine does cook out.
    • Liquid Vegetable Stock - use a good quality vegetable stock such as Campbells.
    • Prawns - use green (uncooked) prawns peeled and deveined
    • Cream - use a cooking cream (such as Bulla brand) or thickened cream
    • Baby Spinach - for stirring through
    • Lemon - add a squeeze of fresh lemon juice to the risotto. This adds a beautiful flavour and helps to cut through the richness of the risotto
    • Butter - stirring butter through the risotto at the end gives the risotto the ultimate creamy texture

    Step By Step Instructions

    Let's get cooking! You won't believe how simple our Thermomix Garlic Prawn Risotto recipe is!

    Please scroll to the recipe card at the bottom of the post for ingredient quantities and the full detailed method.

    Step 1 - Grate The Parmesan

    Grate the parmesan cheese and set it aside.

    Grated parmesan in a Thermomix.

    Step 2 - Chop & Saute

    In a clean and dry Thermomix bowl, chop the onion and garlic then scrape down the bowl.

    Onion in a Thermomix.

    Add the butter and olive oil and saute.

    Sauteed butter and onion in a Thermomix.

    Step 3 - Cook The Risotto

    Insert the Butterfly attachment.

    Add the arborio rice and saute for 1 minute.

    Rice in a Thermomix.

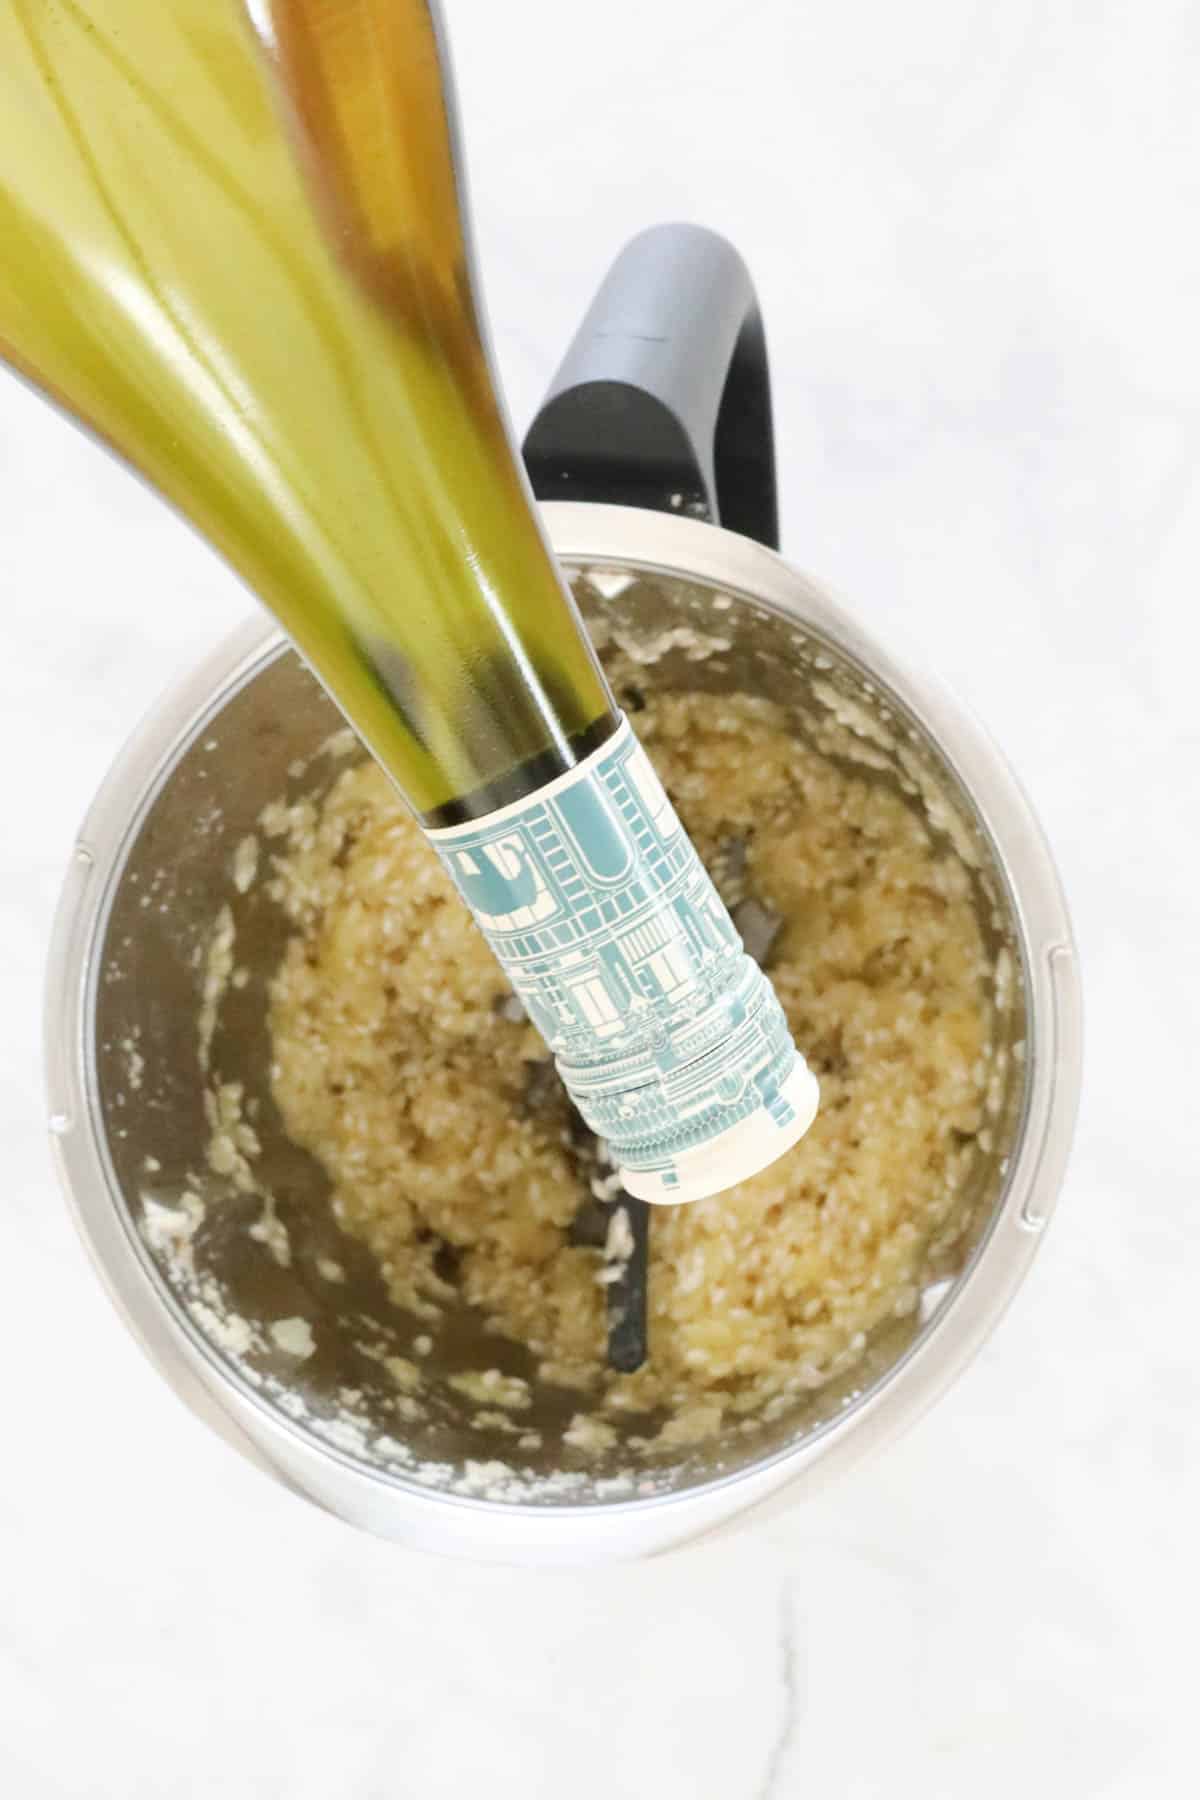
    Add the wine and cook for a further 2 minutes.

    Wine being poured into a Thermomix.

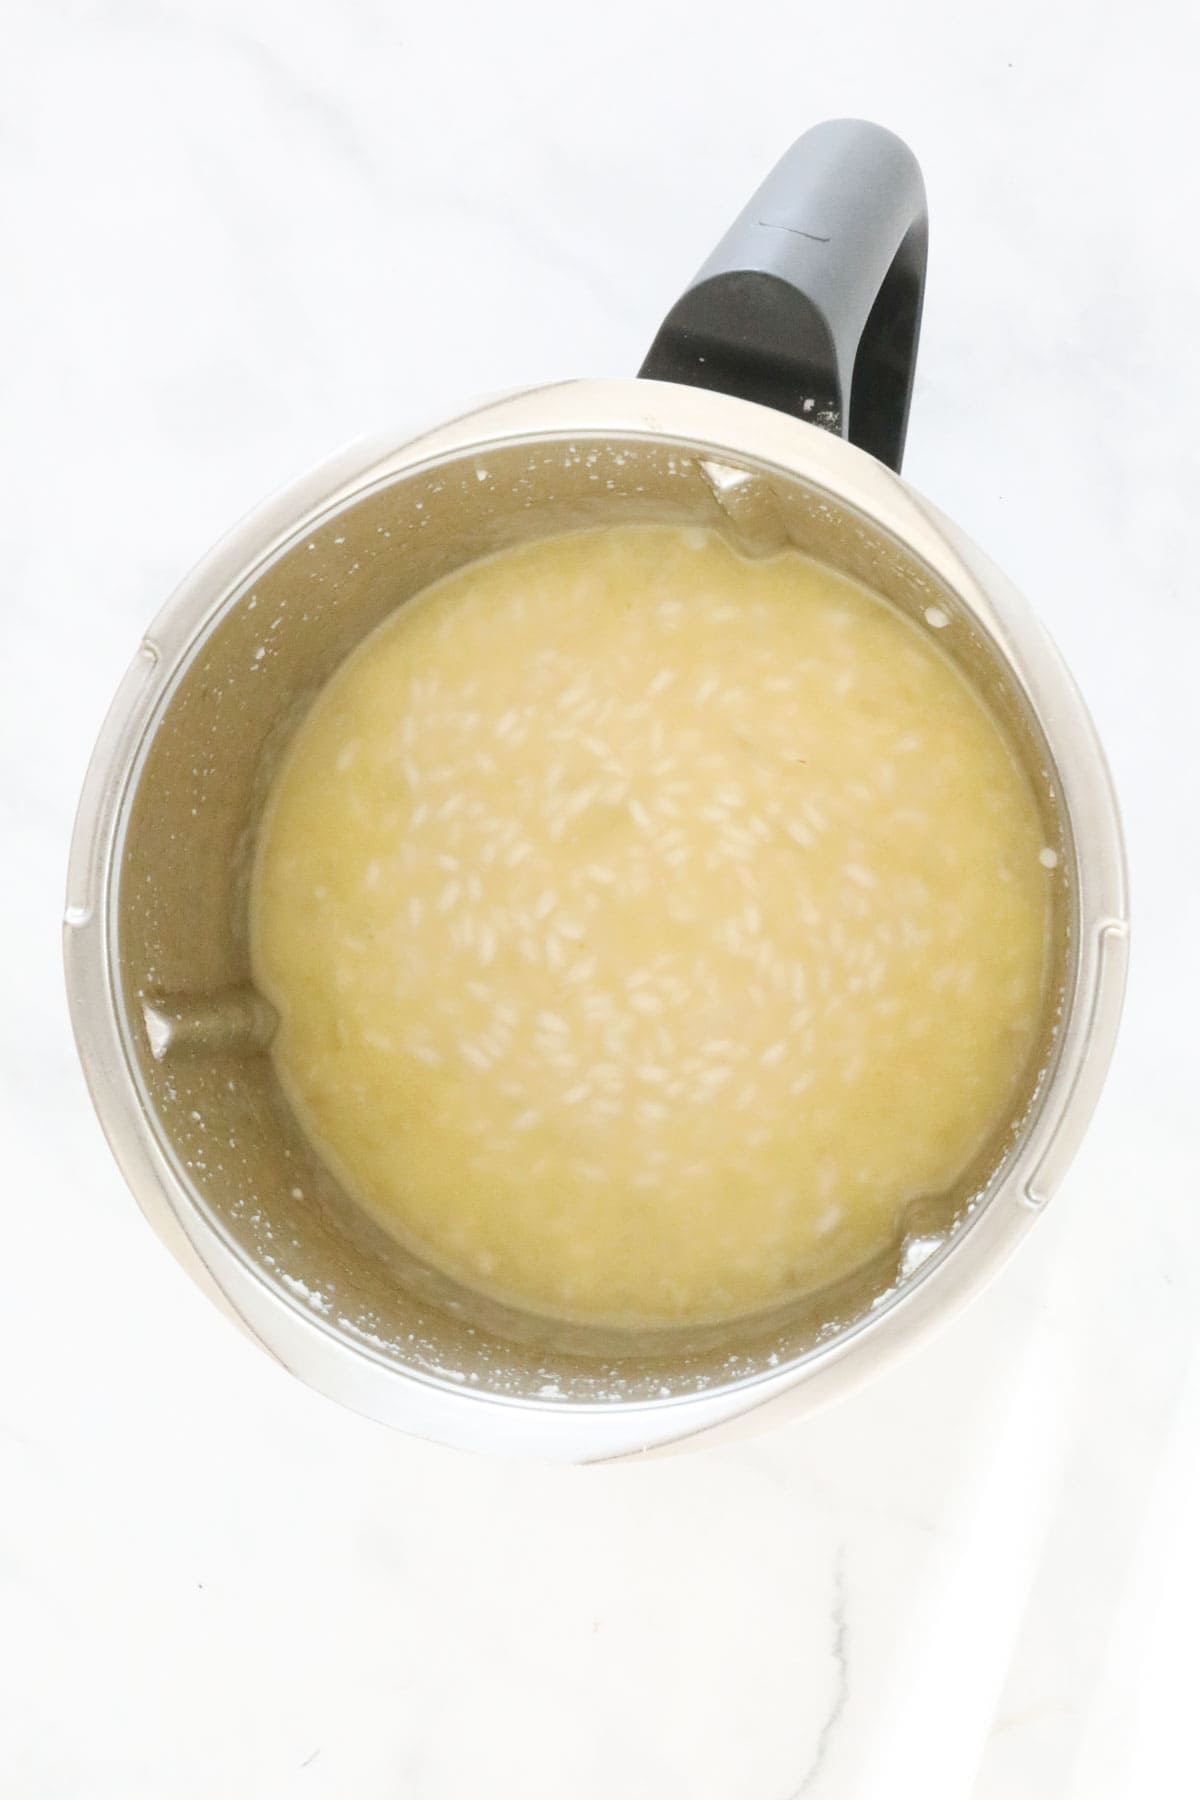
    Add the liquid vegetable stock and cook the risotto for 13 minutes.

    Remove the Butterfly.

    Rice ad liquid in a Thermomix.

    Step 4 - Cook The Prawns

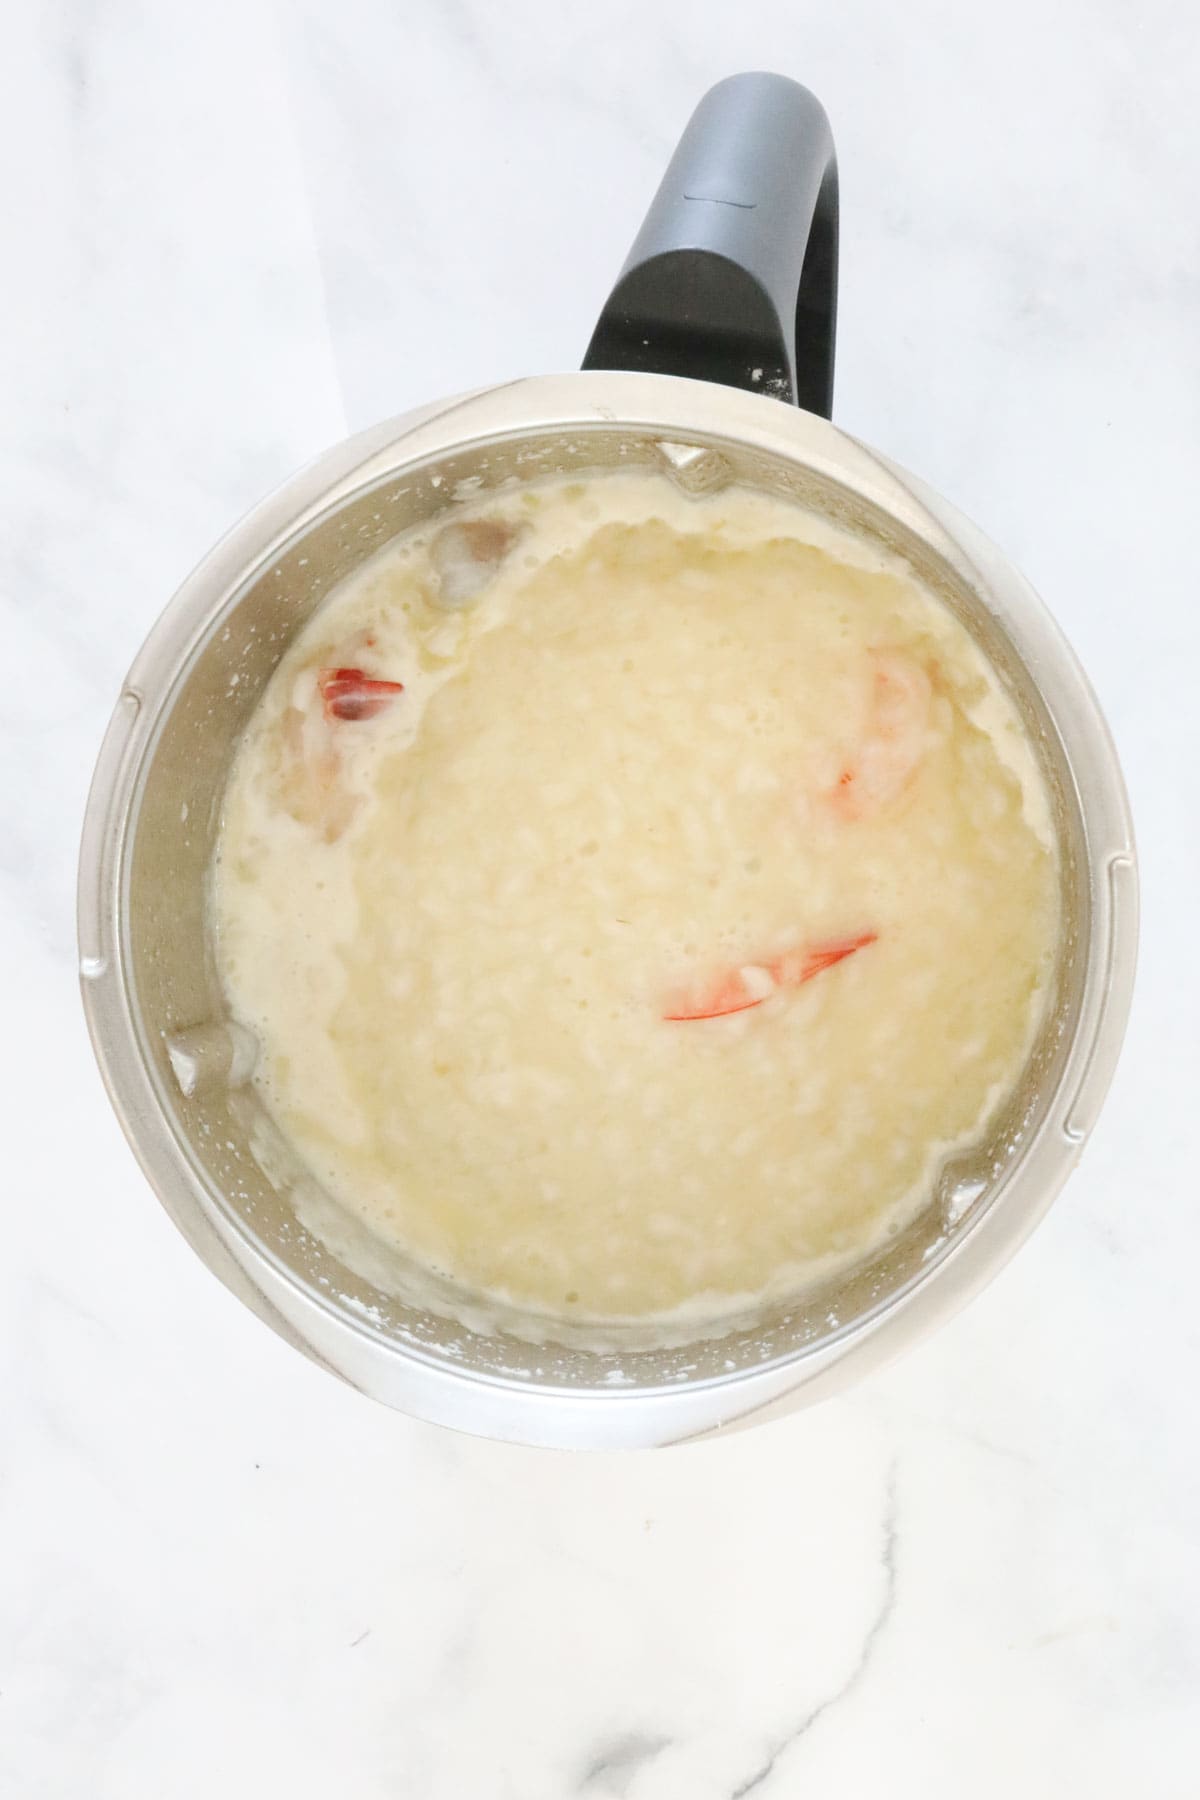
    Add the prawns and the cream and cook for 5 minutes.

    TIP: Use the spatula through the MC hole to stir the risotto - this ensures that the prawns cook evenly.

    Risotto is a Thermomix.

    Step 5 - Rest The Risotto

    Place the baby spinach into the ThermoServer.

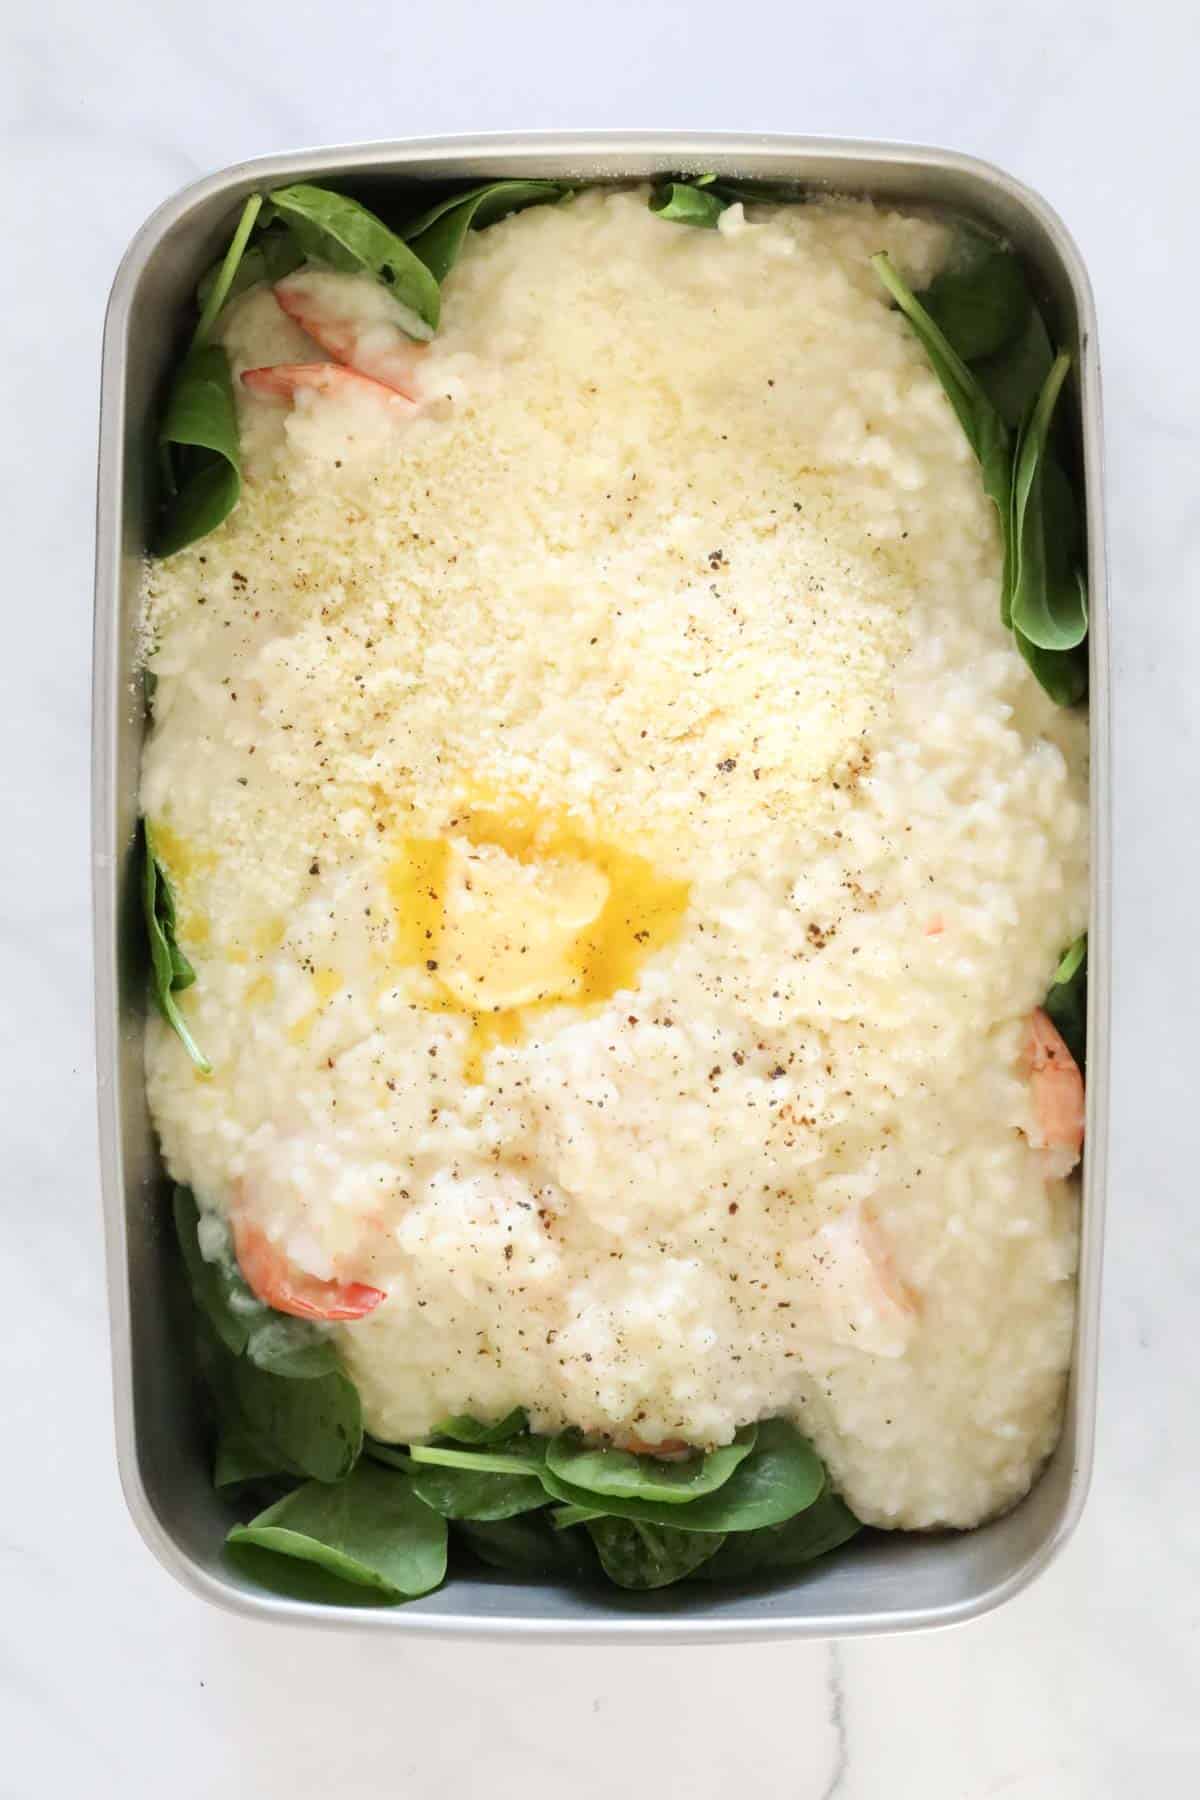
    Pour over the risotto, lemon juice, butter, parmesan cheese and salt and pepper.

    Butter, parmesan and risotto in a ThermoServer.

    Stir until the baby spinach has wilted.

    Cover and allow to rest and thicken for 10 minutes.

    Prawn and spinach risotto in a ThermoServer.

    Serve immediately with extra grated parmesan cheese on top.

    Expert Tips

    Our simple tips will ensure the perfect Thermomix Garlic Prawn Risotto!

    • Arborio Rice - this variety of rice is perfect for risottos as it's deliciously creamy. Unlike other rice varieties, do NOT wash the rice before making risotto - the starch is what makes your risotto creamy
    • White Wine - use a dry white wine such as pinot grigio or sav blanc or omit the wine and replace it with extra liquid vegetable stock if you prefer. Please note that the alcohol in the wine does cook out.
    • Remove the MC while cooking the risotto - this is for safety reasons. When the Thermomix is cooking at high temperatures, steam builds up. Removing the MC ensures that the steam can escape. Place the rice basket or the splatter guard over the top of the MC hole to catch any splatters.
    • Resting Time - it's important to allow the risotto to rest for 10 minutes to thicken.
    • This recipe is best consumed immediately. I don't recommend reheating or freezing it.
    An overhead shot of a bowl of prawn risotto.

    FAQs

    Can I make this in an older version of the Thermomix?

    Yes! This recipe is suitable to all models of the Thermomix.

    Can I use homemade vegetable stock paste?

    Yes you can! Simply add water to make it up to the correct grams.

    How will I know if the prawns are cooked?

    They will be piping hot and white in the centre (not opaque). Ensure you stir the prawns using the spatula through the MC hole to ensure even cooking.

    A bowl of garlic prawn risotto.

    Related Recipes

    Looking for more tasty Thermomix risottos?

    You've come to the right place!

    • An overhead shot of fresh vegetables and prosciutto on top of a creamy risotto.
      Thermomix Lemon Risotto
    • A bowl of risotto with pumpkin, chicken, bacon and spinach.
      Thermomix Chicken, Pumpkin, Bacon & Baby Spinach Risotto
    • A risotto with baby spinach and avocado.
      Thermomix Chicken and Mushroom Risotto
    • Overhead view of Bowl of Thermomix Zucchini Pea and Bacon risotto sitting on a black hand towel with a gold fork next to it. in the background is a zucchini and a white bowl with cheese in it.
      Thermomix Zucchini, Pea and Bacon Risotto

    SHOP OUR RANGE OF THERMOMIX COOKBOOKS

    Browse our collection of hardcopy Thermomix cookbooks here.

    There's everything from family dinners to kids snacks, desserts to cookies, slices to Christmas recipes, cocktails to chocolate recipes and more!

    Complete set o 16 ThermoBliss recipe books.
    A bowl of garlic prawn and spinach risotto.
    Print Recipe
    4.85 from 39 votes

    Thermomix Garlic Prawn Risotto

    Our Thermomix Garlic Prawn Risotto is a firm favourite in our house! A rich creamy risotto, with fresh prawns, parmesan and baby spinach... YUM!
    Prep Time10 minutes mins
    Cook Time23 minutes mins
    Total Time33 minutes mins
    Course: Dinner, main meal
    Cuisine: Italian
    Diet: Vegetarian
    Servings: 4 serves
    Calories: 646kcal
    Author: Lucy & Lauren
    Cost: $10

    Equipment

    • Thermomix

    Ingredients

    • 50 g parmesan cheese
    • 1 brown onion halved
    • 3 teaspoon minced garlic
    • 40 g butter
    • 40 g olive oil
    • 320 g arborio rice
    • 60 g white wine
    • 720 g liquid vegetable stock
    • 400 g green prawns (peeled and deveined)
    • 120 g cooking cream
    • 120 g fresh baby spinach leaves
    • juice of 1 lemon
    • 1 tbs butter
    • extra parmesan to serve

    Instructions

    • Place the parmesan cheese into the Thermomix bowl.
      Grate for 10 seconds, Speed 9.
      Set aside in a separate bowl.
      Wash and dry the Thermomix bowl. 
    • Place the onion and garlic into the Thermomix bowl. Chop for 3 seconds, Speed 5. Scrape down the sides of the bowl.
    • Add the butter and olive oil. Saute for 3 minutes, Varoma, Speed 1. 
    • Insert the butterfly whisk. Add the risotto rice and saute for 1 minute, Varoma, Reverse, Speed 1 (MC off). 
    • Add the white wine and saute for a further 2 minutes, Varoma, Reverse, Speed 1 (MC off but the rice basket or splatter guard sitting on top of the lid). 
    • Scrape the bottom of the bowl. Add the liquid vegetable stock and cook for 13 minutes, 100 degrees, Reverse, Speed 1 (MC off but the rice basket or splatter guard sitting on top of the lid). 
      Remove the Butterfly.
    • Add the prawns and cooking cream and cook for a further 5 minutes, Varoma, Reverse, Speed 1 (MC off but the rice basket or splatter guard sitting on top of the lid). 
      Use the spatula through the MC hole to help mix and ensure even cooking of the prawns.
    • Add the baby spinach leaves to the ThermoServer and pour over the risotto.
      Stir through the parmesan cheese, lemon juice, 1 tbs butter and season with salt and pepper.
      Allow to rest and thicken for 10 minutes.
    • Serve with extra parmesan cheese. 

    Notes

    RECIPE NOTES & TIPS
    • Arborio Rice - this variety of rice is perfect for risottos as it's deliciously creamy. Unlike other rice varieties, do NOT wash the rice before making risotto - the starch is what makes your risotto creamy
    • White Wine - use a dry white wine such as pinot grigio or sav blanc or omit the wine and replace it with extra liquid vegetable stock if you prefer. Please note that the alcohol in the wine does cook out.
    • Remove the MC while cooking the risotto - this is for safety reasons. When the Thermomix is cooking at high temperatures, steam builds up. Removing the MC ensures that the steam can escape. Place the rice basket or the splatter guard over the top of the MC hole to catch any splatters.
    • Resting Time - it's important to allow the risotto to rest for 10 minutes to thicken.
    • This recipe is best consumed immediately. I don't recommend reheating or freezing it.

    Nutrition

    Calories: 646kcal | Carbohydrates: 69g | Protein: 22g | Fat: 30g | Saturated Fat: 13g | Polyunsaturated Fat: 2g | Monounsaturated Fat: 12g | Trans Fat: 0.3g | Cholesterol: 147mg | Sodium: 736mg | Potassium: 367mg | Fiber: 3g | Sugar: 2g | Vitamin A: 3127IU | Vitamin C: 9mg | Calcium: 247mg | Iron: 5mg

    Thermomix Chicken & Leek Pies

    August 6, 2018

    A chicken and leek pie with sesame seeds on top.

    Our Thermomix Chicken & Leek Pies are the perfect family dinner! Serve with mashed potato and steamed vegetables for an easy midweek meal. 

    An overhead shot of a chicken and bacon pie in a ramekin.

    When the weather cools down, it's all about the pies in our house!

    And these Thermomix Chicken & Leek Pies are always a massive hit.

    The creamy filling is packed with leek, bacon and tender chunks of chicken, while the crispy puff pastry tops it off perfectly.

    So if you're after a family-friendly (and even fussy toddler-approved!) dinner, then these Thermomix Chicken & Leek Pies are definitely for you!

    An overhead shot of a pie in a ramekin.

    Why You're Going To Love This Recipe

    • Easy Family Dinner - my family absolutely LOVE these Thermomix Chicken & Leek Pies. They're such a kid-friendly meal and really easy to whip up!
    • Freezer-Friendly - you can prepare the filling ahead of time, allow it to cool completely in the fridge and then freeze for up to 1 month. Allow the filling to defrost before assembling the pies and baking.
    • Versatile - make mini pies or 1 large pie... the choice is yours!
    • Full Of Flavour - everyone loves the combination of chicken, bacon and leek in a creamy sauce!

    What You Need

    This classic pie filling consists of bacon, leek and chicken in a creamy sauce, then topped with flaky puff pastry and crunchy sesame seeds!

    Please scroll to the recipe card at the bottom of the post for ingredient quantities and the full detailed method.

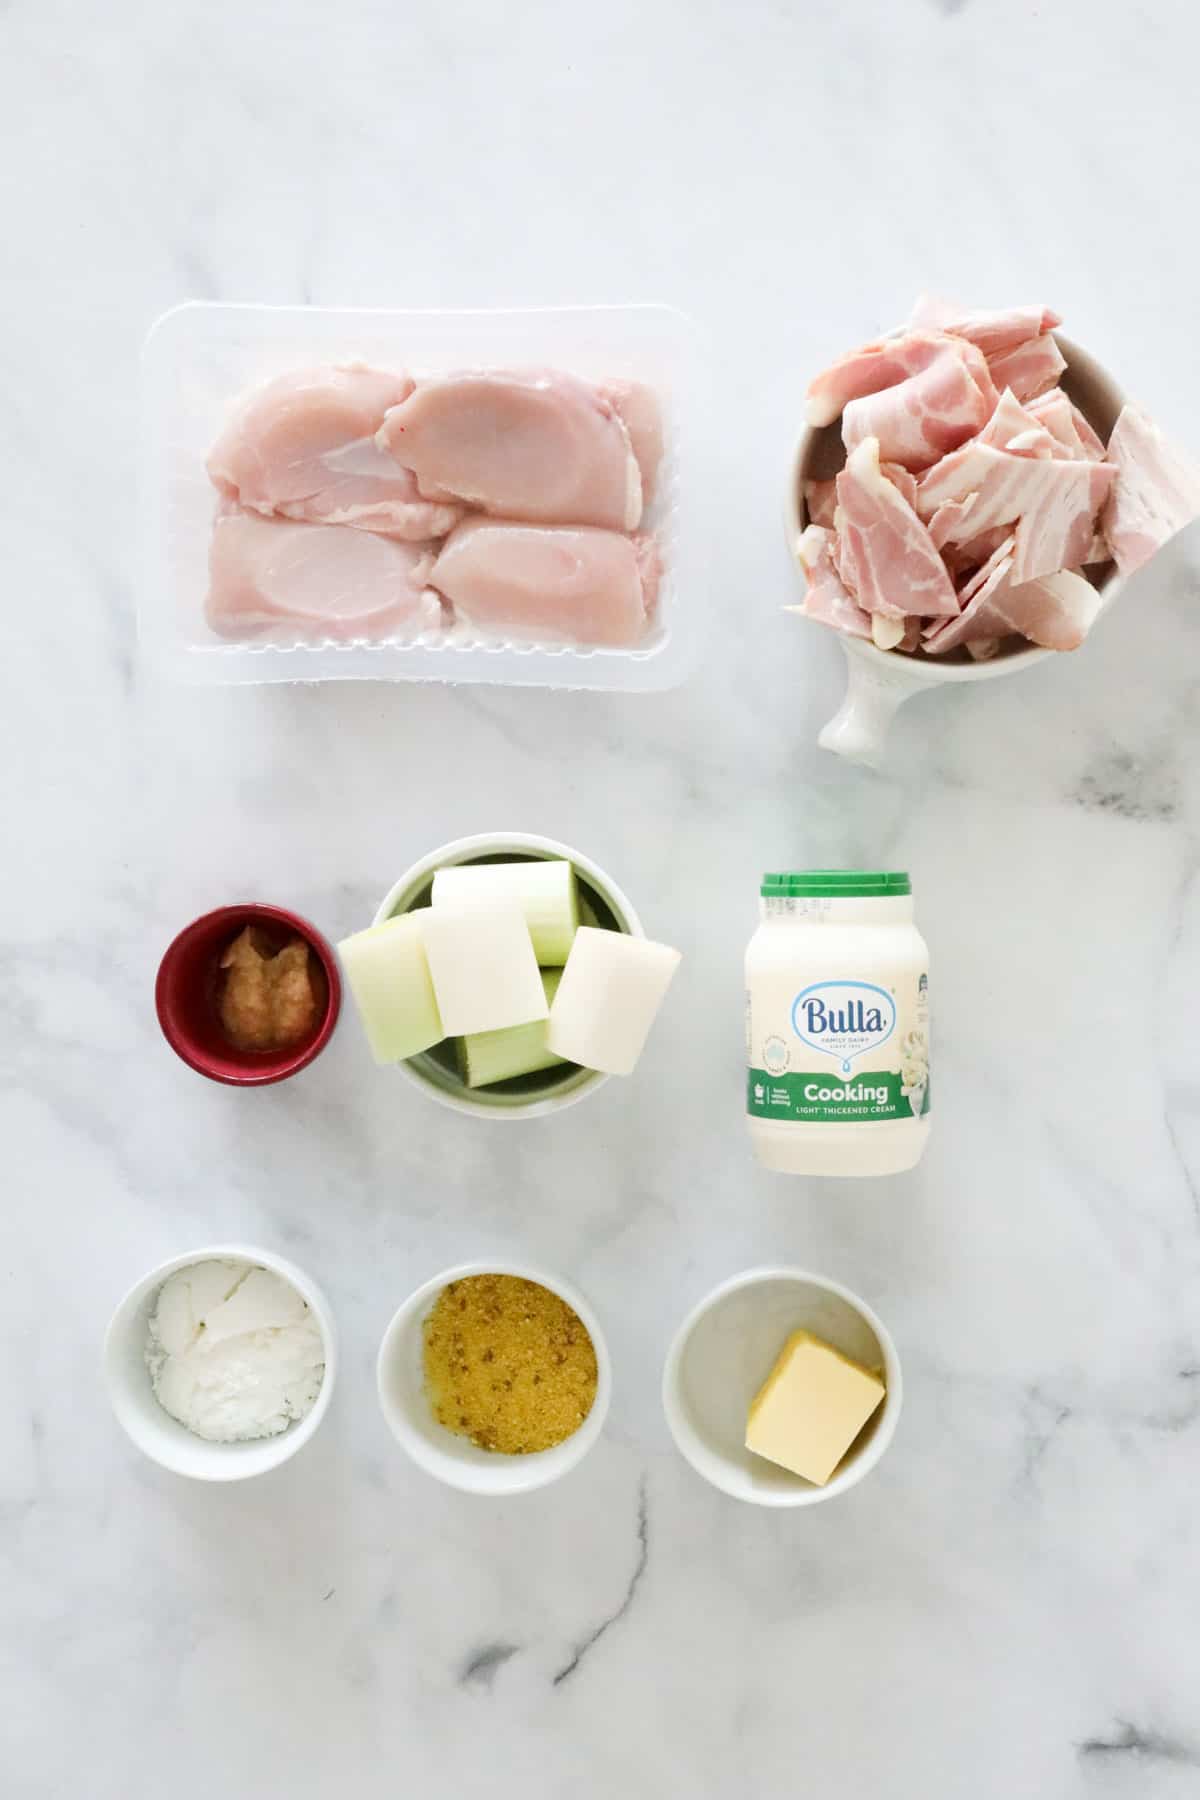
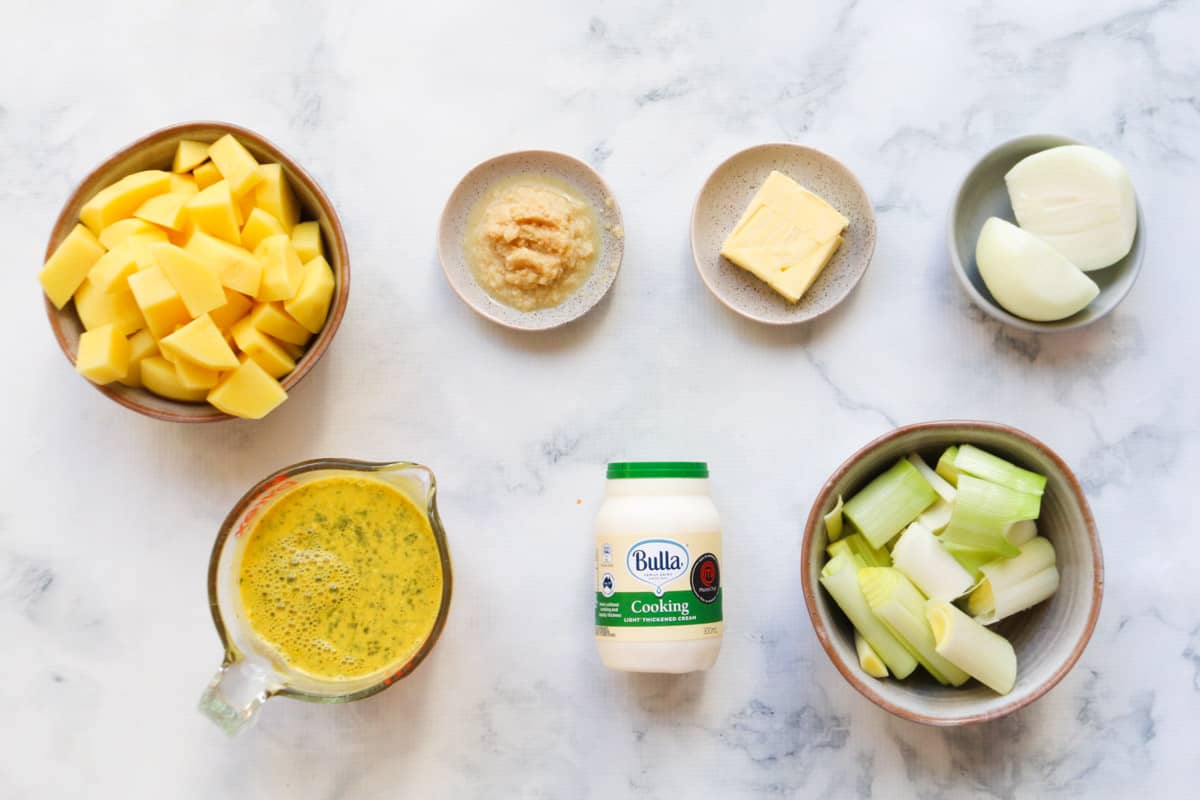
    The ingredients for Thermomix Creamy Chicken Pies.

    For The Pie Filling

    • leeks - there's no need to thinly slice the leeks, simply chop them into large chunks and let the Thermomix do the fine chopping for you!
    • garlic - use minced garlic or fresh garlic cloves
    • bacon - I recommend using streaky bacon for the recipe
    • butter - for sauteing the bacon, leek and garlic
    • chicken - I recommend using chicken thighs as they stay tender once cooked. Alternatively, chicken breasts can be used
    • cream - I recommend using Bulla cooking cream as it doesn't curdle when cooked
    • chicken stock powder - optional but it adds to the flavour (preferably use low salt chicken stock powder)

    For The Pastry

    • puff pastry sheets - defrosted
    • egg - lightly beaten for brushing over the top of the pastry
    • sesame seeds - for sprinkling

    Step By Step Instructions

    Our Thermomix Chicken & Leek Pies are hearty and warming on a cold wintery night!

    Let's get cooking!

    Step 1 - Prepare The Chicken & Leek Filling

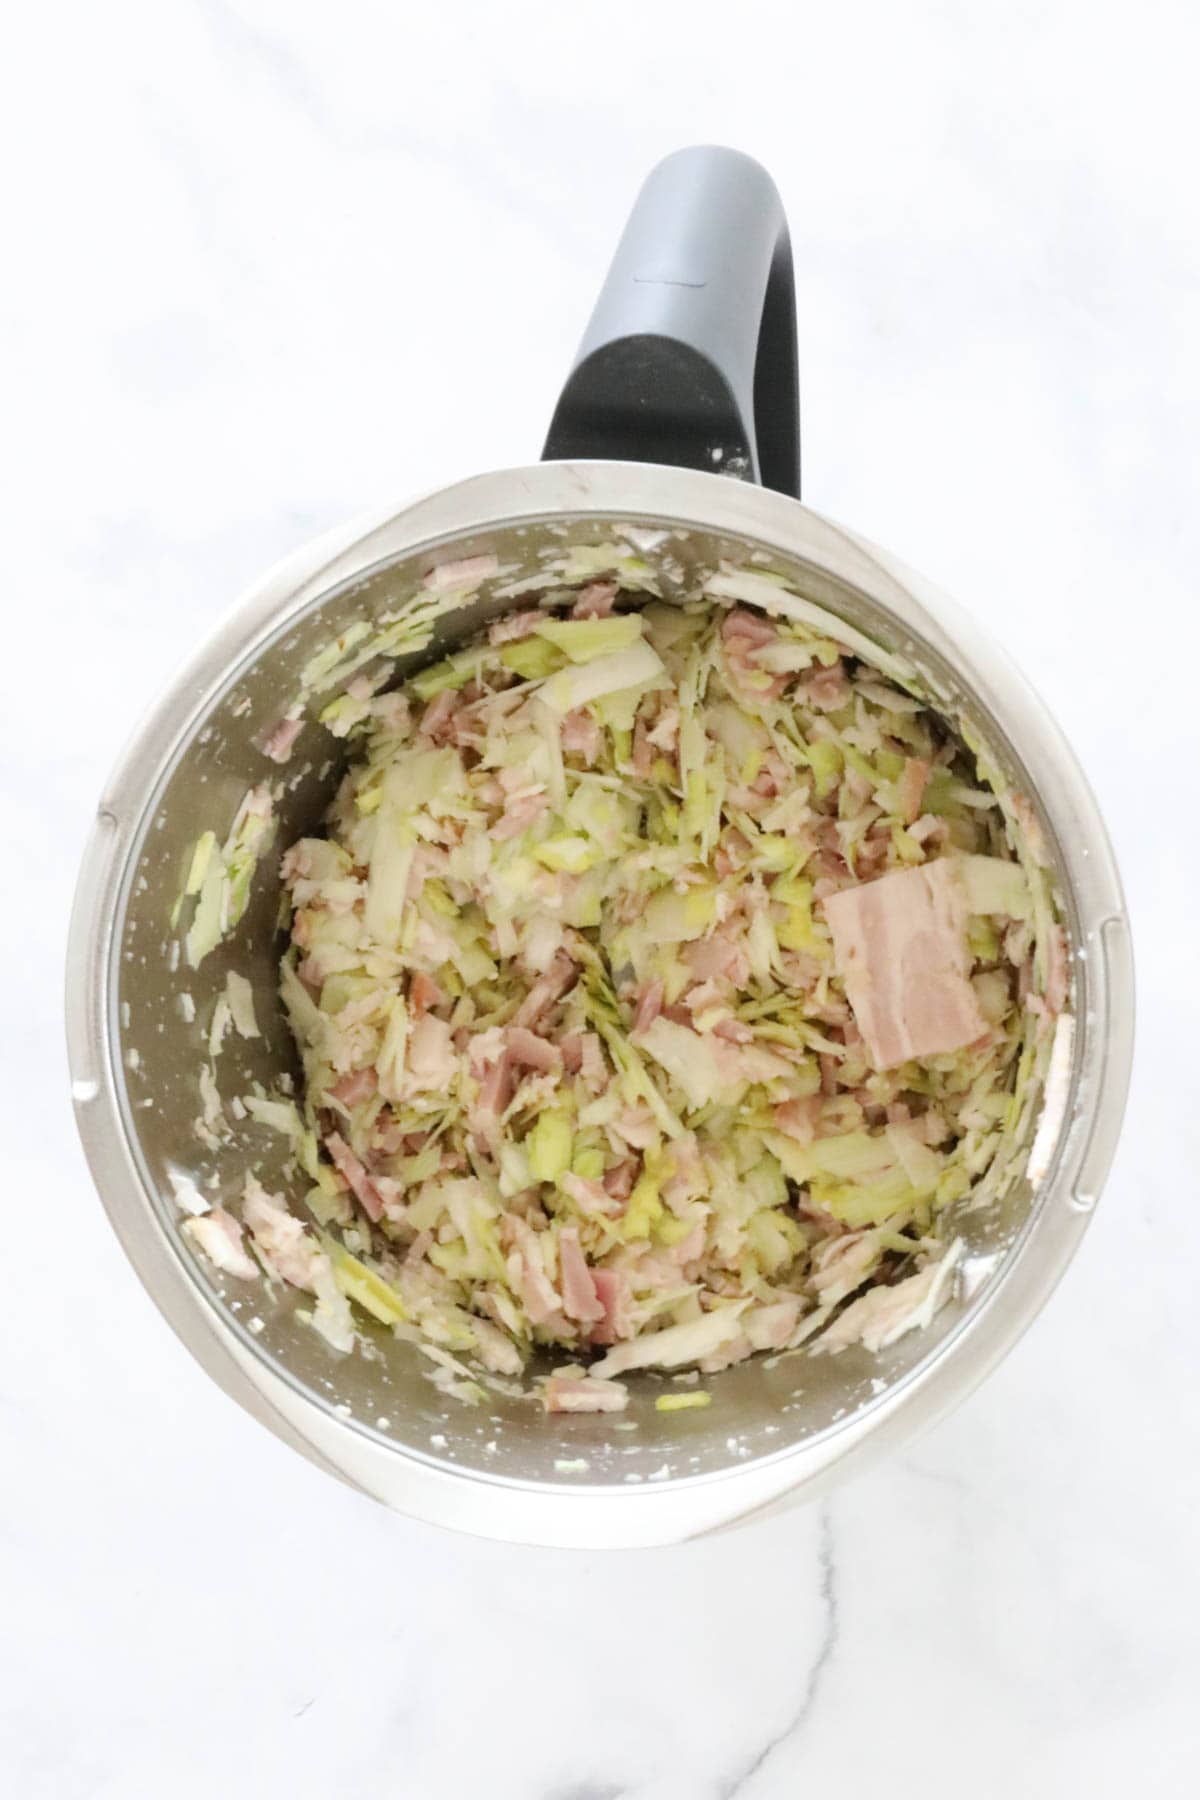
    Chop the leeks, garlic and mince in the Thermomix bowl.

    TIP: Continue mixing until it's chopped to your desired texture.

    Pie mixture in a Thermomix.

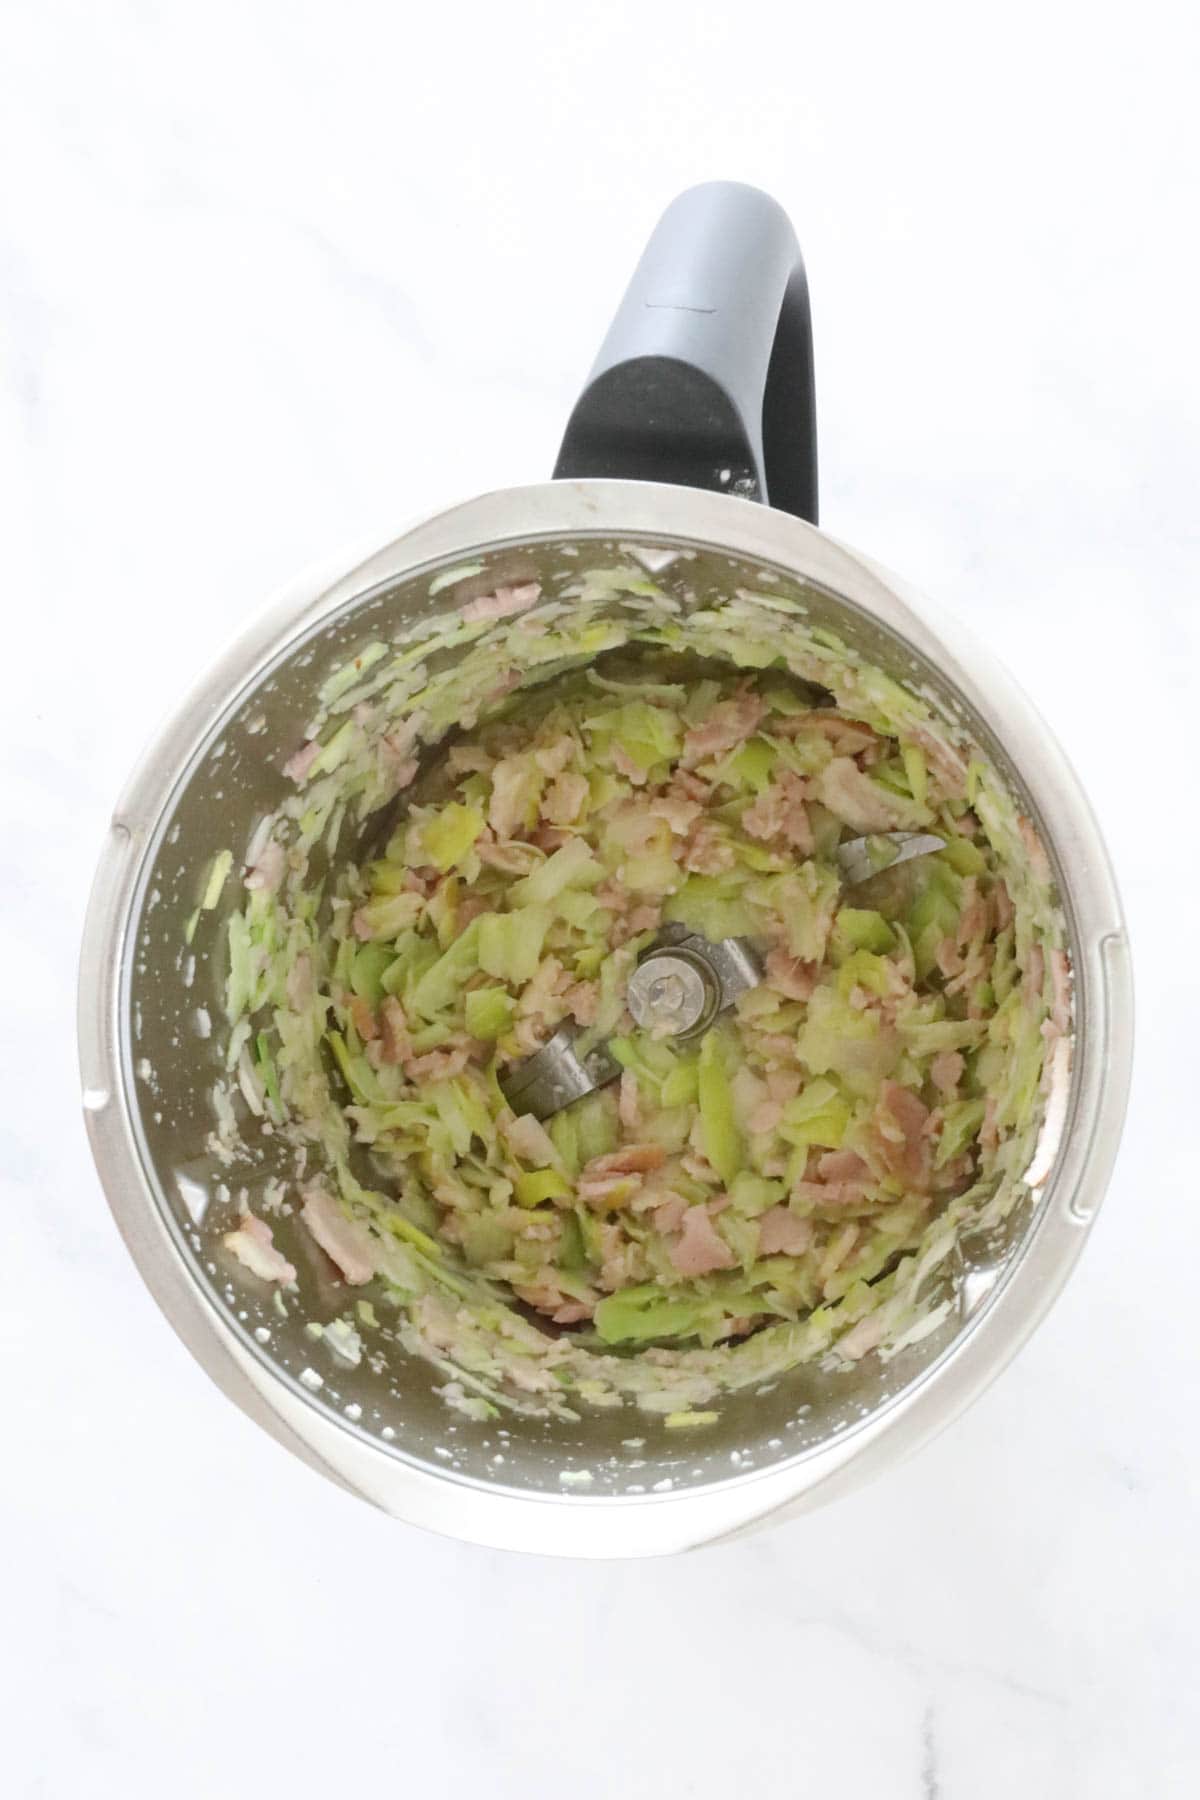
    Add the butter and saute the mixture.

    Sauteed leek and bacon in a Thermomix.

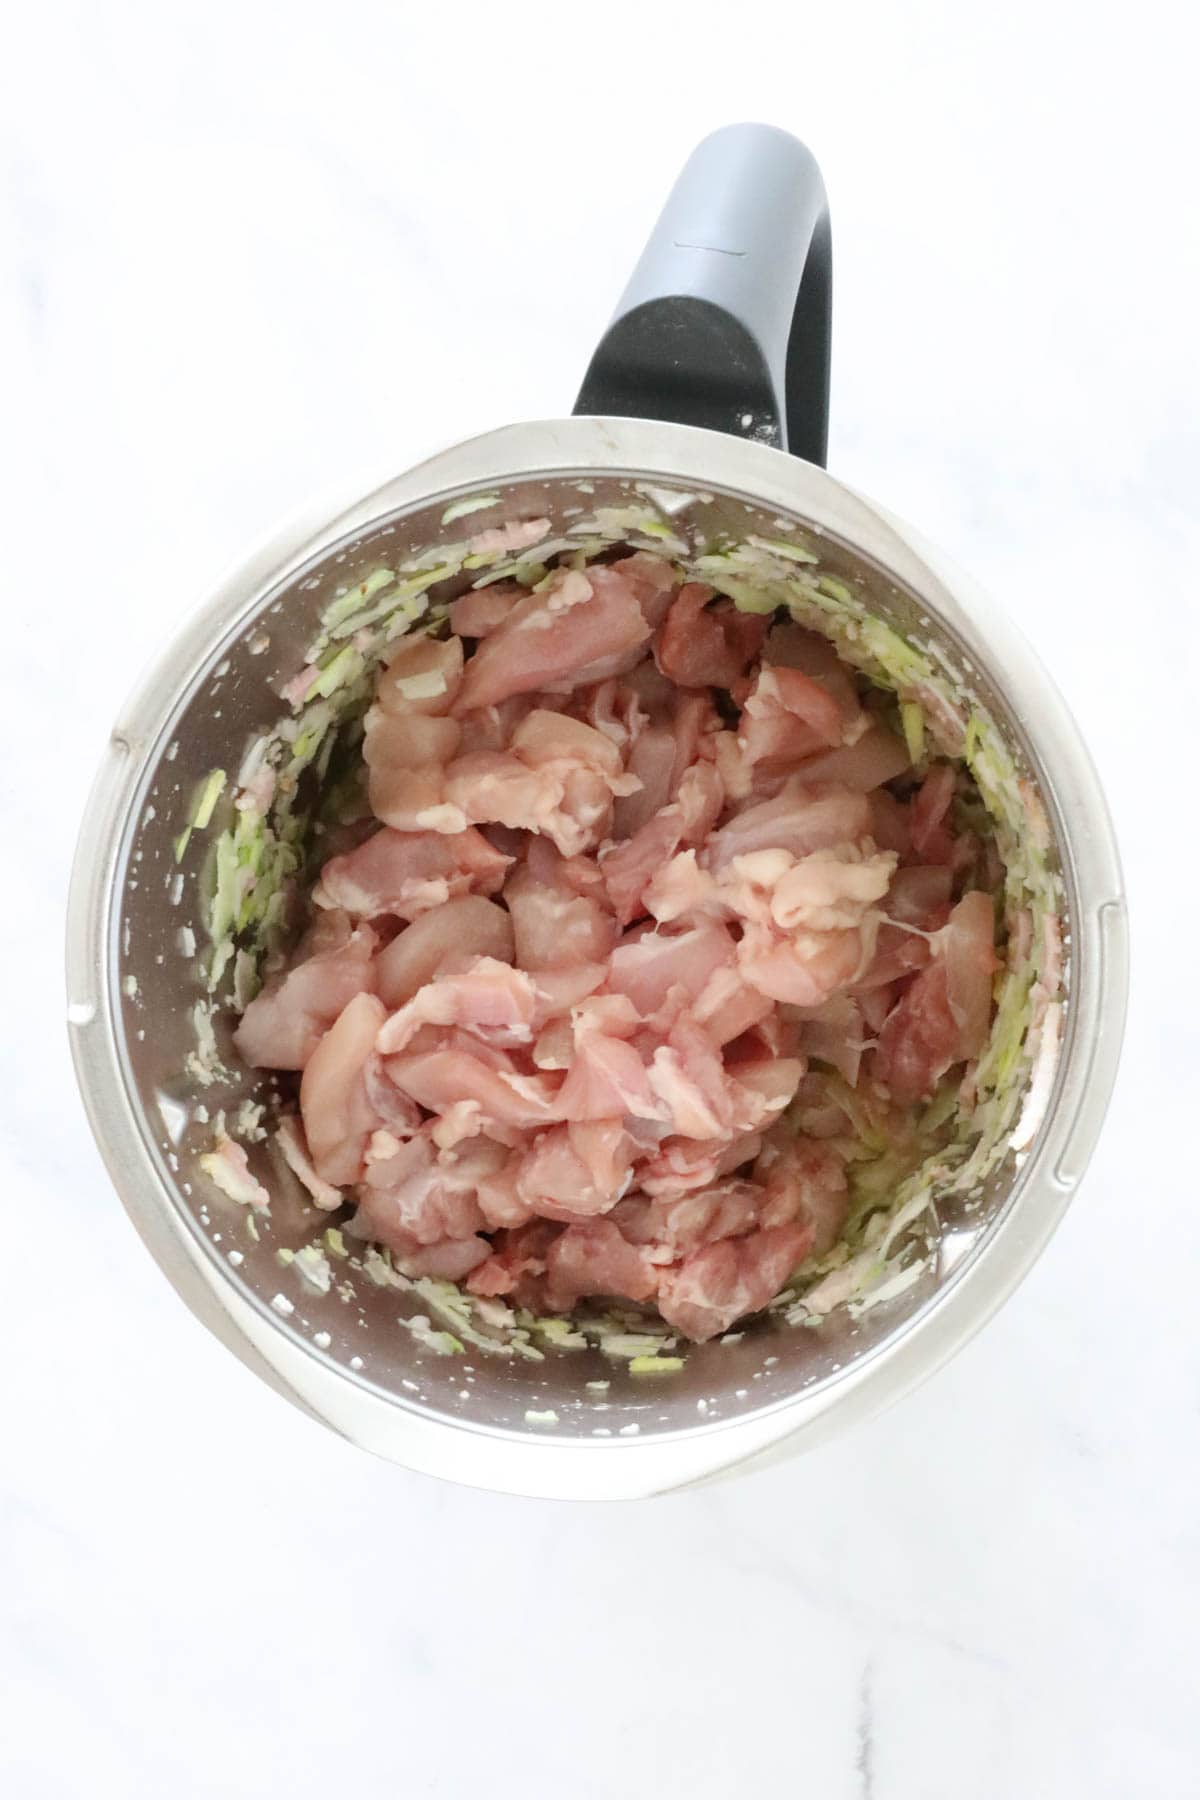
    Add the chopped chicken to the bowl.

    Raw chicken in a Thermomix.

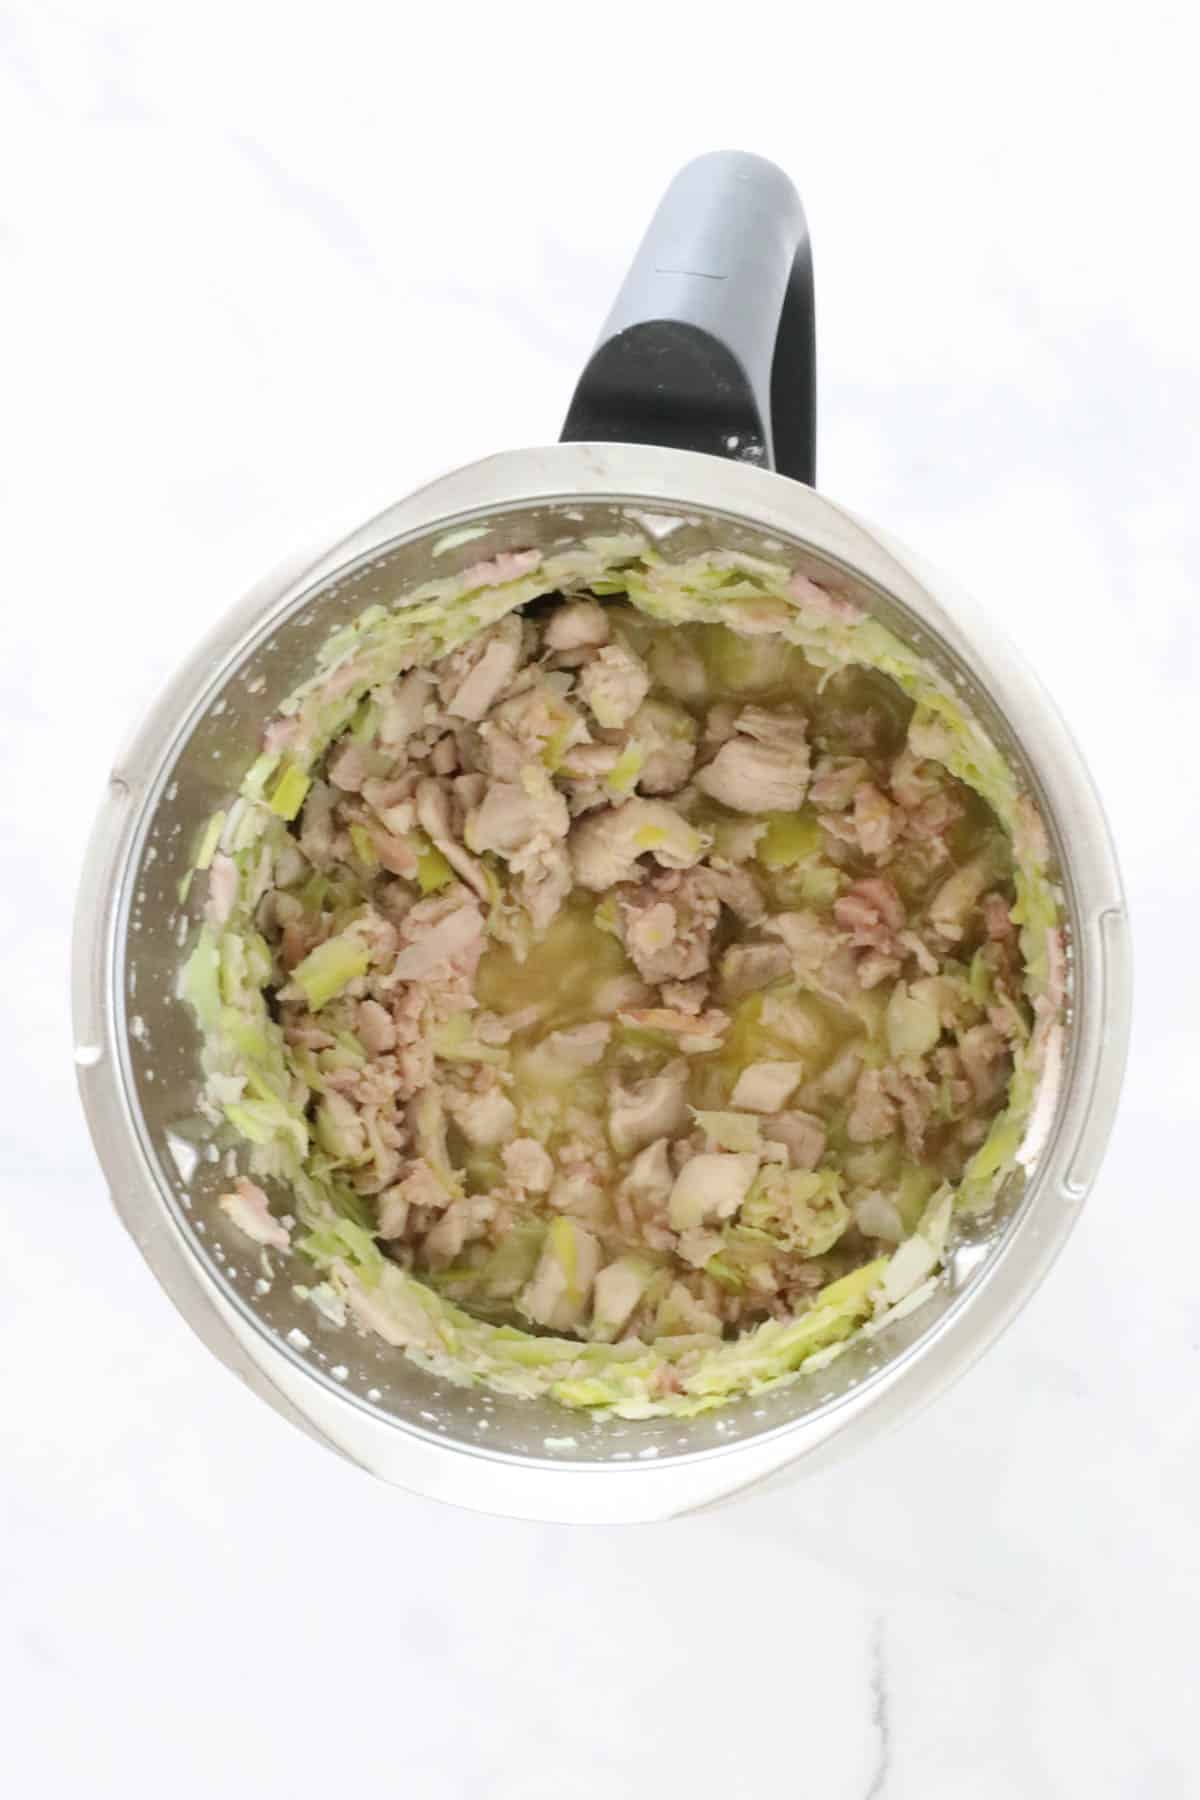
    Cook for 5 minutes.

    TIP: For safety reasons, ensure that the MC removed but the splatter guard or rice basket on top of the lid.

    Cooked chicken and leek in a Thermomix.

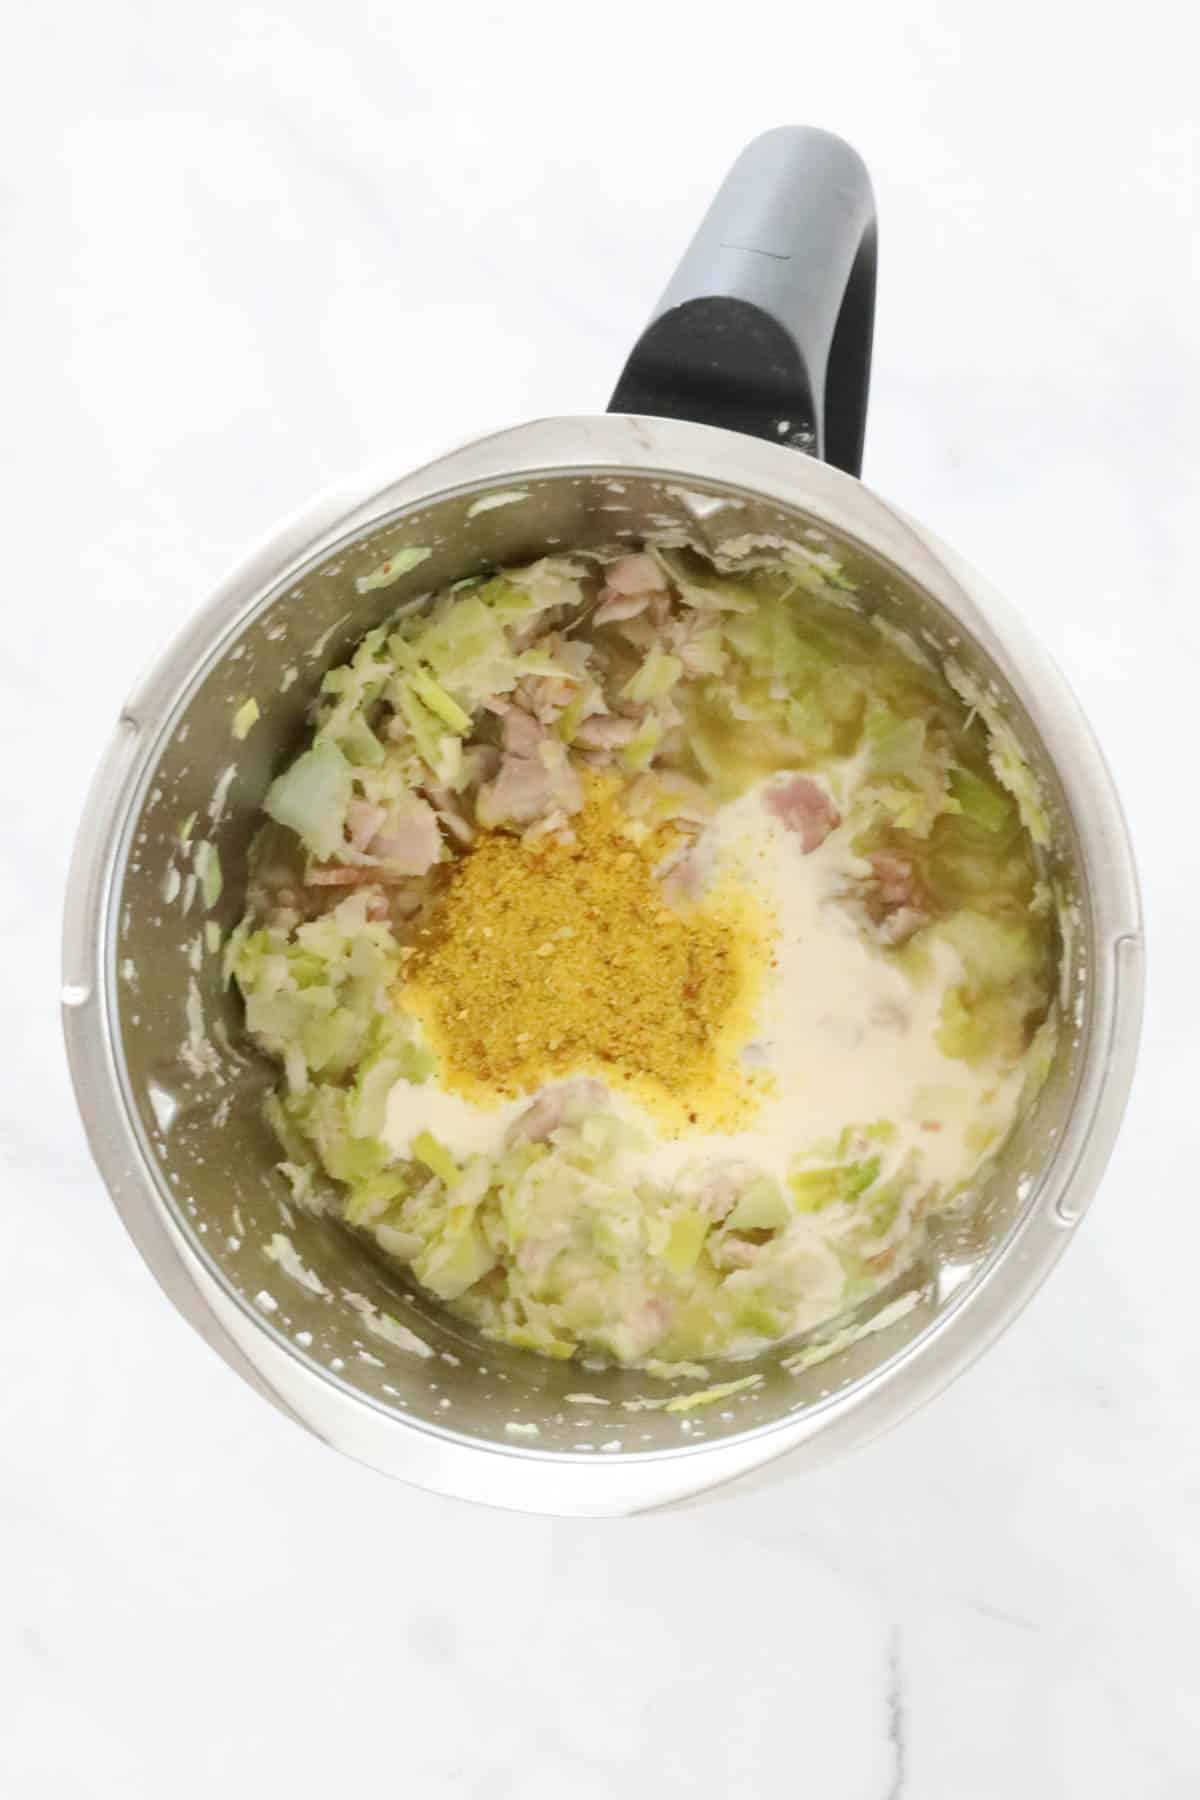
    Add the cooking cream and chicken stock powder (if using) and cook for 20 minutes.

    TIP: For safety reasons, ensure that the MC removed but the splatter guard or rice basket on top of the lid.

    Leek, bacon, cream and stock in a Thermomix.

    Step 2 - Assemble The Pies

    Divide the mixture between oven-safe ramekins.

    Creamy pie filling in a ramekin.

    Add a circle of puff pastry over the top and press down to seal against the edges.

    Cut slits into the pastry to allow the steam to escape.

    Brush the beaten egg over the top of the pastry and then sprinkle with sesame seeds (if using).

    Pastry brushed with egg and sprinkled with sesame seeds.

    Bake in the oven until the filling is piping hot and the pastry is golden and flaky.

    TIP: If the pastry is over-browning, simply place a sheet of foil loosely over the top and continue cooking.

    An overhead shot of a pie in a ramekin.

    Expert Tips

    It's SO simple to make our creamy Thermomix Chicken & Leek Pies!

    • you can make mini pies or one large pie if you prefer - if making one large pie, you'll need to increase the cooking time slightly (cook until the filling is piping hot in the centre and the pastry is flaky and golden.
    • you can use chicken breasts in place of chicken thighs if you prefer.
    • for safety reasons, when sauteing and then cooking the filling, ensure that the MC is removed but the splatter guard or rice basket on top of the lid (this allows steam to escape but stops any splatters).
    • cut slits into the pastry to allow the steam to escape when cooking.
    • Make the filling ahead of time and store in an airtight container in the fridge for 1-2 days or freeze for up to 1 month.
    • Store leftover pies in the fridge for 1 day before reheating thoroughly.
    A fork in a chicken and bacon pie.

    FAQs

    Why do I have to remove the MC during the cooking time in this recipe?

    Once the Thermomix has heated to a certain temperature, steam begins to build up. For safety reasons, it's important to remove the MC when cooking at high temperatures and instead place the splatter guard (TM6) or the rice basked on top of the lid instead. This allows the steam to escape while stopping splatters.

    Can I make one large pie instead of smaller pies?

    Of course! Simply increase the cooking time slightly (the filling needs to be piping hot in the centre while the pastry should be flaky and golden.

    Help! My pastry is over-browning but my filling isn't ready!

    No problem! Simply place a sheet of foil loosely over the top of the pies and continue cooking.

    Chicken and bacon puff pastry pie.

    Related Recipes

    Fill up those hungry tummies with these simple family meals!

    • A risotto with baby spinach and avocado.
      Thermomix Chicken and Mushroom Risotto
    • Two rissoles sitting on a green speckled plate with salad on the side.
      Thermomix Rissoles
    • A bowl of Chinese chicken soup.
      Thermomix Chicken, Noodle & Corn Soup
    • A bowl of risotto with pumpkin, chicken, bacon and spinach.
      Thermomix Chicken, Pumpkin, Bacon & Baby Spinach Risotto

    SHOP OUR RANGE OF THERMOMIX COOKBOOKS

    Browse our collection of hardcopy Thermomix cookbooks here.

    There's everything from family dinners to kids snacks, desserts to cookies, slices to Christmas recipes, cocktails to chocolate recipes and more!

    Complete set o 16 ThermoBliss recipe books.
    A chicken and leek pie with sesame seeds on top.
    Print Recipe
    4.80 from 15 votes

    Thermomix Chicken & Leek Pies

    Our Thermomix Chicken & Leek Pies are the perfect family dinner! Serve with mashed potato and steamed vegetables for an easy midweek meal. 
    Prep Time10 minutes mins
    Cook Time55 minutes mins
    Total Time1 hour hr 5 minutes mins
    Course: Dinner, family meals, main meal
    Cuisine: chicken, pies, thermomix
    Servings: 5 pies
    Calories: 705kcal
    Author: Lucy & Lauren
    Cost: $10

    Equipment

    • Thermomix

    Ingredients

    • 2 leeks roughly chopped
    • 2 teaspoon minced garlic
    • 150 grams streaky bacon roughly chopped
    • 30 grams butter
    • 500 grams chicken thigh fillets cut into 2cm cubes
    • 160 grams cooking cream (see notes)
    • 2 teaspoon chicken stock powder
    • 2 sheets defrosted puff pastry
    • 1 egg lightly beaten

    Instructions

    • Place the leeks, garlic and bacon into the Thermomix bowl. Chop for 4 seconds, Speed 5.
    • Add the butter and saute for 5 minutes, Varoma, Reverse, Speed 1 (with MC off but the splatter guard or rice basket on top of the lid).
    • Add the chopped chicken and cook for a further 5 minutes, Varoma, Reverse, Speed 1 (with MC off but the splatter guard or rice basket on top of the lid).
    • Add the cooking cream and chicken stock and cook for 20 minutes, 100 degrees, Reverse, Speed Soft (with MC off but the splatter guard or rice basket on top of the lid).
    • Divide the mixture equally between 5 ramekins (or 1 large casserole dish). 
    • Cut out circles from the pastry (just larger than your ramekins) and place over the top. Press to secure the pastry to the edge of the ramekins.
      Cut slits in the top of the pastry with a knife (to allow the steam to escape).
      Brush with the egg and sprinkle with sesame seeds (optional).
    • Bake in an oven preheated to 200 degrees celsius (fan-forced) for 25 minutes or until golden. 

    Notes

    RECIPE NOTES & TIPS
    • you can use chicken breasts in place of chicken thighs if you prefer.
    • If the mixture is too runny for your liking when it's finished cooking in the Thermomix, dissolve 2 tbs cornflour in a little water and mix through on Speed 2, Reverse before diving between the ramekins. 
    • for safety reasons, when sauteing and then cooking the filling, ensure that the MC is removed but the splatter guard or rice basket on top of the lid (this allows steam to escape but stops any splatters).
    • cut slits into the pastry to allow the steam to escape when cooking.
    • If your pastry is over-browning, simply place a sheet of foil loosely over the top of the pies and continue cooking.
    • Make the filling ahead of time and store in an airtight container in the fridge for 1-2 days or freeze for up to 1 month.
    • Store leftover pies in the fridge for 1 day before reheating thoroughly.
    • If you make 1 large pie (rather than individual ones), you'll need to increase the cooking time in the oven to approximately 35 minutes. 

    Nutrition

    Calories: 705kcal | Carbohydrates: 40g | Protein: 29g | Fat: 47g | Saturated Fat: 19g | Polyunsaturated Fat: 6g | Monounsaturated Fat: 18g | Trans Fat: 0.3g | Cholesterol: 155mg | Sodium: 809mg | Potassium: 466mg | Fiber: 2g | Sugar: 2g | Vitamin A: 1132IU | Vitamin C: 5mg | Calcium: 66mg | Iron: 3mg

    Thermomix Potato & Leek Soup

    July 30, 2018

    A simple and family-friendly Thermomix Potato & Leek Soup recipe that everyone will love! Made from basic ingredients and ready to eat in just 45 minutes.

    A bowl of potato and leek soup topped with crispy bacon.

    If you're after a hearty and delicious Thermomix Potato & Leek Soup recipe, then you've come to the right place! This one is  so simple to make and it's always a hit (even with the fussiest of little eaters).

    Just like our Creamy Cauliflower Soup, Chunky Minestrone Soup, Thai Pumpkin Soup and our Chicken Noodle Soup, this soup recipe is the perfect cure for the winter blues.

    A creamy soup in a bowl topped with bacon.

    Why You're Going To Love This Recipe

    What's not to love about a hearty and nutritious winter warming Thermomix Potato & Leek Soup!

    • Healthy - Packed full of healthy vegetables, this soup is the perfect medicine for your winter sniffles.
    • Budget-Friendly - Made from just a handful of basic ingredients, this soup costs just a few dollars to make (and makes a BIG batch!).
    • Vegetarian Option - Omit the crispy bacon on top for a vegetarian-friendly option.
    • Freezer-Friendly - Pop any leftovers into the freezer for up to 3 months. The perfect midweek dinner or lazy weekend lunch.

    What You Need

    Just 7 basic ingredients is all you need to make our Thermomix Potato & Leek Soup!

    Note: Please scroll to the recipe card at the bottom of the post for ingredient quantities and the full method.

    The ingredients for potato and leek soup.
    • leeks - cut off the green part of the leeks and use the white section
    • onion - choose a brown or yellow onion
    • butter - unsalted or salted butter is fine to use in this recipe
    • garlic - mince your own cloves of fresh garlic or use pre-minced garlic in a jar
    • potatoes - for best results choose a variety of potato that is suitable for cooking and mashing (ie. brushed potatoes). Peel and chop into large chunks.
    • chicken stock liquid - use store-bought liquid chicken stock or make your own by mixing 1 teaspoon of powder stock through every 1 cup of water. Alternatively, you can use your own homemade chicken stock paste.
    • cream - choose a cream that is suitable for heating (like a cooking cream or a thickened cream).

    Step By Step Instructions

    Note: Please scroll to the recipe card at the bottom of the post for ingredient quantities and the full method.

    Step 1 - Chop The Onion & Leeks

    Mix the leeks and halved onion until finely chopped. Scrape down the sides of the bowl occasionally.

    Onion and leek in a Thermomix bowl.

    Step 2 - Saute

    Add the butter and garlic and saute until soft.

    Butter and garlic on top of diced leek and onion.

    Step 3 - Add The Potatoes

    Add the potatoes and cook for a further 5 minutes.

    Potatoes peeled and chopped in a stainless jug.

    Step 4 - Cook

    Add the liquid chicken stock and season with salt and pepper.

    IMPORTANT NOTE: Do NOT exceed the MAX line at any stage. Use less liquid stock if you are nearing the MAX line.

    Cook for 20 minutes. Remove the MC before cooking, but place the rice basket over the whole to catch any splatters.

    Allow the soup to cool slightly before pureeing (do not attempt to puree while the soup is very hot as this can be very dangerous).

    Add the cream and mix through gently.

    Serve with crispy bacon (optional).

    A smooth yellow soup.

    Expert Tips & FAQ

    What happens if I've reached the MAX line and still have extra stock to add?

    It's important that you never exceed the MAX line. If you're nearing the line, simply omit the excess liquid stock you have.

    Pureeing the soup

    Remove the lid and allow the soup to cool for a few minutes before replacing the lid and pureeing. Start off on Speed 1 before very slowly increasing to Speed 6. If the machine starts to shudder or shake, go back down to Speed 1 and increase ever so slightly.

    Storing

    Store this soup in an airtight container in the fridge for up to 3 days.

    Freezing

    Freeze in an airtight container for up to 3 months.

    A round bowl filled with potato and leek soup with bacon on top.

    More Thermomix Soup Recipes

    The Thermomix is simply the BEST when it comes to making delicious and healthy soups.

    Here's a few more of our favourite Thermomix soup recipes:

    • Thermomix Tomato Soup - a budget-friendly soup that's ready in no time at all. Delicious served with homemade sourdough or scrolls.
    • Classic Thermomix Pumpkin Soup - this old fashioned soup is an all-time favourite amongst our readers.
    • Chicken & Corn Soup - just like your favourite Chinese takeaway soup! Plus it only takes 20 minutes to prepare and cook!
    A spoon in a bowl of bacon topped soup.

    Thermomix Dinners Cookbooks

    If you hadn't already guessed, we LOVE simple family dinners that you can cook in your Thermomix!

    Click here to browse our range of printed Thermomix dinner cookbooks (that also come with free eBook versions).

    A collection of three 'A Month of Dinners' recipe books
    Print Recipe
    4.91 from 72 votes

    Thermomix Potato & Leek Soup

    A simple and family-friendly Thermomix Potato & Leek Soup recipe that everyone will love!
    Prep Time10 minutes mins
    Cook Time35 minutes mins
    Total Time45 minutes mins
    Course: Main
    Cuisine: soup
    Servings: 6 serves
    Calories: 330kcal
    Author: Lucy & Lauren

    Equipment

    • Thermomix

    Ingredients

    • 2 leeks white section only, roughly chopped
    • 1 onion halved
    • 40 g butter
    • 3 teaspoon minced garlic or 3 fresh garlic cloves minced
    • 700 g brushed potatoes peeled and diced
    • 800 g liquid chicken stock see notes
    • salt and pepper to season
    • 200 g cream cooking cream or thickened cream
    • crispy bacon for serving, optional

    Instructions

    • Place the leeks and onion into the Thermomix bowl and chop for 5 seconds, Speed 6. Scrape down the sides of the bowl. 
    • Add the butter and minced garlic and cook for 5 minutes, 100 degrees, Speed 1. 
    • Add the potatoes and cook for 5 minutes, 100 degrees, Speed 1.
    • Add the chicken stock liquid (see notes), salt and pepper and cook for 20 minutes, 100 degrees, Speed 2 (with the MC removed but the rice bowl sitting on top to stop any splashes). 
    • Remove the lid and allow the soup to cool for a few minutes. Replace the lid and very slowly increase to Speed 6 to puree the soup for approximately 30 seconds (see notes).
    • Add the cooking cream and heat for a further 3 minutes, 100 degrees, Speed 2. 

    Notes

    RECIPE NOTES & TIPS
    Ingredients Info:
    • leeks - cut off the green part of the leeks and use the white section
    • onion - choose a brown or yellow onion
    • butter - unsalted or salted butter is fine to use in this recipe
    • garlic - mince your own cloves of fresh garlic or use pre-minced garlic in a jar
    • potatoes - for best results choose a variety of potato that is suitable for cooking and mashing (ie. brushed potatoes). Peel and chop into large chunks.
    • chicken stock liquid - use store-bought liquid chicken stock or make your own by mixing 1 teaspoon of powder stock through every 1 cup of water. Alternatively, you can use your own homemade chicken stock paste.
    • cream - choose a cream that is suitable for heating (like a cooking cream or a thickened cream).
     
    More Recipe Notes:
    Do NOT exceed the MAX line - It's important that you never exceed the MAX line. If you're nearing the line, simply omit the excess liquid stock you have.
    Very carefully puree the soup - Remove the lid and allow the soup to cool for a few minutes before replacing the lid and pureeing. Start off on Speed 1 before very slowly increasing to Speed 6. If the machine starts to shudder or shake, go back down to Speed 1 and increase ever so slightly.
    Storing - Store this soup in an airtight container in the fridge for up to 3 days.
    Freezing - Freeze in an airtight container for up to 3 months.

    Nutrition

    Calories: 330kcal | Carbohydrates: 33g | Protein: 7g | Fat: 20g | Saturated Fat: 12g | Polyunsaturated Fat: 1g | Monounsaturated Fat: 6g | Trans Fat: 1g | Cholesterol: 64mg | Sodium: 265mg | Potassium: 748mg | Fiber: 3g | Sugar: 5g | Vitamin A: 1158IU | Vitamin C: 29mg | Calcium: 68mg | Iron: 2mg

    Thermomix Chocolate Slice

    July 25, 2018

    Chocolate slice with sprinkles on top.

    Our classic no-bake Thermomix Chocolate Slice is made with sweetened condensed milk, crushed biscuits and sprinkles!

    Chocolate slice with sprinkles on top.

    It's no secret that we LOVE making slices in our Thermomixes... especially easy no-bake slices!

    Just like our Snickers Slice, Coconut Ice and Malteser Slice, this classic Chocolate Slice is always popular with the kids (little and big!).

    Let's get started....

    Why You're Going To Love This Recipe

    What's not to love about a simple Thermomix chocolate slice!?

    • No-Bake - there's no need to turn the oven on with this easy no bake slice. Simply melt, mix and chill!
    • Basic Ingredients - our slice is made using pantry and fridge staples, making it a budget friendly option.
    • Perfect For Lunch Boxes - the kids absolutely LOVE our chocolate slice recipe. Pop a piece into school lunchboxes for the yummiest treat.
    • Freezer-Friendly - freeze for up to 3 months. Frozen pieces can be placed straight into lunchboxes and they'll be defrosted by recess!
    Sprinkles chocolate slice cut into pieces.

    What You Need

    There's no need to make an extra trip to the supermarket - our Thermomix chocolate slice is made from pantry staples!

    Please scroll to the recipe card at the bottom of the post for ingredient quantities and the full detailed method.

    The ingredients for chocolate slice.
    • Biscuits - choose plain, sweet biscuits such as Arnotts Marie
    • Sweetened Condensed Milk - use full fat (not skim) sweetened condensed milk as it sets firmer
    • Butter - salted or unsalted butter is fine to use
    • Cocoa Powder - use regular unsweetened cocoa powder
    • Coconut - use shredded or desiccated coconut
    • Milk Chocolate - for melting over the top
    • Coconut oil - or vegetable oil. This helps to stop the chocolate from cracking when cut.
    • Sprinkles or 100s and 1000s - to decorate.

    Step By Step Instructions

    It couldn't be easier to make our Thermomix Chocolate Slice!

    Please scroll to the recipe card at the bottom of the post for ingredient quantities and the full detailed method.

    Step 1 - Crush The Biscuits

    Place the biscuits into the Thermomix bowl.

    Crush the biscuits and set aside in a seperate bowl.

    NOTE: It's fine for there to be a few small chunks remaining.

    Crushed biscuits in a Thermomix.

    Step 2 - Melt

    Melt the butter, sweetened condensed milk and cocoa powder until smooth.

    Chocolate mixture in a Thermomix.

    Step 3 - Mix

    Add the reserved crushed biscuits and coconut and mix to combine.

    TIP: Use the spatula through the MC hole to help mix.

    Chocolate mixture in a Thermomix.

    Step 4 - Press Into Tin

    Spoon the mixture into a prepared slice tin and press down firmly with the back of a spoon.

    Set aside.

    Chocolate slice mixture pressed into a tin.

    Step 5 - Make The Chocolate Layer

    Melt the chocolate in a clean and dry Thermomix bowl.

    Pour over the top of the slice and decorate with sprinkles or coconut.

    Place into the fridge to set.

    Chocolate slice with sprinkles in a tin.

    Expert Tips

    • For the best results, use full fat sweetened condensed milk (not skim)
    • You can use melted white, milk or dark chocolate on top
    • Add 100s and 1000s or coconut to the top of the melted chocolate layer
    • Scrape down the sides of the Thermomix bowl occasionally while mixing.
    • Use the spatula through the MC hole to help mix.
    • Adding coconut oil or vegetable oil to the melted chocolate helps to stop it from cracking once cut.
    • Store in an airtight container in the fridge for up to 1 week.
    • Freeze in an airtight container for up to 3 months.
    A cake plate topped with pieces of chocolate slice.

    FAQs

    Can I make this recipe without a Thermomix?

    Yes you can! Simply crush the biscuits in a food processor (or with a rolling pin) and melt the mixture in the microwave or on the stovetop.

    Can I use coconut on top instead?

    Yes! If you'd rather sprinkle coconut over the melted chocolate layer instead of 100s and 1000s, that's a great option too!

    Can I freeze this slice?

    Yes you can! For up to 3 months in an airtight container.

    Pieces of chocolate slice.

    Related Recipes

    Looking for more Thermomix no-bake slices?

    Here's a few of our most popular recipes!

    • A close up of a piece of peppermint slice.
      Thermomix Peppermint Slice
    • An overhead shot of a Cadbury Caramello slice.
      Thermomix Caramello Slice
    • Two pieces Mars Bar Slice sitting on top of each other.
      Thermomix Mars Bar Slice
    • three pieces of Licorice Assort Slice stacked. Licorice all sort pieces next to it.
      Thermomix Licorice Allsort Slice

    OUR RANGE OF THERMOMIX COOKBOOKS

    Browse our collection of hardcopy Thermomix cookbooks here.

    There's everything from family dinners to kids snacks, desserts to cookies, slices to Christmas recipes, cocktails to chocolate recipes and more!

    ThermoBliss complete set
    Chocolate slice with sprinkles on top.
    Print Recipe
    5 from 9 votes

    Thermomix Chocolate Slice

    You are going to love this no bake Thermomix Chocolate Slice made with crushed biscuits and sweetened condensed milk!
    Prep Time10 minutes mins
    Chilling Time4 hours hrs
    Total Time4 hours hrs 10 minutes mins
    Course: Slices
    Cuisine: Australian
    Servings: 24 serves
    Calories: 248kcal
    Author: Lucy & Lauren
    Cost: $5

    Equipment

    • 18x 28cm Slice Tray
    • Thermomix

    Ingredients

    • 400 g Marie Biscuits or similar plain sweet biscuits
    • 395 g sweetened condensed milk
    • 250 g butter
    • 25 g cocoa powder
    • 30 g shredded coconut
    • 250 g milk chocolate
    • 15 g coconut oil or vegetable oil, optional
    • sprinkles to decorate, optional

    Instructions

    • Line an 18cm X 28cm slice tin with baking paper, making sure you leave plenty hanging over the edges to help you remove the slice once it’s set.
    • Place the plain biscuits into your Thermomix bowl and crush for 10 seconds, Speed 6. Scrape down the sides of your bowl and mix for a further 5 seconds, Speed 6, or until the biscuits are finely crushed.
      Set aside until needed.
      TIP: use your spatula to push the biscuits down into the bowl while its mixing.
    • Pour the sweetened condensed milk into your Thermomix bowl and add the butter (chopped into 3cm pieces) and cocoa powder.
      Cook for 3 minutes, 60 degrees, Speed 2, or until the butter has completely melted.
    • Add the biscuits and shredded coconut to your Thermomix bowl and mix for 10 seconds, Speed 4, or until the mixture has combined.
      TIP: Use the spatula to help mix.
    • Pour the mixture into your prepared slice tin and flatten the surface with the back of a metal spoon.
    • Clean and dry your Thermomix bowl. Add the chocolate pieces and grate for 6 seconds, Speed 6. Scrape down the sides of the bowl.
      Add the coconut oil (or vegetable oil) and cook for 3 minutes, 50 degrees, Speed 3, or until the chocolate has completely melted.
    • Pour the melted chocolate over the top of your slice and decorate with sprinkles (optional).
      Place the slice in the fridge for 4 hours or until set.

    Notes

    RECIPE NOTES & TIPS
    • For the best results, use full fat sweetened condensed milk (not skim)
    • You can use melted white, milk or dark chocolate on top
    • Add 100s and 1000s or coconut to the top of the melted chocolate layer
    • Scrape down the sides of the Thermomix bowl occasionally while mixing.
    • Use the spatula through the MC hole to help mix.
    • Adding coconut oil or vegetable oil to the melted chocolate helps to stop it from cracking once cut.
    • Store in an airtight container in the fridge for up to 1 week.
    • Freeze in an airtight container for up to 3 months.

    Nutrition

    Calories: 248kcal | Carbohydrates: 28g | Protein: 3g | Fat: 15g | Saturated Fat: 9g | Polyunsaturated Fat: 1g | Monounsaturated Fat: 4g | Trans Fat: 0.3g | Cholesterol: 28mg | Sodium: 178mg | Potassium: 129mg | Fiber: 1g | Sugar: 18g | Vitamin A: 304IU | Vitamin C: 0.4mg | Calcium: 64mg | Iron: 1mg

    Thermomix Thai Pumpkin Soup

    July 23, 2018

    Thermomix Thai Pumpkin Soup

    A simple and delicious Thermomix Thai Pumpkin Soup that is absolutely packed with flavour. Ready to eat in just over 30 minutes!

    Serve it with homemade bread or scrolls for a tasty lunch or dinner.

    A bowl of pumpkin soup with naan bread in the background.

    Say hello to the easiest Thermomix Thai Pumpkin Soup you will ever make!
    Made with just 4 ingredients... and ready to eat in 35 minutes.

    Full of flavour and completely delicious.

    This delicious soup has a yummy Thai-style twist on our classic Thermomix Pumpkin Soup and Dairy-Free Pumpkin Soup recipes.

    Why You're Going To Love This Recipe

    There is SO much to love about our Thermomix Thai Pumpkin Soup!

    • 4 Ingredients - forget long and complicated recipes with a huge list of ingredients... our Thai Pumpkin Soup requires just 4 ingredients!
    • Quick & Easy - ready to eat in 35 minutes! This no-fuss soup is cooked and pureed all in the Thermomix.
    • Freezer-Friendly - pop any leftovers in the freezer for easy lunches or dinners.
    • Dairy-Free - we use coconut cream in this recipe which gives a luscious, creamy flavour (minus the dairy!).
    A bowl of pumpkin soup made with Thai red curry paste.

    What You Need

    Just 4 ingredients!

    Note: Please scroll to the recipe card at the bottom of the post for ingredient quantities and the full method.

    The ingredients for Thai Pumpkin Soup.
    • Pumpkin - I recommend using butternut pumpkin. However, you can use any variety you like, including Kent, Jap etc. Remove the skin and seeds and cut the pumpkin into 3cm pieces.
    • Red Curry Paste - you can use any brand you like (I generally use Ayam). You will find curry paste in the Asian section of your supermarket.
    • Water - do NOT exceed the MAX line in the Themomix (this is especially important in the TM31 model where the bowl is smaller).
    • Coconut Cream - or coconut milk. You can use regular coconut cream or light. Again, this can be bought from the Asian section of the supermarket.

    Step By Step Instructions

    It couldn't be easier to make this flavour-packed Thermomix soup!

    Note: Please scroll to the recipe card at the bottom of the post for ingredient quantities and the full method.

    Step 1 - Cook The Soup

    Place all of the ingredients into the Thermomix bowl.

    IMPORTANT NOTE: Do NOT exceed the MAX line at any stage. Use less water if you are nearing the MAX line.

    Cook for 25 minutes.

    Remove the MC before cooking, but place the rice basket or splatter guard over the hole to catch any splatters.

    Pumpkin, red curry paste, coconut cream and stock in a Thermomix bowl.

    Step 2 - Allow To Cool Slightly

    It's important to allow the soup to cool slightly before pureeing.

    NOTE: Do not attempt to puree while the soup is very hot as this can be dangerous.

    Pumpkin soup in a Thermomix.

    Step 3 - Puree

    Start off on Speed 1 before very slowly increasing to Speed 6. If the machine starts to shudder or shake, go back down to Speed 1 and increase ever so slightly.

    Smooth pureed thai pumpkin soup in a Thermomix bowl.

    Expert Tips

    • Do NOT exceed the MAX line - It's important that you never exceed the MAX line. If you're nearing the line, simply omit some of the water. This is especially important in the TM31 model - as the bowl is smaller.
    • Pureeing the soup safely - Allow the soup to cool for a few minutes. With the lid in place, VERY slowly increase the Speed to Speed 6. If the machine starts to shake, decrease the Speed and increase even more slowly.
    • Store in an airtight container in the fridge for up to 3 days.
    • Freeze in an airtight container for up to 3 months.

    FAQ

    What is the splatter guard?

    The splatter guard is an accessory that comes with the newer Thermomix models. It fits over the top of the Thermomix lid (when the MC is removed) to catch any splatters - perfect when cooking soup! If you don't have a splatter guard, you can place the rice basket over the MC hole instead.

    Can I use coconut milk instead of coconut cream?

    Yes you can. However, coconut cream will give you the richest flavour.

    How do I know if the pumpkin has cooked enough?

    After the cooking time, insert a fork into a piece of the pumpkin. It should be soft and easily break apart. If it's still firm, cook for a further 5 minutes and test again.

    A simple and delicious Thermomix Thai Pumpkin Soup... perfect served on it's own (and even better with hot crusty bread!). 

    Related Recipes

    If you love making soups in your Thermomix, make sure you try these popular recipes!

    • Creamy pumpkin and sweet potato soup in a black bowl.
      Thermomix Sweet Potato & Pumpkin Soup
    • A spoon in a bowl of vegetable soup.
      Thermomix Vegetable Soup
    • A chicken soup with vegetables and noodles in a bowl.
      Thermomix Chicken Noodle Soup
    • A blue tea towel around a bowl of white soup with bacon.
      Thermomix Cauliflower Soup

    THERMOMIX DINNERS COOKBOOKS

    If you hadn't already guessed, we LOVE simple family dinners that you can cook in your Thermomix!

    Click here to browse our range of printed Thermomix dinner cookbooks (that also come with free eBook versions).

    A collection of three 'A Month of Dinners' recipe books
    Thermomix Thai Pumpkin Soup
    Print Recipe
    4.91 from 11 votes

    Thermomix Thai Pumpkin Soup

    A simple and delicious Thermomix Thai Pumpkin Soup... perfect served on it's own (and even better with hot crusty bread!). 
    Prep Time10 minutes mins
    Cook Time25 minutes mins
    Total Time35 minutes mins
    Course: Soup
    Cuisine: healthy recipes
    Diet: Vegetarian
    Diet: healthy soup
    Servings: 4 serves
    Calories: 166kcal
    Author: Lucy & Lauren
    Cost: $5

    Equipment

    • Thermomix

    Ingredients

    • 1 kg butternut pumpkin cut into 3cm chunks
    • 2 tbs red curry paste
    • 270 g coconut cream
    • 500 g water

    Instructions

    • Place all ingredients into the Thermomix bowl (do not go past the max fill line - see notes). 
    • Cook for 25 minutes, 100 degrees, Speed 2 (or until the pumpkin is soft). Allow to cool slightly. 
    • To puree the soup, very slowly increase the speed to Speed 6. If the machine starts to shake, decrease the speed and slowly increase again. 

    Notes

    RECIPE NOTES & TIPS
    When adding the water do not fill past the maximum line. If you can't fit the 500g of water into the bowl without going past the line, leave some water out. It is dangerous to fill past the maximum line. 
    Allow the soup to cool slightly before mixing to a smooth consistency. Very slowly increase the speed of mixing and if the machine starts to shake, turn the speed back down and continue to increase even more slowly. 
    Store in an airtight container in the fridge for up to 3 days.
    Freeze in an airtight container for up to 3 months.

    Nutrition

    Calories: 166kcal | Carbohydrates: 34g | Protein: 3g | Fat: 1g | Saturated Fat: 0.3g | Polyunsaturated Fat: 0.2g | Monounsaturated Fat: 0.2g | Sodium: 16mg | Potassium: 880mg | Fiber: 5g | Sugar: 11g | Vitamin A: 27756IU | Vitamin C: 53mg | Calcium: 134mg | Iron: 2mg

    Thermomix Sweet Potato & Pumpkin Soup

    July 16, 2018

    Creamy pumpkin and sweet potato soup in a black bowl.

    A healthy, creamy and nourishing Thermomix Sweet Potato & Pumpkin Soup recipe that takes just 10 minutes to prepare. Have dinner on the table in 45 minutes - perfect served with homemade bread or savoury scrolls.

    Creamy pumpkin and sweet potato soup in a black bowl.

    When the weather cools down, it's the perfect time to put your Thermie to work and make batch after batch of healthy veggie-packed soups!

    From this Thermomix Sweet Potato & Pumpkin Soup to our Thermomix Vegetable Soup, Thermomix Chicken Soup and Thermomix Chicken & Corn Soup, there's no better time to get soup making!

    Add a side of savoury muffins, a loaf of sourdough or homemade bread rolls to soak up all the delicious leftovers in the bowl.

    Why You're Going To Love This Thermomix Soup

    This is such a popular and simple soup... even the kids love it!

    • Vegetarian - this meat-free soup is perfect for vegetarians (or meat-free Mondays!).
    • Budget-Friendly - use pumpkin and sweet potato when they're in season for a cheap and tasty veggie-packed meal.
    • Freezer-Friendly - this soup reheats beautifully, so pop any leftovers into the freezer for a quick and easy lunch or dinner.
    • Suitable For All Thermomix Models - this recipe can be made in any model of the Thermomix.
    • Set & Forget - Just 15 minutes prep time... and then let the Thermomix do all the hard work for you!
    A bowl of creamy yellow soup.

    What You Need

    Just a few basic ingredients is all it takes to make this Thermomix Sweet Potato & Pumpkin Soup!

    Please scroll to the recipe card at the bottom of the post for the ingredient quantities and the full detailed method.

    The ingredients for sweet potato and pumpkin soup.
    • Onion - choose a medium-sized brown onion.
    • Olive Oil - for sauteing the onion.
    • Garlic - use store-bought minced garlic or mince a fresh garlic clove.
    • Pumpkin - you can use any variety of pumpkin you like. I generally choose butternut, but Jap, Kent etc are all perfectly fine too.
    • Sweet Potato - also known as Kumara. This gives the soup a sweet and creamy flavour.
    • Potatoes - choose a potato that is suitable for mashing as it will cook until soft and easily puree in the soup.
    • Chicken Stock Liquid - you can use store-bought chicken stock liquid or make your own by mixing 2 tablespoons of homemade chicken stock with 500g water.
    • Cream - choose a cream that is suitable for cooking (like Bulla cooking cream) as it wont curdle when heated.
    • Salt and Pepper - to season.

    Step By Step Thermomix Instructions

    15 minutes active prep time is all it takes to make this tasty and healthy soup.

    Please scroll to the recipe card at the bottom of the post for the ingredient quantities and the full detailed method.

    Step 1 - Chop & Saute

    Place the halved onion into the Thermomix bowl and mix to grate.

    Onion in a Thermomix bowl.

    Add the olive oil and garlic and saute until soft and fragrant.

    Sauteed onion in a Thermomix bowl.

    Step 2 - Cook The Soup

    Add the vegetables and stock and stock and cook for 30 minutes.

    TIP: Ensure the MC is removed and the splatter guard (or simmering basket) is in place to stop splatters.

    Chopped vegetables in a stainless jug.

    Step 3 - Puree

    Allow the soup to cool slightly, and then with the splatter guard or simmering basket in place, puree the soup by very slowly increasing the speed.

    TIP: If the machine starts to shake, turn down the speed and increase it even more slowly.

    Pureed yellow soup in a stainless jug.

    Step 4 - Add The Cream

    Pour the cream onto the pureed soup and season with salt and pepper.

    Cream being poured into soup.

    Cook until heated through.

    A creamy pumpkin and sweet potato soup in a jug.

    FAQ

    All your Thermomix Sweet Potato & Pumpkin Soup questions answered!

    Can I use only sweet potato or pumpkin on it's own?

    Absolutely! Just ensure that the total weight of the vegetables used is equal to that in the recipe below.

    Can I make this without a Thermomix?

    Yes you can. Simply cook in a pot on the stovetop instead.

    Is this recipe suitable for use in all Thermomix models?

    Yes! You can make this soup in a TM31, TM5 or TM6.

    What is a splatter guard?

    A splatter guard is an extra lid that fits over the Thermomix lid (when the MC is removed). It prevents splatters when soup is cooking or blending. If you have an older model Thermomix, you can place the simmering basket (rice basket) over the top of the MC hole instead.

    A spoon in a bowl of soup.

    Expert Tips

    • Do NOT exceed the MAX line - at no stage should you exceed the MAX line in the Thermomix machine. This is particularly important with the TM31 as the bowl is smaller than the TM5 and TM6. If you are close to the MAX line, use less chicken stock liquid.
    • If you have homemade chicken stock, you can use 2 tablespoons mixed with 500g water in place of the chicken stock liquid.
    • When pureeing the soup, allow it to cool for a few minutes. Ensure the MC is removed and the splatter guard or rice basket is in place. Very slowly increase the speed. If the machine starts to shake, turn it down and increase the speed even more slowly.
    • Store in an airtight container in the fridge for up to 3 days.
    • Reheat frozen soup in a pot on the stovetop or in the microwave.
    • Reheat defrosted soup in the microwave, on the stovetop or in the Thermomix.
    • Allow the soup to cool completely in the fridge and then freeze for up to 3 months.
    Parsley on top of a bowl of soup.

    Thermomix Dinners Cookbooks

    If you hadn't already guessed, we LOVE simple family dinners that you can cook in your Thermomix!

    Click here to browse our range of printed Thermomix dinner cookbooks (that also come with free eBook versions).

    A collection of three 'A Month of Dinners' recipe books
    Creamy pumpkin and sweet potato soup in a black bowl.
    Print Recipe
    4.88 from 8 votes

    Thermomix Sweet Potato & Pumpkin Soup

    A healthy, creamy and nourishing Thermomix Sweet Potato & Pumpkin Soup recipe that takes just 10 minutes to prepare. Have dinner on the table in 45 minutes - perfect served with homemade bread or savoury scrolls.
    Prep Time10 minutes mins
    Cook Time35 minutes mins
    Total Time45 minutes mins
    Course: Dinner
    Cuisine: soup
    Diet: healthy soup
    Servings: 6 serves
    Calories: 213kcal
    Author: Lucy & Lauren
    Cost: $10

    Equipment

    • 1 Thermomix

    Ingredients

    • 1 brown onion halved
    • 15 g olive oil
    • 2 teaspoon minced garlic or 2 garlic cloves, minced
    • 600 g pumpkin chopped into 3cm cubes
    • 200 g sweet potato (approx 1 small), chopped into 3cm cubes
    • 200 g potatoes (approx 1 large or 2 small), chopped into 3cm cubes
    • 500 g chicken stock liquid see notes
    • 125 g cooking cream
    • salt and pepper to taste

    Instructions

    • Place the halved onion into the Thermomix bowl. Chop for 5 seconds, Speed 5. Scrape down the sides of the bowl. 
    • Add the olive oil and minced garlic and saute for 3 minutes, Varoma, Speed 1. 
    • Add the chopped pumpkin, sweet potato, potato and chicken stock liquid. Remove the MC (measuring cup) and place the splatter guard or simmering basket on top to avoid any splatters.
      Cook for 30 minutes, 100 degrees, Speed 1.
    • Allow to cool slightly (see notes). Very slowly turn the speed up to Speed 4 then continue to slowly increase to Speed 9 for 1 minute or until smooth. 
      Ensure the splatter guard or simmering basket is in place while blending.
    • Add the cream, season with salt and pepper and heat for 3 minutes, Speed 1, 80 degrees. 

    Notes

    RECIPE NOTES & TIPS
    • Do NOT exceed the MAX line - at no stage should you exceed the MAX line in the Thermomix machine. This is particularly important with the TM31 as the bowl is smaller than the TM5 and TM6. If you are close to the MAX line, use less chicken stock liquid.
    • If you have homemade chicken stock, you can use 2 tablespoons mixed with 500g water in place of the chicken stock liquid.
    • When pureeing the soup, allow it to cool for a few minutes. Ensure the MC is removed and the splatter guard or rice basket is in place. Very slowly increase the speed. If the machine starts to shake, turn it down and increase the speed even more slowly.
    • Store in an airtight container in the fridge for up to 3 days.
    • Reheat frozen soup in a pot on the stovetop or in the microwave.
    • Reheat defrosted soup in the microwave, on the stovetop or in the Thermomix.
    • Allow the soup to cool completely in the fridge and then freeze for up to 3 months.

    Nutrition

    Calories: 213kcal | Carbohydrates: 25g | Protein: 5g | Fat: 11g | Saturated Fat: 5g | Polyunsaturated Fat: 1g | Monounsaturated Fat: 4g | Cholesterol: 26mg | Sodium: 147mg | Potassium: 733mg | Fiber: 3g | Sugar: 7g | Vitamin A: 13552IU | Vitamin C: 19mg | Calcium: 59mg | Iron: 2mg

    Thermomix Mince Recipes

    July 11, 2018

    A collage of recipes made in the Thermomix using minced meat.

    Browse our collection of budget-friendly Thermomix mince recipes... including delicious recipes using chicken, beef and pork mince!

    From chicken parma balls to Japanese gyoza, Mexican beef bowls to classic pasta bake and more!

    A collage of recipes made in the Thermomix using minced meat.

    Mince meat is such a versatile and easy ingredient to cook with!

    It's a cheaper type of meat, making it perfect for creating simple, budget-friendly, family meals.

    Whether you're preparing kid-friendly snacks like homemade nuggets or sausage rolls, or preparing tasty dinners like our chicken parma balls and beef pasta bake, mince is always the answer!!!

    Table Of Contents

    • Thermomix Chicken Mince Recipes
      • Thermomix Chicken Meatballs
      • Thermomix Chicken Nuggets
      • Thermomix Chicken & Zucchini Nuggets
      • Thermomix Chicken Parma Balls
    • Thermomix Pork Mince Recipes
      • Thermomix Gyoza
    • Thermomix Beef Mince Recipes
      • Thermomix Beef Pies
      • Thermomix Beef & Veggie Pasta Bake
      • Thermomix Mexican Beef Bowls
      • Thermomix Beef Rissoles
      • Thermomix Sausage Rolls

    Thermomix Chicken Mince Recipes

    Thermomix Chicken Meatballs

    Our Asian inspired meatballs are so simple to prepare! Serve them in rolls, on top of rice or in lettuce cups (for a low carb option).

    Pop any leftover meatballs into school lunchboxes for a tasty lunch!

    Thermomix Chicken Meatballs

    Easy & family-friendly, Thermomix Chicken Meatballs made from chicken mince, sweet chilli sauce and soy sauce. These are great for kids and toddlers!
    Thermomix Chicken Meatballs Recipe
    Asian style chicken meatballs with kewpie mayo.

    Thermomix Chicken Nuggets

    Do your kids love chicken nuggets? Make them these yummy oven baked nuggets for a healthier alternative (with no additives or preservatives!).

    Thermomix Chicken Nuggets

    Our homemade Thermomix chicken nuggets are oven baked to perfection! A favourite with the little (and big!) kids.
    Thermomix Chicken Nuggets Recipe
    A half eaten panko crumbed chicken nugget

    Thermomix Chicken & Zucchini Nuggets

    Perfect for fussy toddlers or hungry kids... these nuggets are absolutely delicious! Serve them on their own as a snack or add a side of steamed vegetables for a veggie-packed dinner.

    Thermomix Chicken and Zucchini Nuggets

    Our healthy Thermomix chicken and zucchini nuggets are perfect for fussy toddlers or kids! You'll never but frozen nuggets again!
    Thermomix Chicken and Zucchini Nuggets Recipe
    A small bowl of relish next to a pile of golden crunchy nuggets made with chicken and zucchini.

    Thermomix Chicken Parma Balls

    One of our most popular dinner recipes ever! These have all the elements of a pub-style chicken parma but in a simple oven bake using chicken mince.

    Thermomix Chicken Parma Balls.

    These delicious Thermomix Chicken Parma Balls make the perfect quick and easy dinner!
    Thermomix Chicken Parma Balls. Recipe
    Overhead view of a large spoon scooping up a Chicken Parma Ball.

    Thermomix Pork Mince Recipes

    Thermomix Gyoza

    Our easy Japanese gyoza makes the perfect lunch or light dinner. Prepare the mixture in the Thermomix and then panfry for a crispy base and a steamed top. The BEST!

    Thermomix Gyoza (Pan Fried)

    Delicious pan-fried Thermomix gzoya made with a delicious Asian-inspired pork, cabbage, garlic, ginger and soy filling.
    Thermomix Gyoza (Pan Fried) Recipe
    Homemade gyozas on a plate.

    Thermomix Beef Mince Recipes

    Thermomix Beef Pies

    Whether you have a pie maker or an oven, you can bake these tasty beef pies! Prepare the filling in the Thermomix and then bake until crispy and crunchy on the outside and meaty-good on the inside!

    Thermomix Beef Pies

    Classic Aussie Thermomix Beef Pies made from beef mince and cooked in a pie maker (or oven). A simple freezer-friendly snack perfect for lunch or dinner!
    Thermomix Beef Pies Recipe
    An overhead shot of a beef pie.

    Thermomix Beef & Veggie Pasta Bake

    A classic pasta bake that's always a winner with the kids! Packed full of vegetables and beef mince and topped with lots of melted cheese.

    Thermomix Beef and Vegetable Pasta Bake

    Our Thermomix Beef and Vegetable Pasta Bake is easy to prepare, feeds a crowd and can also be frozen!
    Thermomix Beef and Vegetable Pasta Bake Recipe
    Cooked Pasta bake with a couple of scoops removed, a gold spoon is sticking out to the side.

    Thermomix Mexican Beef Bowls

    One of my personal favourite dinners! These are just like tacos... but in a healthy, tasty bowl! This low carb version is simply delicious and perfect for Friday night fake-away.

    Thermomix Mexican Beef Bowls

    Our Thermomix Mexican Beef Bowls are packed full of flavour! Simply add your favourite salad ingredients, rice, grated cheese, a dollop of sour cream and corn chips!
    Thermomix Mexican Beef Bowls Recipe
    A Mexican beef salad bowl.

    Thermomix Beef Rissoles

    This is such a simple and kid-friendly recipe. Budget-friendly and so versatile! Serve them with salad or vegetables for an easy midweek meal.

    Thermomix Rissoles

    These Thermomix Rissoles are made with beef and vegetables and are one of our families favourite recipes!
    Thermomix Rissoles Recipe
    Two rissoles sitting on a green speckled plate with salad on the side.

    Thermomix Sausage Rolls

    Who doesn't love a batch of homemade sausage rolls!? This classic recipe is made with a combination of beef mince and sausage mince. Perfect for lazy weekend lunches or to enjoy while watching the footy!

    Thermomix Sausage Rolls Recipe

    Our homemade Thermomix Sausage Rolls recipe is just like the classic Sausage Rolls that you grew up with. Best of all, they can be ready to enjoy within an hour, it doesn't get much better than that!
    Thermomix Sausage Rolls Recipe Recipe
    sideview of stack of homemade sausage rolls

    Shop Our Range Of Thermomix Cookbooks

    Browse our collection of hardcopy Thermomix cookbooks here.

    There's everything from family dinners to kids snacks, desserts to cookies, slices to Christmas recipes, cocktails to chocolate recipes and more!

    ThermoBliss complete set

    Thermomix Condensed Milk Cookies

    July 9, 2018

    three condensed milk biscuits stacked together with more biscuits in the background.

    Our super easy Thermomix Condensed Milk Cookies are the perfect biscuit jar filler! These biscuits are made from just 4 basic ingredients, they are freezer friendly, super versatile and best of all, you will be able to make around 100 biscuits using this recipe!

    Three condensed milk biscuits on a bench.

    If you've got a can of sweetened condensed milk sitting in your cupboard, then we've got the perfect recipe for you! Our Thermomix Condensed Milk Cookies are simply delicious and so easy to make. But best of all, you can add any flavourings or add-ins you like!

    Why you will love this recipe:

    • 4 ingredients - you will need just FOUR simple ingredients to make these Thermomix Condensed Milk Biscuits.
    • Versatile - although you can enjoy these biscuits as they are, why not add your favourite 'add in' to the dough? Some of our favourites are sprinkles, chocolate chips or Milo.
    • Freezer friendly - both the dough and the cooked biscuits can be frozen for up to two months.
    • Bulk baking - you will get approximately 100 cookies from this recipe.
    Thermomix Condensed Milk Cookies

    Ingredients:

    Please note you will find the full ingredient list and recipe method in the recipe card below.

    To make our cookies, you'll need:

    • butter
    • caster sugar
    • self-raising flour
    • sweetened condensed milk
    Ingredients needed to make Condensed Milk Cookies.

    How to Make Condensed Milk Cookies in a Thermomix:

    1. Combine the butter and sugar until pale and creamy.
    2. Add the sweetened condensed milk.
    3. Add the self-raising flour and mix until dough is formed.
    4. Add any extra ingredients - if using.
    5. Roll into balls and bake.
    Collage of steps to make Condensed Milk Cookies in a Thermomix.

    Cookie Add In Ideas:

    • Sprinkles
    • Smarties
    • Mini Marshmallows
    • Peanut Butter
    • Coconut
    • Sultanas
    • Milo
    • Chocolate Chips
    Thermomix Condensed Milk Cookies

    Expert Tips

    • Ensure the butter is softened to assist combining with the caster sugar.
    • To make multiple flavoured biscuits from the one dough, split your dough and place into bowls.
    • We use a teaspoon to scoop up the dough. You can make larger biscuits however the baking time will vary and you will get less cookies.
    • This recipe will make approximately 100 cookies.
    • You can halve the ingredients to make less cookies.
    • The uncooked dough and baked biscuits can be frozen for up to two months.
    Close up of three condensed milk biscuits with chocolate chips.

    You may also enjoy these recipes:

    • Thermomix Fairy Biscuits
    • Thermomix Ginger Biscuits
    • Milo Biscuits
    • Thermomix Sugar Cookies
    • Thermomix Chocolate Chip Cookies
    • ANZAC Biscuits
    • Thermomix Coconut Biscuits
    • Cornflake Biscuits
    • Thermomix Monte Carlo Biscuits
     
    three condensed milk biscuits stacked together with more biscuits in the background.
    Print Recipe
    4.91 from 62 votes

    Thermomix Condensed Milk Cookies

    Our super easy Thermomix Condensed Milk Cookies are the perfect biscuit jar filler! They are made from just 4 basic ingredients and you will get around 100 biscuits from a batch!
    Prep Time10 minutes mins
    Cook Time12 minutes mins
    Total Time20 minutes mins
    Course: Biscuits, Biscuits and Cookies, cookies
    Cuisine: Australian
    Servings: 100 cookies
    Calories: 82kcal
    Author: Lucy & Lauren

    Equipment

    • Thermomix
    • 3 x Baking Trays

    Ingredients

    • 500 grams butter softened
    • 170 grams caster sugar
    • 395 grams sweetened condensed milk
    • 750 grams self-raising flour
    • any flavourings or add-ins you like (see notes)

    Instructions

    • Preheat oven to 180 degrees celsius (fan-forced). Grease and line 3 baking trays and set aside (or as many trays as will fit in your oven).
    • Place the butter and caster sugar into the Thermomix bowl. Mix for 1 minute, Speed 5 (scrape down the sides after 30 seconds).
    • Add the condensed milk and mix for 30 seconds, Speed 5.
    • Add 250g of the self-raising flour and mix for 20 seconds, Speed 6. Scrape down the sides of the bowl. Add another 250g of the self-raising flour and mix for a further 20 seconds. Add the final 250g and mix for 20 seconds, Speed 6 (please note that you'll need to use the spatula to assist with the mixing).
    • Divide the cookie dough between bowls and flavour however you'd like (see notes).
    • Roll into teaspoon-sized balls and place onto the prepared baking trays. Press down lightly with a fork.
    • Bake for 10-12 minutes. Allow to cool for 10 minutes on the baking trays before transferring to a wire rack to cool completely. Store in an airtight container at room temperature for up to a week.  

    Notes

    • You can add any flavourings you like to the cookie dough (sprinkles, sultanas, Milo, nuts, peanut butter, Smarties etc). 
    • Ensure the butter is softened to assist combining with the caster sugar.
    • To make multiple flavoured biscuits from the one dough, split your dough and place into bowls.
    • We use a teaspoon to scoop up the dough. You can make larger biscuits however the baking time will vary and you will get less cookies.
    • This recipe will make approximately 100 cookies.
    • You can halve the ingredients to make less cookies.
    • The uncooked dough and baked biscuits can be frozen for up to two months.

    Nutrition

    Calories: 82kcal | Carbohydrates: 9g | Protein: 1g | Fat: 5g | Saturated Fat: 3g | Polyunsaturated Fat: 0.2g | Monounsaturated Fat: 1g | Trans Fat: 0.2g | Cholesterol: 12mg | Sodium: 37mg | Potassium: 23mg | Fiber: 0.2g | Sugar: 4g | Vitamin A: 136IU | Vitamin C: 0.1mg | Calcium: 14mg | Iron: 0.1mg

    Looking for even more?

    For more great snack recipe ideas, check out our range of books and eBooks.You can shop the full range of print and eBooks here.

    ThermoBliss complete set

    Thermomix Apple and Cinnamon Muffins

    July 4, 2018

    Overhead view of Apple and Cinnamon Muffins sitting on a flowered serving tray. In the background there are green apples and a checkered tea towel.

    This simple Thermomix Apple and Cinnamon Muffin recipe will quickly become your new favourite snack! These Muffins can be ready to enjoy in under 30 minutes, they are freezer friendly and great for the kids lunchboxes.

    Apple and Cinnamon Muffins sitting on a flowered serving tray. In the background there are green apples and a checkered tea towel.

    Both of our families love to enjoy homemade muffins as a snack and these Thermomix Apple and Cinnamon Muffins are one of their favourites.  These muffins are similar to our Thermomix Apple and Cinnamon Loaf recipe but they last a whole lot longer than the loaf thanks to being individually portioned!!

    Why you will love this recipe:

    • Easy to adapt - You can use any type of apple when making these muffins AND you don't have to peel the apples either. I also like to make them using leftover apple pieces that come home in my kids lunchboxes.
    • Lunchbox friendly - These muffins make a great snack and store well in lunchboxes.
    • Quick to prepare - This recipe can be ready in under 30 minutes.
    • Freezer friendly - Store these Apple and Cinnamon Muffins in the freezer for up to two months.
    Overhead view of Apple and Cinnamon Muffins sitting on a flowered serving tray. In the background there are green apples and a checkered tea towel.

    Ingredients

    Please note you will find the full list of ingredients and method in the recipe card below.

    • Apples - use any type of apples for this recipe. You can also leave the skin on if you prefer.
    • Self-raising flour - if needed, substitute with plain flour with 2 teaspoons of baking powder added.
    • Caster Sugar
    • Cinnamon
    • Butter - unsalted butter was used in this recipe
    • Milk
    • Eggs - 70gram Eggs are used in all of our recipes.
    • Vanilla Extract - Vanilla essence can also be used.
    • Baking Powder
    Ingredients needed to make APple and Cinnamon Muffins.

    How to Make Apple and Cinnamon Muffins

    1. Melt the butter.
    2. Add the apple pieces and blitz until desired consistency is achieved.
    Melted butter in a Thermomix bowl.
    Grated apples mixture in a thermomix bowl.

    3. Add the milk, vanilla extract and eggs and mix to combine.

    4. Add the self-raising flour, baking powder, caster sugar and cinnamon and mix to combine.

    Grated apples combined with butter, milk and eggs in a Thermomix bowl.
    Apple and cinnamon muffin batter in a Thermomix bowl.

    5. Divide the mixture between paper cases sitting in muffin trays.

    6. Bake until golden.

    Baked APple and Cinnamon Muffins in a rose gold muffin tray.

    Hints and Tips

    • You can use ANY variety of apples when making this recipe and while I prefer to leave the apple peel on, you can certainly peel your apple first if you prefer. 
    • If your kids are like mine and like to eat just half an apple (and then leave it lying around the house, but let's not talk about that!) this recipe is a perfect way to use those half eaten apples, or even pieces of sliced apple that are leftover from snacks or their lunch boxes.
    • Store the cooked muffins in an airtight container and enjoy within four days.
    • To freeze, place in a freezer safe container and store for up to two months.
    • This recipe will make approximately 18 standard sized muffins. You can make larger bakery style or smaller mini muffins, please note the cooking time will vary.
    What apples are best for making muffins?

    Granny Smith are most commonly used in baking as they hold their shape well during cooking. For this recipe you can use any type of apple.

    How many apples equal 1 cup?

    1 large apple (80grams) chopped will equal approximately 1 cup.

    Apple and Cinnamon Muffins sitting on a flowered serving tray. In the background there are green apples and a checkered tea towel.

    You may also enjoy these recipes:

    • Thermomix Apple and Blueberry Scrolls
    • Thermomix Choc Banana Muffins
    • Thermomix Blueberry Muffins
    • Thermomix Lemon Curd Cupcakes
    • Thermomix Strawberry and Banana Loaf
    • Thermomix Carrot, Apple & Zucchini Loaf
    • Carrot Cake
    • Thermomix Vanilla Cupcakes
    Overhead view of Apple and Cinnamon Muffins sitting on a flowered serving tray. In the background there are green apples and a checkered tea towel.
    Print Recipe
    4.91 from 21 votes

    Thermomix Apple and Cinnamon Muffins

    Our Thermomix Apple and Cinnamon Muffin recipes takes less than 30 minutes to prepare and bake, are perfect for lunchboxes and freezer friendly too.
    Prep Time5 minutes mins
    Cook Time20 minutes mins
    Total Time25 minutes mins
    Course: Snacks
    Cuisine: Australian
    Servings: 18 Muffins
    Calories: 135kcal
    Author: Lucy & Lauren

    Equipment

    • 2 x 12 hole muffin trays
    • 18 x Cupcake cases

    Ingredients

    • 150 grams Apple 2 Large apples with the core removed and cut into quarters
    • 2 eggs 70 grams
    • 260 grams milk
    • 80 grams butter
    • 300 grams self-raising flour
    • 1 teaspoon baking powder
    • 1 ½ teaspoon cinnamon
    • 100 grams caster sugar
    • 1 teaspoon vanilla extract

    Instructions

    • Preheat your oven to 180 degrees celsius (fan-forced). Place 18 paper muffin liners into a 2 x 12 hole muffin trays and set aside until needed..
    • Place the butter into your Thermomix bowl and cook for 2 minutes, 60 degrees, speed 2 to melt.
    • Add the cored and quartered apples to your Thermomix bowl and use the 1 second turbo function to chop into small pieces. You will only need to do this 2 - 3 times.
    • Add the eggs, milk and vanilla extract and mix for 15 seconds, speed 4.
    • Add the self-raising flour, baking powder, cinnamon, and caster sugar to your Thermomix bowl and mix for 10 seconds on speed 4 - REVERSE.
    • Scrape down the sides of the bowl and mix for a further 5 seconds on speed 4 - REVERSE.
    • Spoon the mixture into the prepared cases (filling ⅔ of the way to the top) and place into the oven to bake for 18 - 20 minutes or until cooked when tested with a skewer.
    • Allow to cool in the tray for 5 minutes before transferring onto a wire rack to cool completely.

    Notes

    • You can use ANY variety of apples when making this recipe and while I prefer to leave the apple peel on, you can certainly peel your apple first if you prefer. 
    • If your kids are like mine and like to eat just half an apple (and then leave it lying around the house, but let's not talk about that!) this recipe is a perfect way to use those half eaten apples, or even pieces of sliced apple that are leftover from snacks or their lunch boxes.
    • Store the cooked muffins in an airtight container and enjoy within four days.
    • To freeze, place in a freezer safe container and store for up to two months.
    • This recipe will make approximately 18 standard sized muffins. You can make larger bakery style or smaller mini muffins, please note the cooking time will vary.

    Nutrition

    Calories: 135kcal | Carbohydrates: 20g | Protein: 3g | Fat: 5g | Saturated Fat: 3g | Polyunsaturated Fat: 0.4g | Monounsaturated Fat: 1g | Trans Fat: 0.1g | Cholesterol: 29mg | Sodium: 65mg | Potassium: 56mg | Fiber: 1g | Sugar: 7g | Vitamin A: 166IU | Vitamin C: 0.4mg | Calcium: 39mg | Iron: 0.3mg

    Looking for even more?


    You can shop our complete range of  Thermomix print and eBooks here.

    ThermoBliss complete set

    The BEST Thermomix Bliss Ball Recipes

    July 2, 2018

    A collage of bliss balls made in the Thermomix

    Browse our collection of the very best Thermomix Bliss Ball recipes... healthy, nutritious and great energy boosting snacks!

    From peanut butter to double chocolate brownie, apricot to muesli bliss balls and more!

    A collage of bliss balls made in the Thermomix

    Nothing beats a batch of healthy bliss balls for a quick, easy and nutritious snack! Whether you're refueling after the gym, filling up the kids hungry tummies after school, or packing lunch boxes... bliss balls are always a great option.

    We hope you enjoy our simple bliss ball recipes!

    Thermomix Weet-Bix Balls

    If you have a box of Weet-Bix sitting in the pantry... or even just the big pile of crumbs at the bottom... then this is the recipe for you. An all-time favourite with the kids!

    Thermomix Weet-Bix Balls

    Our Thermomix Weet-Bix Balls are nut-free, freezer-friendly and a great option for school or kindy lunch boxes!
    Thermomix Weet-Bix Balls Recipe
    A bowl of chia, currant and weet-bix balls.

    Thermomix Apricot Balls

    One of our most popular recipes! These are naturally sweetened by the apricots, with the delicious crunch from the chia seeds.

    Thermomix Apricot Balls

    Our Thermomix Healthy Apricot Balls are the perfect lunchbox snack - made from apricots, coconut, rolled oats, chia seeds, coconut oil and rice malt syrup... ready in just 5 minutes!
    Thermomix Apricot Balls Recipe
    Apricot chia balls.

    Thermomix Chocolate Bliss Balls

    Nutty, chocolatey and SO yum! Make a double batch and freeze for easy 'grab and go' snacks.

    Thermomix Healthy Chocolate Bliss Balls

    These Thermomix Healthy Chocolate Bliss Balls are a great snack for the entire family.
    Thermomix Healthy Chocolate Bliss Balls Recipe
    Nutty chocolate balls on a plate.

    Thermomix Double Choc Brownie Bliss Balls

    One of our oldest and most popular recipes ever! These yummy little balls taste just like a chocolate brownie... but healthy!

    Thermomix Double Chocolate Brownie Bliss Balls

    Our most popular bliss ball recipe! Inspired by the flavours of a chocolate brownie... but in a healthy little bliss ball!
    Thermomix Double Chocolate Brownie Bliss Balls Recipe
    Round bliss balls on a cake stand.

    Tips For Making Bliss Balls In Your Thermomix

    All your bliss ball making questions answered!

    • medjool dates are best - as they are larger and softer. You can, however, use dried pitted dates but they are dried and may need to be soaked in liquid before using. Alternatively if using dried pitted dates, you could add a small amount of honey or rice malt syrup when mixing.
    • ensure the pips have been removed from the dates - this is super important! If the dates haven't been pitted, you can almost guarantee that they'll wreck your poor Thermomix blades (and taste awful!).
    • you can use any model of the Thermomix - these recipes are suitable for use in all models.
    • double or triple the recipes - these recipes can all be doubled or tripled. Note that you may need to mix for longer when increasing the quantities.
    • store - in an airtight container in the fridge for up to 1 week.
    • freeze - in an airtight container for up to 3 months.


    Our Range Of Thermomix Cookbooks

    Shop our range of Thermomix cookbooks here!

    We have everything from family dinners to cocktails, lunch box recipes to slices, Christmas recipes to cookies and SO much more!!

    ThermoBliss complete set

    Shop the cookbook here

    Thermomix Chicken Meatballs

    June 25, 2018

    Asian style chicken meatballs with kewpie mayo.

    Easy & family-friendly, our Thermomix Chicken Meatballs are made from chicken mince, sweet chilli sauce and soy sauce. Great for kids and toddlers!

    A fork with an Asian meatball on it.

    With hungry kids in the house, I'm always on the lookout for simple and tasty (kid-approved) dinners that are made using basic, everyday ingredients.

    And these Thermomix Chicken Meatballs are exactly that... quick, easy and very delicious!

    You can serve them on their own, with a bowl of rice and steamed vegetables, or even with pasta or mashed potato!

    Why You're Going To Love This Recipe

    What's not to love about a quick and easy dinner that will be on the table in under 30 minutes!

    • Favourite With The Kids - the subtle flavours of chicken mince, soy sauce and sweet chilli make these simple chicken meatballs a hit with even the fussiest of eaters.
    • Versatile - Serve the Thermomix chicken meatballs on their own, in lettuce wraps, in a rice bowl with steamed veggies, with an Asian-style salad, with noodles, pasta or mashed potato... the choice is yours!
    • Toddler Finger Food - when my son was a toddler, he LOVED eating these meatballs. They make a really tasty and easy option for little eaters.
    • Freezer-Friendly - Freeze any meatballs (uncooked or cooked) for up to 1 month.
    A bowl of Asian style chicken meatballs.

    What You Need

    This yummy Asian-style Thermomix Chicken Meatballs are made using basic pantry ingredients.

    Please scroll to the recipe card at the bottom of the post for ingredient quantities and the full detailed method.

    The ingredients for Thermomix Chicken Meatballs
    • Chicken Mince - use store-bought chicken mince or mince your own chicken meat in the Thermomix
    • Breadcrumbs - regular breadcrumbs or panko crumbs can be used
    • Ginger & Garlic - use fresh or jarred minced garlic and ginger
    • Soy Sauce - light or low sodium soy sauce is best
    • Sweet Chilli Sauce - this is used both in the chicken meatballs mixture and for brushing over the cooked meatballs
    • Lime Juice - fresh or bottled lime juice can be used
    • Sesame Seeds - for sprinkling over the top

    Step By Step Instructions

    Lets make Thermomix Chicken Meatballs!

    Please scroll to the recipe card at the bottom of the post for ingredient quantities and the full detailed method.

    Step 1 - Mix The Ingredients

    Place all of the meatball ingredients into the Thermomix bowl.

    Chicken mince, garlic, soy and sweet chilli in a Thermomix.

    Mix until combined.

    Chicken mince in a Thermomix.

    Step 2 - Roll Into Balls

    Use damp hands to roll the mixture into tablespoon-sized balls.

    Place into a lightly greased mini muffin tin (or onto a regular flat baking tray).

    Raw chicken meatballs.

    Step 3 - Bake

    Bake the meatballs for 15 minutes.

    Remove from the oven.

    Cooked chicken meatballs.

    Brush with extra sweet chilli sauce and sprinkle with sesame seeds.

    Place back into the oven for 2 minutes or until the meatballs are piping hot and cooked through in the centre.

    Cooked meatballs with sesame seeds.

    Serve immediately.

    Sesame seed topped chicken meatballs.

    Expert Tips

    • I like to prepare the mixture in the Thermomix and then bake them in the oven in mini-muffin tins. The muffin tins help the meatballs to cook evenly and keep their shape perfectly (but if you don't have a mini muffin tray, you can use a regular flat baking tray).
    • You can use store-bought chicken mince or mince chicken breasts/thighs in the Thermomix.
    • Use damp hands when rolling the meatballs (this will help the mixture to stop sticking to your hands)
    • Brush a little extra sweet chilli sauce over the top of the cooked meatballs to help the sesame seeds stick and also to give the meatballs an extra delicious flavour.
    • Serve the Thermomix chicken meatballs on their own, in lettuce wraps, in a rice bowl with steamed veggies, with an Asian-style salad, with noodles, pasta or mashed potato... the choice is yours!
    • Freeze cooked or uncooked meatballs for up to 1 month.
    • Store leftovers in the fridge and consume within 24 hours.
    Kewpie and sesame seeds on top of meatballs.

    FAQs

    Can I use other types of minced meat?

    Yes absolutely! I also like to mix things up and occasionally use pork mince instead. Beef, lamb or turkey mince would also work!

    Can I double this recipe?

    Yes, however, you will need to mix the ingredients for slightly longer and use the spatula through the MC hole to help mix.

    A fork with an Asian meatball on it.

    Related Recipes

    Minced meat is such a versatile ingredient!

    Here's a few more of our favourite Thermomix meals using minced meat:

    • Overhead view of a large spoon scooping up a Chicken Parma Ball.
      Thermomix Chicken Parma Balls
    • A half eaten panko crumbed chicken nugget
      Thermomix Chicken Nuggets
    • Homemade gyozas on a plate.
      Thermomix Gyoza (Pan-Fried)
    • Two rissoles sitting on a green speckled plate with salad on the side.
      Thermomix Rissoles

    SHOP OUR RANGE OF THERMOMIX COOKBOOKS

    Browse our collection of hardcopy Thermomix cookbooks here.

    There's everything from family dinners to kids snacks, desserts to cookies, slices to Christmas recipes, cocktails to chocolate recipes and more!

    Complete set o 16 ThermoBliss recipe books.

    Asian style chicken meatballs with kewpie mayo.
    Print Recipe
    5 from 5 votes

    Thermomix Chicken Meatballs

    Easy & family-friendly, Thermomix Chicken Meatballs made from chicken mince, sweet chilli sauce and soy sauce. These are great for kids and toddlers!
    Prep Time10 minutes mins
    Cook Time17 minutes mins
    Total Time27 minutes mins
    Course: Main Course, Snacks
    Cuisine: asian
    Servings: 20 balls
    Calories: 47kcal
    Author: Lucy & Lauren
    Cost: $5

    Equipment

    • Thermomix
    • Oven

    Ingredients

    • 500 grams chicken mince
    • 30 grams breadcrumbs
    • 1 teaspoon minced ginger
    • 1 tsp minced garlic
    • 30 g light soy sauce
    • 45 g sweet chilli sauce plus extra for brushing
    • 15 g lime juice
    • sesame seeds to sprinkle

    Instructions

    • Preheat oven to 200 degrees celsius (fan-forced). 
    • Lightly spray a non-stick mini-muffin tray with cooking spray and set aside (see notes).  
    • Place all ingredients (except for the sesame seeds) into the Thermomix bowl.  Mix for 10 seconds, Speed 5.
      Scrape down the sides of the bowl and repeat for a further 5-10 seconds, or until well combined. 
    • Roll into 1 tablespoon-sized balls and place into the prepared mini-muffin tin (see notes). Cook in the oven for 15 minutes. 
    • Brush over the extra sweet chilli sauce and sprinkle with sesame seeds.
      Cook for a further 2 minutes, or until cooked through. 

    Notes

    RECIPE NOTES & TIPS
    • I like to prepare the mixture in the Thermomix and then bake them in the oven in mini-muffin tins. The muffin tins help the meatballs to cook evenly and keep their shape perfectly (but if you don't have a mini muffin tray, you can use a regular flat baking tray).
    • You can use store-bought chicken mince or mince chicken breasts/thighs in the Thermomix.
    • Use damp hands when rolling the meatballs (this will help the mixture to stop sticking to your hands)
    • Brush a little extra sweet chilli sauce over the top of the cooked meatballs to help the sesame seeds stick and also to give the meatballs an extra delicious flavour.
    • Serve the Thermomix chicken meatballs on their own, in lettuce wraps, in a rice bowl with steamed veggies, with an Asian-style salad, with noodles, pasta or mashed potato... the choice is yours!
    • Freeze cooked or uncooked meatballs for up to 1 month.
    • Store leftovers in the fridge and consume within 24 hours.
     

    Nutrition

    Calories: 47kcal | Carbohydrates: 2g | Protein: 5g | Fat: 2g | Saturated Fat: 1g | Polyunsaturated Fat: 0.4g | Monounsaturated Fat: 1g | Trans Fat: 0.02g | Cholesterol: 22mg | Sodium: 144mg | Potassium: 140mg | Fiber: 0.1g | Sugar: 1g | Vitamin A: 0.4IU | Vitamin C: 0.3mg | Calcium: 5mg | Iron: 0.3mg

    Thermomix Vegetarian Sausage Rolls

    June 20, 2018

    A pile of pastries.

    You wont believe that our Thermomix Vegetarian Sausage Rolls are completely meat-free!

    They taste just like a classic sausage roll... minus the meat!

    A pile of pastries.

    Say hello to the most delicious (meat-free!) 'sausage rolls' you'll ever make.

    Made with a combination of finely chopped vegetables, walnuts and rolled oats... you won't believe these sausage rolls are vegetarian!

    Even the fussiest of toddlers will love these yummy vegetarian pastry rolls.

    Serve them as a tasty after school snack, pop them into school lunch boxes or enjoy hot from the oven while watching the footy!

    Why You're Going To Love This Recipe

    What's not to love about 'sausage rolls' that everyone can enjoy!

    • Meat-Free - you won't believe that these sausage rolls contain absolutely NO meat!
    • Versatile - mix and match with your favourite veggies. I particularly like using sweet potato in place of the carrot or zucchini. You can also add corn kernels for a yummy twist.
    • Kid-Friendly: this is a popular recipe with both kids and adults alike! Even the fussiest of toddlers will LOVE our Thermomix Vegetarian Sausage Rolls.
    • Freezer Friendly: uncooked or cooked rolls can be frozen for up to 2 months (in an airtight container with sheets of baking paper between each layer).
    • Suitable for use in all models of the Thermomix - this recipe can be made in any of the Thermomix models.
    A stack of homemade vegetarian pastries.

    What You Need

    Our Thermomix Vegetarian Sausage Rolls are made using pantry and fridge staple ingredients.

    Please scroll to the recipe card at the bottom of the post for ingredient quantities and the full detailed method.

    The ingredients for meat-free sausage rolls.
    • Garlic - you can use fresh garlic cloves or minced garlic in this recipe.
    • Onion - use a brown onion.
    • Carrot & Zucchini - or substitute with sweet potato or your choice of vegetables.
    • Herbs - use dried mixed herbs (or your favourite dried herbs).
    • Walnuts - these give the sausage rolls a nutty texture and flavour.
    • Rolled Oats - use regular old fashioned rolled oats (not quick oats).
    • Eggs - I recommend using large eggs (60g each).
    • Feta Cheese - I use recommend using either a creamy Danish feta or Greek Feta for this recipe.
    • Bread - stale bread is best! However, you can you fresh bread if you don't have any stale to make the bread crumbs, but I do suggest toasting it first.
    • Puff Pastry - make sure your pastry is not completely defrosted (still slightly firm) when rolling. If the pastry is warm and defrosted, the mixture will spill out and the pastry will be very difficult to roll. 

    Step By Step Instructions

    It's so simple to make our Thermomix Vegetarian Sausage Rolls!

    Please scroll to the recipe card at the bottom of the post for ingredient quantities and the full detailed method.

    Step 1 - Chop

    Place the garlic, onion, zucchini and carrot into the Thermomix and grate for 6 seconds, Speed 5.

    Grated vegetables in a Thermomix.

    Step 2 - Mix

    Add the herbs, walnuts and rolled oats and mix to combine.

    Add the eggs, cheese and bread and mix again.

    Bread and vegetables in a Thermomix.
    Creamy mixture in a Thermomix.

    Step 3 - Roll

    Slice the slightly defrosted pastry sheets in half and add ⅛ of the mixture.

    Creamy mixture on top of pastry.

    Roll the pastry to enclose and repeat until all of the mixture has been used.

    Sausage rolls on a baking tray.

    Step 4 - Bake

    Brush the tops of the vegetarian sausage rolls with a lightly beaten egg and bake for 20 - 25 minutes or until the pastry is golden and crunchy.

    Golden baked pastries on a wire rack.

    Expert Tips

    • If you find your mixture is too runny (won't hold together when placed on the pastry), add an extra slice of stale bread and mix again for 10 seconds, Speed 5.
    • Make sure your pastry is not completely defrosted (still slightly firm) when rolling. If the pastry is warm and defrosted, the mixture will spill out and the pastry will be very difficult to roll. 
    • Sweet potato, capsicum or corn kernels can also be used.
    • This recipe will make 32 mini sausage rolls when the rolls of pastry are cut into 4 pieces. You can make your sausage rolls larger or smaller, however please note the cooking time will vary accordingly.
    • Store leftover rolls in an airtight container in the fridge for 3 days.
    • Freeze leftovers in an airtight container for up to 2 months (with sheets of baking paper between each layer).
    • To reheat cooked sausage rolls, place them into a preheated oven at 180 degrees celsius (fan-forced) and cook for 10 - 15 minutes. If you notice that the sausage rolls are browning too much, place a sheet of foil over the top and continue reheating.
    A hand holding a sausage roll.

    FAQs

    Help! My mixture is too runny!

    This can be easily solved by mixing through another piece of stale bread. Runny mixture can be caused by the type of feta cheese used or the amount of liquid in the vegetables used.

    Can I use any model of the Thermomix for this recipe?

    Yes, absolutely! Our Thermomix Vegetarian Sausage Rolls can be made using any model of the Thermomix.

    Can I freeze uncooked rolls?

    Yes you can freeze both the uncooked and the cooked rolls for up to 2 months. Ensure you place sheets of baking paper between each layer of the rolls to stop them from sticking.

    A half eaten vegetarian pastry.

    Related Recipes

    Need some more savoury snacks recipe inspo?

    We've got you covered!

    • Egg and bacon pastries.
      Thermomix Egg & Bacon Quiches
    • Zucchini slice in a round white baking dish.
      Thermomix Zucchini Slice
    • An overhead shot of polenta chips.
      How To Make Thermomix Polenta Chips
    • A stack of spinach and feta gozlemes.
      Thermomix Cheesy Spinach & Feta Gozlemes

    Our Range Of Thermomix Cookbooks

    Browse our collection of hardcopy Thermomix cookbooks here.

    There's everything from family dinners to kids snacks, desserts to cookies, slices to Christmas recipes, cocktails to chocolate recipes and more!

    ThermoBliss complete set
    A pile of pastries.
    Print Recipe
    4.94 from 31 votes

    Thermomix Vegetarian Sausage Rolls

    Our Thermomix Vegetarian Sausage Rolls are simple, delicious and completely meat-free!
    Prep Time15 minutes mins
    Cook Time30 minutes mins
    Total Time45 minutes mins
    Course: Snacks
    Cuisine: Australian
    Diet: vegetarian
    Servings: 32
    Calories: 242kcal
    Author: Lucy & Lauren
    Cost: $10

    Equipment

    • Thermomix
    • 2 Baking Trays
    • Oven

    Ingredients

    • 2 cloves garlic or 2 teaspoon minced garlic
    • 100 grams brown onion cut in half
    • 120 grams carrot cut into 3 cm pieces
    • 150 grams zucchini cut into 3cm pieces
    • 1 tablespoon dried mixed herbs
    • 120 grams walnuts
    • 110 grams rolled oats
    • 3 eggs
    • 200 grams feta cheese
    • 80 grams stale bread approximately 2 slices torn into small pieces.
    • 4 sheets frozen puff pastry partially thawed
    • 1 egg to brush the pastry

    Instructions

    • Preheat your oven to 210 degrees celsius (fan-forced) and lightly grease two baking trays.
    • Place the garlic cloves, onion , carrot and zucchini into your Thermomix bowl and mix for 6 Seconds, Speed 5.
    • Scrape down the sides of your Thermomix bowl and add the dried mixed herbs, walnuts and rolled oats. Mix for 4 seconds, Speed 5 to combine. Scrape down the sides and repeat for a further 4 seconds.
    • Scrape down the sides of your Thermomix bowl and add (in this order) the torn pieces of stale bread, eggs and feta cheese and mix for 20 seconds, Speed 5 to combine. Use your spatula to push the ingredients down into the bowl for the first 10 seconds.
    • Place your partially thawed pastry onto your bench and cut in half lengthways.
      Add filling along the centre of each pastry piece and then carefully roll to enclose.
      Cut each roll into 4 pieces.
      Repeat until you have used all of the mixture/pastry.
    • Place the rolls onto your baking trays and brush with the extra lightly beaten egg.
    • Transfer to your preheated oven and bake for 25 minutes or until the pastry is puffy and golden.

    Notes

    RECIPE NOTES & TIPS
    • If you find your mixture is too runny (won't hold together when placed on the pastry), add an extra slice of stale bread and mix again for 10 seconds, Speed 5.
    • Make sure your pastry is not completely defrosted (still slightly firm) when rolling. If the pastry is warm and defrosted, the mixture will spill out and the pastry will be very difficult to roll. 
    • Sweet potato, capsicum or corn kernels can also be used.
    • This recipe will make 32 mini sausage rolls when the rolls of pastry are cut into 4 pieces. You can make your sausage rolls larger or smaller, however please note the cooking time will vary accordingly.
    • Store leftover rolls in an airtight container in the fridge for 3 days.
    • Freeze leftovers in an airtight container for up to 2 months (with sheets of baking paper between each layer).
    • To reheat cooked sausage rolls, place them into a preheated oven at 180 degrees celsius (fan-forced) and cook for 10 - 15 minutes. If you notice that the sausage rolls are browning too much, place a sheet of foil over the top and continue reheating.

    Nutrition

    Calories: 242kcal | Carbohydrates: 19g | Protein: 5g | Fat: 16g | Saturated Fat: 4g | Polyunsaturated Fat: 4g | Monounsaturated Fat: 8g | Trans Fat: 1g | Cholesterol: 26mg | Sodium: 170mg | Potassium: 94mg | Fiber: 1g | Sugar: 1g | Vitamin A: 698IU | Vitamin C: 1mg | Calcium: 51mg | Iron: 1mg

    Thermomix Chicken, Noodle & Corn Soup

    June 11, 2018

    A bowl of Chinese chicken soup.

    Our classic Thermomix Chicken, Noodle & Corn Soup is a midweek winner! This winter soup is always a hit with the whole family!

    Soy sauce drizzled over chicken, corn and noodle soup.

    Say hello to the most delicious, flavour-packed, Chinese restaurant style soup!

    A creamy corn soup with tender shredded chicken and noodles, drizzled with soy sauce, sweet chilli sauce and egg whites!

    Serve for dinner on a cold winters night with our pull-apart bread, brioche rolls or sourdough.

    Why You're Going To Love This Recipe

    What's not to love about this homemade Chinese restaurant staple!?

    • Fast and Fresh - prepped, cooked and on the table in 30 minutes!
    • Packed With Flavour - the classic combination of chicken, corn and soy is simply delicious (and a hit with the kids!)
    • Classic Chinese Restaurant Favourite - just like your favourite takeout soup... but homemade (and even tastier!)
    • Freezer-Friendly - freeze any leftovers for up to 3 months. Perfect for grab and reheat lunches.
    • Suitable For All Thermomix Models - this recipe can be made in any of the Thermomix models.
    Soy sauce and spring onions on top of corn soup.

    What You Need

    Our classic Thermomix Chicken, Noodle and Corn Soup is packed with delicious ingredients.

    Please scroll to the recipe card at the bottom of the post for ingredient quantities and the full detailed method.

    The ingredients for Thermomix Chicken, Noodle & Corn Soup.
    • Spring Onions - finely chopped.
    • Olive Oil
    • Garlic - use fresh garlic or minced jarred garlic.
    • Chicken Noodle Soup Mix - or substitute with ½ packet of 2 minute noodles.
    • Creamed Corn - use a tin of creamed corn.
    • Corn Kernels - use tinned or frozen corn kernels.
    • Chicken Stock Liquid - use store-bought liquid chicken stock or use homemade paste combined with water.
    • Chicken - use shredded cooked chicken (either steam chicken breasts in the Thermomix or use a cooked BBQ chicken).
    • Sauces - we use soy sauce and sweet chilli sauce in this soup recipe.
    • Cornflour - dissolved in cold water. This helps to thicken the soup.
    • Egg Whites - this adds a classic Chinese restaurant finish to this soup.

    Step By Step Instructions

    Have our Thermomix Chicken, Noodle & Corn Soup on the table in 30 minutes!

    Please scroll to the recipe card at the bottom of the post for ingredient quantities and the full detailed method.

    Step 1 - Chop & Saute The Spring Onions

    Chop the spring onions, add the garlic and olive oil and saute until soft and fragrant.

    Chopped spring onions in a Thermomix.

    Step 2 - Cook The Soup

    Add the chicken noodle soup mix, creamed corn, corn kernels, chicken stock liquid, and shredded chicken and cook the soup for 15 minutes.

    Chicken and stock in a Thermomix.

    Step 3 - Add The Egg Whites & Sauces

    With the blades turning, slowly drizzle the egg whites through the MC hole.

    Slowly pour through the dissolved cornflour, soy sauce and sweet chilli sauce.

    A Thermomix creamy corn soup.

    Taste the soup and add extra sauces if needed.

    A Chicken, Noodle & Corn Soup in a Thermomix.

    Serve immediately with extra soy sauce and chopped spring onions.

    A chicken and corn soup in a bowl.

    Expert Tips

    Our Thermomix Chicken, Noodle & Corn Soup is so simple to make... follow our top tips for the perfect soup every time!

    • you can use either cooked BBQ chicken or steam chicken breasts in the Thermomix (using this recipe).
    • ensure that the MC is removed - and the splatter guard or rice basket is sitting over the MC hole instead. This is for safety reasons as steam builds up when the MC is in place when cooking at high temperatures. Using the splatter guard or rice basket allows the steam to escape while catching any splatters.
    • you can use a packet of chicken noodle soup mix or use ½ packet of 2 minute noodles
    • very slowly drizzle the egg whites through the MC hole while the blades are stirring
    • use the Reverse function once the chicken has been added to stir rather than chop
    • store in an airtight container in the fridge for up to 2 days or freeze for up to 3 months.
    A bowl of Chinese chicken soup.

    FAQs

    Can I use a bought cooked BBQ chicken?

    Yes absolutely! Leftover BBQ chicken or a store-bought cooked chicken is a great timesaving option.

    Can I steam chicken breasts in the Thermomix?

    Yes you can. Follow our simple recipe for steaming and shredding chicken breasts in the Thermomix using the Varoma (you won't believe how easy it is!).

    Can I double this recipe?

    No - this recipe cannot be doubled as it would exceed the MAX line.

    An overhead shot of Chicken, Noodle & Corn Soup.

    Related Recipes

    Warm up this winter with our delicious Thermomix soup recipes!

    Here's just a few more of our favourites:

    • A spoon in a bowl of vegetable soup.
      Thermomix Vegetable Soup
    • Overhead view of Minestrone Soup in a black bowl that has been topped with grated Parmesan cheese. The bowl is sitting on a black and white checkered tea towel.
      Thermomix Minestrone Soup
    • A gold soup in a black bowl filled with soup.
      Thermomix Chicken Soup
    • Creamy pumpkin and sweet potato soup in a black bowl.
      Thermomix Sweet Potato & Pumpkin Soup

    SHOP OUR RANGE OF THERMOMIX COOKBOOKS

    Browse our collection of hardcopy Thermomix cookbooks here.

    There's everything from family dinners to kids snacks, desserts to cookies, slices to Christmas recipes, cocktails to chocolate recipes and more!

    Complete set o 16 ThermoBliss recipe books.
    A bowl of Chinese chicken soup.
    Print Recipe
    5 from 12 votes

    Thermomix Chicken, Noodle & Corn Soup

    Our classic Thermomix Chicken, Noodle & Corn Soup is a midweek winner! This winter soup is sure to be a hit with the whole family!
    Prep Time10 minutes mins
    Cook Time20 minutes mins
    Total Time30 minutes mins
    Course: Dinners
    Cuisine: Australian
    Servings: 4 serves
    Calories: 384kcal
    Author: Lucy & Lauren
    Cost: $5

    Equipment

    • Thermomix

    Ingredients

    • 3 spring onion stems
    • 10 grams olive oil
    • 2 teaspoon minced garlic
    • 50 grams packet chicken noodle soup mix
    • 420 grams can creamed corn
    • 125 grams can corn kernels drained & rinsed
    • 1000 grams chicken stock liquid
    • 2 cups shredded cooked chicken (see notes)
    • 2 teaspoon soy sauce
    • 1 tbs sweet chilli sauce
    • 2 tbs cornflour dissolved in ¼ cup cold water
    • 2 egg whites lightly beaten

    Instructions

    • Place spring onions into the Thermomix bowl. Chop on Speed 5 for 5 seconds. Scrape down the sides and repeat.
    • Add the minced garlic and olive oil and saute for 3 minutes, 100 degrees, Speed Soft (with the MC off and the splatter guard or rice basket over the top of the MC hole).
    • Add the chicken noodle soup mix, creamed corn, corn kernels, chicken stock liquid, and shredded chicken and cook for 15 minutes, 100 degrees, Reverse Speed 1 (with the MC off and the splatter guard or rice basket over the top of the MC hole).
    • Set the timer to 2 minutes and mix on Speed 1. Slowly add the soy sauce, sweet chilli sauce, cornflour (mixed with water) and the lightly beaten egg whites.
    • Divide between the serving bowls. Top with remaining onion and extra soy sauce (optional)

    Notes

    RECIPE NOTES & TIPS
    For the chicken you can either:
    a) buy a cooked BBQ chicken from the supermarket and shred it (this is my favourite option for a quick and easy dinner), or
    b) steam and shred 2 chicken breasts (using this recipe).
    • ensure that the MC is removed - and the splatter guard or rice basket is sitting over the MC hole instead. This is for safety reasons as steam builds up when the MC is in place when cooking at high temperatures. Using the splatter guard or rice basket allows the steam to escape while catching any splatters.
    • you can use a packet of chicken noodle soup mix or use ½ packet of 2 minute noodles
    • very slowly drizzle the egg whites through the MC hole while the blades are stirring
    • use the Reverse function once the chicken has been added to stir rather than chop
    • store in an airtight container in the fridge for up to 2 days or freeze for up to 3 months.
     

    Nutrition

    Calories: 384kcal | Carbohydrates: 44g | Protein: 21g | Fat: 15g | Saturated Fat: 4g | Polyunsaturated Fat: 3g | Monounsaturated Fat: 7g | Trans Fat: 0.1g | Cholesterol: 50mg | Sodium: 1951mg | Potassium: 683mg | Fiber: 3g | Sugar: 12g | Vitamin A: 270IU | Vitamin C: 9mg | Calcium: 47mg | Iron: 2mg

    Upgrading from a TM31 to a TM5 - Is it worth it?

    June 4, 2018

    A picture of a Thermomix

    Are you thinking of upgrading from a TM31 to a TM5? Are you wondering if it will be worth the money? Do you want to know the differences between the two Thermomix machines? I've got you covered with my personal review!

    Upgrading from a TM31 to a TM5 - Is it worth it?

    I owned my TM31 (Thermomix 31) for quite a few years and boy did it serve me well! It was always reliable (I had a couple of minor things fixed over the years - the scales and blades etc), but otherwise, my trusty TM31 didn't skip a beat!

    When the new TM5 came out, I tossed up whether or not to upgrade immediately and decided against it. My TM31 was still working beautifully and I didn't see think that there were any massive differences between the two machines. Fast forward 18 months or so, and I decided to go ahead and upgrade. There still wasn't anything 'wrong' with my TM31 - not at all!! I made the decision based on this website!!! I felt that if I was producing Thermomix recipes, it would be best if I had experience with both machines. Simple as that!!

    Upgrading from a TM31 to a TM5 - Is it worth it?

    Photo credit

    A lot of people suggested that I keep my TM31 as a second machine, but I decided to sell it (locally on a Facebook Buy Swap & Sell Group). There were a few reasons for this:

    • I didn't have the space in my kitchen for 2 Thermomix machines;
    • There's only my husband, myself and our toddler in our house, so I really don't need two machines;
    • I was able to use the money that I sold my TM31 for to fund around half of the cost of the new TM5

    So that's my first tip! If you're really keen to upgrade, have a think about whether you could sell your old machine and use the money to put towards your new one (I sold mine for $1000).

    The differences between the TM31 and the TM5

    Here's a list of the main differences between the TM31 and the TM5 (there are lots more - but these are the ones I've found to be the most noticeable):

    • the bowl is slightly bigger (10% larger);
    • the Varoma and ThermoServer are also slightly bigger;
    • they look different (the TM5 has a touchscreen and dial whereas the TM31 has buttons and a dial);
    • the TM5 can weigh while the machine is operating;
    • the TM5 uses electronic recipe chips which allows you to access the recipes on the touch screen;
    • there's more temperature, speed and weight options;
    • the butterfly has changed design;
    • the lid closes and opens automatically (it has a slight delay in releasing the lid which is an added safety feature);
    • You can use a Cook-Key with the TM5 and easily browse, sync, and cook your favourite recipes (this is an extra cost).
    Upgrading from a TM31 to a TM5 - Is it worth it?

    Photo credit

    My verdict 

    The functionality of both machines are exactly the same. Both machines will cook the same, work the same, do the same thing. The main difference is in the technology with the touchscreen and the recipe chips of the TM5.

    I mainly keep my Everyday Cookbook recipe chip on the machine and use it for our basics, like pizza dough, porridge etc, and have found it to be quite handy. But otherwise, I'm happy to still use a cookbook or Google a recipe. So the recipe chips haven't been a massive thing for me.

    My favourite part of the upgraded TM5 has been that I can now weigh while the machine is mixing or heating (not a big thing... but it is handy!).

    I can't comment on the Cook-Key because mine is still in it's box (eeeeek... I know, I know! I'm terrible!!). I'm looking forward to sitting down and having a play with it at some stage, but I just haven't had a chance so far (and to be honest, I kind of just love using all of the recipes on the internet and the Recipe Community anyway!).

    So all in all, the TM5 is great (just like the TM31 is). If you don't currently own a Thermomix, then I'd go for the TM5 version. But if you've already got the TM31, I'd make a decision based on the following:

    • do I have a large family and would I find the increased bowl size helpful?
    • is the new technology and recipe chips/Cook-Key important to me?
    • can I sell my old Thermomix and use the money to put towards the TM5? (you might be surprised at how much you'll get for your TM31!)

    If it's a yes to those questions, then I'd definitely consider upgrading. But if you're happy with your TM31 and not really interested in the minor changes, then I'd hold on to your good old machine!

    I hope this review helps you to make a decision! As we all know, Thermomix machines are EXPENSIVE, so it's a big call whether or not to lay out the cash and upgrade to the new model. The good news is that whatever you decide to do, they're both amazing machines!

    UPDATED: Read my review of the new Thermomix TM6 model here.

    How much does a Thermomix cost? Find out here

    Thermomix Beef and Vegetable Pasta Bake

    May 30, 2018

    Cooked Pasta bake with a couple of scoops removed, a gold spoon is sticking out to the side.

    Our Thermomix Beef and Vegetable Pasta Bake is perfect if you need to feed a crowd! Made with simple and budget friendly ingredients, you can be sitting down to enjoy this easy Pasta Bake in around one hour!

    Side view of cooked pasta bake.

    This recipe is also a great meal to make for friends or family, as let's face it, you really can't go wrong with a pasta bake!  The addition of the cheese sauce helps to give the pasta bake a delicious flavour and if you are big cheese fans like us, you can also pop some grated mozzarella cheese over the top of the pasta bake before popping it into the oven - yum!

    You will love:

    Budget friendly - bulk up the meat sauce to go even further with the addition of extra veggies. We also like to add sweet potato and even broccoli. This recipe is also perfect for using up any leftover veggies.

    Freezer friendly - store leftovers in the fridge for up to three months.

    Side view of a charcoal bowl filled with Pasta Bake. In the background is a white baking dish filled with the rest of the pasta bake.

    Ingredients

    Please note you will find a full list of ingredients and their quantities in the recipe card below.

    • Brown Onion
    • Garlic
    • Olive Oil
    • Zucchini
    • Carrot
    • Beef Mince
    • Crushed Tomatoes - passata can be used instead
    • Tomato Paste
    • Dried Mixed Herbs
    • Pasta - we like to use small spiral pasta for this recipe, however any type of small pasta can be used.
    Ingredients to make a pasta bake in the thermomix on a white bench.

    How to make our Thermomix Beef and Vegetable Pasta Bake

    Step 1. Grate the onion and garlic.

    Step 2. Add the olive oil and cook until softened.

    Cooked onion and garlic in a Thermomix bowl.

    Step 3. Add the zucchini and carrots and mix.

    Chopped vegetables in a thermomix bowl.

    Step 4. Add the tomato paste, crushed tomatoes, water and dried mixed herbs. Place the beef mince into the steaming basket and cook.

    Beef and vegetable sauce ingredients in a thermomix bowl.

    Step 5. Cook the pasta until it has just softened.

    Step 6. Add the meat sauce and cooked pasta to an oven safe baking dish. Gently stir to combine.

    Pasta and sauce in a white baking dish.

    Step 7. Prepare the cheese sauce and cook.

    Step 8. Pour the cheese sauce over the top of the pasta and meat sauce before placing into the oven to bake.

    Pasta bake topped with cheese sauce in a white baking dish ready to go into the oven.

    Step 9. Cook until the cheese sauce begins to turn golden. Serve immediately.

    Cooked Pasta Bake straight from the oven.

    Recipe Hints and Tips

    Bulk up your meat sauce with the addition of sweet potato or extra vegetables.

    Passata can be used in place of crushed tomatoes.

    You can use different size/shaped baking dishes for this recipe, however you will need a dish with a minimum capacity of 3 litres.

    This recipe can be made up to two days in advance, simply then prepare the cheese sauce and bake when ready to serve.

    Store in the fridge for up to three days. Freeze leftovers in a freezer safe container for up to three months.

    A gold fork holding up pasta bake.

    Frequently Asked Questions

    Should I cover my pasta bake in the oven?

    When making our Thermomix Pasta Bake recipe, there is no need to cover the pasta bake in the oven as it only needs to bake long enough to brown the cheese. If you are reheating the dish, we do recommend covering the top of the dish with foil to prevent the top burning, as your dish will be in the oven for a longer period of time.

    Do you need to boil pasta before baking?

    While some recipes do not require pasta to be boiled before baking, when making this Thermomix Beef and Vegetable Pasta Bake, you will need to cook the pasta first as the liquid content of the sauce will not be enough to cook the pasta properly.

    Cooked Pasta bake with a couple of scoops removed, a gold spoon is sticking out to the side.

    You may also enjoy:

    • Thermomix Chicken Tenders
    • Thermomix Chow Mein
    • Thermomix Zucchini, Pea and Bacon Risotto
    • Thermomix Chicken Curry
    • Thermomix Creamy Chicken Bacon Pasta Bake

    Looking for even more?

     You can find even more delicious and simple Thermomix dinners in our books and eBooks. Shop the range here.

    Complete set o 16 ThermoBliss recipe books.
    Cooked Pasta bake with a couple of scoops removed, a gold spoon is sticking out to the side.
    Print Recipe
    4.71 from 24 votes

    Thermomix Beef and Vegetable Pasta Bake

    Our Thermomix Beef and Vegetable Pasta Bake is easy to prepare, feeds a crowd and can also be frozen!
    Prep Time20 minutes mins
    Cook Time45 minutes mins
    Total Time1 hour hr 5 minutes mins
    Course: Dinner
    Cuisine: Australian
    Servings: 6 people
    Calories: 648kcal
    Author: Lucy & Lauren
    Cost: $15

    Equipment

    • 1 x Large baking dish Minimun 3 litre capacity.

    Ingredients

    • 300 grams spiral pasta

    Meat Sauce

    • 80 grams brown onion cut in half
    • 2 cloves garlic
    • 20 grams olive oil
    • 80 grams zucchini cut into 3cm cubes
    • 60 grams carrot cut into 3cm cubes
    • 800 grams crushed tomatoes
    • 50 grams tomato paste
    • 1 tablespoon mixed herbs
    • 100 grams water
    • 500 grams beef mince

    Cheese Sauce

    • 30 grams butter
    • 20 grams plain flour
    • 250 grams milk
    • 100 grams tasty cheese cut into 3cm cubes
    • 25 grams parmesan cheese
    • ½ teaspoon nutmeg
    • pinch of salt and pepper

    Instructions

    • Place the garlic and brown onion into the Thermomix bowl. Mix for 4 seconds, Speed 5.
    • Scrape down the sides of the bowl and add the olive oil. Cook for 3 mins, Varoma temp, Speed 2 with the MC off.
    • Add the zucchini and carrot and mix for 4 sec, speed 5 with the MC on. Blitz for longer if you want finer pieces of vegetables.
    • Add the crushed tomatoes, mixed herbs, water and tomato paste. Place the beef mince into the steaming basket and break up with your spatula. Gently and carefully pop it into the TM bowl and cook for 8 mins, Varoma temp, Speed 3.
    • Carefully remove the lid and break up the mince. Cook for a further 6 minutes, Varoma temperature, Speed 3.
    • Carefully remove the basket and transfer the meat sauce to the baking dish. Set aside until needed.
    • Cook the spiral pasta for 6 minutes or until it is almost cooked through. Drain and place the cooked pasta into the baking dish before gently stirring through the meat sauce. Set aside until needed.
    • Preheat your oven to 180 degrees celsius (fan-forced).
    • To make the cheese sauce, place the cubed pieces of the tasty and parmesan cheese into a clean Thermomix bowl and blitz for 10 seconds on Speed 10 or until finely grated.
    • Add the butter, plain flour, milk, nutmeg and salt and pepper to your Thermomix bowl and cook for 7 minutes at 80 degrees on Speed 4.
    • Pour the cheese sauce over the top of the pasta mixture and place into the oven to bake for 30 minutes or until the cheese sauce is golden.
    • Carefully remove the pasta bake from the oven and serve.

    Notes

    Bulk up your meat sauce with the addition of sweet potato or extra vegetables.
    Passata can be used in place of crushed tomatoes.
    You can use different size/shaped baking dishes for this recipe, however you will need a dish with a minimum capacity of 3 litres.
    This recipe can be made up to two days in advance, simply then prepare the cheese sauce and bake when ready to serve.
    Store in the fridge for up to three days. Freeze leftovers in a freezer safe container for up to three months.

    Nutrition

    Calories: 648kcal | Carbohydrates: 57g | Protein: 31g | Fat: 33g | Saturated Fat: 14g | Polyunsaturated Fat: 2g | Monounsaturated Fat: 13g | Trans Fat: 1g | Cholesterol: 94mg | Sodium: 534mg | Potassium: 990mg | Fiber: 5g | Sugar: 12g | Vitamin A: 2560IU | Vitamin C: 19mg | Calcium: 306mg | Iron: 5mg

    Thermomix Healthy Apricot Balls

    May 28, 2018

    Apricot chia balls.

    Our Thermomix Healthy Apricot Balls are the perfect lunchbox snack - made from apricots, coconut, rolled oats, chia seeds, coconut oil and rice malt syrup... ready in just 5 minutes!

    A bowl filled with apricot balls.

    If you're looking for a recipe that's:

    • yummy
    • kid-approved
    • healthy
    • perfect for lunch boxes

    .... then that's exactly what our Thermomix Healthy Apricot Balls are!

    Apricot chia balls.

    Why You're Going To Love This Recipe

    • Quick & Easy - ready in just 5 minutes!! This is the EASIEST Thermomix Healthy Apricot Balls you'll ever make!
    • Freezer-Friendly - freeze in an airtight container for up to 2 months. The balls will only take a few minutes to defrost.
    • Loved By Kids - these Thermomix Healthy Apricot Balls are an all-time favourite with the kids! Whether it's for breakfast, after school snacks or a lunch box treat... they're always a hit!
    • One Bowl Recipe - the Thermomix does EVERYTHING for you! It will chop the apricots and combine the mixture for you.

    What You Need

    Just a handful of basic ingredients!

    The ingredients for apricot balls.
    • Dried Apricots - these can be purchased from the dried fruits aisle of the supermarket
    • Oats - choose regular old fashioned rolled oats or quick oats
    • Coconut - choose fine desiccated coconut
    • Chia Seeds - either white or black chia seeds can be used
    • Coconut Oil - melted
    • Rice Malt Syrup - or honey

    Step By Step Instructions

    It's SO easy to make Thermomix Healthy Apricot Balls!

    Please scroll to the recipe card at the bottom for ingredient quantities and the full detailed method.

    Step 1 - Chop The Apricots

    Place the dried apricots into the Thermomix bowl and chop finely.

    Chopped apricots in a Thermomix.

    Step 2 - Combine The Remaining Ingredients

    Add the remaining ingredients to the Thermomix bowl. Mix to combine.

    Ingredients for chia, oat and apricot balls.

    Step 3 - Roll Into Balls

    Roll the mixture into balls and store in the fridge until needed.

    A hand holding an apricot bliss ball.

    Expert Tips

    If the mixture is too crumbly - add a little more honey/rice malt syrup and mix again.

    If you don't have a Thermomix, you can use a blender or food processor.

    Oats - use rolled oats or quick oats.

    Storing - Store in an airtight container in the fridge for up to 5 days.

    Freezing - freeze in an airtight container for up to 2 months. The balls will only take a few minutes to defrost.

    Apricot bliss balls in a bowl.

    FAQ

    Are apricot balls suitable for lunchboxes?

    Yes! They are completely nut-free, which makes them an excellent option for lunchboxes.

    Can I make this recipe without a Thermomix?

    Absolutely! You can use a food processor or blender instead.

    How many balls does this recipe make?

    This recipe makes 16 apricot balls.

    A bowl filled with apricot oat bliss balls.

    Related Recipes

    Love a healthy snack? We do too!

    Here's a few more of our favourite snack recipes:

    • Seed and oat muesli bars.
      Healthy Thermomix Muesli Bars
    • Round bliss balls on a cake stand.
      Thermomix Double Chocolate Brownie Bliss Balls
    • Two pieces of Apricot and Coconut Slice stacked on top of each other. In the background are dried apricots.
      Two Ingredient Thermomix Apricot and Coconut Slice
    • A close up of a square of slice made with rolled oats and dates, and drizzled with dark chocolate.
      Thermomix Date Slice

    THERMOMIX RECIPE COOKBOOKS

    Browse our collection of printed Thermomix cookbooks including our value bundles!

    ThermoBliss complete set
    Apricot chia balls.
    Print Recipe
    4.86 from 7 votes

    Thermomix Apricot Balls

    Our Thermomix Healthy Apricot Balls are the perfect lunchbox snack - made from apricots, coconut, rolled oats, chia seeds, coconut oil and rice malt syrup... ready in just 5 minutes!
    Prep Time5 minutes mins
    Total Time5 minutes mins
    Course: healthy snacks
    Cuisine: healthy recipes
    Servings: 16 balls
    Calories: 72kcal
    Author: Lucy & Lauren
    Cost: $5

    Equipment

    • Thermomix

    Ingredients

    • 190 g dried apricots
    • 70 g rolled oats
    • 20 g desiccated coconut
    • 1 tbs chia seeds
    • 2 tbs coconut oil melted
    • 2 tbs rice malt syrup or honey

    Instructions

    • Chop the dried apricots for 5 seconds, Speed 8. Scrape down the sides of the bowl.
    • Add all of the remaining ingredients and mix together for 10 seconds, Speed 6.
    • Roll the mixture into balls.

    Notes

    RECIPE NOTES & TIPS
    If the mixture is too crumbly - add a little more honey/rice malt syrup and mix again.
    If you don't have a Thermomix, you can use a blender or food processor.
    Oats - use rolled oats or quick oats.
    Storing - Store in an airtight container in the fridge for up to 5 days.
    Freezing - freeze in an airtight container for up to 2 months. The balls will only take a few minutes to defrost.

    Nutrition

    Calories: 72kcal | Carbohydrates: 11g | Protein: 1g | Fat: 3g | Saturated Fat: 2g | Polyunsaturated Fat: 0.3g | Monounsaturated Fat: 0.3g | Trans Fat: 0.001g | Sodium: 2mg | Potassium: 163mg | Fiber: 2g | Sugar: 6g | Vitamin A: 428IU | Vitamin C: 0.1mg | Calcium: 14mg | Iron: 1mg

    Thermomix Apple and Blueberry Scrolls

    May 23, 2018

    A bunch of baked scrolls with apple and blueberries rolled through and drizzled with white icing

    These Thermomix Apple and Blueberry Scrolls make the perfect morning tea or lunchbox treat!

    If you are looking to mix things up a little when it comes to your homemade treats, you can't go past these Thermomix Apple and Blueberry Scrolls.  These scrolls are made using our 2 Ingredient Thermomix Scroll Dough recipe and then all you do is scatter the dough with yummy apple pieces and blueberries, roll them up, cut and bake - how easy!

    To make these Scrolls even more special, you can also make a simple vanilla icing to drizzle over the top of them once they are baked. Simply combine 1 ½ cups of icing sugar with 1 teaspoon of vanilla extract, 1 tablespoon of butter, add boiling water and mix until it's a smooth consistency.

    Drizzle this over the top of the Apple and Blueberry Scrolls when they have almost cooled, and then leave to cool completely.

    Tips for Making Thermomix Apple and Blueberry Scrolls

    • You can use any type of apples for this recipe. You can also choose to leave the skin on if you would prefer.
    • Either fresh or frozen blueberries can be used for this recipe.
    • If you find your dough is too soft, add a little extra flour to it when you have turned it onto your mat. The water content in different brands of greek yoghurt can vary.
    • If you don't have any Greek Yoghurt, you can also make these scrolls using our yeast free dough recipe that you will find here.

    Looking for more? You may also like these scroll recipes:

    • Pizza Scrolls
    • Yeast Free Cinnamon Scrolls
    • Vegemite and Cheese Scrolls
    • Ham, Cheese and Mayo Scrolls
    • Pesto and Cheese Scrolls

    Side view of 2 ingredient dough sitting on a blue striped plate.
    Print Recipe
    4.91 from 10 votes

    Thermomix 2 Ingredient Dough

    It doesn't get easier than this 2 Ingredient Dough recipe! This recipe can be made in under 5 minutes and is perfect for scrolls, pizzas and more!
    Prep Time5 minutes mins
    Total Time5 minutes mins
    Course: Snacks
    Cuisine: Australian, Modern
    Servings: 1 portion
    Calories: 1296kcal
    Author: Lucy & Lauren
    Cost: $5

    Equipment

    • 1 x Thermomix

    Ingredients

    • 280 grams Greek Yoghurt
    • 300 grams self raising flour plus extra for your bench

    Instructions

    • Place the greek yoghurt and self raising flour into your Thermomix bowl and mix for 10 seconds, speed 4 to combine.
    • Select the 'kneading' function and mix for 3 minutes.
    • Turn the dough out onto your bench or Thermomat and lightly bring it together into a ball.
    • Use for scrolls, pizzas or flatbreads.

    Notes

    If you don't have any self-raising flour you can substitute with plain flour. You will need to add three teaspoons of baking powder.
    Any type of plain greek yoghurt can be used. You can also use plain natural or regular yoghurt as well.
    If you find your dough is sticky and difficult to work with (this can happen as the fluid content of different brands of yoghurt varies), simply add a little extra flour.
    To freeze, place into a freezer safe container and store for up to three months.

    Nutrition

    Calories: 1296kcal | Carbohydrates: 229g | Protein: 64g | Fat: 11g | Saturated Fat: 4g | Polyunsaturated Fat: 2g | Monounsaturated Fat: 0.4g | Cholesterol: 16mg | Sodium: 121mg | Potassium: 300mg | Fiber: 7g | Sugar: 12g | Vitamin A: 168IU | Calcium: 373mg | Iron: 3mg

    Enjoy!

    For more yummy snack recipes, make sure you grab your copy of our Thermomix Lunch Box Recipes book!

    How to steam & shred chicken breasts in the Thermomix

    May 14, 2018

    Steamed and shredded white chicken breast meat in a bowl.

    See just how easy it is to steam & shred chicken breasts in the Thermomix.. this makes the most delicious sandwich filling!

    How to steam & shred chicken breasts in the Thermomix

    Using the Thermomix to steam & shred chicken breasts is a fantastic (and healthy) way to prepare this classic sandwich filling- and best of all, it's SO simple!!

    See just how easy it is to steam & shred chicken breasts in the Thermomix.. this makes the most delicious sandwich filling!

    First of all, let's get through the steps to steam a chicken breast...

    See just how easy it is to steam & shred chicken breasts in the Thermomix.. this makes the most delicious sandwich filling!

    HOW TO STEAM A CHICKEN BREAST IN THE THERMOMIX

    Step 1. Make a slit in a large chicken breast (approx 400g) so that you can open it up flat.

    Step 2. Place 1000g (1 litre) of water into the Thermomix bowl. Add 1 teaspoon chicken stock powder (optional - see recipe card for notes).

    Step 3. Place the cut chicken breast flat onto the Varoma tray.

    Step 4. Cook on Varoma, Speed 2, 20 minutes.


    HOW TO SHRED A CHICKEN BREAST IN THE THERMOMIX

    Step 1. Drain the water from the Thermomix bowl (that you just used to steam the chicken breast).

    Step 2. Cut the chicken breast in half and place into the Thermomix bowl.

    Step 3. Chop on Reverse, Speed 4, 5 seconds. Scrape down the sides of the bowl and repeat until you have a consistency you like (I generally shred my chicken for a total of 10 seconds).

    Step 4. Optional - add whole egg mayonnaise, a squeeze of lemon juice, salt and pepper and mix on Reverse Speed 2 until combined (this makes a really yummy sandwich filling).

    See just how easy it is to steam & shred chicken breasts in the Thermomix.. this makes the most delicious sandwich filling!

    WATCH THE VIDEO:

    How to steam & shred chicken breasts in the Thermomix


    Steamed and shredded white chicken breast meat in a bowl.
    Print Recipe
    4.67 from 6 votes

    How to steam & shred chicken breasts in the Thermomix

    See just how easy it is to steam & shred chicken breasts in the Thermomix.. this makes the most delicious sandwich filling!
    Prep Time5 minutes mins
    Cook Time20 minutes mins
    Total Time25 minutes mins
    Course: lunch box, Lunchbox Ideas
    Cuisine: lunch, sandwich filling, thermomix
    Servings: 4 serves
    Calories: 114kcal
    Author: Lucy & Lauren

    Ingredients

    • 400 g chicken breast
    • 1000 g water
    • 1 teaspoon chicken stock
    • whole egg mayonnaise, lemon juice, salt and pepper, to flavour

    Instructions

    • Make a slit in a large chicken breast (approx 400g) so that you can open it up flat. 
    • Place 1000g (1 litre) of water into the Thermomix bowl. Add 1 teaspoon chicken stock powder (see notes). 
    • Place the cut chicken breast flat onto the Varoma tray and cook on Varoma, Speed 2, 20 minutes. 
    • To shred the chicken, drain the water from the Thermomix bowl. Cut the chicken breast in half and place into the Thermomix bowl.
    • Chop on Reverse, Speed 4, 5 seconds. Scrape down the sides of the bowl and repeat until you have a consistency you like (I generally shred my chicken for a total of 10 seconds).
    • * Optional step - add whole egg mayonnaise, a squeeze of lemon juice, salt and pepper and mix on Reverse Speed 2 until combined (this makes a really yummy sandwich filling).

    Notes

    You can substitute the chicken stock powder for vegetable stock, or leave it out and add fresh herbs instead. 

    Nutrition

    Calories: 114kcal | Carbohydrates: 0.04g | Protein: 21g | Fat: 3g | Saturated Fat: 1g | Polyunsaturated Fat: 0.4g | Monounsaturated Fat: 1g | Trans Fat: 0.01g | Cholesterol: 64mg | Sodium: 130mg | Potassium: 371mg | Sugar: 0.02g | Vitamin A: 30IU | Vitamin C: 1mg | Calcium: 13mg | Iron: 0.4mg

    See just how easy it is to steam & shred chicken breasts in the Thermomix.. this makes the most delicious sandwich filling!


    Thermomix Apple Loaf

    May 9, 2018

    Sliced Apple Loaf on a timber serving board with loaf behind it.

    Our Thermomix Apple Loaf is easy to make, and even easier to eat! This recipe is made with simple ingredients and can be prepared and baked in under one hour.

    Sliced Apple Loaf on a timber serving board with loaf behind it.

    I'm a big fan of apple recipes (our Apple and Berry Cake is one of my all time favourites!) so you can just imagine how much I'm in love with this yummy Thermomix Apple Loaf recipe.  I've made this loaf quite a lot over the years and find it's a good way to use up those half eaten apples that my kids like to put back into the fridge!

    You will love:

    Quick to prepare - this Apple Loaf can be ready to go into the oven in under 10 minutes.

    Packed with flavour - with the perfect ration of apple and cinnamon, you will enjoy every single bite of this delicious loaf.

    Budget friendly - the cake batter is made from pantry staples and you can even use up the kids leftover apples!

    Freezer friendly - freeze for up to three months.

    Apple Loaf made in a Thermomix sitting on a sheet of baking paper.

    Ingredients

    Please note you will find a full list of ingredients and the method in the recipe card below.

    • Self-raising flour
    • Caster sugar
    • Butter - we used unsalted butter
    • Vanilla extract - vanilla essence can also be used
    • Eggs - 70 gram eggs
    • Milk - full cream or skim milk can be used
    • Apples - any type of apple variety can be used
    • Cinnamon
    Ingredients to make a Thermomix Apple Loaf on a speckled bench top.

    How to make an Apple Loaf in a Thermomix:

    Step 1. Roughly chop the apple and toss in cinnamon.

    Apple pieces coated with cinnamon in a white bowl.

    Step 2. Place the remaining ingredients into Thermomix bowl and mix until combined.

    Ingredients to make an Apple Loaf in a Thermomix bowl.
    Cake batter in a Thermomix bowl.

    Step 3. Transfer the cake mixture to a lined loaf pan.

    Apple loaf mixture in a loaf pan.

    Step 4. Sprinkle the apple pieces over the top.

    Apple Loaf batter in a loaf tin lined with baking paper.

    Step 5. Bake until golden and cooked through when tested with a skewer.

    Apple loaf straight from the oven in baking dish.

    Recipe Hints and Tips

    You can use any type of apple for this Thermomix Apple Loaf recipe, we have used Granny Smith, Royal Gala and Pink Lady Apples with success in the past.

    You also don't have to peel the apples.

    Store in an airtight container in at room temperature and enjoy within five days.

    This recipe can be made in advance and frozen, so it's perfect for school lunchboxes and also for when unexpected guests pop in.

    FAQ

    How do you stop fruit sinking to the bottom of a cake?

    Lightly dust fruit pieces with flour or a spice such as cinnamon to prevent it from sinking to the bottom of your cake pan or muffin wrapper.

    What is the best variety of apple to use when baking?

    It is best to use an apple which will hold its shape when baked. Try using apple varieties such as Fuji, Royal Gala, Pink Lady or Granny Smith.

    overhead image of a piece of sliced apple loaf on a white plate.

    You may also enjoy:

    • Thermomix Orange Butter Cake Recipe
    • Thermomix Pound Cake Recipe
    • Thermomix Apple and Cinnamon Muffins
    • Thermomix Apple & Cinnamon Scrolls
    • Thermomix Lemon and Poppy Seed Cake
    • Thermomix Vanilla Cake
    • Thermomix Orange and Sultana Cake
    • Thermomix Strawberry and Banana Loaf
    • Thermomix Butter Cake
    Sliced Apple Loaf on a timber serving board with loaf behind it.
    Print Recipe
    4.95 from 36 votes

    Thermomix Apple Loaf

    Our Thermomix Apple Loaf recipe makes a great sweet treat for the whole family.
    Prep Time10 minutes mins
    Cook Time50 minutes mins
    Total Time1 hour hr
    Course: Desserts
    Cuisine: Australian
    Servings: 10 Slices
    Calories: 260kcal
    Author: Lucy & Lauren

    Equipment

    • 1 x large loaf pan

    Ingredients

    • 225 grams self raising flour
    • 165 grams caster sugar
    • 125 grams butter softened
    • 1 teaspoon vanilla extract
    • 2 eggs
    • 130 grams milk
    • 80 grams apple
    • ½ teaspoon cinnamon

    Instructions

    • Preheat your oven to 180 degrees celsius (fan-forced) and line the base and sides of a large loaf tin with baking paper.
    • Peel the apple and roughly chop it into pieces no bigger than 1cm. Place the apple pieces into a small bowl and add the cinnamon before gently stirring to combine. Set aside until needed.
    • Place the self raising flour, caster sugar, butter, vanilla extract, eggs and milk into your Thermomix bowl and mix for 15 seconds, speed 5.
    • Scrape down the sides of the bowl and mix for a further 10 seconds, speed 4 or until the mixture is smooth and well combined.
    • Pour the mixture into your prepared loaf tin and sprinkle the apple pieces over the top.
    • Place the Apple Loaf into your oven and bake for 50 - 55 minutes or until cooked when tested with a skewer. Carefully remove your Apple and Cinnamon Loaf from the oven and allow it to cool in the loaf tin for 10 minutes before transferring to a wire rack to cool completely.

    Notes

    You can use any type of apple for the recipe, we have used Granny Smith, Royal Gala and Pink Lady Apples with success in the past.
    You also don't have to peel the apples.
    Store in an airtight container in at room temperature and enjoy within five days.
    This recipe can be made in advance and frozen, so it's perfect for school lunchboxes and also for when unexpected guests pop in.

    Nutrition

    Calories: 260kcal | Carbohydrates: 35g | Protein: 4g | Fat: 12g | Saturated Fat: 7g | Polyunsaturated Fat: 1g | Monounsaturated Fat: 3g | Trans Fat: 0.4g | Cholesterol: 61mg | Sodium: 99mg | Potassium: 67mg | Fiber: 1g | Sugar: 18g | Vitamin A: 386IU | Vitamin C: 0.4mg | Calcium: 29mg | Iron: 0.4mg

    Looking for even more?

    You can find more simple and delicious Thermomix recipes in our books and ebooks. Shop the range here.

    Thermomix Milo Biscuits

    May 7, 2018

    A stack of Milo biscuits on a white stand.

    Our super easy Thermomix Milo Biscuits are made using just 5 ingredients... butter, self-raising flour, condensed milk, caster sugar and Milo! 

    Just 10 minutes prep time and ready to eat in 20 minutes...

    A plate of chocolate malted milk biscuits.

    When it comes to filling up school lunchboxes (and hungry little tummies!), these Milo Biscuits get the big tick of approval!

    Just like our Thermomix Weet-Bix Balls, Blueberry Muffins and Apricot & Coconut Balls, these Milo Biscuits are quick and easy to prepare and they taste delicious.

    Why You're Going To Love This Recipe

    Milo is a classic Australian malted milk drink... so why not turn it into tasty cookies!

    • 5 Ingredients - our recipe is made using just Milo, butter, caster sugar, sweetened condensed milk and self raising flour.
    • Ready In 20 Minutes - just 10 minutes prep time and 10 minutes cooking time is all it takes to make these yummy Thermomix Milo Biscuits.
    • Budget-Friendly - all of the ingredients in our Milo cookies are basic pantry and fridge staples... meaning they will cost you hardly anything to make!
    • Freezer-Friendly - both the uncooked dough and the baked cookies can be frozen.
    • Suitable For All Thermomix Models - our recipe is suitable for use in any of the Thermomix models.
    Milo biscuits on a baking tray.

    What You Need

    Just 5 ingredients are required to make our Thermomix Milo Biscuits!

    Please scroll to the recipe card at the bottom of the post for ingredient quantities and the full detailed method.

    The ingredients for Milo Biscuits.
    • Butter - use salted or unsalted butter. Soften to room temperature before using.
    • Caster Sugar - also known as superfine sugar.
    • Sweetened Condensed Milk - I recommend using full fat (not skim) sweetened condensed milk.
    • Self-Raising Flour - use store-bought self raising flour or make your own self raising flour using baking powder and plain flour.
    • Milo - or any malted milk powder.

    Step By Step Instructions

    Just 1.2.3.4... that's all it takes to make Thermomix Milo Biscuits!

    Please scroll to the recipe card at the bottom of the post for ingredient quantities and the full detailed method.

    Step 1 - Cream The Butter & Sugar

    Place the softened butter and the caster sugar into the bowl.

    Mix until pale and creamy.

    Butter in a Thermomix bowl.

    Step 2 - Add The Sweetened Condensed Milk

    Pour the sweetened condensed milk into the Thermomix bowl and mix until combined.

    Step 3 - Add The Dry Ingredients

    Add the self raising flour and Milo.

    Milo and flour being added to a Thermomix.

    Mix until combined.

    Malted milk biscuit mixture in a Thermomix.

    Step 4 - Bake

    Roll into teaspoon-sized balls and place onto the prepared baking trays.

    Press down lightly with a fork. 

    Chocolate biscuits on a baking tray.

    Bake for 10 minutes.

    A Milo tin in the background of a plate of bicsuits.

    Expert Tips

    • Soften the butter to room temperature before using
    • Use full fat (not skim) sweetened condensed milk
    • use Milo or any malted milk powder
    • Use a fork to press down the cookie dough balls before baking
    • Bake for 10 minutes (the biscuits will continue to firm up upon cooling)
    • Store in an airtight container at room temperature for up to 1 week
    • Freeze the uncooked dough or baked cookies for up to 3 months
    An overhead shot of crinkly Milo cookies.

    FAQs

    What is Milo?

    Milo is a famous malted milk powder here in Australia. If Milo is not available where you live, you can substitute it for any malted milk powder.

    Do I need to line the baking trays with baking paper?

    If you have non-stick baking trays, there's no need to line them with baking paper.

    Can I make this recipe in an older version of the Thermomix?

    Yes! This recipe is suitable for use in all models of the Thermomix.

    A hand holding a Milo Biscuit.

    Related Recipes

    Looking for more easy Thermomix biscuit recipes to fill up the cookie jar!?

    Here's a few of our favourites!

    • three condensed milk biscuits stacked together with more biscuits in the background.
      Thermomix Condensed Milk Cookies
    • Thermomix Chocolate Chip Cookies
    • A jam drop biscuit.
      Thermomix Jam Drops
    • Thermomix Monte Carlo Biscuits sitting on a white platter.
      Thermomix Monte Carlo Biscuits

    OUR RANGE OF THERMOMIX COOKBOOKS

    Browse our collection of hardcopy Thermomix cookbooks here.

    There's everything from family dinners to kids snacks, desserts to cookies, slices to Christmas recipes, cocktails to chocolate recipes and more!

    ThermoBliss complete set
    A stack of Milo biscuits on a white stand.
    Print Recipe
    4.92 from 25 votes

    Thermomix Milo Biscuits

    Super easy Thermomix Milo Biscuits made from just 5 ingredients... butter, self-raising flour, condensed milk, caster sugar and Milo! 
    Prep Time10 minutes mins
    Cook Time10 minutes mins
    Total Time20 minutes mins
    Course: Biscuits and Cookies
    Cuisine: Australian
    Servings: 25 biscuits
    Calories: 91kcal
    Author: Lucy & Lauren
    Cost: $5

    Equipment

    • Thermomix
    • Oven

    Ingredients

    • 125 g butter room temperature
    • 60 g caster sugar
    • 100 g sweetened condensed milk
    • 185 g self-raising flour
    • 40 g Milo (malted milk powder)

    Instructions

    • Preheat oven to 180 degrees celsius (fan-forced). 
    • Grease and line 2 baking trays and set aside.
    • Place room temperature butter and caster sugar into the Thermomix bowl. Cream 45 seconds, Speed 5 (scrape down the sides after 20 seconds). 
    • Add the condensed milk and mix for a further 20 seconds, Speed 5. 
    • Add the self-raising flour and Milo and mix for 20 seconds, Speed 6. Scrape down the sides of the bowl and repeat for a further 5-10 seconds or until completely combined. 
    • Roll into teaspoon-sized balls and place onto the prepared baking trays. Press down lightly with a fork. 
    • Bake for 10 minutes. Allow to cool for 10 minutes on the baking trays before transferring to a wire rack to cool completely. 

    Notes

    RECIPE NOTES & TIPS
    • Soften the butter to room temperature before using
    • Use full fat (not skim) sweetened condensed milk
    • use Milo or any malted milk powder
    • Use a fork to press down the cookie dough balls before baking
    • Bake for 10 minutes (the biscuits will continue to firm up upon cooling)
    • Store in an airtight container at room temperature for up to 1 week
    • Freeze the uncooked dough or baked cookies for up to 3 months

    Nutrition

    Calories: 91kcal | Carbohydrates: 11g | Protein: 1g | Fat: 5g | Saturated Fat: 3g | Polyunsaturated Fat: 0.2g | Monounsaturated Fat: 1g | Trans Fat: 0.2g | Cholesterol: 12mg | Sodium: 44mg | Potassium: 36mg | Fiber: 0.2g | Sugar: 5g | Vitamin A: 139IU | Vitamin C: 0.2mg | Calcium: 18mg | Iron: 0.1mg

    Thermomix Roasted Vegetable Quiche

    May 2, 2018

    A slice of roasted vegetable quiche.

    Our simple and creamy Thermomix Roasted Vegetable Quiche is packed with roasted vegetables, spinach and feta. The perfect midweek family dinner.

    A half eaten vegetable quiche.

    This super versatile quiche is a great recipe to make when you're trying to use up leftover vegetables in the fridge!

    You can roast any combination of vegetables you like - zucchini, sweet potato, pumpkin, capsicum, broccoli, onion etc are all great options!

    Serve the quiche on it's own for a simple family dinner, or add your favourite salad or crusty bread on the side.

    Why You're Going To Love This Recipe

    There's so much to love about our Thermomix Roasted Vegetable Quiche!

    • Budget-Friendly - there's no need to spend a fortune buying a store-bought quiche, when you can make your own at home... for a fraction of the cost!
    • Great Way To Use Up Veggies - I love to make this quiche at the end of the week (before I do a grocery shop!) because it's a great way to use up any last veggies we have laying around!
    • Versatile - mix and match with any of your favourite veggies (or whatever you have on hand!), add some bacon or ham, swirl through some caramelised onion.. the options are endless!
    • Time Saving Option - don't have time to make your own pastry? No problem! Use frozen shortcrust pastry or a store-bought pastry shell instead!
    • Suitable For Use In All Thermomix Models - this recipe can be prepared using any of the Thermomix models.
    A homemade pastry tart.

    What You Need

    Our Thermomix Roasted Vegetable Quiche recipe is entirely from pantry and fridge staples.

    Please scroll to the recipe card at the bottom of the post for the ingredient quantities and the full detailed method.

    For The Pastry

    The ingredients for homemade pastry.
    • Plain Flour - also known as all purpose flour
    • Olive Oil - use a mild olive oil in this recipe
    • Butter - salted or unsalted butter can be used
    • Salt - add a pinch of cooking salt or sea salt
    • Cold Water

    For The Filling

    The ingredients for a vegetable quiche.
    • Vegetables - your choice of vegetables (as long as the overall weight is 500g)
    • Feta - use a soft feta (like Danish feta) or goats cheese
    • Baby Spinach - or use regular spinach that's been chopped into smaller pieces
    • Eggs - use large eggs (approximately 60g each
    • Cheese - use cheddar or Tasty cheese
    • Milk - use full cream milk (or cream)

    Step By Step Instructions

    Let's prepare a simple vegetable quiche in the Thermomix!

    Please scroll to the recipe card at the bottom of the post for the ingredient quantities and the full detailed method.

    Step 1 - Make The Pastry

    Place all of the pastry ingredients into the Thermomix bowl.

    Mix for a few seconds and then scrape down the sides of the bowl.

    Dough in a Thermomix.

    Use the Dough function to knead the dough.

    Dough in a Thermomix.

    Form it into a ball, wrap in plastic wrap and place into the fridge for 30 minutes before rolling out and blind baking (see recipe card below).

    Dough wrapped in plastic wrap.

    Step 2 - Roast The Vegetables

    While the pastry is blind baking, place the chopped vegetables onto a baking tray.

    Drizzle with olive oil and season with salt and pepper.

    Roast until the vegetables are tender.

    Vegetables on a baking tray.

    Place the baby spinach into the base of the cooked pastry shell.

    Top with the roasted vegetables and the feta cheese.

    Set aside.

    Vegetables and feta in a pastry shell.

    Step 3 - Prepare The Egg Filling

    Place the cheese into the Thermomix bowl and mix until grated.

    Grated cheese in a Thermomix.

    Add the eggs and milk (or cream).

    Egg mixture in a Thermomix.

    Mix until combined.

    Egg mixture in a Thermomix.

    Step 4 - Bake

    Carefully pour the egg mixture over the top of the roasted vegetables.

    An uncooked vegetable quiche.

    Bake in the oven for 30 minutes or until cooked through when tested with a skewer.

    A piece of roast vegetable tart being removed.

    Expert Tips

    Follow our simple tips for a delicious Thermomix roasted vegetable quiche!

    • if you don't have time for homemade pastry, use 2 sheets of defrosted shortcrust pastry instead
    • it's important to blind-bake the pastry (or pastry sheets) first so that the pastry becomes flakey and doesn't go soggy when the filling is added
    • place your loose bottomed tart tin onto a flat baking tray to make it easier to move in and out of the oven
    • you can use any type of vegetables you like - as long as you stick to the overall weight. 
    • substitute the milk for cream for an ultra creamy quiche
    • if your quiche is browning too quickly, simply place a sheet of foil loosely over the top and continue cooking.
    • store in an airtight container in the fridge and consume within 2 days
    • freeze for up to 3 months
    • place the quiche into the fridge overnight to defrost before thoroughly reheating OR defrost in the microwave before crisping up in the oven or air fryer.
    A slice of savoury tart.

    FAQs

    Do I have to make my own pastry?

    No, however, making homemade pastry will give you the ultimate quiche! You can use 2 sheets of frozen shortcrust pastry or a pre-made shortcrust pastry shell, if you prefer.

    Do I need to roast the vegetables first?

    Yes! This brings out the flavour of the vegetables and also ensures that they are perfectly tender and cooked through.

    Can I add bacon or ham to this recipe?

    Absolutely! Simply add it along with the egg filling before baking.

    An overhead shot of a piece of quiche.

    Related Recipes

    We have SO many more easy family dinner recipes for you to try and enjoy!

    • A slice of egg and bacon quiche.
      Thermomix Egg & Bacon Quiche
    • A stack of zucchini fritters with chutney on top.
      Thermomix Zucchini Fritters
    • Cooked Pasta bake with a couple of scoops removed, a gold spoon is sticking out to the side.
      Thermomix Beef and Vegetable Pasta Bake
    • A Mexican beef salad bowl.
      Thermomix Mexican Beef Bowls

    SHOP OUR RANGE OF THERMOMIX COOKBOOKS

    Browse our collection of hardcopy Thermomix cookbooks here.

    There's everything from family dinners to kids snacks, desserts to cookies, slices to Christmas recipes, cocktails to chocolate recipes and more!

    Complete set o 16 ThermoBliss recipe books.
    A slice of roasted vegetable quiche.
    Print Recipe
    No ratings yet

    Thermomix Roasted Vegetable Quiche

    Our simple and creamy Thermomix Roasted Vegetable Quiche is packed with roasted vegetables, spinach and feta.
    Prep Time15 minutes mins
    Cook Time55 minutes mins
    Chilling Time30 minutes mins
    Total Time1 hour hr 40 minutes mins
    Course: Dinners
    Cuisine: Australian
    Diet: Vegetarian
    Servings: 8 serves
    Calories: 481kcal
    Author: Lucy & Lauren
    Cost: $5

    Equipment

    • Thermomix
    • Quiche tin
    • Oven

    Ingredients

    For The Pastry

    • 500 g plain flour
    • 60 g butter
    • 60 g olive oil
    • 110 g cold water
    • ½ teaspoon salt

    For The Filling

    • 400 g your choice of vegetables cubed, pumpkin, sweet potato, potato, capsicum, red onion, zucchini etc
    • 1 tbs olive oil
    • salt and pepper to season
    • 60 g baby spinach
    • 120 g feta cheese soft feta (like Danish)
    • 90 g cheddar cheese
    • 6 eggs
    • 100 g milk (or cream)

    Instructions

    Prepare The Pastry

    • Place all ingredients into the Thermomix bowl and mix for 10 seconds, Speed 6.
      Scrape down the sides of the bowl.
    • Select the Dough function and knead for 2 minutes.
      Form into a ball, wrap in plastic wrap and chill in the fridge for 30 minutes.
    • Remove the pastry from the fridge and roll out to approximately 1cm thick.
      Place into a well-greased 24cm X 4cm deep loose bottomed quiche or tart tin.
      Place the loose bottomed tart tin onto a flat baking tray (this makes it easier to move the quiche in and out of the oven without moving the loose base).
    • Preheat oven to 200 degrees celsius (fan-forced).
      Blind bake with pie weights or rice for 15 minutes.
      Remove the weights and reduce the temperature to 180 degrees celsius (fan-forced).
      Cook the pastry for a further 10 minutes or until lightly golden.
    • Remove from the oven and set aside.

    Prepare The Filling

    • Place the cubed vegetables onto a flat baking tray.
      Drizzle with olive oil and season with salt and pepper.
      Roast in the oven while the pastry is blind baking for 20 minutes or until tender.
    • Place the baby spinach into the base of the cooked pastry and top with the roasted vegetables and feta.
      Set aside.
    • Place the cheddar cheese into the Thermomix bowl and grate for 10 seconds, Speed 6.
    • Add the eggs and milk and mix for 20 seconds, Speed 3.
    • Carefully pour the egg mixture over top of the roasted vegetables.
    • Bake in the oven for 30 minutes or until golden and cooked through.

    Notes

    RECIPE NOTES & TIPS
    • if you don't have time for homemade pastry, use 2 sheets of defrosted shortcrust pastry instead
    • it's important to blind-bake the pastry (or pastry sheets) first so that the pastry becomes flakey and doesn't go soggy when the filling is added
    • place your loose bottomed tart tin onto a flat baking tray to make it easier to move in and out of the oven
    • you can use any type of vegetables you like - as long as you stick to the overall weight. 
    • substitute the milk for cream for an ultra creamy quiche
    • if your quiche is browning too quickly, simply place a sheet of foil loosely over the top and continue cooking.
    • store in an airtight container in the fridge and consume within 2 days
    • freeze for up to 3 months
    • place the quiche into the fridge overnight to defrost before thoroughly reheating OR defrost in the microwave before crisping up in the oven or air fryer.

    Nutrition

    Calories: 481kcal | Carbohydrates: 40g | Protein: 16g | Fat: 28g | Saturated Fat: 12g | Polyunsaturated Fat: 2g | Monounsaturated Fat: 12g | Trans Fat: 0.3g | Cholesterol: 152mg | Sodium: 533mg | Potassium: 136mg | Fiber: 1g | Sugar: 1g | Vitamin A: 607IU | Calcium: 247mg | Iron: 3mg

    Thermomix Chocolate Self Saucing Pudding

    April 30, 2018

    Ice cream on top of chocolate pudding.

    A classic Thermomix Chocolate Self Saucing Pudding with a moist chocolate cake layer and a rich chocolate sauce hidden underneath! The perfect winter dessert.

    Ice cream on top of chocolate pudding.

    When the weather cools down, there's no better time to make delicious and comforting winter desserts!

    From crumbly, sweet pies to dessert cakes, puddings to homemade custard... and more!

    Lets get baking...

    An overhead shot of a chocolate dessert.

    Why You're Going To Love This Recipe

    There's so much to love about this winter warmer dessert!

    • Budget-Friendly - this Thermomix chocolate self saucing pudding is made using just a handful of basic pantry and fridge staples
    • Winter Comfort Food - serve this classic pudding warm with ice-cream, cream or custard
    • Suitable In All Thermomix Models - this recipe is suitable for use in all of the Thermomix models
    • Old Fashioned Classic - this recipe has certainly stood the test of time... and now it's even easier to make using your Thermomix!
    A spoonful of chocolate self saucing pudding.

    What You Need

    Our Thermomix chocolate self saucing pudding is made using just a handful of budget-friendly basic ingredients.

    The ingredients for chocolate pudding.

    For The Chocolate Pudding

    • Butter - salted or unsalted butter can be used in this recipe
    • Milk - I recommend using full cream (full fat) milk for the best results
    • Vanilla Extract - or vanilla essence
    • Egg - use a large egg, at room temperature
    • Self Raising Flour - this is the rising agent in the recipe
    • Cocoa Powder - use regular unsweetened cocoa powder
    • Caster Sugar - a superfine sugar perfect for baking

    For The Chocolate Sauce

    • Extra Cocoa Powder & Caster Sugar - for sprinkling over the top
    • Boiling Water

    Step By Step Instructions

    It's so easy to make our Thermomix chocolate self saucing pudding.

    Step 1 - Make The Pudding Batter

    Place the butter into the Thermomix bowl and heat until melted.

    Melted butter in a Thermomix.

    Add the egg, vanilla and milk and mix to combine.

    Egg and melted butter in a Thermomix.

    Add the self-raising flour, cocoa powder and caster sugar and mix until combined.

    Chocolate batter in a Thermomix.

    Pour the batter into a greased baking dish.

    Chocolate pudding batter in a dish.

    Step 2 - Prepare The Sauce

    Sprinkle the cocoa powder and the caster sugar evenly over the chocolate pudding batter.

    Caster sugar and cocoa powder on top of pudding mixture.

    Very carefully (see tips below), pour the boiling water over the top of the cocoa powder and caster sugar.

    Boiling water on top of chocolate pudding batter.

    Bake for 30 minutes or until just cooked (do NOT overcook) - the pudding should be very wobbly thanks to the sauce underneath!

    Serve immediately.

    Expert Tips

    Follow our top tips for the perfect Thermomix chocolate self saucing pudding!

    • Pour the boiling water over the pudding just before cooking.
    • Use a large spoon (turned over) to pour the boiling water over the pudding so that it doesn't disturb the pudding batter.
    • Once baked, serve immediately (the sauce will start to soak into the pudding once cooled).
    • Do NOT overcook the pudding. The cake layer should be just cooked through and wobbly, while the sauce underneath will be runny.
    • Serve warm with custard, cream or ice-cream.
    • This recipe can be stored in an airtight container for up to 3 days or freeze for up to 3 months. Please note: once cooled, the sauce will soak into the pudding.
    Ice cream on top of chocolate pudding.

    FAQS

    How do I pour the boiling water over the top without disturbing the chocolate pudding batter?

    I like to turn a large spoon over the pour the boiling water over the top of the spoon. This way the boiling water slowly and gently drips onto the pudding batter.

    How can I make sure there's lots of sauce?

    It's important not to overcook the pudding! The cake layer should be cooked through but very wobbly (thanks to the sauce underneath).

    Can this be made ahead of time?

    You can prepare the chocolate pudding batter ahead of time. However, the cocoa powder, caster sugar and boiling water cannot be added until just before cooking. Once baked, serve immediately.

    Ice cream swirled through chocolate hot pudding.

    Related Recipes

    When the weather cools down, it's time to whip up some more of our delicious winter desserts!

    • A slice of sticky date pudding on a white plate.Melted vanilla icecream is running down the sides.
      Thermomix Sticky Date Pudding
    • A simple and delicious Thermomix Baked Lemon Cheesecake.. the perfect dessert for any occasion!
      Thermomix Baked Lemon Cheesecake
    • Thermomix Apple Pie
      Thermomix Apple Pie
    • Thermomix Ricotta & Raspberry Cake
      Thermomix Ricotta & Raspberry Cake

    OUR RANGE OF THERMOMIX COOKBOOKS

    Browse our collection of hardcopy Thermomix cookbooks here.

    There's everything from family dinners to kids snacks, desserts to cookies, slices to Christmas recipes, cocktails to chocolate recipes and more!

    ThermoBliss complete set
    Ice cream on top of chocolate pudding.
    Print Recipe
    4.83 from 63 votes

    Thermomix Chocolate Self-Saucing Pudding

    A rich Thermomix Chocolate Self-Saucing Pudding that will satisfy even the biggest of chocoholics! This is one of the best winter desserts ever!
    Prep Time10 minutes mins
    Cook Time30 minutes mins
    Total Time40 minutes mins
    Course: Dessert
    Cuisine: Chocolate, winter desserts
    Servings: 6 serves
    Calories: 278kcal
    Author: Lucy & Lauren
    Cost: $5

    Equipment

    • Thermomix
    • Oven

    Ingredients

    • 60 grams butter
    • 125 grams milk
    • 2 teaspoon vanilla extract
    • 1 egg
    • 150 grams self-raising flour
    • 25 grams cocoa powder
    • 110 grams caster sugar
    • 450 grams boiling water
    • 25 g extra cocoa powder
    • 110 grams extra caster sugar

    Instructions

    • Preheat oven to 160 degrees celcius. Grease a large oven baking dish and set aside (minimum of 6 cup capacity).
    • Place butter into a clean Thermomix bowl and melt for 2 minutes, 100 degrees, Speed 1. Allow to cool slightly.
    • Add the milk, vanilla extract and egg and mix for 20 seconds, Speed 4.
    • Add the self-raising flour, cocoa powder and caster sugar and mix for 10 seconds, Speed 4. 
      Scrape down the sides of the bowl and mix for a further 10 seconds or until smooth.
    • Pour the mixture into the prepared dish.
    • Boil the water and set aside.
    • Sift the extra cocoa powder over the pudding mixture then sprinkle over the extra caster sugar. 
      Carefully pour over the boiling water.
    • Bake for 30 minutes or until firm on the top. 
      Allow to cool slightly, then dust with icing sugar or serve with ice-cream, custard or cream. 

    Notes

    RECIPE NOTES & TIPS
    • Pour the boiling water over the pudding just before cooking.
    • Use a large spoon (turned over) to pour the boiling water over the pudding so that it doesn't disturb the pudding batter.
    • Once baked, serve immediately (the sauce will start to soak into the pudding once cooled).
    • Do NOT overcook the pudding. The cake layer should be just cooked through and wobbly, while the sauce underneath will be runny.
    • Serve warm with custard, cream or ice-cream.
    • This recipe can be stored in an airtight container for up to 3 days or freeze for up to 3 months. Please note: once cooled, the sauce will soak into the pudding.

    Nutrition

    Calories: 278kcal | Carbohydrates: 42g | Protein: 6g | Fat: 11g | Saturated Fat: 6g | Polyunsaturated Fat: 1g | Monounsaturated Fat: 3g | Trans Fat: 0.3g | Cholesterol: 51mg | Sodium: 89mg | Potassium: 198mg | Fiber: 4g | Sugar: 20g | Vitamin A: 324IU | Calcium: 49mg | Iron: 2mg

    Thermomix Marble Cake

    April 25, 2018

    Slice of Marble cake on a grey plate.

    This Thermomix Marble Cake is just like the classic Marble Cake you grew up with! It is made using a simple vanilla cake batter which is then divided into three parts. The result is a soft, moist and delicious cake which is perfect for your next special occasion or morning tea.

    Slice of Marble cake on a grey plate.

    This cake is a simple butter cake recipe which is then split into three portions to colour. To ensure that you get a really cool marble effect, it's important to not over mix the mixture with your butter knife when combining, otherwise the colours will combine into one.

    Why you will love this recipe

    • Simple ingredients - you don't need any special ingredients for this recipe.
    • Versatile - if you don't have pink food colouring, that's ok! Just leave it out and keep this as a chocolate and vanilla cake.
    • Freezer friendly - this cake can be frozen for up to two months when it's both iced and not iced.
    Cut Marble cake on a white plate.

    Ingredients

    Please note you will find the full ingredient list and recipe instructions in the recipe card below.

    • Self-raising flour - you can use plain flour and add 1 ½ teaspoons of baking powder.
    • Butter - I use unsalted butter for this recipe.
    • Milk - either full cream or skim milk is fine for this recipe.
    • Eggs - We use 70gram eggs in our recipes.
    • Caster Sugar - also know as superfine sugar.
    • Vanilla Extract - vanilla essence can also be used.
    • Cocoa
    • Pink Food Colouring
    Thermomix Marble Cake Recipe

    How to make a Marble Cake

    1. Combine the butter and sugar until pale and creamy.
    2. Add the remaining ingredients and mix until combined.
    butter and sugar combined in a Thermomix bowl.
    Marble cake combined in bowl.

    3. Divide the mixture between three bowls.

    4. Add the cocoa to one bowl and mix to combine, do the same with the pink food colouring to another bowl.

    3 bowls of cake batter.
    Pink and chocolate cake batter.

    5. Add the mixture to your prepared baking tin.

    Marble Cake batter in baking dish.

    6. Use a butter knife to swirl the mixture and flatten the surface.

    Marble cake batter before going into the oven.

    7. Bake until golden and cooked through when tested with a skewer.

    Marble Cake in baking tin after coming out of the oven.

    Expert Tips

    • You will need to use softened butter for this recipe.
    • If you don't have any pink food colouring, different colours can be used or you can divide the mixture into two and have one chocolate and one vanilla.
    • You can create as much or little swirl as you like, use us butter knife to mix the batter to create this effect.
    • This Marble Cake can be baked in different sized cake tins, please note the baking time will vary.
    • To freeze, wrap in cling wrap or place in a freezer safe container and store for up to two months.
    • I usually ice this Thermomix Marble Cake with a simple chocolate icing however you can also top it with a store bought chocolate or vanilla icing, and it's even delicious served un-iced.
    Slice of Marble cake on a grey plate.
    Slice of Marble cake on a grey plate.
    Print Recipe
    4.64 from 22 votes

    Thermomix Marble Cake

    This easy Thermomix Marble Cake recipe is simple to make and the perfect cake for your next special occasion - it's also freezer friendly too.
    Prep Time10 minutes mins
    Cook Time30 minutes mins
    Total Time40 minutes mins
    Course: Desserts
    Cuisine: Australian
    Servings: 10 pieces
    Calories: 212kcal
    Author: Lucy & Lauren

    Equipment

    • 1 x 20cm round cake tin
    • Thermomix

    Ingredients

    • 110 grams butter at room temp
    • 110 grams caster sugar
    • 1 teaspoon vanilla extract
    • 80 grams milk
    • 2 eggs 70 gram eggs
    • 200 grams self raising flour
    • 1 teaspoon cocoa
    • pink food colouring

    Instructions

    • Preheat your oven to 180 degrees celsius (fan-forced) and line a 20cm round baking tin with baking paper. Set aside until needed.
    • Place the butter and caster sugar into your Thermomix bowl and mix for 30 seconds, Speed 3. Scrape down the sides of the bowl and mix for a further 20 seconds, Speed 3.
    • Add the vanilla extract, milk, eggs and self raising flour and mix for 10 seconds, Speed 4.
    • Scrape down the sides of the bowl and mix for a further 5 seconds, Speed 4 or until well combined.
    • Transfer the mixture in three equal parts (approx 180g each) and add the cocoa to one and a couple of drops of pink food colouring (or cochineal if using) to the other. Mix to create the coloured mixture.
    • Add spoonfuls of the three different coloured mixtures to your prepared loaf tin and once all the mixture is in the tin, use a butter knife to gently swirl the mixture to create the ‘marble’ effect.
    • Place the cake tin into the oven and cook for 30 – 35 minutes or until your marble cake is cooked through when tested with a skewer.
    • Cool in tin for 5 minutes before transferring to a wire rack to cool completely.
    • Store in an airtight container or freeze indivually wrapped slices in the freeer for up to 3 months.

    Notes

    • You will need to use softened butter for this recipe.
    • If you don't have any pink food colouring, different colours can be used or you can divide the mixture into two and have one chocolate and one vanilla.
    • You can create as much or little swirl as you like, use us butter knife to mix the batter to create this effect.
    • This Marble Cake can be baked in different sized cake tins, please note the baking time will vary.
    • To freeze, wrap in cling wrap or place in a freezer safe container and store for up to two months.
    • I usually ice this Thermomix Marble Cake with a simple chocolate icing however you can also top it with a store bought chocolate or vanilla icing, and it's even delicious served un-iced.

    Nutrition

    Calories: 212kcal | Carbohydrates: 26g | Protein: 4g | Fat: 10g | Saturated Fat: 6g | Polyunsaturated Fat: 1g | Monounsaturated Fat: 3g | Trans Fat: 0.4g | Cholesterol: 57mg | Sodium: 87mg | Potassium: 49mg | Fiber: 1g | Sugar: 12g | Vitamin A: 336IU | Calcium: 21mg | Iron: 0.4mg

    Looking for More?

    You can find more great cake recipes in our  Books and eBooks. You can also shop the full range of print and eBooks here.

    ThermoBliss complete set

    Thermomix Beetroot Ravioli with Goats Cheese

    April 23, 2018

    Homemade ravioli parcels.

    Our Thermomix Beetroot Ravioli with Goats Cheese is a restaurant quality meal at home! Served with burnt butter, crispy sage leaves and parmesan cheese - this is one dinner that you'll make over and over again. 

    Homemade ravioli parcels.

    This is one of our personal favourite Thermomix dinners to make at home!

    Little parcels of soft pasta filled with creamy goats cheese and mint... so decadent and delicious.

    Plus, you can freeze any leftovers for a quick 'grab and cook' meal!

    Looking for more pasta recipes?

    Our Thermomix Beef & Veggie Pasta Bake, Creamy Chicken & Bacon Pasta Bake or BBQ Chicken Pasta are all delicious options.

    Why You're Going To Love This Recipe

    What's not to love about our Thermomix Beetroot Ravioli!

    • Restaurant Quality - this impressive Thermomix dinner is a restaurant quality meal... at home!
    • Looks Fancy, But....! - while this meal looks super fancy, it's actually incredibly simple to make.
    • Suitable For All Models Of The Thermomix - you can make this dinner using any of the Thermomix models.
    • Freezer-Friendly - freeze any leftover ravioli and cook directly from frozen for a simple weeknight dinner.
    Crispy sage on homemade pasta.

    What You Need

    Packed full of flavour, this gourmet homemade pasta is simply delicious.

    Please scroll to the recipe card at the bottom of the post for ingredient quantities and the full detailed method.

    The ingredients for beetroot ravioli.

    For The Pasta Dough

    • beetroot - use 3 medium sized beetroots. I recommend buying pre-cooked beetroot to save time. This is available from the fruit and vegetable section of the supermarket.
    • eggs - use large eggs (approx 60g each)
    • flour - use regular all-purpose plain flour

    For The Filling

    • cheeses - we use a combination of ricotta and goats cheese for the ultimate flavour and texture
    • mint - use fresh mint

    Step By Step Instructions

    It's actually super easy to make your own homemade Thermomix beetroot ravioli!

    Please scroll to the recipe card at the bottom of the post for ingredient quantities and the full detailed method.

    Step 1 - Puree The Beetroot

    Place the cooked beetroot into the Thermomix bowl and mix until pureed.

    Pureed beetroot in a Thermomix.

    Step 2 - Add The Eggs

    Add the eggs to the pureed beetroot.

    Egg and beetroot in a Thermomix.

    Mix until smooth and glossy.

    Glossy pureed beetroot in a Thermomix.

    Step 3 - Add The Flour

    Add the plain flour and mix to combine. Then knead (using the kneading/Interval function) for 6 minutes.

    Place into a bowl, cover with plastic wrap and set aside for 1 hour.

    Beetroot dough in a Thermomix.

    Step 4 - Make The Filling

    Place the fresh mint leaves into the Thermomix bowl.

    Finely chop.

    Chopped mint in a Thermomix.

    Add the cheeses and season with salt and pepper.

    Cheese and herbs in a Thermomix.

    Mix until smooth and then place into the fridge to chill.

    Cheese and herbs mixed together.

    Step 5 - Make The Ravioli

    Divide the dough into 4 equal portions.

    Roll each portion out until it's very thin (approx ½ cm).

    Place teaspoonfuls of the filling onto one piece of the dough.

    Spoonfuls of cheese mixture on rolled out pasta dough.

    Place an extra sheet of dough over the top.

    Use a knife to cut around the filling and dough, making small ravioli squares.

    Then use a fork to press down and seal the edges.

    Repeat with the remaining two dough sheets.

    Ravioli parcels on a chopping board.

    At this stage, you can either freeze the ravioli (in an airtight container with sheets of baking paper between each layer) or you can cook the ravioli.

    If cooking, bring a saucepan full of lightly salted water to the boil. Drop the ravioli in. Once they float to the surface, serve with a burnt butter and sage sauce.

    Expert Tips

    • Save time by using precooked beetroot
    • You will need 3 beetroot (approximately 250g in total)
    • use plain goats cheese or flavoured goats cheese (I occasionally use a dill flavoured goats cheese in this recipe)
    • roll the dough out very thin
    • make sure you've left enough space around the filling to allow the pasta dough to seal together
    • cook the ravioli until it floats to the top of the boiling water (it will only take a couple of minutes)
    • serve with your choice of sauce - I recommend a burnt butter and sage sauce
    • freeze any uncooked ravioli for up to 3 months
    • you can boil frozen ravioli directly from the freezer
    Crispy sage on top of homemade ravioli.

    FAQs

    Can I use my favourite soft feta instead of goats cheese?

    Oh course! Any soft feta is suitable to use.

    Should I use firm or soft ricotta?

    We recommend using the soft ricotta that you buy in containers (refer to ingredients image above).

    Goats cheese inside homemade ravioli.

    Related Recipes

    Looking for more Thermomix dinner inspiration?

    Here's a few more of our favourite recipes:

    • An overhead shot of a bowl of japanese curry.
      Thermomix Japanese Chicken Curry
    • A stack of golden chargrilled lamb gozlemes.
      Thermomix Lamb, Spinach & Feta Gozleme
    • Overhead view of a large spoon scooping up a Chicken Parma Ball.
      Thermomix Chicken Parma Balls
    • Side view of Chow Mein in a black bowl and topped with peanuts.
      Thermomix Chow Mein

    SHOP OUR RANGE OF THERMOMIX COOKBOOKS

    Browse our collection of hardcopy Thermomix cookbooks here.

    There's everything from family dinners to kids snacks, desserts to cookies, slices to Christmas recipes, cocktails to chocolate recipes and more!

    A bundle of 15 Thermomix Cookbooks.
    Homemade ravioli parcels.
    Print Recipe
    5 from 1 vote

    Thermomix Beetroot Ravioli with Goats Cheese

    A delicious and deceptively simple meal.
    Prep Time20 minutes mins
    Cook Time10 minutes mins
    Resting & Chilling Time1 hour hr
    Total Time1 hour hr 30 minutes mins
    Course: Dinner
    Cuisine: dinner, pasta
    Servings: 6 serves
    Calories: 597kcal
    Author: Lucy & Lauren
    Cost: $10

    Equipment

    • Thermomix
    • Stove-top

    Ingredients

    • 3 medium beetroots (peeled and cooked) approximately 250g - see notes
    • 2 eggs
    • 430 grams plain flour
    • 250 grams ricotta cheese
    • 180 grams soft goats cheese or feta
    • 2 tbs mint, finely chopped
    • salt and pepper

    To Serve

    • 120 grams butter
    • 10 grams fresh sage leaves
    • parmesan cheese to serve

    Instructions

    • Place the cooked beetroot into the Thermomix bowl and mix for 5 seconds, Speed 8. Scrape down the sides and repeat 2-3 more times or until finely chopped. 
    • Add the eggs and mix for 10 seconds, Speed 7.
    • Add the plain four and mix on Interval Speed (kneading/dough function), 6 minutes. 
    • Remove the dough from the bowl and use the extra flour to roll into a ball. Set aside in a bowl and cover with cling wrap for 1 hour. 
    • In a clean Thermomix bowl, add the mint leaves and chop for 10 seconds, Speed 6. Scrape down the sides of the bowl.
      Add the ricotta cheese, goats cheese, salt and pepper. Mix for 10 seconds, Speed 5. Scrape down the sides of the bowl and repeat. Place the mixture into a bowl in the fridge until needed. 
    • Divide the dough into 4 equal portions. Roll each portion out into a large thin rectangle (approximately ½cm thick). 
    • Place small teaspoons of the cheese mixture onto 2 of the dough rectangles (approximately 1 inch apart). 
    • Place the remaining two dough rectangles over the top and press down between the mixture to form small parcels. 
    • Use a sharp knife to cut the parcels out and then close each parcels edges with a fork. Place the parcels onto a flat baking tray. 
    • Bring a large pot of water to the boil, add the ravioli and cook until they float to the top (it will only take a couple of minutes). 
    • Meanwhile, place the butter into a large frying pan and melt until bubbling. Add the sage leaves and stir until crispy. Add the cooked ravioli and stir for 30 seconds to coat. 
    • Serve immediately with fresh parmesan cheese. 

    Notes

    RECIPE NOTES & TIPS
    • Save time by using precooked beetroot
    • You will need 3 beetroot (approximately 250g in total)
    • use plain goats cheese or flavoured goats cheese (I occasionally use a dill flavoured goats cheese in this recipe)
    • roll the dough out very thin
    • make sure you've left enough space around the filling to allow the pasta dough to seal together
    • cook the ravioli until it floats to the top of the boiling water (it will only take a couple of minutes)
    • serve with your choice of sauce - I recommend a burnt butter and sage sauce
    • freeze any uncooked ravioli for up to 3 months
    • you can boil frozen ravioli directly from the freezer

    Nutrition

    Calories: 597kcal | Carbohydrates: 62g | Protein: 19g | Fat: 30g | Saturated Fat: 18g | Polyunsaturated Fat: 2g | Monounsaturated Fat: 8g | Trans Fat: 1g | Cholesterol: 146mg | Sodium: 560mg | Potassium: 310mg | Fiber: 3g | Sugar: 3g | Vitamin A: 975IU | Vitamin C: 3mg | Calcium: 273mg | Iron: 4mg

    Thermomix Creamy Chicken Bacon Pasta Bake

    April 9, 2018

    A family-friendly Thermomix Creamy Chicken & Bacon Pasta Bake... the perfect midweek meal!

    A family-friendly Thermomix Creamy Chicken & Bacon Pasta Bake... the perfect midweek meal!

    A family-friendly Thermomix Creamy Chicken & Bacon Pasta Bake... the perfect midweek meal!

    In our house, dinners during the week need to be quick, easy and no-fuss! This Thermomix Creamy Chicken & Bacon Pasta Bake is exactly that. Just let the Thermie do it's thing then pop into the oven with lots of yummy cheese and bake. Too easy!

    A family-friendly Thermomix Creamy Chicken & Bacon Pasta Bake... the perfect midweek meal!

    I like to add peas and corn to my pasta bake, but you can add absolutely any other veggies you like. Baby spinach is also another favourite here!

    A family-friendly Thermomix Creamy Chicken & Bacon Pasta Bake... the perfect midweek meal!

    To get that beautiful golden and cheesy top on your Thermomix Creamy Chicken & Bacon Pasta Bake, I love using a mix of grated mozzarella, cheddar and parmesan cheese. YUM!!

    A family-friendly Thermomix Creamy Chicken & Bacon Pasta Bake... the perfect midweek meal!

    This is always a winner with my toddler and I hope your family loves it too!

    A family-friendly Thermomix Creamy Chicken & Bacon Pasta Bake... the perfect midweek meal!

    A family-friendly Thermomix Creamy Chicken & Bacon Pasta Bake... the perfect midweek meal!

    For more great Thermomix dinner recipes, check out our 'A MONTH OF THERMOMIX DINNERS' eBook!

    Two hands holding a recipe book - A Month of Thermomix Dinners

    A family-friendly Thermomix Creamy Chicken & Bacon Pasta Bake... the perfect midweek meal!
    Print Recipe
    4.86 from 61 votes

    Thermomix Creamy Chicken & Bacon Pasta Bake

    A family-friendly Thermomix Creamy Chicken & Bacon Pasta Bake... the perfect midweek meal!
    Prep Time10 minutes mins
    Cook Time40 minutes mins
    Total Time50 minutes mins
    Course: Dinner, main meal
    Cuisine: pasta, pasta bake
    Servings: 6 serves
    Calories: 689kcal
    Author: Lucy & Lauren

    Ingredients

    • 80 grams onion, halved
    • 100 grams bacon rashers, halved
    • 2 teaspoon minced garlic
    • 20 grams olive oil
    • 380 grams chicken breast, chopped into 3cm cubes
    • 1 teaspoon chicken stock powder (or 1 tablespoon homemade stock)
    • 500 grams boiling water
    • 300 ml cream
    • 2 tomatoes, chopped
    • salt and pepper, to taste
    • 250 grams small pasta (ie. penne, spirals)
    • 300 grams frozen peas or corn
    • 1 cup grated cheeses (mozzarella, cheddar, parmesan etc)

    Instructions

    • Place the onion and bacon rashers into the Thermomix bowl and chop for 3 seconds, Speed 6. 
    • Add the minced garlic and olive oil and sauté 4 minutes, 100 degrees, Speed 1. 
    • Add the chopped chicken breast, chicken stock, boiling water, cream, and chopped tomatoes to the Thermomix bowl. Season with salt and pepper. Do not go past the 'fill' line. 
    • Cook 5 minutes, 100 degrees, REVERSE, Speed 1. Place the steaming basket on the lid instead of the MC to stop splatters.
    • Add the pasta and cook for a further 15 minutes, 100 degrees, REVERSE, Speed 1. (The sauce will be quite thick). 
    • Preheat oven to 200 degrees celsius (fan-forced). 
    • Pour the pasta into a baking dish and stir through 300g frozen peas or corn. 
    • Top with 1 cup grated cheese. 
    • Bake in the preheated oven for 15 minutes or until golden.

    Nutrition

    Calories: 689kcal | Carbohydrates: 48g | Protein: 29g | Fat: 43g | Saturated Fat: 20g | Polyunsaturated Fat: 5g | Monounsaturated Fat: 15g | Trans Fat: 0.1g | Cholesterol: 130mg | Sodium: 571mg | Potassium: 714mg | Fiber: 6g | Sugar: 10g | Vitamin A: 1504IU | Vitamin C: 36mg | Calcium: 208mg | Iron: 3mg

    Thermomix Mojitos

    April 2, 2018

    Side view of two glasses filled with Mojito cocktails. Mint leaves and lime wedges are sitting next to the glasses.

    Our Thermomix Mojitos made with rum, soda water, raw sugar, fresh limes and mint are the perfect cocktail for any occasion! This cocktail recipe can also easily be doubled or halved for a single serve and you can be enjoying these Mojitos in just 5 minutes!

    Side view of two glasses filled with Mojito cocktails. Mint leaves and lime wedges are sitting next to the glasses.

    If you've been visiting ThermoBliss for a while now, you'll know that we're pretty massive fans of making cocktails in the Thermomix... and these Thermomix Mojitos are up there as one of our favourite recipes of all-time!

    Why you will love this recipe:

    Quick to prepare - you can be enjoying these Mojitos in just five minutes.

    Versatile - this recipe can be doubled or halved for a single serve. You can also omit the white rum to make a Virgin Mojito instead.

    Classic recipe - these Mojitos are a classic recipe that everyone will love.

    Overhead view of a mojito in a tall glass. In the background is lime and mint pieces.

    Mojito Ingredients:

    Please note you will find the full ingredient list and instructions in the recipe card below.

    • Raw Sugar - you can use white sugar if that is all you have.
    • Ice
    • White Rum - we use Bacardi White Rum for this recipe.
    • Mint Leaves - fresh is best.
    • Soda Water - you can omit the sugar and substitute the soda water with lemonade if you prefer.
    Ingredients to make a mojito on a white bench top.

    How to Make Mojitos in a Thermomix:

    Step 1. Blitz the raw sugar.

    Step 2. Add the mint leaves and limes and mix.

      mint, lime and raw sugar combined in a THermomix bowl.

      Step 3. Add the remaining ingredients and mix.

      Mojito ingredients mixed together in a Thermomix bowl.

      Step 4. Divide the Mojitos between serving glasses and enjoy!

      Side view of a Mojito in a tall glass.

      Tips for Making the BEST Thermomix Mojitos:

      Fresh limes and mint work best for this recipe.

      You can omit the sugar and substitute the soda water with lemonade if you wish.

      This recipe can be doubled, please ensure you do not exceed the maximum fill line of your machine.

      You can make these Mojitos an hour or two before needed - omit the ice and give the mixture a gentle stir before adding the ice to serve.

      Frequently Asked Questions

      What is the best alcohol to use when making mojitos?

      We recommend using a good quality White Rum (such as Bacardi) when making mojitos. If you don't have any white rum, vodka can be used instead.

      Can you make a mojito without mint?

      Yes, you can make a mojito cocktail without mint. You can use rosemary or basil in its place, or leave it out completely.

      More Thermomix Cocktail recipes:

      • Thermomix Baileys Cocktail
      • Thermomix Raspberry Gin Cocktail
      • Watermelon, Vodka & Mint Cocktail
      • Thermomix Eggnog Recipe
      • Pina Colada
      • Thermomix Baileys

      Looking for even more?

      Find more easy Thermomix Cocktail recipes in our books and eBooks - shop the range here.

      Complete set o 16 ThermoBliss recipe books.
      Side view of two glasses filled with Mojito cocktails. Mint leaves and lime wedges are sitting next to the glasses.
      Print Recipe
      4.65 from 17 votes

      Thermomix Mojitos

      Our Thermomix Mojitos made with rum, soda water, raw sugar, fresh limes and mint are the perfect cocktail for any occasion!
      Prep Time5 minutes mins
      Total Time5 minutes mins
      Course: cocktails
      Cuisine: Cocktails, drinks
      Servings: 2 cocktails
      Calories: 223kcal
      Author: Lucy & Lauren
      Cost: $10

      Equipment

      • Thermomix
      • 2 x glasses to serve

      Ingredients

      • 30 grams raw sugar
      • 12 fresh mint leaves
      • 2 limes quartered
      • 120 grams white rum (we used Bacardi)
      • 120 grams soda water
      • 300 grams ice

      Instructions

      • Place the raw sugar into the Thermomix bowl and mix for 5 seconds, Speed 8.
      • Add the mint leaves and limes (still with the skins on) and mix for 20 seconds, Speed 3, Reverse.
      • Add the white rum, soda water and ice and mix for 15 seconds, Speed 3, Reverse.
      • Remove the lime quarters and pour into 2 serving glasses. Serve immediately. 

      Notes

      Fresh limes and mint work best for this recipe.
      You can omit the sugar and substitute the soda water with lemonade if you wish.
      This recipe can be doubled, please ensure you do not exceed the maximum fill line of your machine.
      You can make these Mojitos an hour or two before needed - omit the ice and give the mixture a gentle stir before adding the ice to serve.

      Nutrition

      Calories: 223kcal | Carbohydrates: 23g | Protein: 1g | Fat: 1g | Saturated Fat: 1g | Polyunsaturated Fat: 1g | Monounsaturated Fat: 1g | Sodium: 24mg | Potassium: 109mg | Fiber: 2g | Sugar: 16g | Vitamin A: 288IU | Vitamin C: 21mg | Calcium: 46mg | Iron: 1mg

      Thermomix Easter Egg Slice

      March 12, 2018

      A chocolate easter egg slice

      A simple Thermomix Easter Egg Slice filled with yummy chocolate Easter eggs... and it's completely no-bake!! This chocolate-filled slice takes just 10 minutes to prepare.

      A chocolate easter egg slice

      Now that Easter isn't far away, it's time to get started with some chocolate-filled baking.

      And this recipe is doubly as good... because there's LOTS of chocolate involved, but absolutely NO baking required!

      Here at ThermoBliss we LOVE no-bake recipes (especially no-bake slices!).

      This is also a really great recipe for beginners or kids to make (there's no tricky steps involved at all).

      Why You're Going To Love This Recipe

      What's not to love about a quick, easy and sweet slice that's BURSTING with Easter eggs!?

      • A simple no-bake recipe - this Thermomix Easter Egg Slice has a basic biscuit base scattered with your favourite chocolate Easter eggs, then topped with a layer of milk chocolate and sprinkled with even more Easter eggs. Absolutely NO baking needed.
      • 10 minutes prep time - the hardest part of this recipe is waiting for the slice to chill in the fridge.
      • Mix and match - choose any of your favourite mini Easter eggs for this slice (personally I like to use M&Ms crispy speckled eggs as they're easy to cut through AND they're so bright and colourful.
      • Suitable for all models of the Thermomix - regardless of which Thermomix model you own, you can make this recipe in it!
      Easter egg slice on a plate

      What You Need

      You need just 6 ingredients to make our Thermomix Easter Egg Slice!

      Please scroll to the recipe card at the bottom of the post for ingredient quantities and the full detailed method.

      The ingredients for Thermomix Easter Egg Slice
      • Biscuits - choose any plain sweet biscuits (such as Arnotts Marie, Nice etc)
      • Butter - use salted or unsalted butter
      • Sweetened Condensed Milk - choose full fat (not skim or light) sweetened condensed milk as it sets firmer. I personally like Nestle brand - but any brand is fine!
      • Coconut - use fine dry desiccated coconut
      • Mini Easter Eggs - you can choose any mini Easter eggs you like. If using solid eggs, I recommend chopping them into small pieces before using (this makes it easier to cut the slice at the end).
      • Milk Chocolate - use milk chocolate melts (such as Cadbury or Nestle).

      Step By Step Instructions

      It couldn't be easier to make our Thermomix Easter Egg Slice... and it will be prepared in just 10 minutes!

      Please scroll to the recipe card at the bottom of the post for ingredient quantities and the full detailed method.

      Step 1 - Crush The Biscuits

      Crushed biscuits in a jug

      Place the biscuits into the Thermomix and crush until fine crumbs remain.

      Set aside in a seperate bowl.

      Step 2 - Melt

      Melted butter in a jug

      Melt the butter (chopped) and then add the sweetened condensed milk and mix to combine.

      Step 3 - Mix

      Coconut and biscuits in a Thermomix

      Add the coconut and crushed biscuits and mix to combine.

      Mix through the mini Easter eggs (chopped if using solid eggs).

      Easter eggs in a Thermomix

      Press into the prepared tin.

      Easter egg slice mixture ;pressed into a tin

      Step 4 - Decorate

      Chocolate and easter eggs on top of a slice

      Melt the milk chocolate and pour over the slice.

      Decorate with extra mini Easter eggs.

      Step 5 - Chill

      Chill in the fridge for a minimum of 2 hours (preferably overnight) before cutting into slices.

      TIP: remove the slice from the fridge 20 minutes before cutting (this helps to stop the chocolate layer on top from cracking).

      An overhead shot of pieces of easter egg slice

      Expert Tips

      • Use full fat sweetened condensed milk as it sets firmer than skim or light
      • Use any plain sweet biscuits you like (such as Arnotts Marie, Nice etc)
      • Choose your favourite mini Easter eggs - I recommend using M&Ms crispy speckled eggs as they cut easily and are bright and colourful. If using solid mini eggs, I would recommend chopping them into smaller pieces before using (this makes the slice easier to cut).
      • Remove the slice from the fridge 20 minutes before cutting (this helps to stop the chocolate layer on top from cracking).
      • Store in the fridge for up to 1 week
      • Freeze in an airtight container for up to 3 months
      Pieces of easter egg slice

      FAQs

      Can I make this slice without a Thermomix?

      Yes! Absolutely! You can make this slice conventionally using this recipe here.

      Can I make Thermomix Easter Egg Slice with any model of the Thermomix?

      Yes you can. This recipe has been tested in all models.

      What type of mini Easter eggs are best to use?

      Personally, I like to use M&Ms crispy speckled eggs. This is because they're easy to cut through and are also bright and colourful. If you're using solid eggs, I recommend chopping them into smaller chunks before adding to the slice (this makes the slice easier to cut).

      Related Recipes

      Yay! Here at ThermoBliss, we LOVE Easter!

      Here's a few of our most popular Easter recipes:

      • Five Hot Cross Buns on a white platter.
        Thermomix Hot Cross Buns
      • Fudge with Easter eggs.
        Thermomix 3 Ingredient Easter Egg Fudge
      • Rocky road with easter eggs.
        Thermomix Easter Egg Rocky Road
      • Pieces of Brownies with Easter egg stacked on a white plate.
        Thermomix Easter Egg Brownies

      THERMOMIX CHOCOLATE COOKBOOK

      Our Thermomix Chocolate printed cookbook is packed full of delicious chocolate recipes PLUS plenty of Thermomix Easter Recipes too!

      Shop the cookbook here

      All hardcopy cookbooks also come with a free eBook version available to download immediately upon purchase.

      The cover of a recipe book with text Thermomix Chocolate, next to a stack of double chocolate cookies
      A chocolate easter egg slice
      Print Recipe
      5 from 4 votes

      Thermomix Easter Egg Slice

      A simple Thermomix Easter Egg Slice filled with yummy chocolate Easter eggs... and it's completely no-bake!!
      Prep Time10 minutes mins
      Chilling Time2 hours hrs
      Total Time2 hours hrs 10 minutes mins
      Course: Dessert
      Cuisine: Easter
      Servings: 16 pieces
      Calories: 365kcal
      Author: Lucy & Lauren
      Cost: $10

      Equipment

      • 18cm X 28cm slice tin
      • Thermomix

      Ingredients

      • 250 g plain sweet biscuits
      • 100 g butter
      • 90 g desiccated coconut
      • 300 g sweetened condensed milk
      • 200 g mini Easter eggs see notes
      • 250 g milk chocolate
      • extra mini Easter eggs to decorate

      Instructions

      • Grease and line a 18cm X 28cm rectangular slice tin with baking paper.
      • Place the biscuits into the Thermomix bowl and crush for 10 seconds, Speed 8. Pour into a seperate bowl and set aside.
      • Melt the butter in the Thermomix for 2 minutes, 80 degrees, Speed 2 (or until melted).
      • Add the sweetened condensed milk and mix for 10 seconds, Speed 3. Scrape down the sides of the bowl.
      • Add the coconut and the crushed biscuits and mix for 10 seconds, Speed 4. Scrape down the sides of the bowl and repeat for a further 5 seconds.
        Note: If your mixture is too crumbly, add a little more sweetened condensed milk and mix again for 5 seconds.
      • Add the mini Easter eggs and mix for 10 seconds, REVERSE, Speed 3, using the spatula to help mix.
      • Spoon the mixture into the prepared tray and press down firmly with a spoon.
      • Melt the chocolate in a clean and dry Thermomix bowl for 3 minutes, 60 degrees, Speed 2 (or until melted).
        Pour the melted chocolate over the top and decorate with extra mini Easter eggs.
      • Place into the fridge for 2 hours (overnight is best).
        Remove from the fridge 20 minutes before cutting into slices (this makes it easier to cut).

      Notes

      • Use full fat sweetened condensed milk as it sets firmer than skim or light
      • Use any plain sweet biscuits you like (such as Arnotts Marie, Nice etc)
      • Choose your favourite mini Easter eggs - I recommend using M&Ms crispy speckled eggs as they cut easily and are bright and colourful. If using solid mini eggs, I would recommend chopping them into smaller pieces before using (this makes the slice easier to cut).
      • Remove the slice from the fridge 20 minutes before cutting (this helps to stop the chocolate layer on top from cracking).
      • Store in the fridge for up to 1 week
      • Freeze in an airtight container for up to 3 months

      Nutrition

      Calories: 365kcal | Carbohydrates: 38g | Protein: 4g | Fat: 24g | Saturated Fat: 14g | Polyunsaturated Fat: 2g | Monounsaturated Fat: 6g | Trans Fat: 0.2g | Cholesterol: 20mg | Sodium: 126mg | Potassium: 197mg | Fiber: 3g | Sugar: 28g | Vitamin A: 220IU | Vitamin C: 1mg | Calcium: 65mg | Iron: 1mg

      Thermomix Easter Recipes

      March 11, 2018

      A collage of Easter recipes.

      Browse our collection of Thermomix Easter recipes! From hot cross buns to Easter-inspired rocky road, brownies, fudge and more!

      A collage of Easter recipes.

      There's no sweeter time to get into the kitchen and put your Thermomix to work than over the Easter holiday!

      Our recipes are so simple to make (perfect for getting little chefs involved in the cooking!) and are absolutely delicious and PACKED full of Easter eggs!

      All of our recipes in this collection are suitable for use in all Thermomix models.

      To access the full recipe, simply click on any of the links below.

      Thermomix Hot Cross Buns

      Our classic Thermomix hot cross buns are an all-time favourite!

      Prepare a fresh batch for Easter morning and enjoy while still warm from the oven.

      Serve them plain or with butter and jam!

      Thermomix Hot Cross Buns

      Our Thermomix Hot Cross Buns recipe really is the BEST! These buns are light, fluffy and packed with flavour and will be a hit with the whole family.
      Thermomix Hot Cross Buns Recipe
      Five Hot Cross Buns on a white platter.

      Thermomix Chocolate Chip Hot Cross Buns

      For all of the chocoholics out there, our chocolate chip hot cross buns are for you!

      These yummy little chocolatey buns are always a hit (especially with the kids).

      They're also a yummy lunch box filler too!

      Thermomix Chocolate Chip Hot Cross Buns

      Our simple and delicious Thermomix Chocolate Chip Hot Cross Buns make the perfect Easter treat!
      Thermomix Chocolate Chip Hot Cross Buns Recipe
      Thermomix Chocolate Chip Hot Cross Bun sitting on a white bench with choc chips scattered around it. In the background is a baking tray with more chocolate chip hot cross buns.

      Thermomix Hot Cross Bun Wreath

      For something a little extra special, you simply can't beat our hot cross bun wreath!

      Your favourite sweet and fluffy hot cross buns baked into the shape of a wreath.

      This is sure to be a showstopper at Easter breakfast or brunch.

      Thermomix Hot Cross Bun Wreath

      A super cute Thermomix Hot Cross Bun Wreath made with chocolate chips... the perfect Easter breakfast treat!
      Thermomix Hot Cross Bun Wreath Recipe
      A super cute Thermomix Hot Cross Bun Wreath made with chocolate chips... the perfect Easter breakfast treat!

      Thermomix 3 Ingredient Easter Egg Fudge

      Our sweet and simple Easter egg fudge is made using just 3 ingredients - white chocolate, sweetened condensed milk and speckled eggs (like Cadbury, Darrell Lea or M&Ms).

      The perfect Thermomix Easter recipe!

      Thermomix 3 Ingredient Easter Egg Fudge

      Our Thermomix 3 Ingredient Easter Egg Fudge is made with creamy white chocolate, sweetened condensed milk and Easter eggs... the perfect Easter recipe!
      Thermomix 3 Ingredient Easter Egg Fudge Recipe
      Fudge with Easter eggs.

      Thermomix Easter Egg Rocky Road

      Our homemade Easter rocky road is so fun, delicious and versatile! Use any of your favourite Easter eggs (including Creme eggs and marshmallow eggs if you like!).

      This is also a great post-Easter recipe... when you're trying to use up any leftover Easter eggs.

      Thermomix Easter Egg Rocky Road

      A quick and easy Thermomix Easter Egg Rocky Road made with all your favourite Easter chocolates!! Just 10 minutes prep time!
      Thermomix Easter Egg Rocky Road Recipe
      Rocky road with easter eggs.

      Thermomix Easter Egg Slice

      A simple no-bake slice with Easter eggs in the base AND on top! You can't beat that!

      Get the kids to help make this super easy sweet treat.

      Thermomix Easter Egg Slice

      A simple Thermomix Easter Egg Slice filled with yummy chocolate Easter eggs... and it's completely no-bake!!
      Thermomix Easter Egg Slice Recipe
      A chocolate easter egg slice

      Thermomix Easter Egg Brownies

      Making Easter egg brownies in your Thermomix machine couldn't be easier (or tastier!).

      Use any of your favourite mini solid eggs or add speckled eggs for a pretty pop of colour.

      Thermomix Easter Egg Brownies

      These Thermomix Easter Egg Brownies are a simple but delicious Easter dessert PLUS they are a great way to use up any leftover easter eggs!
      Thermomix Easter Egg Brownies Recipe
      Pieces of Brownies with Easter egg stacked on a white plate.

      Thermomix Chocolate Cookbook

      Our Thermomix Chocolate printed cookbook is packed full of delicious chocolate recipes PLUS plenty of Thermomix Easter Recipes too!

      Shop the cookbook here

      All hardcopy cookbooks also come with a free eBook version available to download immediately upon purchase.

      The cover of a recipe book with text Thermomix Chocolate, next to a stack of double chocolate cookies

      Thermomix Easter Egg Rocky Road

      March 5, 2018

      Rocky road with easter eggs.

      A quick and easy Thermomix Easter Egg Rocky Road made with all your favourite Easter chocolates!!

      Rocky road with easter eggs.

      Rocky road is such a classic favourite! Whether you're making batches at Christmas time, for birthday parties, fetes or special celebrations, it's always a delicious treat.

      Our Easter-inspired Thermomix Easter Egg Rocky Road is packed full of your favourite Easter eggs... and we think you're going to LOVE it!

      Why You're Going To Love This Recipe

      There's a lot to love about our Thermomix Easter Egg Rocky Road!

      • 4 Ingredients - our super easy Easter rocky road is made using just chocolate, marshmallow eggs, raspberry lollies and mini Easter eggs.
      • 10 Minutes Prep Time - it's so quick and easy to prepare our Easter rocky road! Have it chilling in the fridge in just 10 minutes.
      • Mix & Match - use any of your favourite mini Easter eggs (speckled eggs, solid eggs, creme eggs etc). You can also use regular marshmallows in place of the marshmallow eggs. You can also use any soft gummy lollies in place of the raspberry lollies.
      • Suitable For All Thermomix Models - this recipe can be made in any of the Thermomix models.
      An overhead shot of easter egg rocky road.

      What You Need

      Just 4 ingredients!

      Please scroll to the recipe card at the bottom of the post for ingredient quantities and the full detailed method.

      • Chocolate - I generally use milk chocolate but you could substitute with dark chocolate if you prefer. Use a good quality chocolate such as Cadbury, Lindt or Nestle
      • Marshmallow Eggs - I use Cadbury marshmallow eggs but you can use any brand you like. You can also use regular marshmallows in place of the marshmallow Easter eggs if you prefer
      • Raspberry Lollies - I use Allens brand but you can substitute them with any gummy lolly (such as snakes, jubes)
      • Mini Easter Eggs - you can use any solid Easter eggs you like (such as speckled eggs, creme eggs, solid eggs, Caramilk eggs)

      Step By Step Instructions

      It takes just a few minutes to make our simple Thermomix Easter Egg Rocky Road!

      Please scroll to the recipe card at the bottom of the post for ingredient quantities and the full detailed method.

      Step 1 - Grate The Chocolate

      Place the chocolate into the Thermomix bowl.

      Mix until finely grated.

      Scrape down the sides of the bowl.

      Step 2 - Melt The Chocolate

      Melt the chocolate for 3-4 minutes (or until melted).

      Step 3 - Mix Through The Add-Ins

      Add the chopped marshmallow eggs, mini eggs and raspberry lollies and mix on Reverse until combined.

      Step 4 - Chill

      Working quickly, pour the rocky road into the prepared tin and sprinkle with extra mini eggs (optional).

      Chill in the fridge.

      Expert Tips

      • Use a good quality chocolate such as Cadbury, Lindt or Nestle
      • Mix and match with your favourite mini eggs
      • Store in an airtight container in the fridge for up to 3 weeks
      • Prepare the tin before starting (as it sets quickly)
      An easter egg on top of a piece of chocolate marshmallow slice.

      FAQs

      Can I make this recipe without a Thermomix?

      Yes absolutely! Simply melt the chocolate in the microwave and stir through the add-ins with a spoon.

      Can I make this in older models of the Thermomix?

      Yes our Thermomix Easter Egg Rocky Road can be made in any model of the Thermomix.

      Chocolate squares with marshmallows, lollies and easter eggs.

      Related Recipes

      Looking for some more Easter recipes!?

      Here's a few of our favourites:

      • Five Hot Cross Buns on a white platter.
        Thermomix Hot Cross Buns
      • Fudge with Easter eggs.
        Thermomix 3 Ingredient Easter Egg Fudge
      • A chocolate easter egg slice
        Thermomix Easter Egg Slice
      • Pieces of Brownies with Easter egg stacked on a white plate.
        Thermomix Easter Egg Brownies

      Thermomix Chocolate Cookbook

      Our Thermomix Chocolate printed cookbook is packed full of delicious chocolate recipes PLUS plenty of Thermomix Easter Recipes too!

      Shop the cookbook here

      All hardcopy cookbooks also come with a free eBook version available to download immediately upon purchase.

      The cover of a recipe book with text Thermomix Chocolate, next to a stack of double chocolate cookies
      Rocky road with easter eggs.
      Print Recipe
      5 from 1 vote

      Thermomix Easter Egg Rocky Road

      A quick and easy Thermomix Easter Egg Rocky Road made with all your favourite Easter chocolates!! Just 10 minutes prep time!
      Prep Time10 minutes mins
      Chilling Time2 hours hrs
      Total Time2 hours hrs 10 minutes mins
      Course: Dessert
      Cuisine: Easter
      Servings: 16 serves
      Calories: 307kcal
      Author: Lucy & Lauren
      Cost: $10

      Equipment

      • Thermomix

      Ingredients

      • 500 g milk chocolate
      • 200 g marshmallow Easter eggs roughly chopped (approx 6)
      • 250 g mini Easter eggs (like M&M speckled eggs, solid eggs, Creme eggs caramel eggs etc)
      • 150 g raspberry lollies

      Instructions

      • Grease and line the base and sides of a 18 X 28cm slice pan with baking paper, letting the sides overhang.
      • Grate the chocolate for 10 seconds, Speed 9. Scrape down the sides of the bowl.
        Melt for 3-4 minutes, 50 degrees, Speed 3.
      • Add the marshmallow eggs, mini eggs and raspberry lollies and mix for 10 seconds, Reverse, Speed 3 or until combined.
      • Working quickly, spread the mixture into the prepared baking pan and sprinkle with extra mini eggs (optional). 
      • Place into the fridge for 2 hours or until completely set. Use a sharp knife to cut into slices.

      Notes

      RECIPE NOTES & TIPS
      • Use a good quality chocolate such as Cadbury, Lindt or Nestle
      • Mix and match with your favourite mini eggs
      • Store in an airtight container in the fridge for up to 3 weeks
      • Prepare the tin before starting (as it sets quickly)

      Nutrition

      Calories: 307kcal | Carbohydrates: 45g | Protein: 3g | Fat: 16g | Saturated Fat: 9g | Polyunsaturated Fat: 0.5g | Monounsaturated Fat: 5g | Sodium: 21mg | Potassium: 137mg | Fiber: 3g | Sugar: 35g | Calcium: 12mg | Iron: 1mg

      Thermomix 2 Ingredient Dough Recipe

      February 21, 2018

      Side view of 2 ingredient dough sitting on a blue striped plate.

      This Thermomix 2 Ingredient Dough Recipe COULD NOT be any easier to make - I promise!! You can have this dough prepared in just five minutes and then it's up to you to decide what to use it for!

      Although this two ingredient dough is super easy to make conventionally, using the Thermomix made it even easier (yes really!), and while it was kneading, I was able to set up the ingredients for the filling, helping to save even more time.

      You will love

      Versatile - this dough can be used to make scrolls, pizzas, flatbreads and more!

      Quick to prepare - there is just 5 minutes of prep time required to make this dough.

      Freezer friendly - this dough is freezer friendly both uncooked and one baked for up to three months.

      Overhead view of Side view of 2 ingredient dough sitting on a blue striped plate.

      Ingredients

      Please note you will find the full list of ingredients and method in the recipe card below.

      • Self-raising flour
      • Yoghurt - you can use either greek or natural yoghurt for this recipe.
      ingredients to make two ingredient dough in a thermomix.

      How to make 2 Ingredient Dough in a Thermomix

      Step 1. Place the ingredients into your Thermomix bowl and mix to combine.

      greek yoghurt and self-raising flour inside of a thermomix bowl.
      combined ingredients for 2 ingredient dough in a thermomix bowl.

      Step 2. Select the kneading function and mix until dough comes together.

      kneaded thermomix 2 ingredient dough.

      Step 3. Turn the dough out onto a bench and gently bring together to form a ball. It is now ready to use!

      Side view of 2 ingredient dough sitting on a blue striped plate.

      Recipe Hints and Tips

      If you don't have any self-raising flour you can substitute with plain flour. You will need to add three teaspoons of baking powder.

      Any type of plain greek yoghurt can be used. You can also use plain natural or regular yoghurt as well.

      If you find your dough is sticky and difficult to work with (this can happen as the fluid content of different brands of yoghurt varies), simply add a little extra flour.

      To freeze, place into a freezer safe container and store for up to three months.

      FAQ

      Why is my 2 ingredient dough sticky?

      If you find your dough sticky when working with it, simply add some extra self-raising flour.

      What does yoghurt do to dough?

      When used in baking, yoghurt will help to provide moisture and softness to dough.

      overhead view of 2 ingredient dough sitting on a blue striped plate.

      What can I use this dough for?

      This two ingredient dough can be used to make Pizzas, Scrolls, Flatbreads and more. You may like to try some of these Scroll flavours:

      • Cinnamon
      • Apple and Cinnamon
      • Vegemite and Cheese
      • Blueberry
      • Jam and Sultana
      • Spinach and Cheese
      • Ham and Cheese

      You may also enjoy these recipes:

      • 4 Ingredient Scones
      • Thermomix Boston Bun
      • Thermomix Turkish Pide
      • Thermomix Vanilla Cake
      • Thermomix Savoury Breads and Scroll Recipes
      Side view of 2 ingredient dough sitting on a blue striped plate.
      Print Recipe
      4.91 from 10 votes

      Thermomix 2 Ingredient Dough

      It doesn't get easier than this 2 Ingredient Dough recipe! This recipe can be made in under 5 minutes and is perfect for scrolls, pizzas and more!
      Prep Time5 minutes mins
      Total Time5 minutes mins
      Course: Snacks
      Cuisine: Australian, Modern
      Servings: 1 portion
      Calories: 1296kcal
      Author: Lucy & Lauren
      Cost: $5

      Equipment

      • 1 x Thermomix

      Ingredients

      • 280 grams Greek Yoghurt
      • 300 grams self raising flour plus extra for your bench

      Instructions

      • Place the greek yoghurt and self raising flour into your Thermomix bowl and mix for 10 seconds, speed 4 to combine.
      • Select the 'kneading' function and mix for 3 minutes.
      • Turn the dough out onto your bench or Thermomat and lightly bring it together into a ball.
      • Use for scrolls, pizzas or flatbreads.

      Notes

      If you don't have any self-raising flour you can substitute with plain flour. You will need to add three teaspoons of baking powder.
      Any type of plain greek yoghurt can be used. You can also use plain natural or regular yoghurt as well.
      If you find your dough is sticky and difficult to work with (this can happen as the fluid content of different brands of yoghurt varies), simply add a little extra flour.
      To freeze, place into a freezer safe container and store for up to three months.

      Nutrition

      Calories: 1296kcal | Carbohydrates: 229g | Protein: 64g | Fat: 11g | Saturated Fat: 4g | Polyunsaturated Fat: 2g | Monounsaturated Fat: 0.4g | Cholesterol: 16mg | Sodium: 121mg | Potassium: 300mg | Fiber: 7g | Sugar: 12g | Vitamin A: 168IU | Calcium: 373mg | Iron: 3mg

      Looking for more?

      You can find simple and delicious recipes in our books and eBooks, shop the range here.
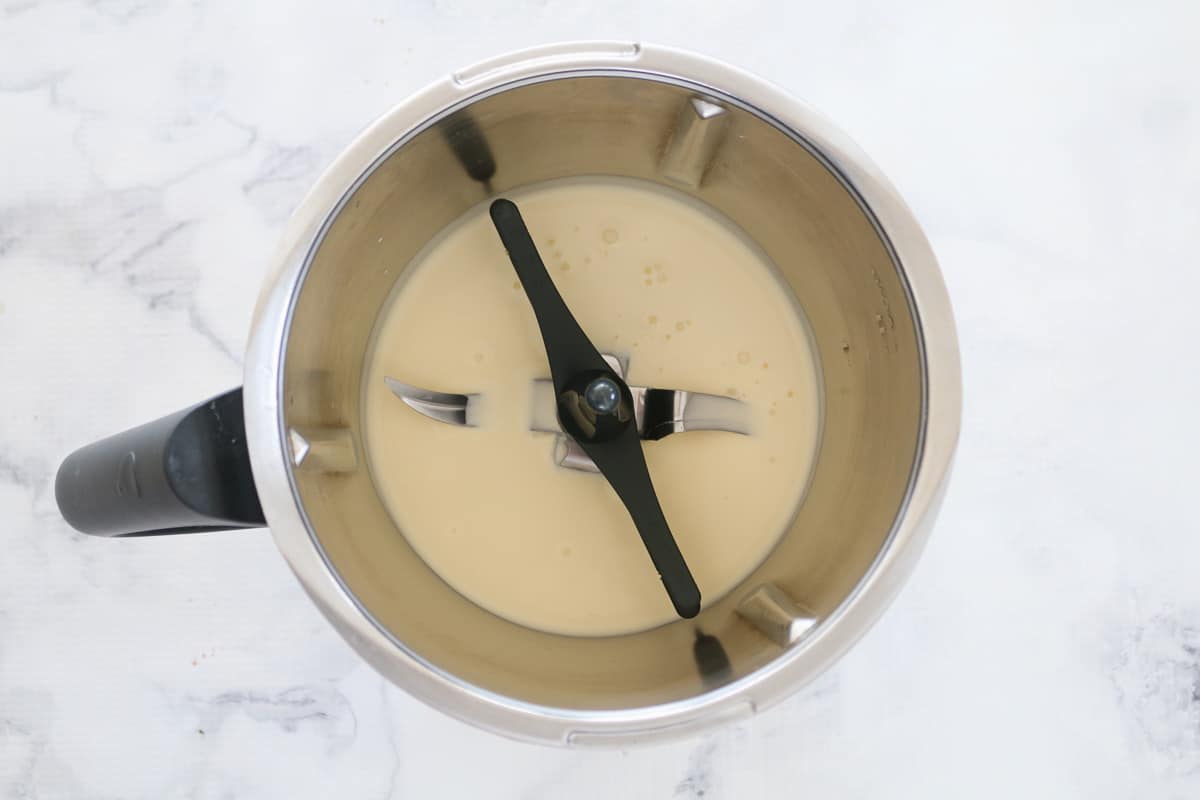
      Image of 13 ThermoBliss recipes books on a marble look background.

      Thermomix Porridge

      February 5, 2018

      An overhead shot of cooked oats in a bowl with banana and seeds.

      Making Thermomix Porridge has never been quicker, easier or more delicious!! Just 3 basic ingredients - oats, milk and water.

      Serve with your choice of honey, fruit, yoghurt, nuts and seeds.

      An overhead shot of cooked oats in a bowl with banana and seeds.

      If you're still using the stovetop to make porridge... STOP NOW!

      The Thermomix makes preparing and cooking porridge SO easy.

      Just like with pizza dough and pasta dough, loaves of bread and yoghurt, the Thermomix really is a wonder machine when it comes to prepping basic favourites.

      A bowl of porridge with fruit and nuts on top.

      Why You're Going To Love This Recipe

      Everyone's favourite winter breakfast couldn't be easier to make!

      Here's why you're going to LOVE our Thermomix porridge:

      • Healthy - porridge is the ultimate nutritious and filling breakfast!
      • Double The Recipe - if serving more than 2 people, simply double the recipe
      • Just 3 ingredients - water, milk and oats!
      • Ready to serve in 12 minutes - zero prep time... 12 minutes cooking time... then enjoy!
      • Suitable for use in all models of the Thermomix - including the TM31, TM5 and TM6

      What You Need

      To make our Thermomix Porridge, you'll need just 3 ingredients (and we can almost guarantee that you'll already have them at home!).

      Please scroll to the recipe card at the bottom of the post for ingredient quantities and the full detailed method.

      Oats, milk and water in bowls.
      • Oats - you can use either traditional rolled oats or quick oats for this recipe
      • Milk - use full cream milk for the thickest porridge and best texture
      • Water

      Step By Step Instructions

      Our one step Thermomix porridge recipe is SO quick and easy!

      Please scroll to the recipe card at the bottom of the post for ingredient quantities and the full detailed method.

      Step 1 - Cook The Porridge

      Place the rolled oats, milk and water into the Thermomix bowl.

      Milk and oats in a Thermomix.

      Cook for 12 minutes**

      Cooked porridge in a Thermomix.

      ** If you'd like your porridge extra thick, cook it for a minute or two longer.

      Pour into bowls and serve with your choice of brown sugar, honey, yoghurt, dried fruits, fresh berries, sliced banana, seeds and nuts.

      Expert Tips

      • You can use regular old fashioned rolled oats or quick oats for this recipe
      • Full cream milk is best as it thickens more than light milk does
      • Increase the cooking time by a few minutes for extra thick porridge
      • If doubling the recipe, cook for an extra minute or two
      • The porridge will thicken on cooling
      • Serve with your choice of serve with your choice of brown sugar, honey, yoghurt, dried fruits, fresh berries, sliced banana, seeds and nuts... the options are endless!
      • Porridge is best served fresh, however, it can be stored in the fridge for up to 2 days and reheated.
      • This recipe is not suitable for freezing.
      Cooked oats with seeds and banana.

      FAQs

      Can I use quick oats instead of rolled oats?

      Yes you can!

      Can I double this recipe?

      Yes! Simply increase the cooking time by a minute or two.

      I like my porridge very thick. How can I make it even thicker?

      Porridge will thicken on cooling, however, if you'd like it extra thick, cook it for a few extra minutes.

      Banana and seeds on top of porridge.

      Related Recipes

      Looking for more Thermomix breakfast ideas?

      Here's some of our most popular breakfast/brunch recipes:

      • Place all ingredients into the Thermomix bowl and mix for 12 minutes, 37 degrees, Speed 3. Meanwhile, fill a ThermoServer with boiling water and set aside. When the yoghurt has finished mixing, pour the water out of the ThermoServer and dry it completely (it will now be warm). Pour the yoghurt into the ThermoServer, cover with the lid and then wrap in a towel or blanket to keep warm. Leave for 12 hours (without opening the lid) in a warm room. Then place into the fridge for at least 3 hours before using.
        Thermomix Yoghurt | Vanilla Pot Set
      • Raspberries on top of overnight oats.
        Thermomix Bircher Muesli
      • Homemade English muffins in a tea towel.
        Thermomix English Muffins
      • Butter on top of pikelets.
        Thermomix Banana Apple Pikelets

      OUR RANGE OF THERMOMIX COOKBOOKS

      Browse our collection of hardcopy Thermomix cookbooks here.

      There's everything from family dinners to kids snacks, desserts to cookies, slices to Christmas recipes, cocktails to chocolate recipes and more!

      ThermoBliss complete set
      An overhead shot of cooked oats in a bowl with banana and seeds.
      Print Recipe
      4.67 from 9 votes

      Thermomix Porridge

      Making Thermomix Porridge has never been quicker, easier or more delicious!! Just 3 basic ingredients... and then add your favourite toppings!
      Prep Time2 minutes mins
      Cook Time12 minutes mins
      Total Time14 minutes mins
      Course: Breakfast
      Cuisine: Western
      Servings: 2 serves
      Calories: 224kcal
      Author: Lucy & Lauren
      Cost: $5

      Equipment

      • Thermomix

      Ingredients

      • 80 g rolled oats
      • 240 g full cream milk
      • 190 g water
      • honey, berries, muesli, greek yogurt, to serve

      Instructions

      • Place the rolled oats, full cream milk and water into the Thermomix bowl. 
      • Cook on 90 degrees, Reverse, Speed 2, 12 minutes. 
      • Divide between 2 bowls, drizzle with honey to taste. Add fresh berries, greek yoghurt and a sprinkle of muesli for crunch. 

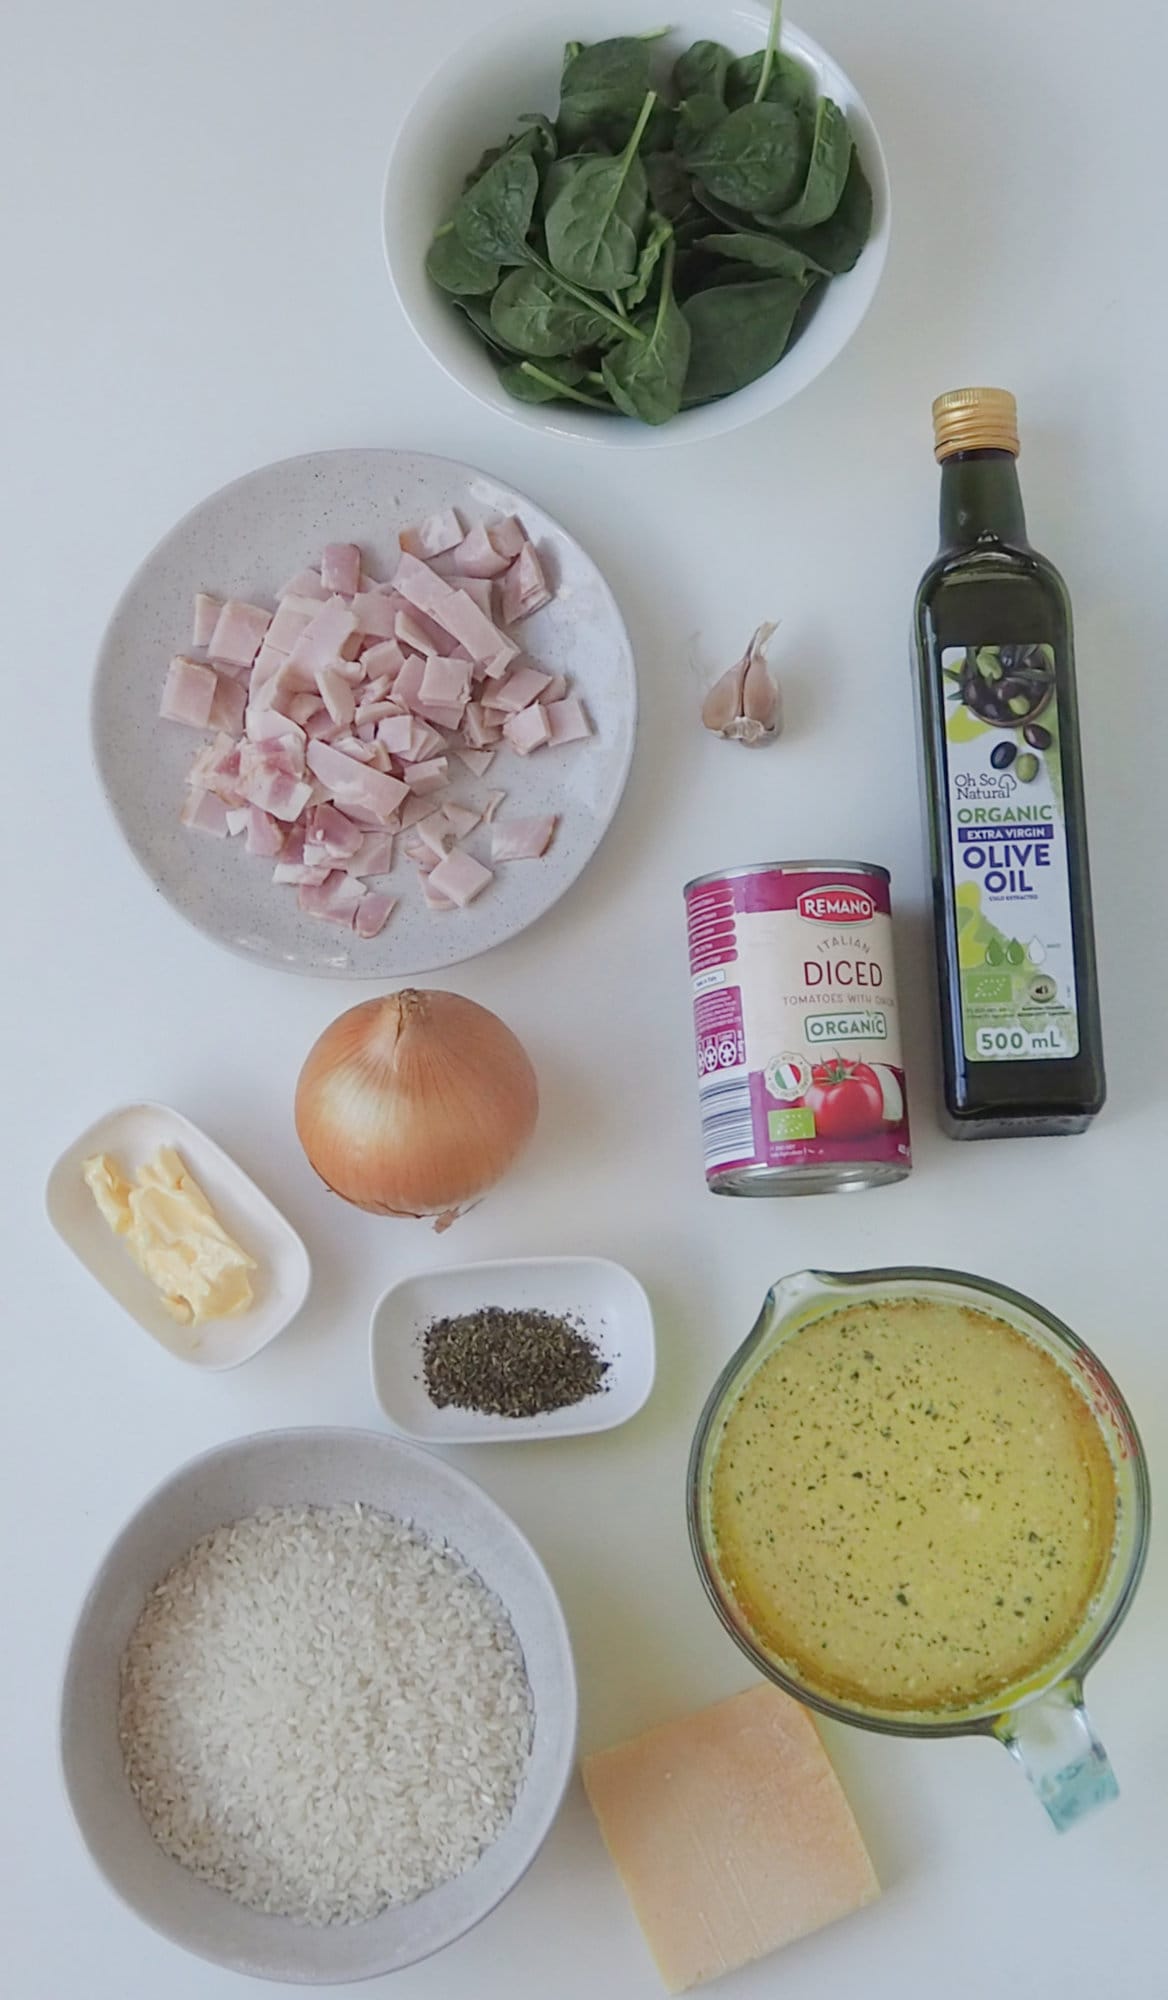
      Notes

      RECIPE NOTES & TIPS
      • You can use regular old fashioned rolled oats or quick oats for this recipe
      • Full cream milk is best as it thickens more than light milk does
      • Increase the cooking time by a few minutes for extra thick porridge
      • If doubling the recipe, cook for an extra minute or two
      • The porridge will thicken on cooling
      • Serve with your choice of serve with your choice of brown sugar, honey, yoghurt, dried fruits, fresh berries, sliced banana, seeds and nuts... the options are endless!
      • Porridge is best served fresh, however, it can be stored in the fridge for up to 2 days and reheated.
      • This recipe is not suitable for freezing.
      This recipe has been adapted from the Everyday Cookbook to serve 2 people. 

      Nutrition

      Calories: 224kcal | Carbohydrates: 33g | Protein: 9g | Fat: 6g | Saturated Fat: 3g | Polyunsaturated Fat: 1g | Monounsaturated Fat: 2g | Cholesterol: 14mg | Sodium: 53mg | Potassium: 325mg | Fiber: 4g | Sugar: 6g | Vitamin A: 194IU | Calcium: 171mg | Iron: 2mg
      « Previous Page
      Next Page »

      Primary Sidebar

      Hi, We're Lauren and Lucy! We're two mums who love to cook and want to show you how easy it is to make delicious family meals, baking treats and lunch box snacks in your Thermomix..

      More about us →

      Thermomix Christmas Recipes

      • Baked gingerbread biscuits on a wire rack.
        The Best Thermomix Gingerbread Recipe
      • Shards of chocolate reindeer inspired bark.
        Thermomix Reindeer Bark
      • Side view of Brandy Custard in a black bowl sitting on a wooden board. In the background is a bottle of brandy.
        Thermomix Brandy Custard
      • Round shortbread biscuits on a white cake stand.
        Thermomix Shortbread

      Thermomix Midweek Meals

      • Cooked Pasta bake with a couple of scoops removed, a gold spoon is sticking out to the side.
        Thermomix Beef and Vegetable Pasta Bake
      • A slice of egg and bacon quiche.
        Thermomix Egg & Bacon Quiche
      • Overhead view of a large spoon scooping up a Chicken Parma Ball.
        Thermomix Chicken Parma Balls
      • Overhead view of Bowl of Thermomix Zucchini Pea and Bacon risotto sitting on a black hand towel with a gold fork next to it. in the background is a zucchini and a white bowl with cheese in it.
        Thermomix Zucchini, Pea and Bacon Risotto

      Thermomix Lunch Box Fillers

      • Egg and bacon pastries.
        Thermomix Egg & Bacon Quiches
      • Glazed cinnamon and apple scrolls.
        Thermomix Apple & Cinnamon Scrolls
      • A bowl of chia, currant and weet-bix balls.
        Thermomix Weet-Bix Balls
      • Front side view of Two slices of Orange butter cake on a white plate. in the background is the rest of the cake on a white serving platter.
        Thermomix Orange Butter Cake Recipe

      Popular Thermomix Cookbooks

      • Complete set o 16 ThermoBliss recipe books.
        ThermoBliss Complete Cookbook Set | 16 Books
      • Front cover images of ThermoBliss 4 book snack and lunch box set.
        ThermoBliss Lunch Box and Kids Snacks Cookbook Bundle | 4 Books
      • A bundle of Thermomix Cocktails and Entertaining Cookbooks.
        Thermomix Entertaining and Cocktails 1, 2 & 3 Cookbook Bundle
      • Image of ThermoBliss Month of Thermomix Dinners 3 Book Bundle Set.
        A Month of Thermomix Dinners 1, 2 & 3 Bundle

      Footer

      ↑ back to top

      About

      • Privacy Policy
      • About Us
      • Terms Of Use

      Newsletter

      • Sign Up for emails and updates

      Contact

      • hello@thermobliss.com

      Please note the content including images and recipes contained within the ThermoBliss website and recipe books are protected by copyright 2024. Adding and/or sharing of content from the ThermoBliss website or recipe books to third party websites or platforms is prohibited.

      Copyright © 2024 ThermoBliss

      Copyright 2024 Brunch Pro on the Brunch Pro Theme

      Manage Cookie Consent
      To provide the best experiences, we use technologies like cookies to store and/or access device information. Consenting to these technologies will allow us to process data such as browsing behavior or unique IDs on this site. Not consenting or withdrawing consent, may adversely affect certain features and functions.
      Functional Always active
      The technical storage or access is strictly necessary for the legitimate purpose of enabling the use of a specific service explicitly requested by the subscriber or user, or for the sole purpose of carrying out the transmission of a communication over an electronic communications network.
      Preferences
      The technical storage or access is necessary for the legitimate purpose of storing preferences that are not requested by the subscriber or user.
      Statistics
      The technical storage or access that is used exclusively for statistical purposes. The technical storage or access that is used exclusively for anonymous statistical purposes. Without a subpoena, voluntary compliance on the part of your Internet Service Provider, or additional records from a third party, information stored or retrieved for this purpose alone cannot usually be used to identify you.
      Marketing
      The technical storage or access is required to create user profiles to send advertising, or to track the user on a website or across several websites for similar marketing purposes.
      • Manage options
      • Manage services
      • Manage {vendor_count} vendors
      • Read more about these purposes
      View preferences
      • {title}
      • {title}
      • {title}

      Rate This Recipe

      Your vote:


      A rating is required
      A name is required
      An email is required