Our classic Thermomix Egg & Bacon Quiches make the perfect lunch box snack or party appetiser. Just 15 minutes prep time, ready to eat in 30 minutes, freezer-friendly and kid-approved!

These Thermomix quiches are always popular!
Whether you're making them for a birthday party, a weekend lunch, school snacks or as part of a savoury platter, they're sure to be a hit!
Just like our family-sized Thermomix Egg & Bacon Quiche, these bite-sized snacks combine the delicious flavours of cheese, bacon, egg and flakey pastry!
Why You're Going To Love This Recipe
Nothing beats these classic little party quiches... crispy pastry with a yummy bacon, cheese and egg filling! These are a party food staple!
- Let The Thermomix Do All The Work - Making these little Thermomix Egg & Bacon Quiches in the Thermomix is so easy! It will grate the cheese for you, cook the bacon and combine the mixture together. Too easy!!!
- Double Batch - You can easily make a double batch by simply doubling the ingredients.
- Freezer-Friendly - stock up the freezer with quick and easy snacks!
- Perfect For Parties - our Thermomix Quiches are always the first things to disappear at parties and get-togethers!

What You Need
These simple Thermomix Egg & Bacon Quiches are made using just a few basic ingredients.
Note: Please scroll to the recipe card at the bottom of the post for ingredient quantities and the full detailed method.
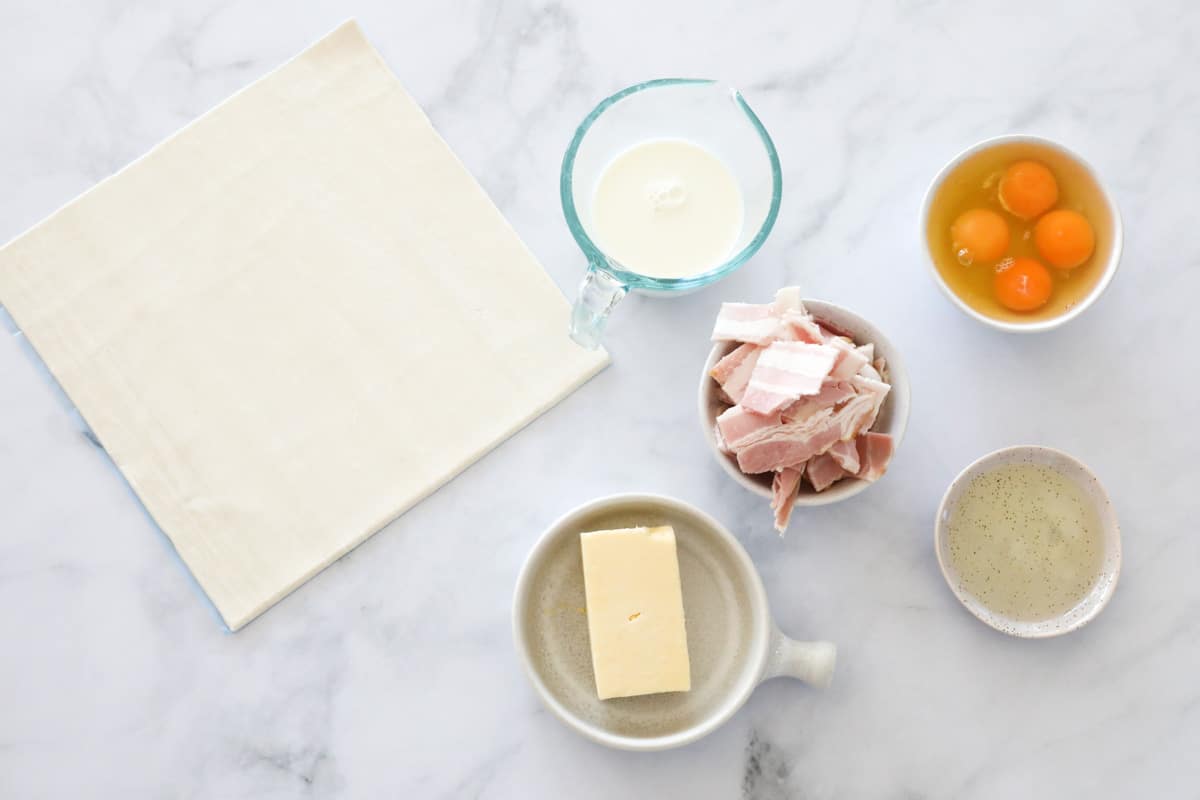
- Puff Pastry - make your own puff pastry or do as I do and use store-bought frozen puff pastry sheets. Allow them to defrost before using.
- Cheese - use cheddar or tasty cheese.
- Bacon - I recommend using streaky bacon in these quiches, however, you can use any cut of bacon you like. You can also use ham if you prefer (if using ham, you can omit the step of cooking the bacon).
- Eggs - use large eggs (approx 60g each).
- Milk - I recommend using full fat milk as it gives the quiches a much more delicious texture than light/skim milk. You can also use cream in place of the milk if you prefer.
Step By Step Instructions
Let the Thermomix grate, saute and mix for you!
Note: Please scroll to the recipe card at the bottom of the post for ingredient quantities and the full detailed method.
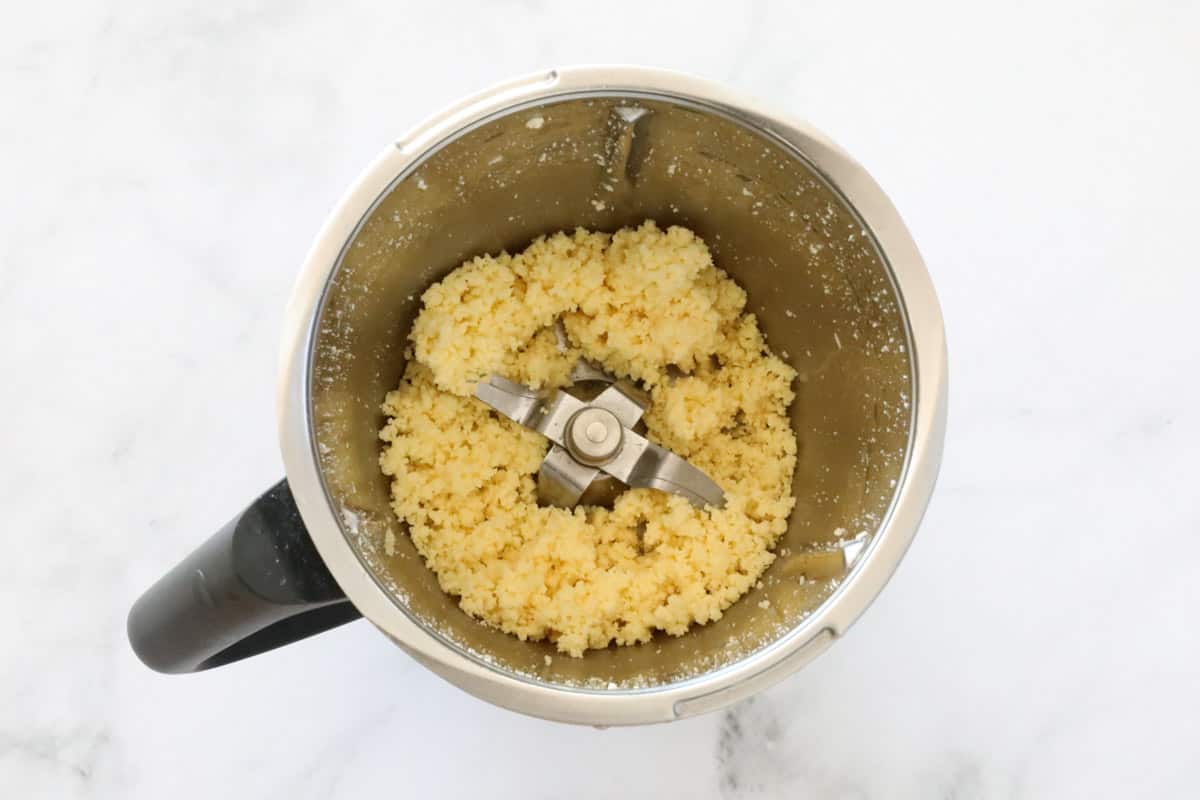
Step 1 - Grate The Cheese
Place the cheddar/tasty cheese into the Thermomix bowl.
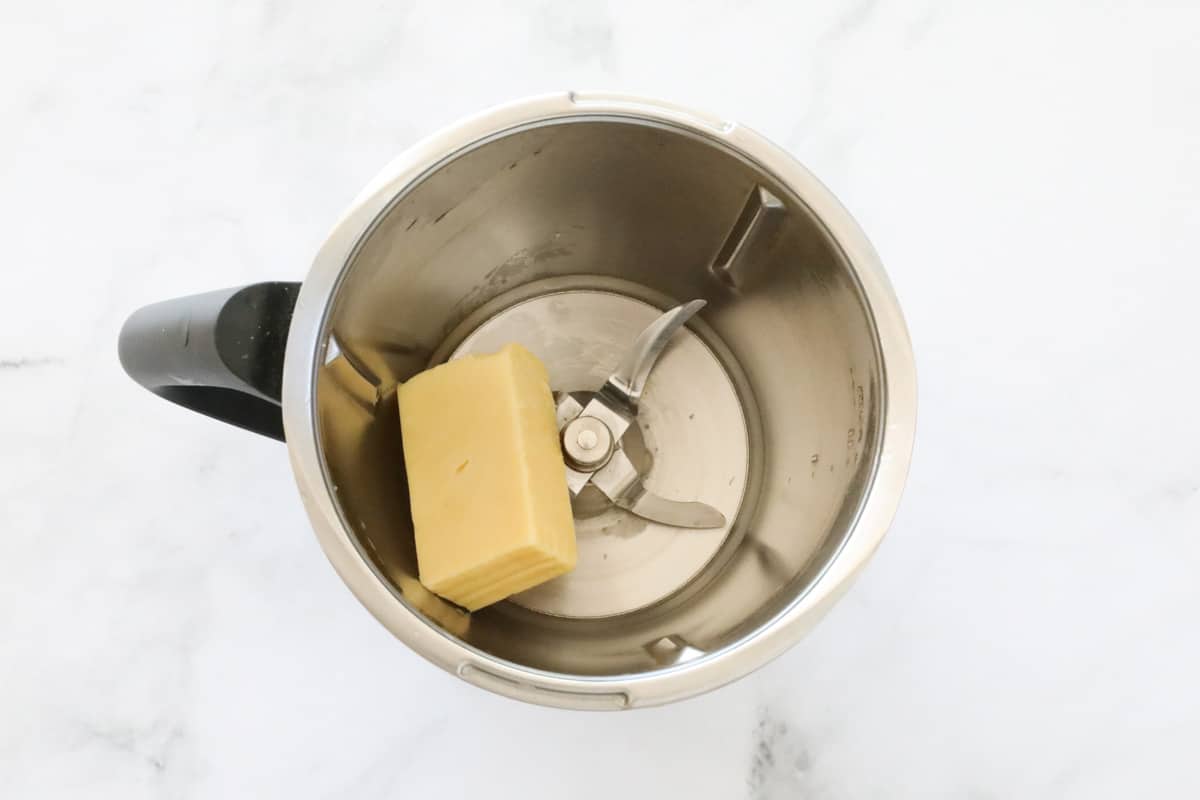
Mix until finely grated and then set aside.
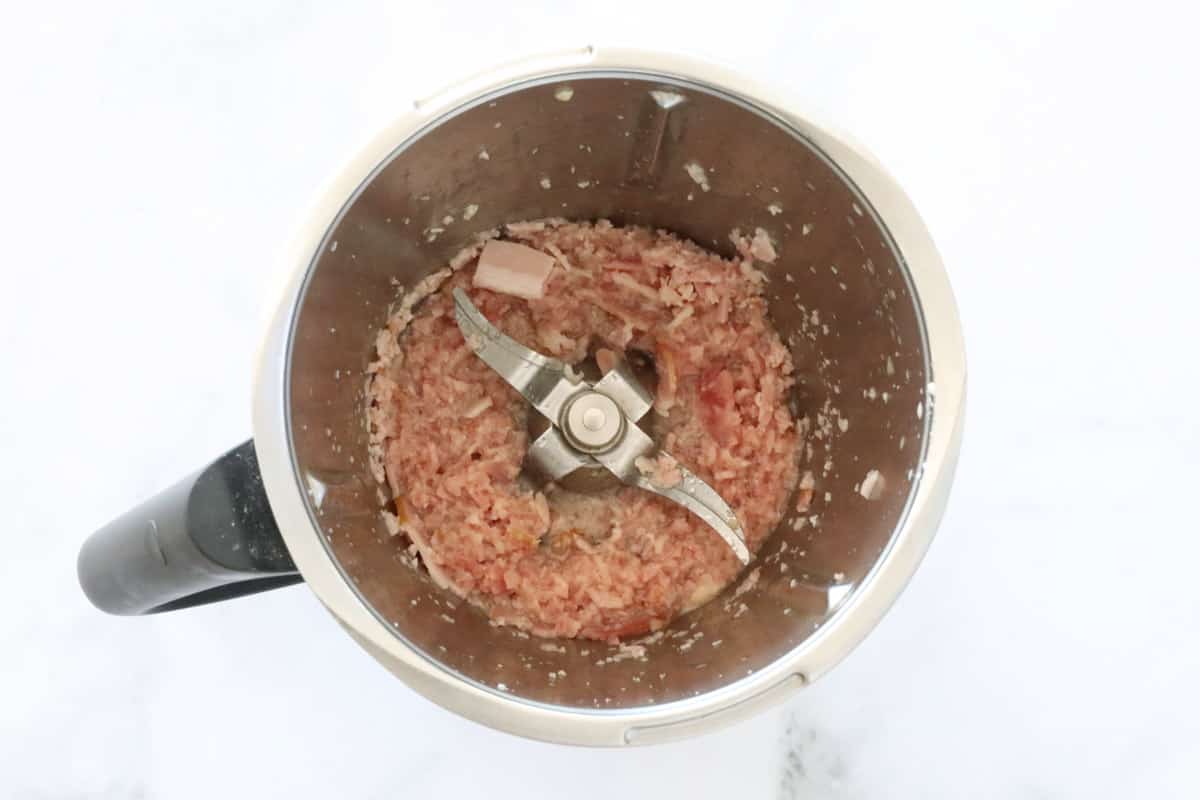
Step 2 - Chop & Cook The Bacon
Place the roughly chopped bacon into the Thermomix bowl and mix until finely chopped.
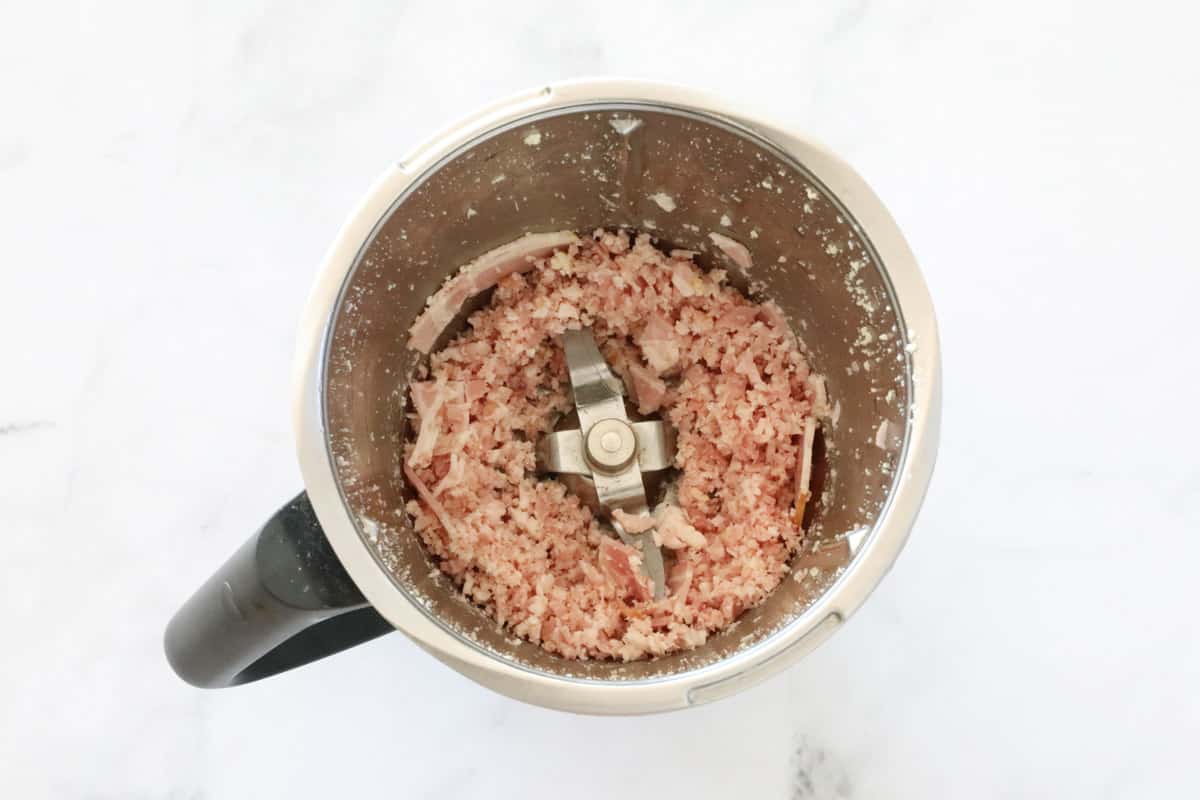
Add the olive oil and saute for 3 minutes.
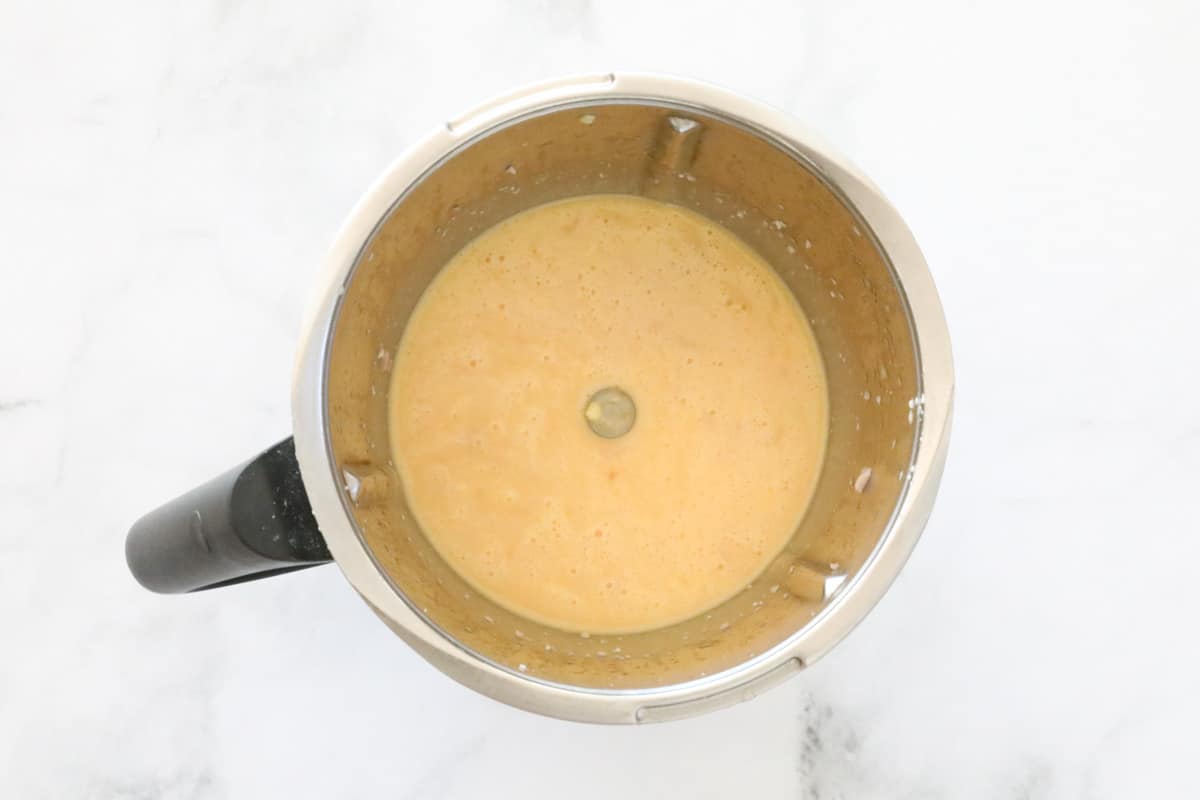
Step 3 - Mix
Add the remaining ingredients to the Thermomix bowl (including the reserved cheese).
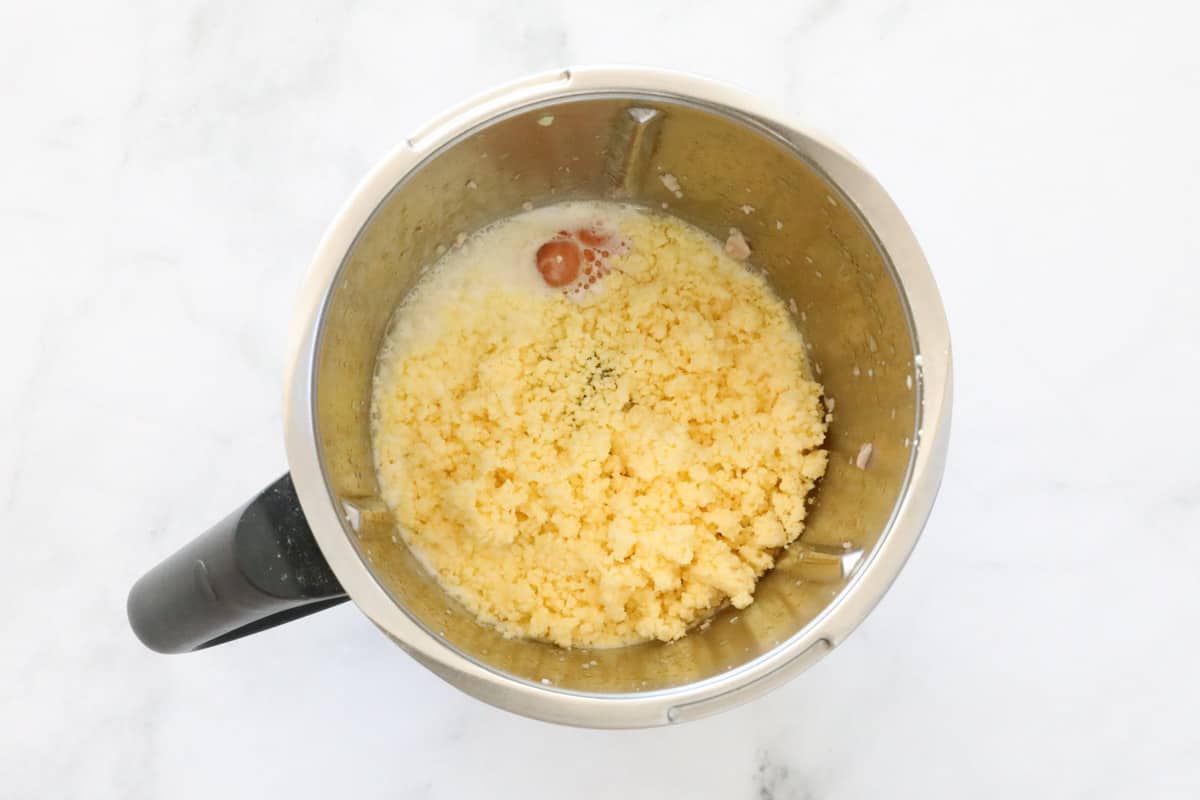
Mix on REVERSE until combined.
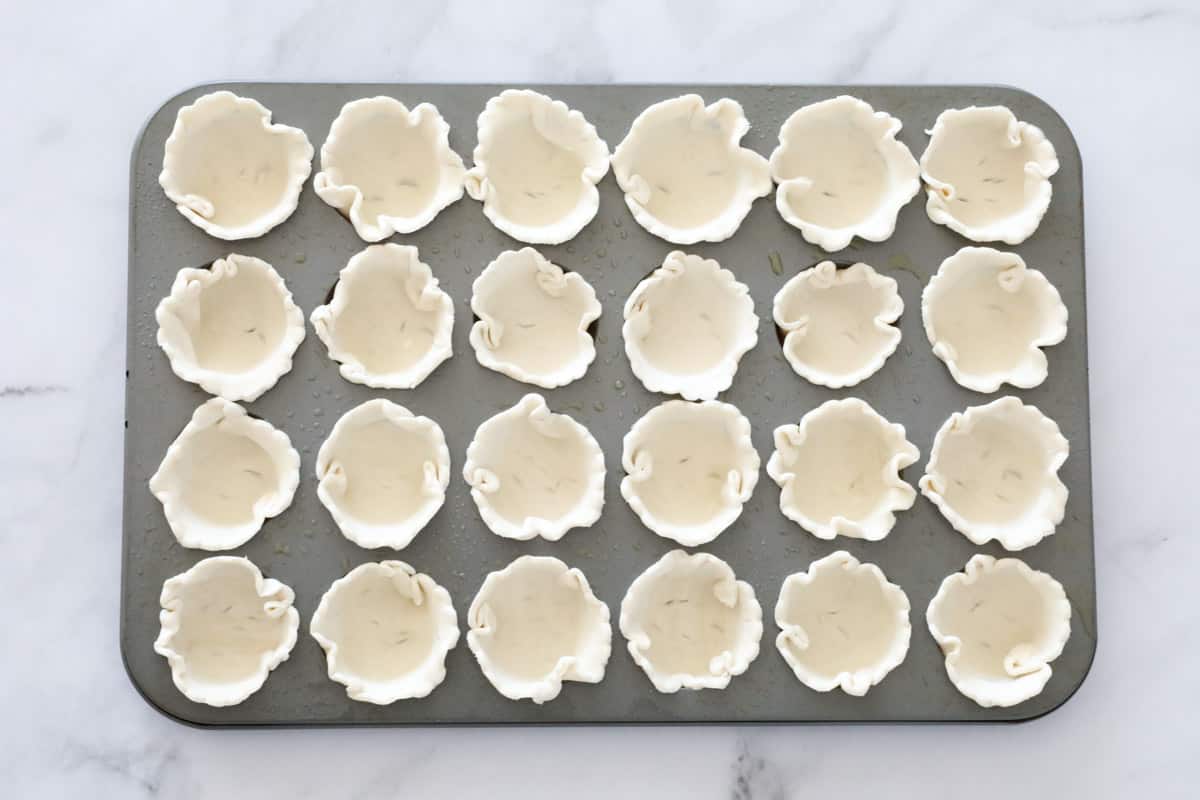
Step 4 - Bake
Using an 8cm round cutter, cut holes from the sheets of puff pastry and gently press into the base of a 24-hole mini muffin tray.
Divide the quiche mixture evenly between the pastry cases.
Bake until golden and cooked through.
Expert Tips
- Allow your puff pastry sheets to defrost before pressing into the mini muffin tin.
- Store in an airtight container in the fridge for up to 3 days.
- Freeze in an airtight container or sealable plastic sandwich bag (like a Glad bag) for up to 3 months.
- Serve the quiches on their own, or with your favourite sauces and chutneys.

FAQs
Yes, absolutely! If you use ham, you can omit the step of cooking the bacon.
The pastry will have puffed up (hence the name 'puff pastry) and the quiches will be golden. As they are so small, they don't take long to cook!
Of course! Simply store in the fridge or freezer and reheat in a low oven when needed.

Related Recipes
If you love quiches as much as we do, check out these other delicious recipes...


Thermomix Lunch Box Cookbooks
For more great lunch box recipes, check out our Thermomix Lunch Box Bundle of hardcopy cookbooks!
The bundle includes:
- Thermomix Lunch Box
- Thermomix Kids Snacks Volume 1
- Thermomix Kids Snacks Volume 2


Thermomix Egg & Bacon Quiches
Equipment
- Thermomix
Ingredients
- 4 sheets puff pastry defrosted
- 125 g cheddar cheese or tasty cheese
- 150 g bacon or ham
- 15 g olive oil
- 4 eggs
- 125 g full fat milk
Instructions
- Place the sheets of puff pastry on a flat bench to defrost.
- Preheat oven to 180 degrees celsius (fan-forced).
- Cut 6 X 8cm round holes from each pastry sheet and press into patty pan baking tins.
- Place the cheese into the Thermomix bowl and grate on Speed 8, 10 seconds. Set aside. Wash and dry the bowl.
- Place the bacon (roughly chopped), into the Thermomix bowl and press Turbo in 1 second bursts until chopped into small pieces.
- Add the olive oil and saute on 100 degrees, Speed 1 for 3 minutes. Allow to cool slightly.
- Add the eggs, milk and cheese and mix on Reverse, Speed 3, 20 seconds.
- Pour the mixture over the pastry cases (being careful not to overfill as the mixture rises when cooked).
- Cook for approximately 10-15 minutes or until the cheese has turned golden and the middle of the quiches has cooked through.
Notes
- Allow your puff pastry sheets to defrost before pressing into the mini muffin tin.
- Store in an airtight container in the fridge for up to 3 days.
- Freeze in an airtight container or sealable plastic sandwich bag (like a Glad bag) for up to 3 months.
- Serve the quiches on their own, or with your favourite sauces and chutneys.


Renee says
So good. Somehow I missed the sautéing step until it was too late so I just kept on going and they still turned out deliciously!
Kaye Wheeler says
Hi,
Just wondering if anyone has attempted making these in the mini pie maker?
Victoria says
Hi, I'm attempting to make a batch of puff pastry in tmx first. Will there be enough to cut 24 circles to fit in my mini muffin tray do you think? I guess I'll have some mixture left over if there is supposed to be 30 serves. Does it keep?
Lucy says
Hi Victoria, it would depend on the puff pastry recipe you're using and how much puff pastry it will make. You should get enough for 24 mini circles though. No the mixture needs to be used straight away (although you can freeze the cooked quiches).
Casey says
So delicious and super easy