• Skip to primary navigation
  • Skip to main content
  • Skip to primary sidebar
  • Thermomix Recipes
  • Christmas
  • Sweet
    • Slices, Brownies & Bars
    • Cookies & Biscuits
    • Cakes & Cupcakes
    • Chocolate
    • Desserts
    • Breakfast & Brunch
    • Healthy Treats
    • Drinks & Smoothies
    • Sweet Breads & Muffins
    • Easter
    • Celebrations
  • Savoury
    • Savoury Thermomix Lunchbox Recipes
    • Main Dishes
    • Sides & Salads
    • Snacks
    • Soups
    • Savoury Breads & Muffins
  • Lunch Box
    • Kids/Toddlers
  • Family Meals
  • Store
    • Shop All
    • Categories
      • Thermomix Recipe Books
      • Thermomix Recipe eBooks
  • Contact

Thermobliss

menu icon
go to homepage
subscribe
search icon
Homepage link
  • Thermomix Recipes
  • Sweet Recipes
  • Savoury Recipes
  • Family Recipes
  • Cookbook Shop
  • Cookbook Index
    • Facebook
    • Instagram
    • Pinterest
  • ×
    Home » All Posts » Family » Lunchbox Recipes » Sweet Thermomix Lunchbox Recipes » Thermomix Jelly Cakes

    Published: Jan 27, 2020 · Modified: Oct 16, 2023 by Lucy ·

    Thermomix Jelly Cakes

    3780 shares
    • Facebook
    Jump to Recipe Print Recipe

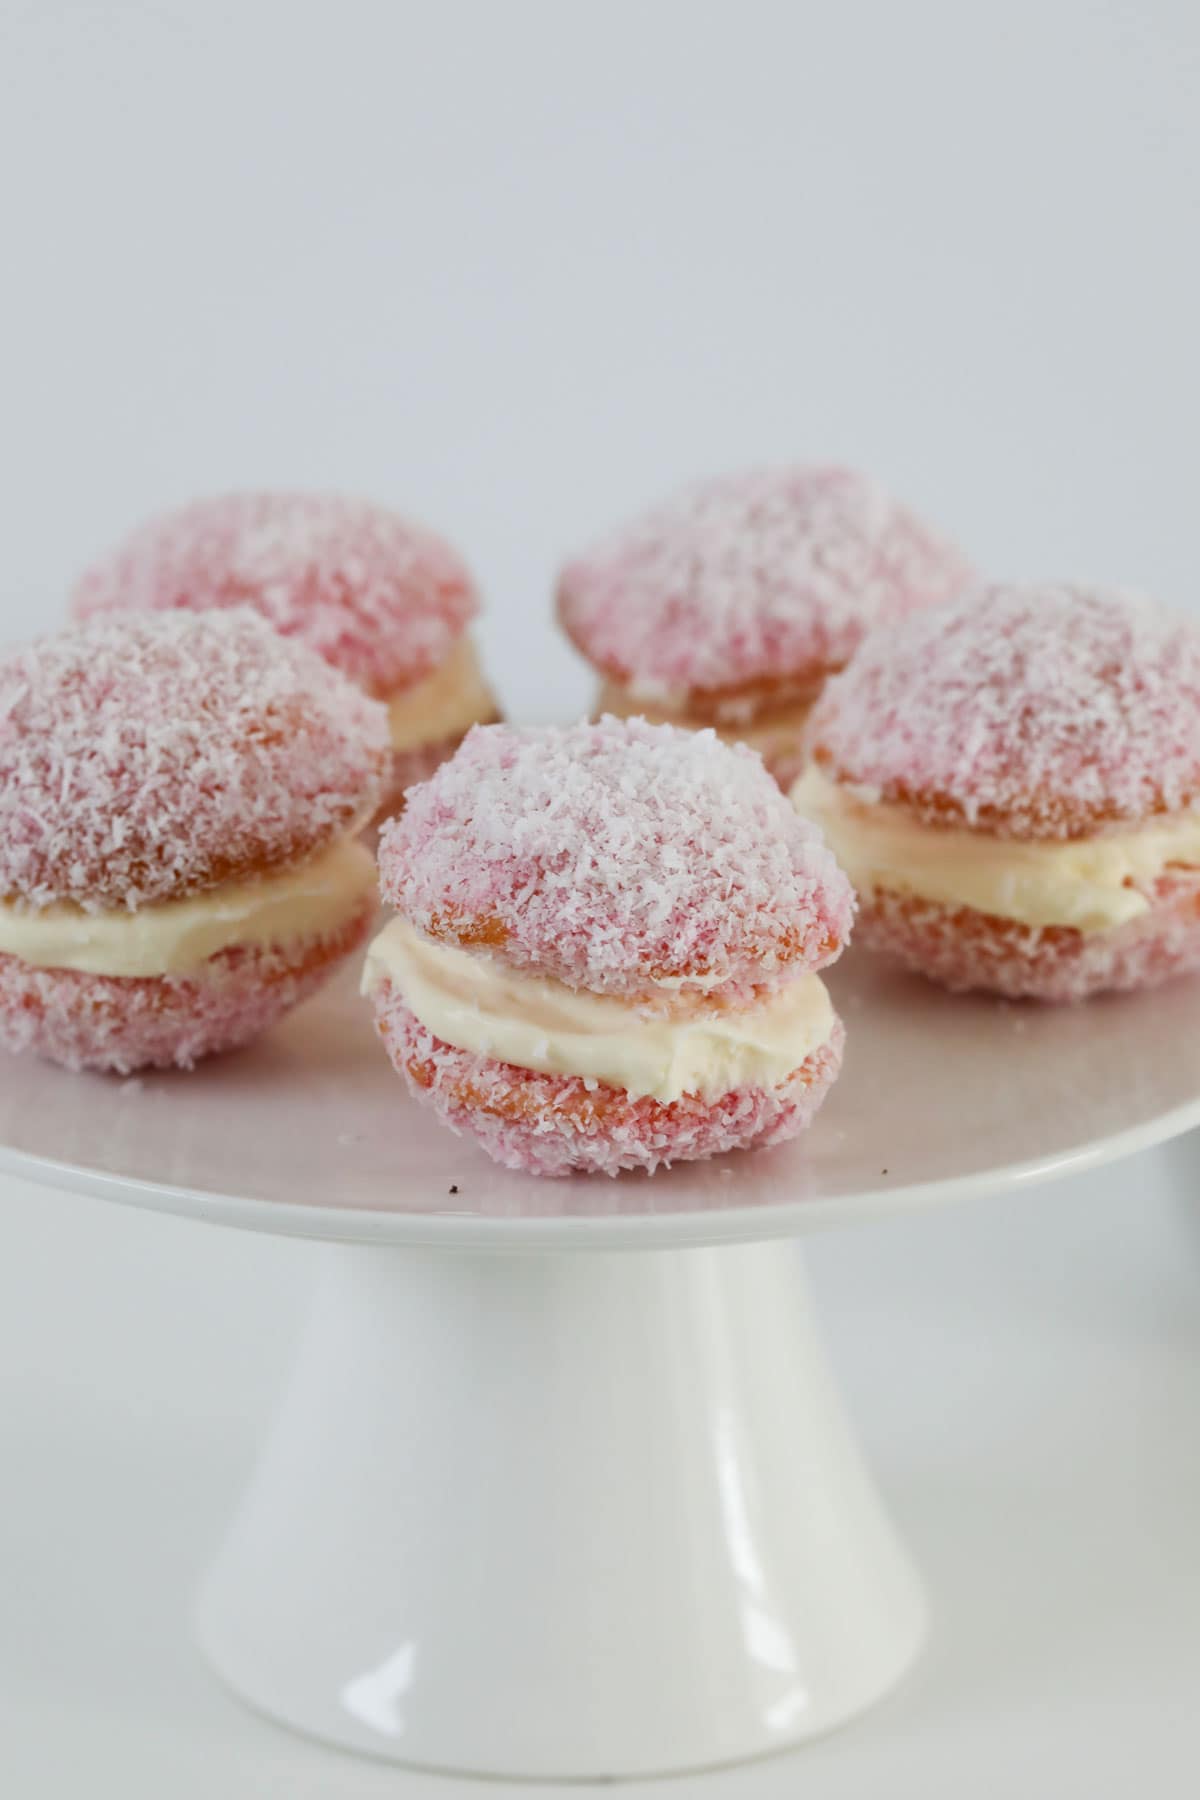
    Our old fashioned Thermomix Jelly Cakes are so easy to prepare and are the ultimate morning tea treat!

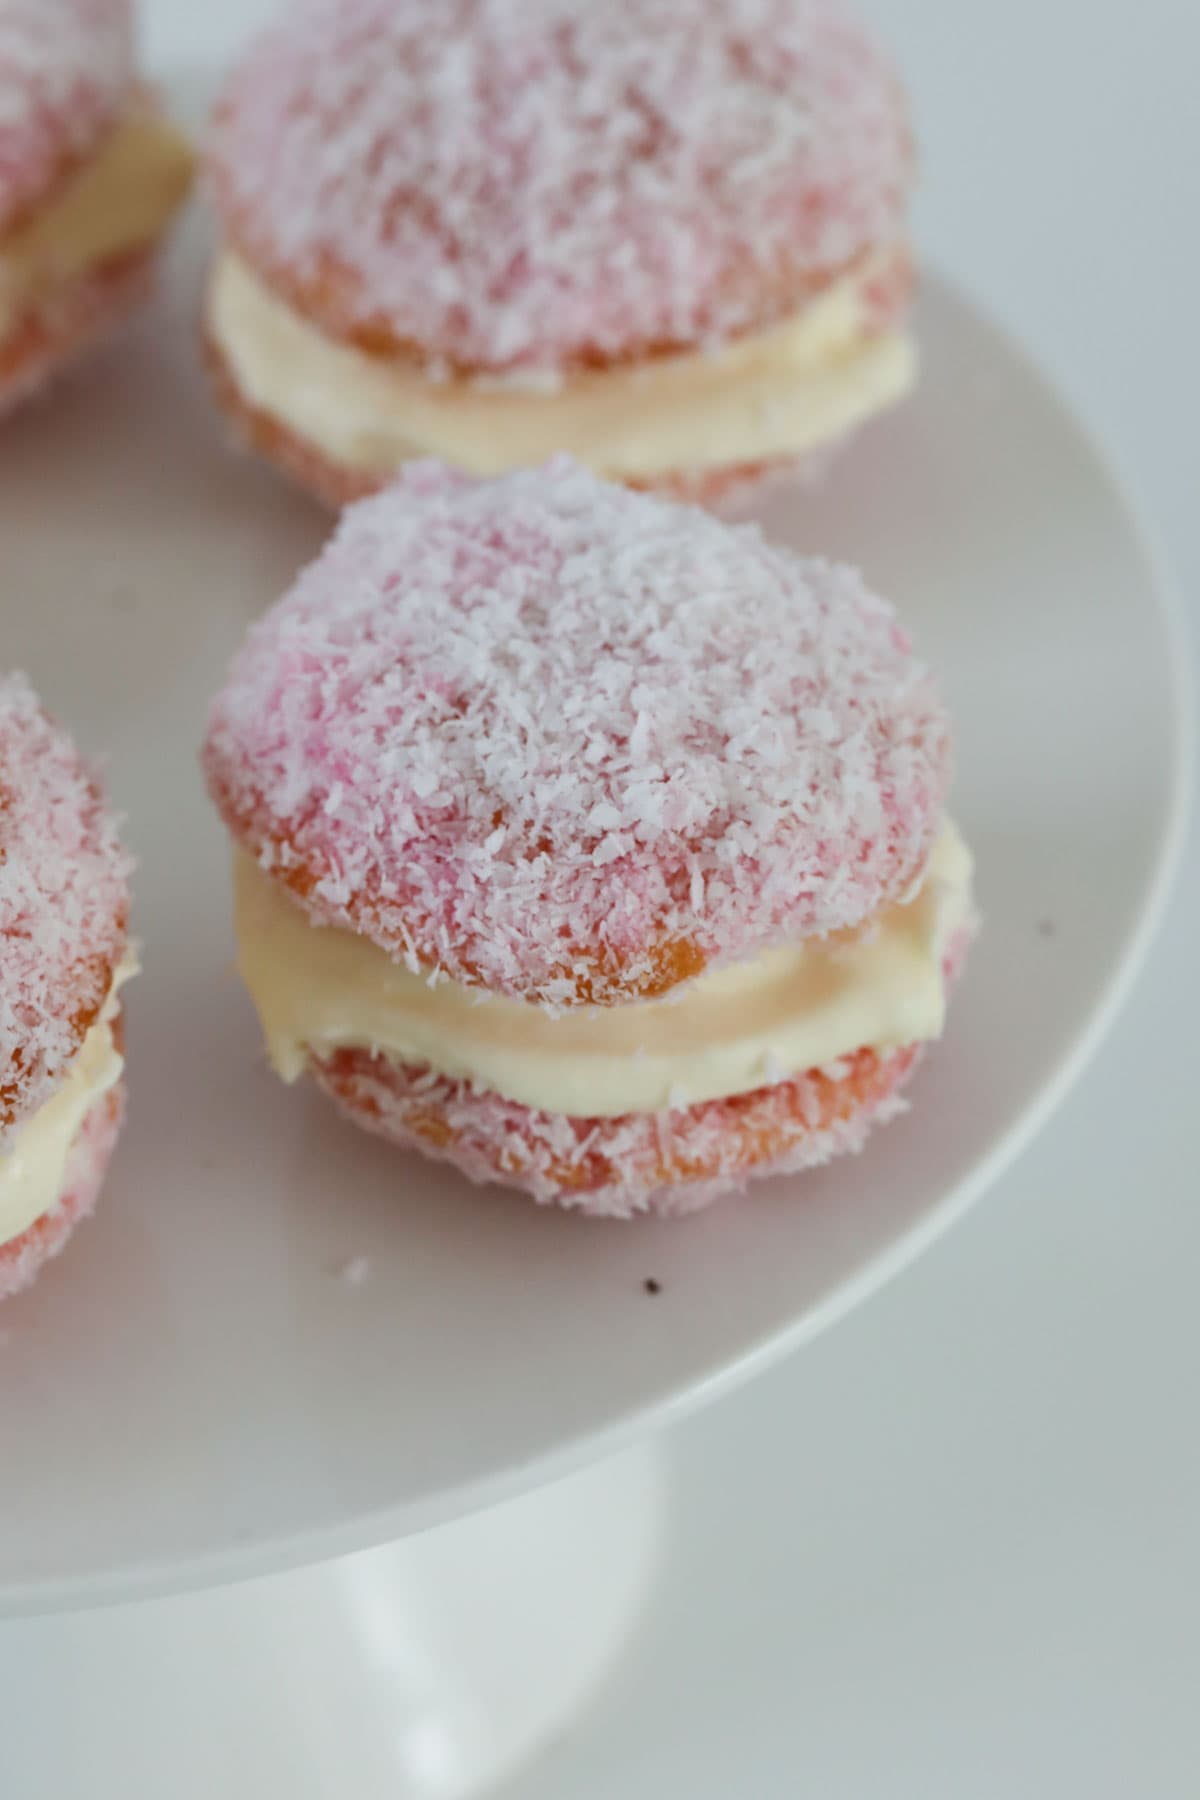
    Soft vanilla cakes dipped in raspberry jelly, then coated with coconut and filled with whipped cream - these are simply the BEST!

    A plate of raspberry jelly cakes.

    When it comes to classic baking recipes, you really can't go past jelly cakes!

    Whether you grew up buying them from the bakery, or eating them at your grandma's house... they really are an old-fashioned favourite.

    Just like our simple scones (and date scones!), lemon slice and marble cake, these classic recipes have certainly stood the test of time.

    An overhead shot of jelly cakes.

    Why You're Going To Love This Recipe

    These classic Thermomix Jelly Cakes are perfect for any occasion!

    • Most Popular - jelly cakes are always the first to disappear at birthday parties, fetes and high teas. Make a batch and see for yourself!
    • The Perfect Combination - delicate, light vanilla cakes with a raspberry jelly and coconut coating filled with whipped cream!
    • Suitable For Use In All Thermomix Models - you can make this recipe using the TM31, TM5 or TM6.
    • Old Fashioned Favourite - these light little cakes are just like your grandma used to make.

    What You Need

    Our Thermomix Jelly Cakes have 3 elements: the vanilla cakes, the raspberry jelly and coconut coating and the whipped cream filling.

    Please scroll to the recipe card at the bottom of the post for ingredient quantities and the full detailed method.

    The ingredients for jelly cakes.

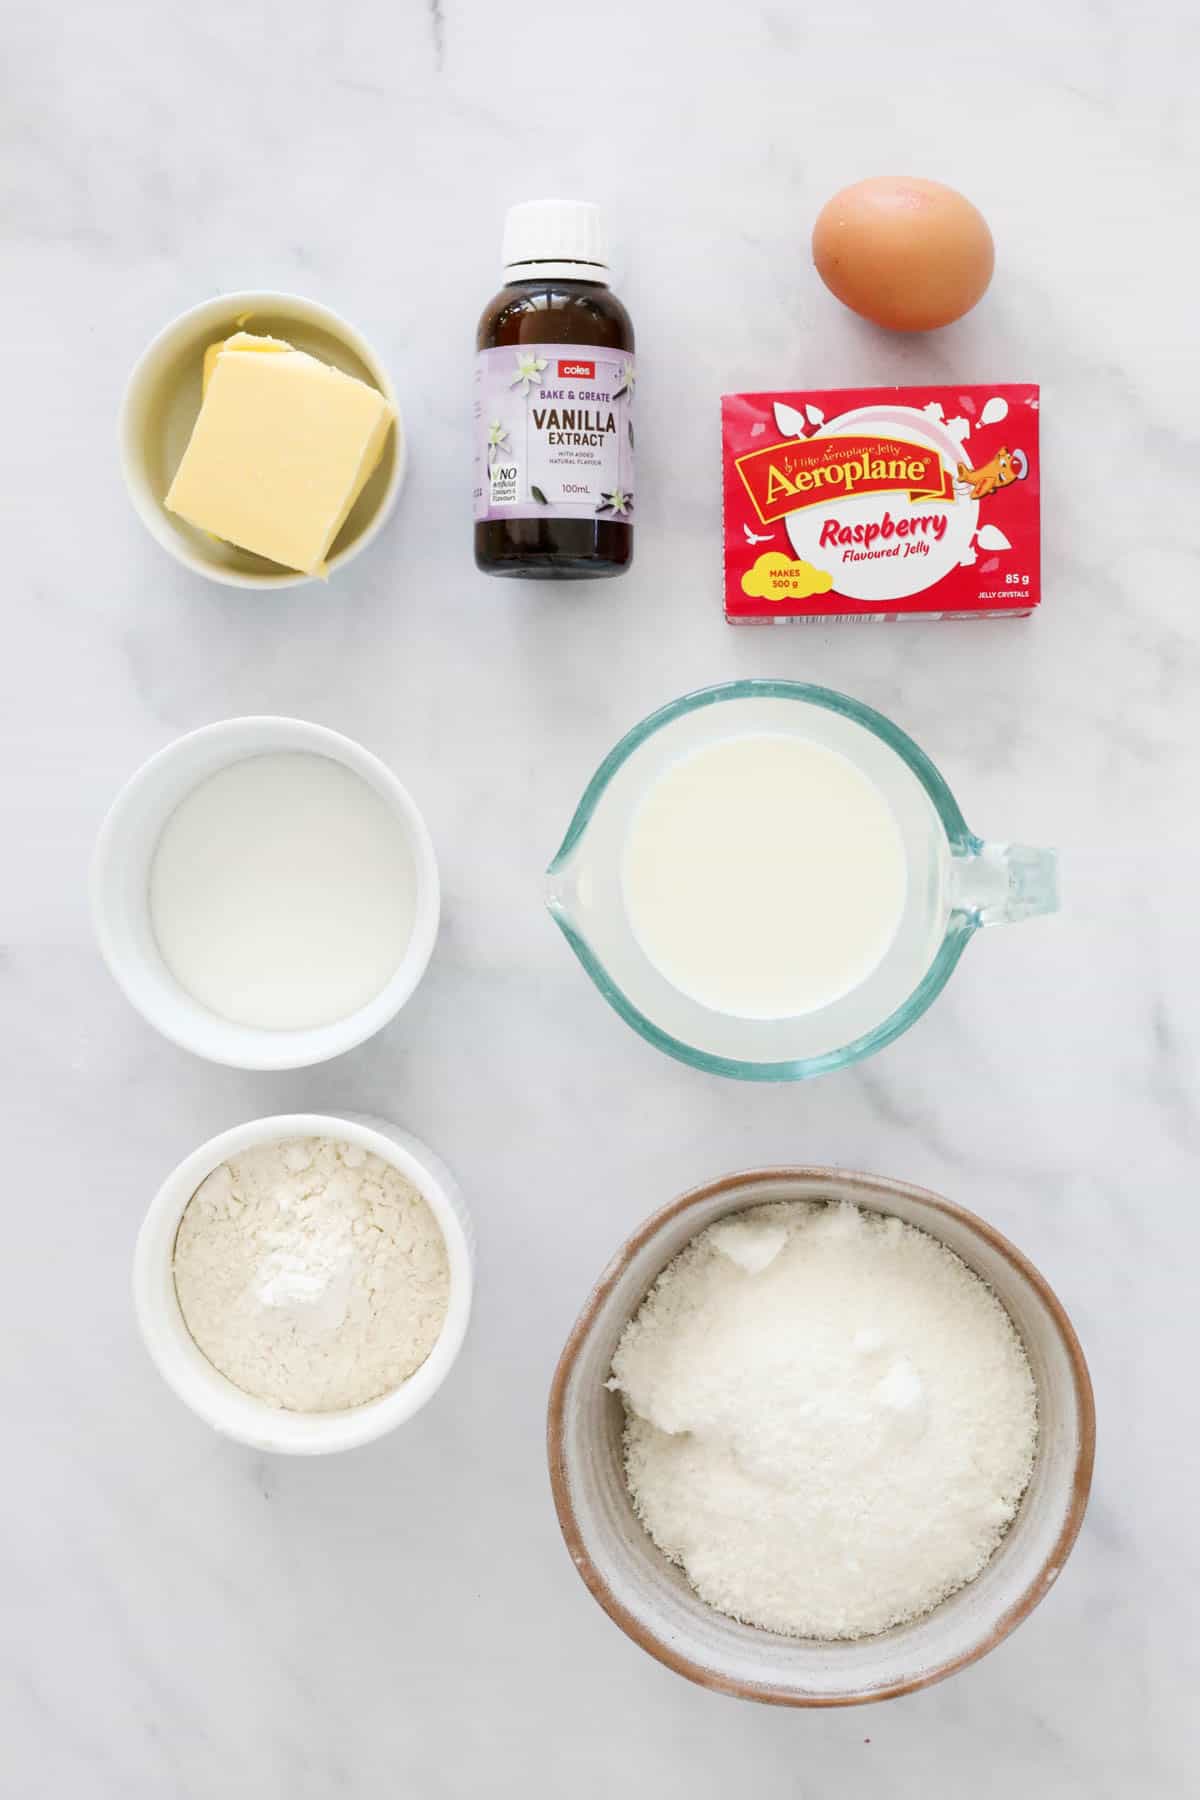
    For The Vanilla Cakes

    • Butter - you can use salted or unsalted butter. Allow it to soften before using as this allows it to cream easily.
    • Caster Sugar - a superfine sugar perfect for cakes!
    • Vanilla Extract - or vanilla essence
    • Egg - use a large (approx 60g) egg at room temperature
    • Milk - full cream (not light) milk will give you the best texture
    • Self-Raising Flour - this is the rising agent in the recipe

    For The Jelly Coating

    • Raspberry Jelly Crystals - I generally use Aeroplane brand jelly. You can substitute the raspberry jelly for any flavour you like.
    • Desiccated Coconut - use fine desiccated coconut not shredded or flaked.

    For The Filling

    • Cream - use thickened or heavy cream that is suitable for whipping.

    Step By Step Instructions

    Our Thermomix Jelly Cakes not only look impressive... they're so yummy too!

    Please scroll to the recipe card at the bottom of the post for ingredient quantities and the full detailed method.

    Here's how you make them...

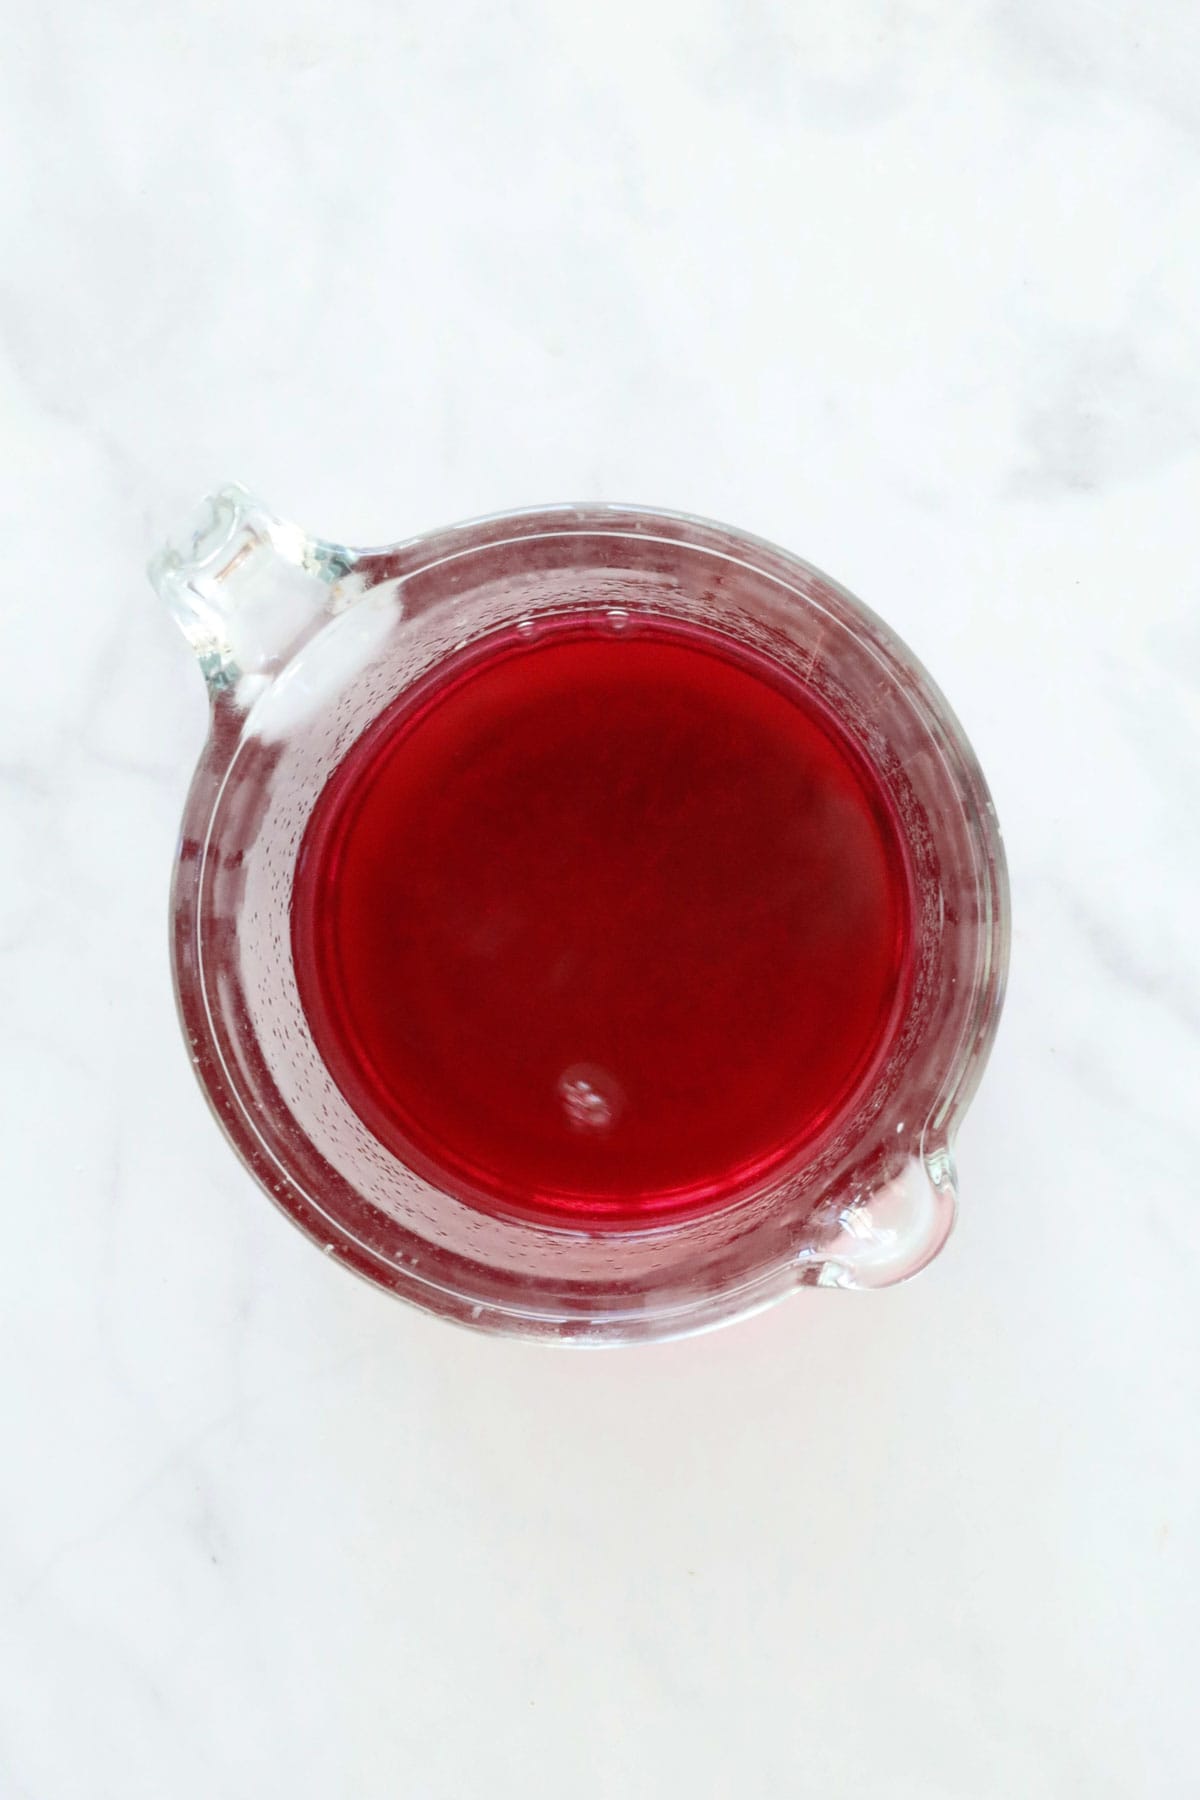
    Step 1 - Prepare The Jelly

    Prepare the jelly and allow to cool in the fridge for 1-2 hours or until thickened (but not set).

    Raspberry jelly in a jug.

    Step 2 - Make The Vanilla Cakes

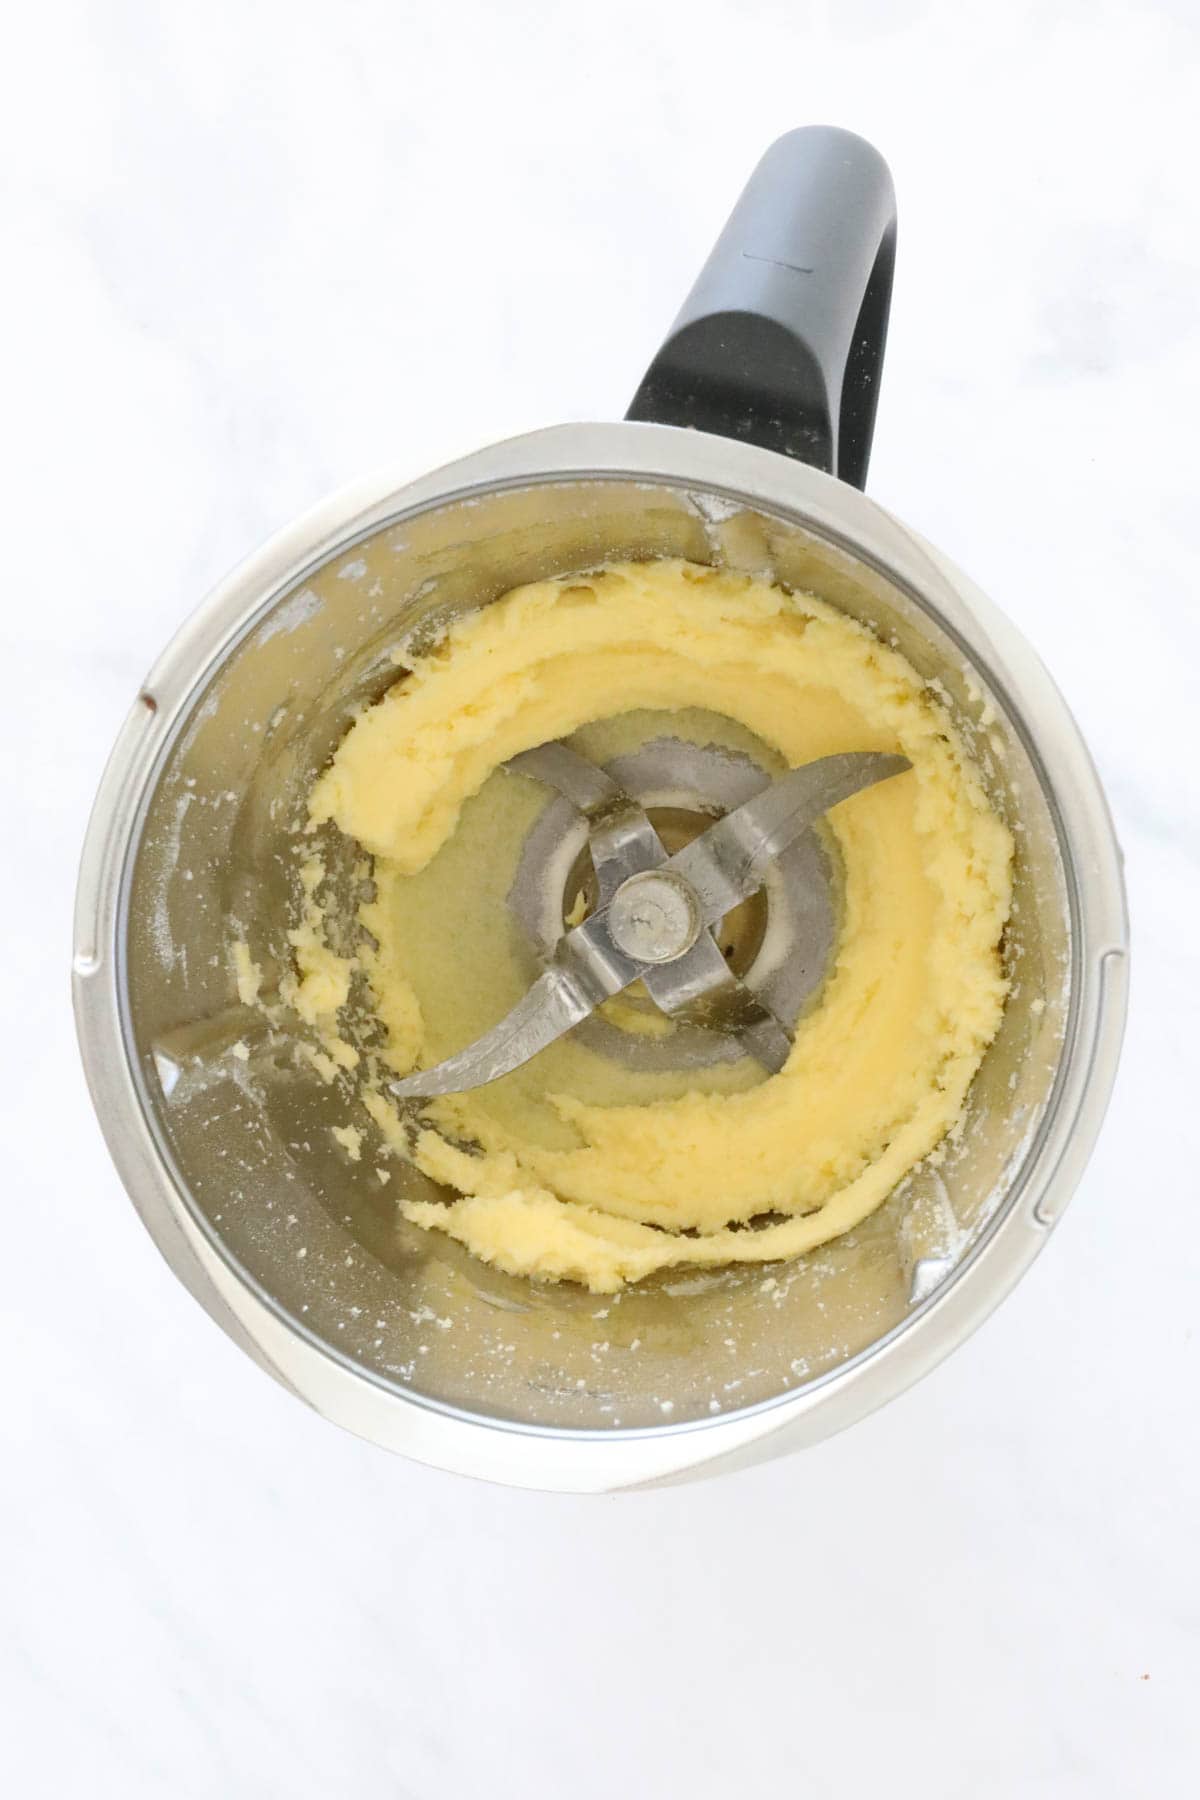
    Cream the butter and sugar in the Thermomix bowl.

    Creamed butter in a Thermomix.

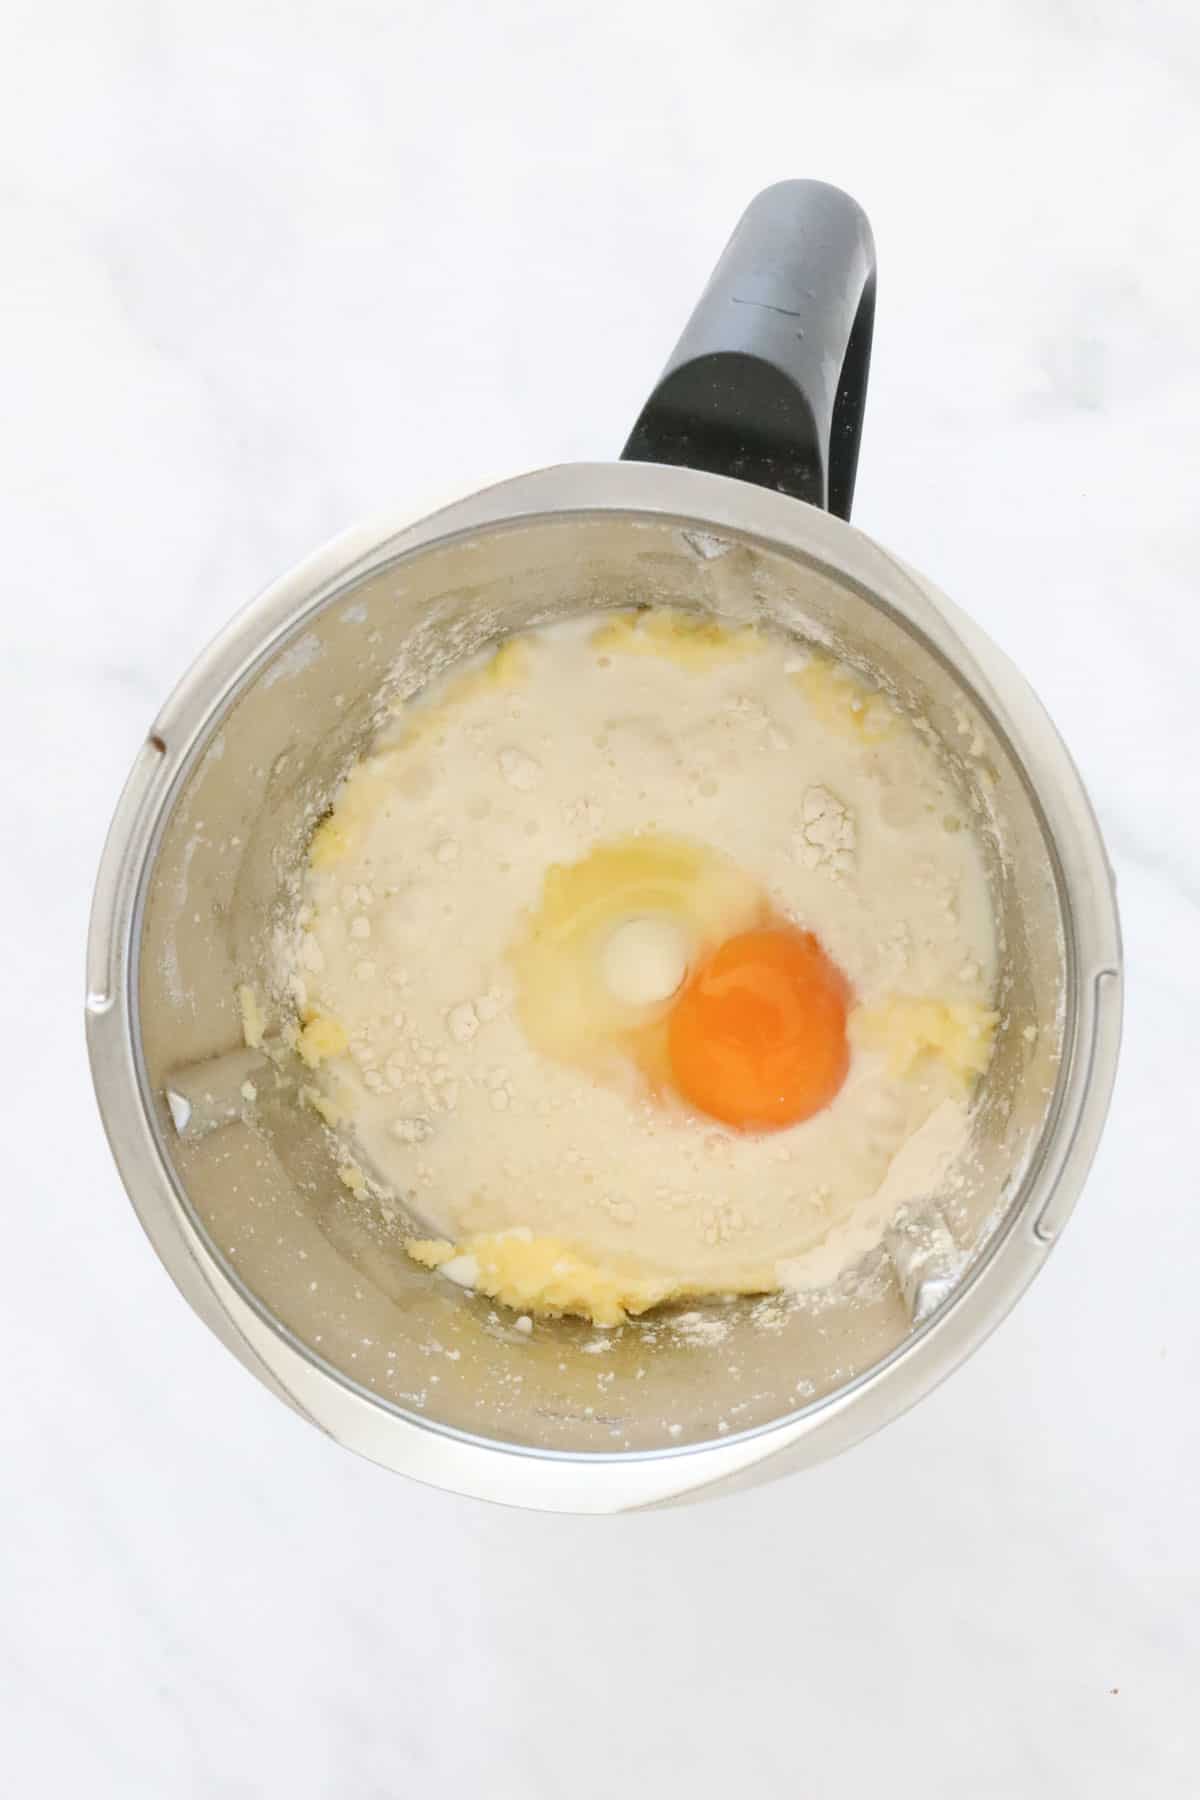
    Add the vanilla extract, egg, milk and self-raising flour to the bowl.
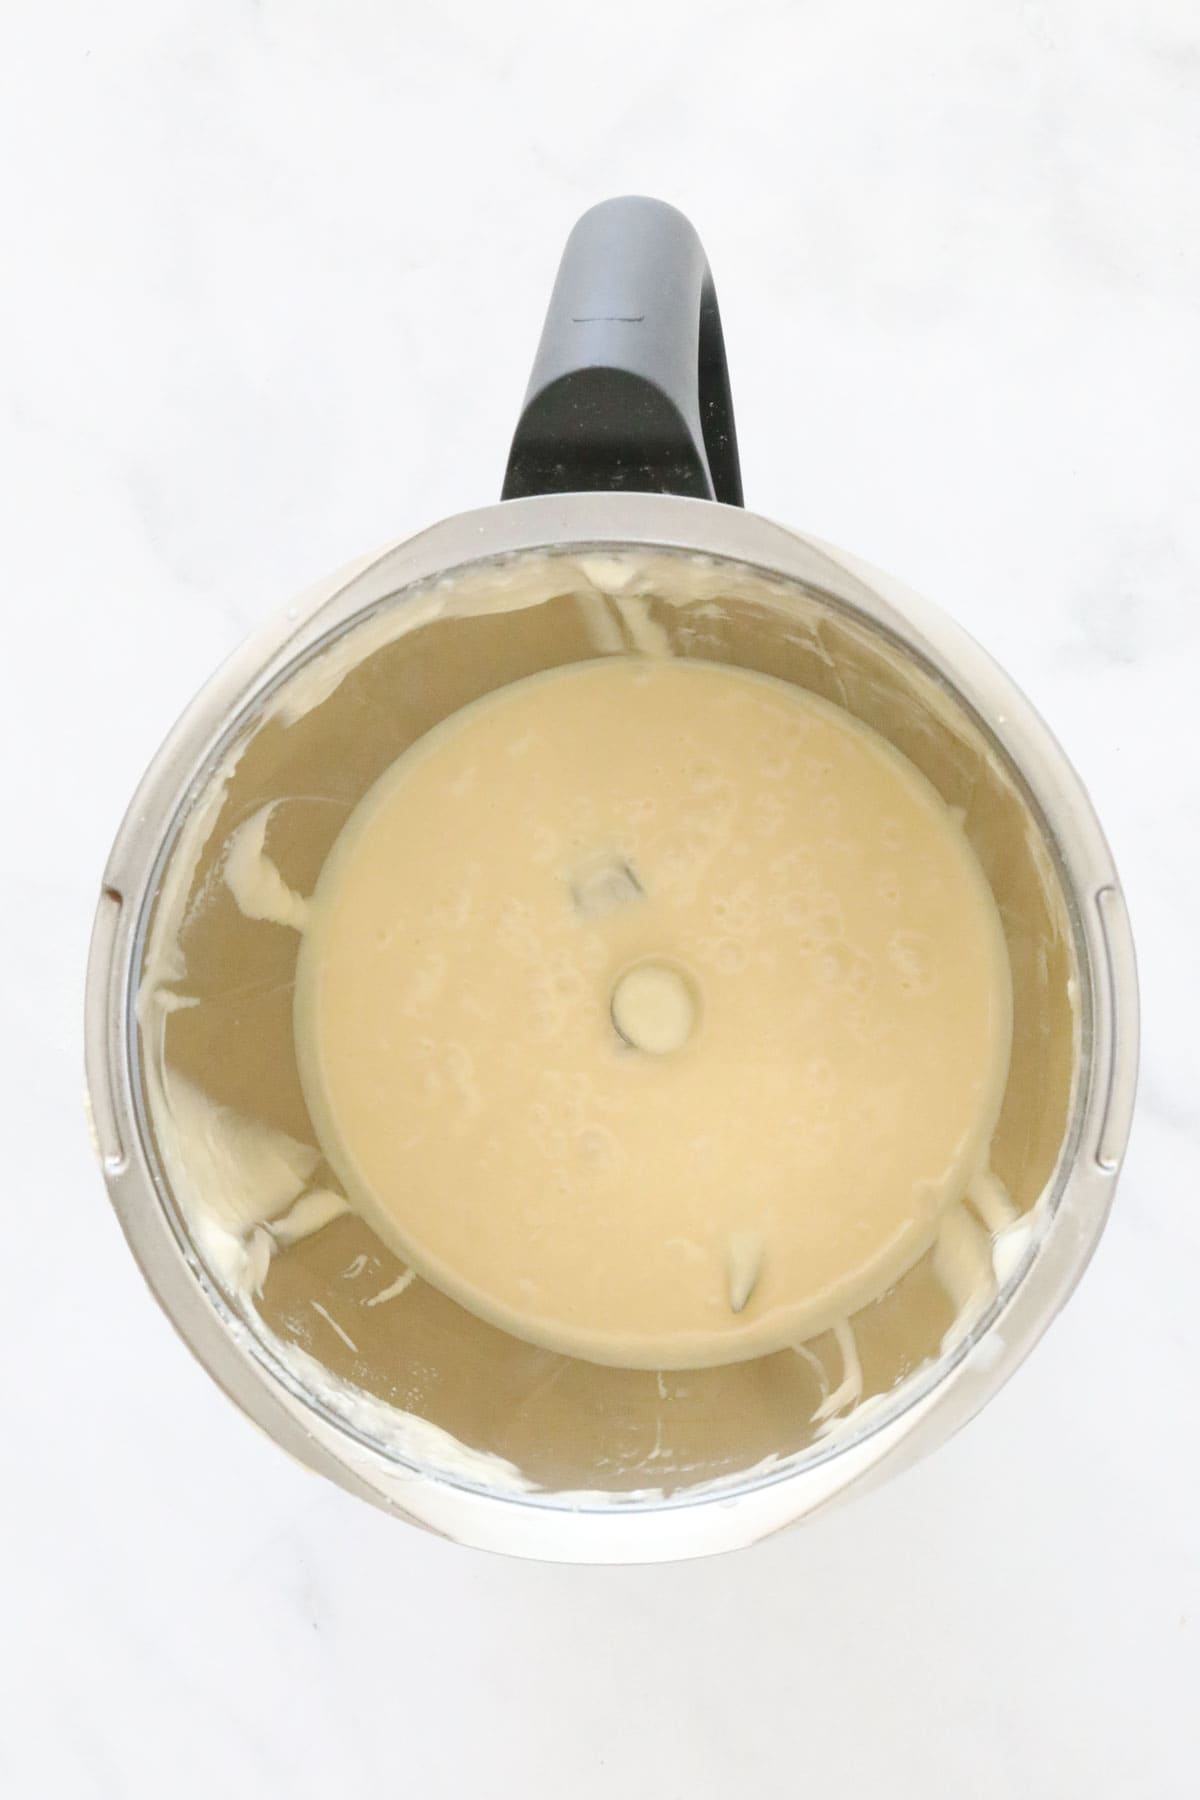
    Cake ingredients in a Thermomix.

    Mix until combined.

    Cake batter in a Thermomix.

    Step 3 - Bake The Cakes

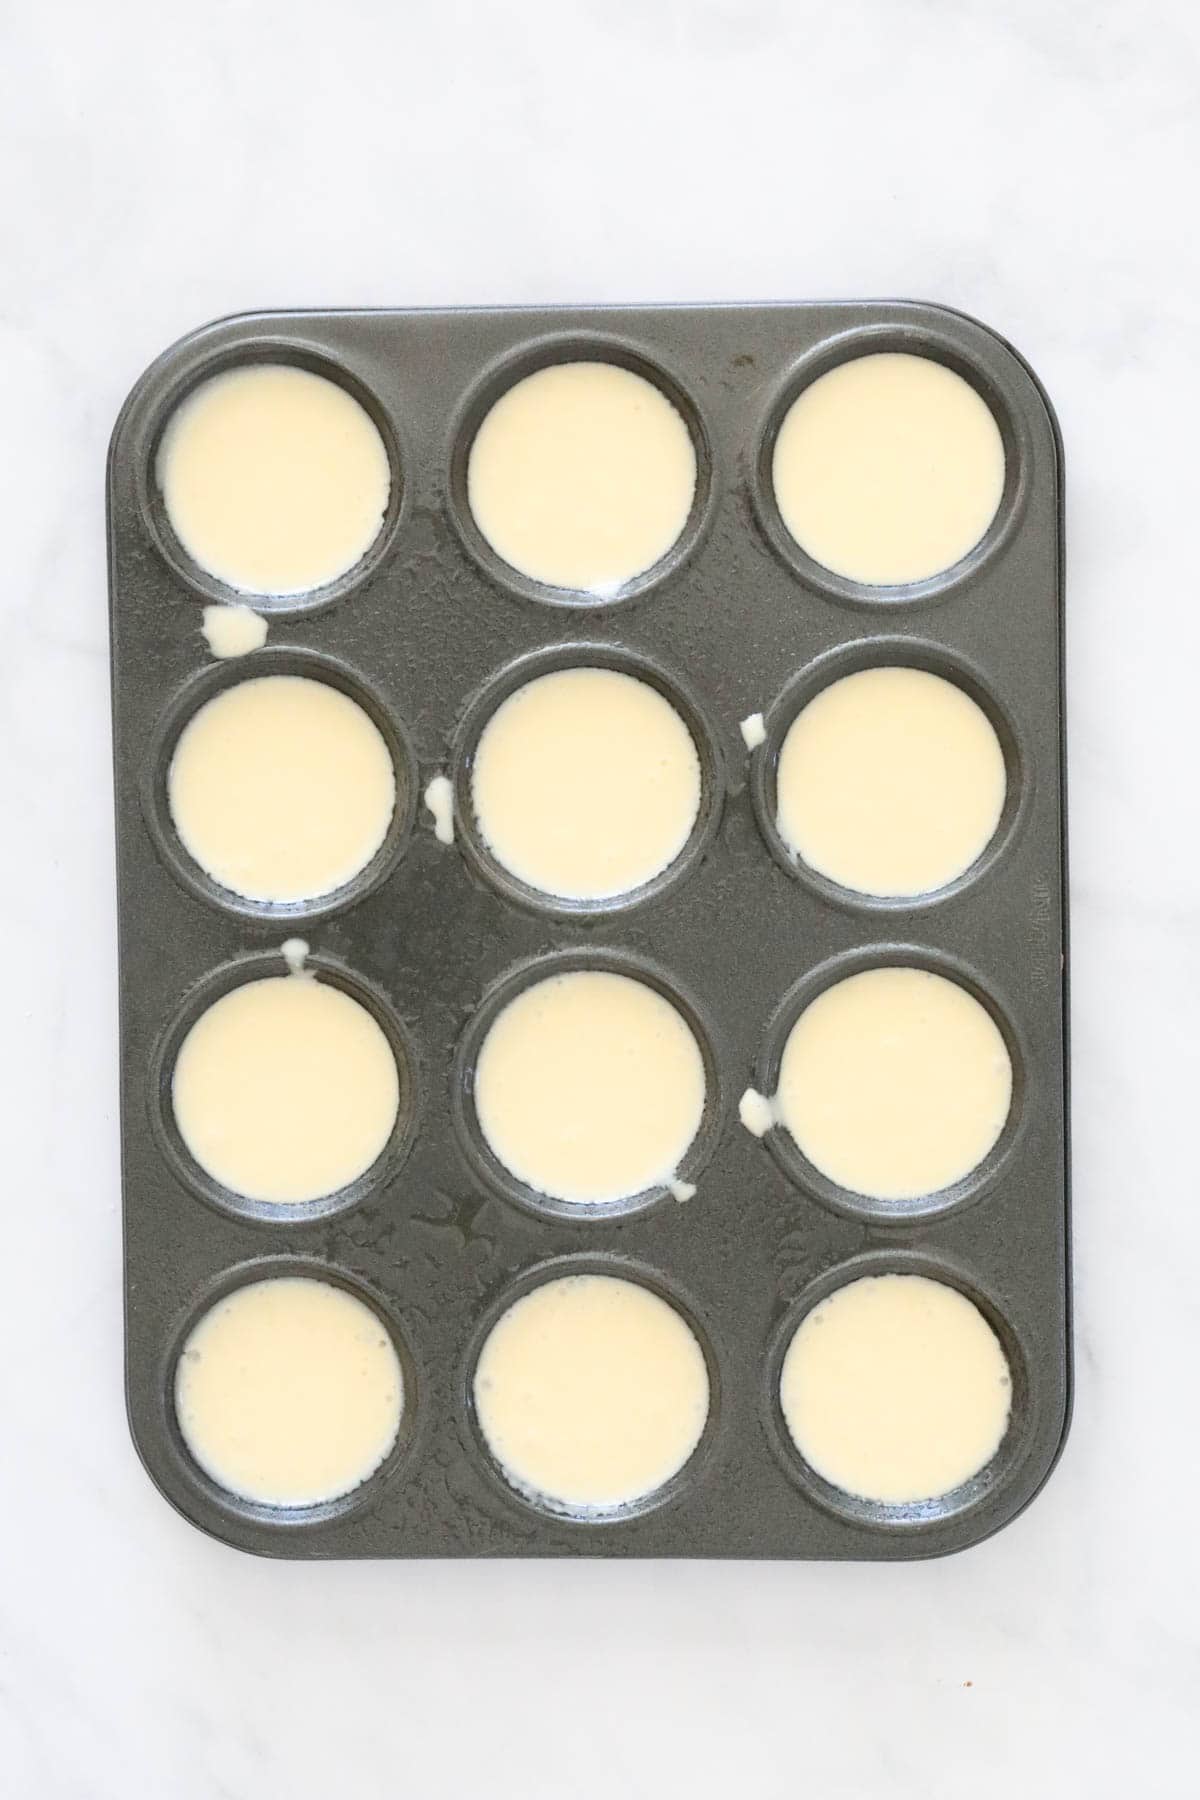
    Pour the mixture into two patty pan tins.

    Bake until lightly golden and cooked through.

    Set aside to cool.

    A patty pan filled with cake mixture.

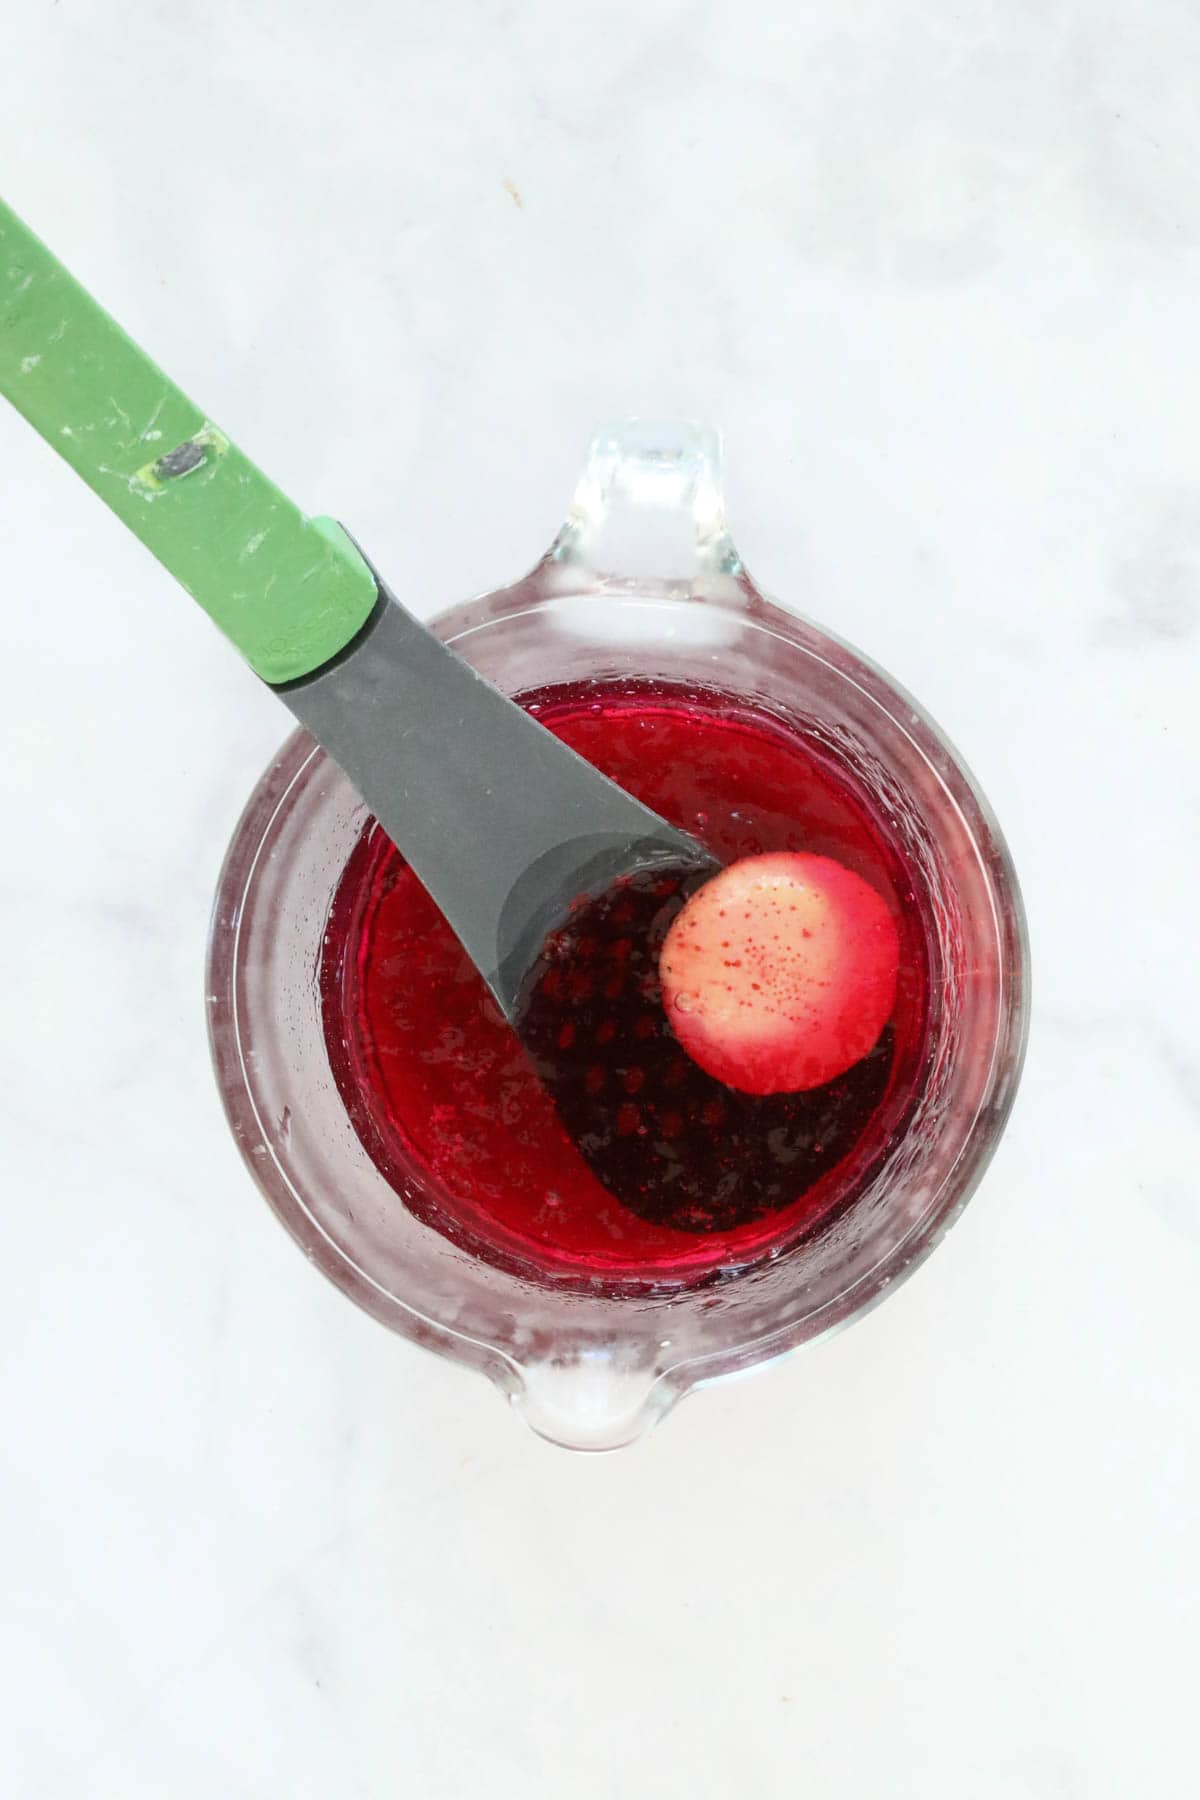
    Step 4 - Dip In Jelly

    Use a slotted spoon to dip the cakes, one by one, into the thickened jelly.

    Allow any excess to drip off.

    A cake being dipped into jelly.

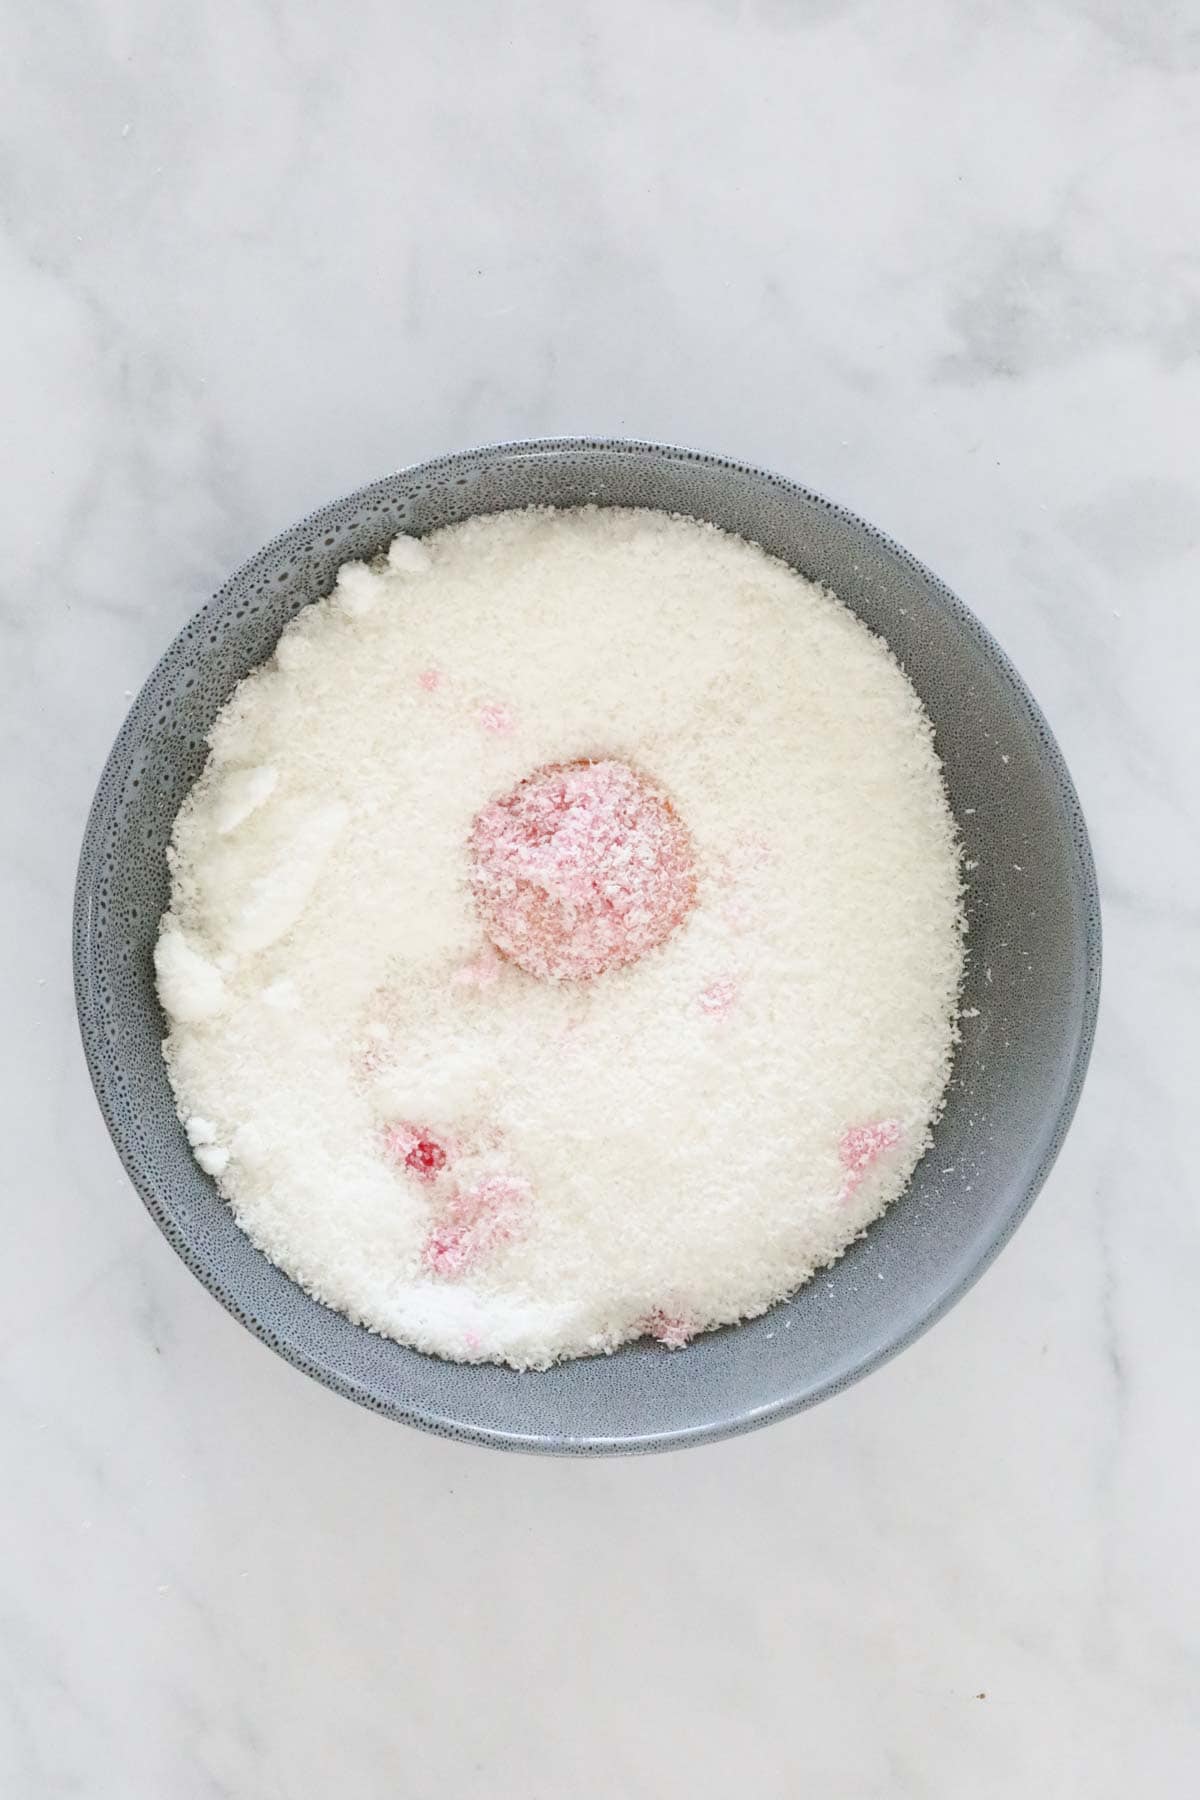
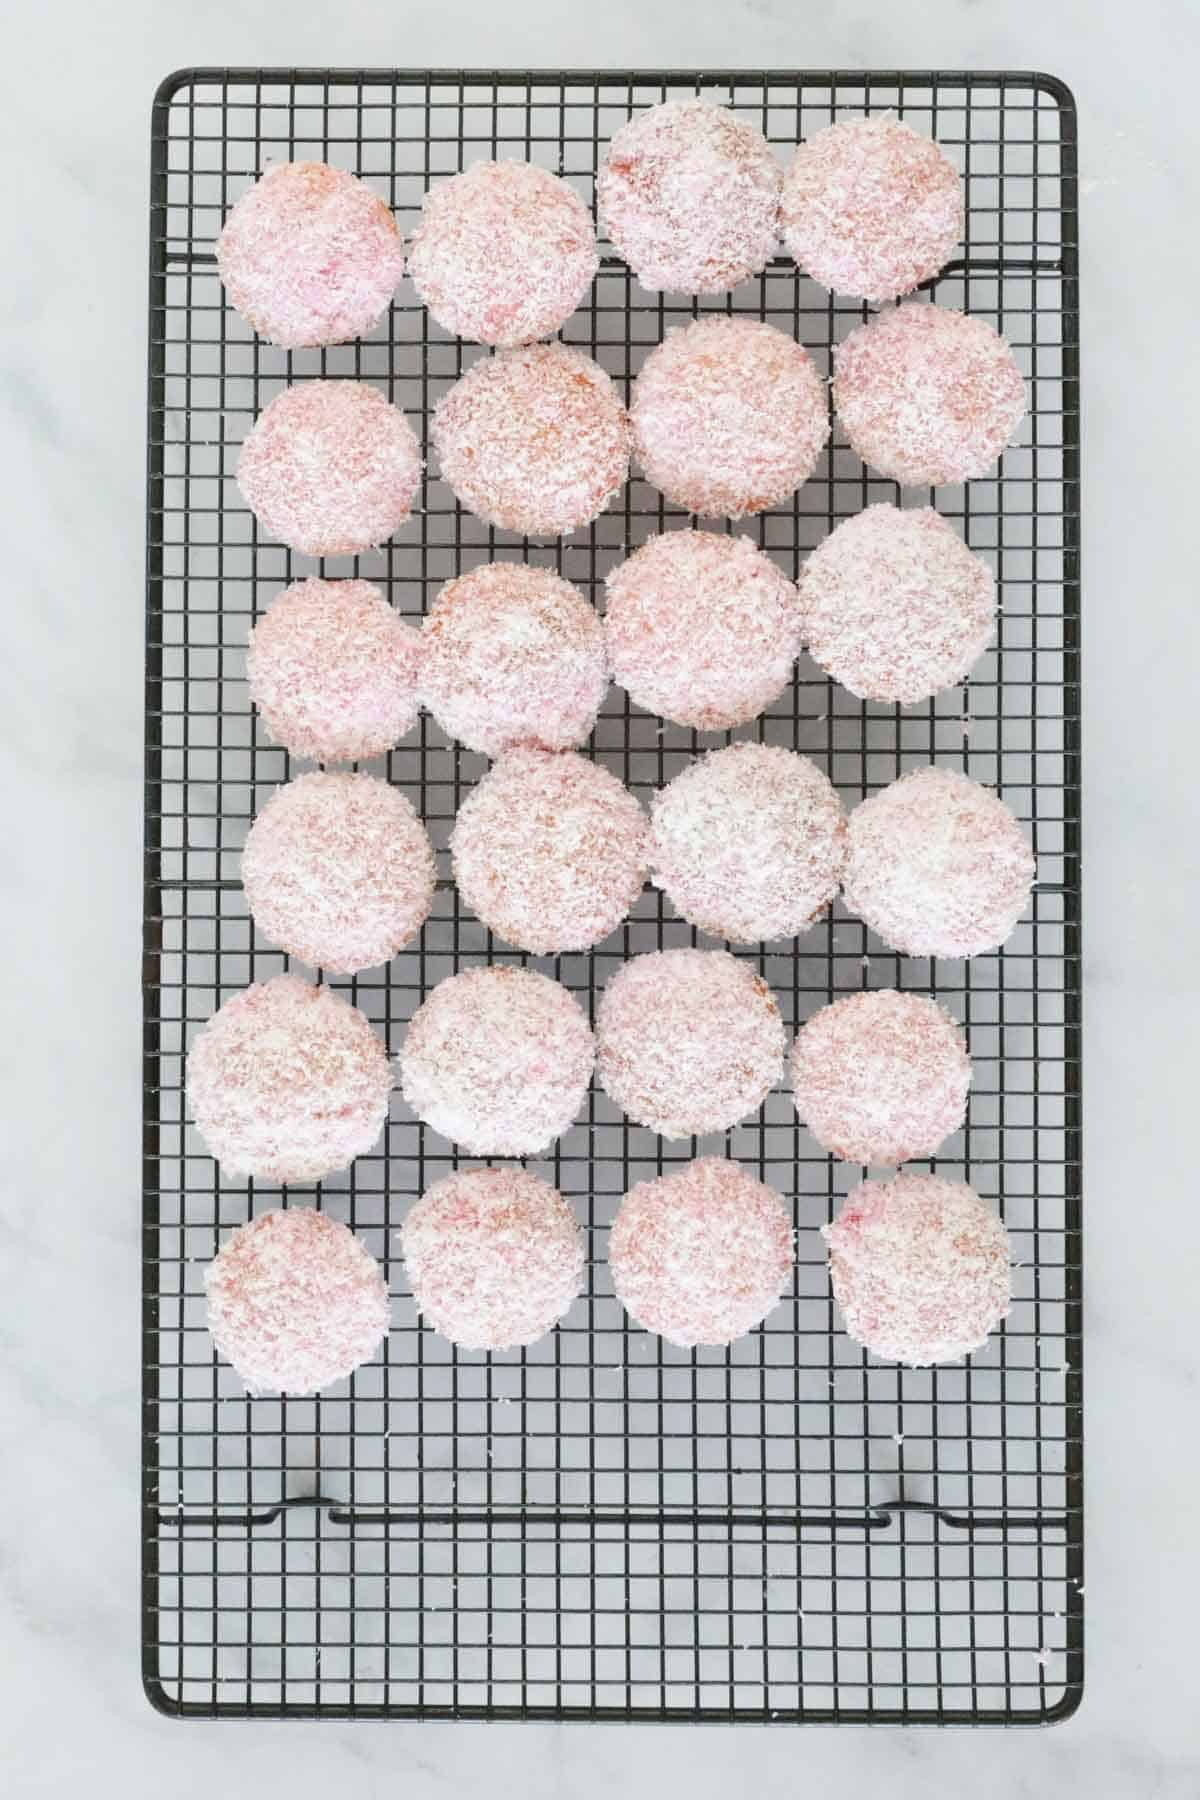
    Step 5 - Coat In Coconut

    Place the coconut into a bowl and toss the jelly cakes around to coat.

    Shake off any excess coconut.

    A cake being tossed in coconut.

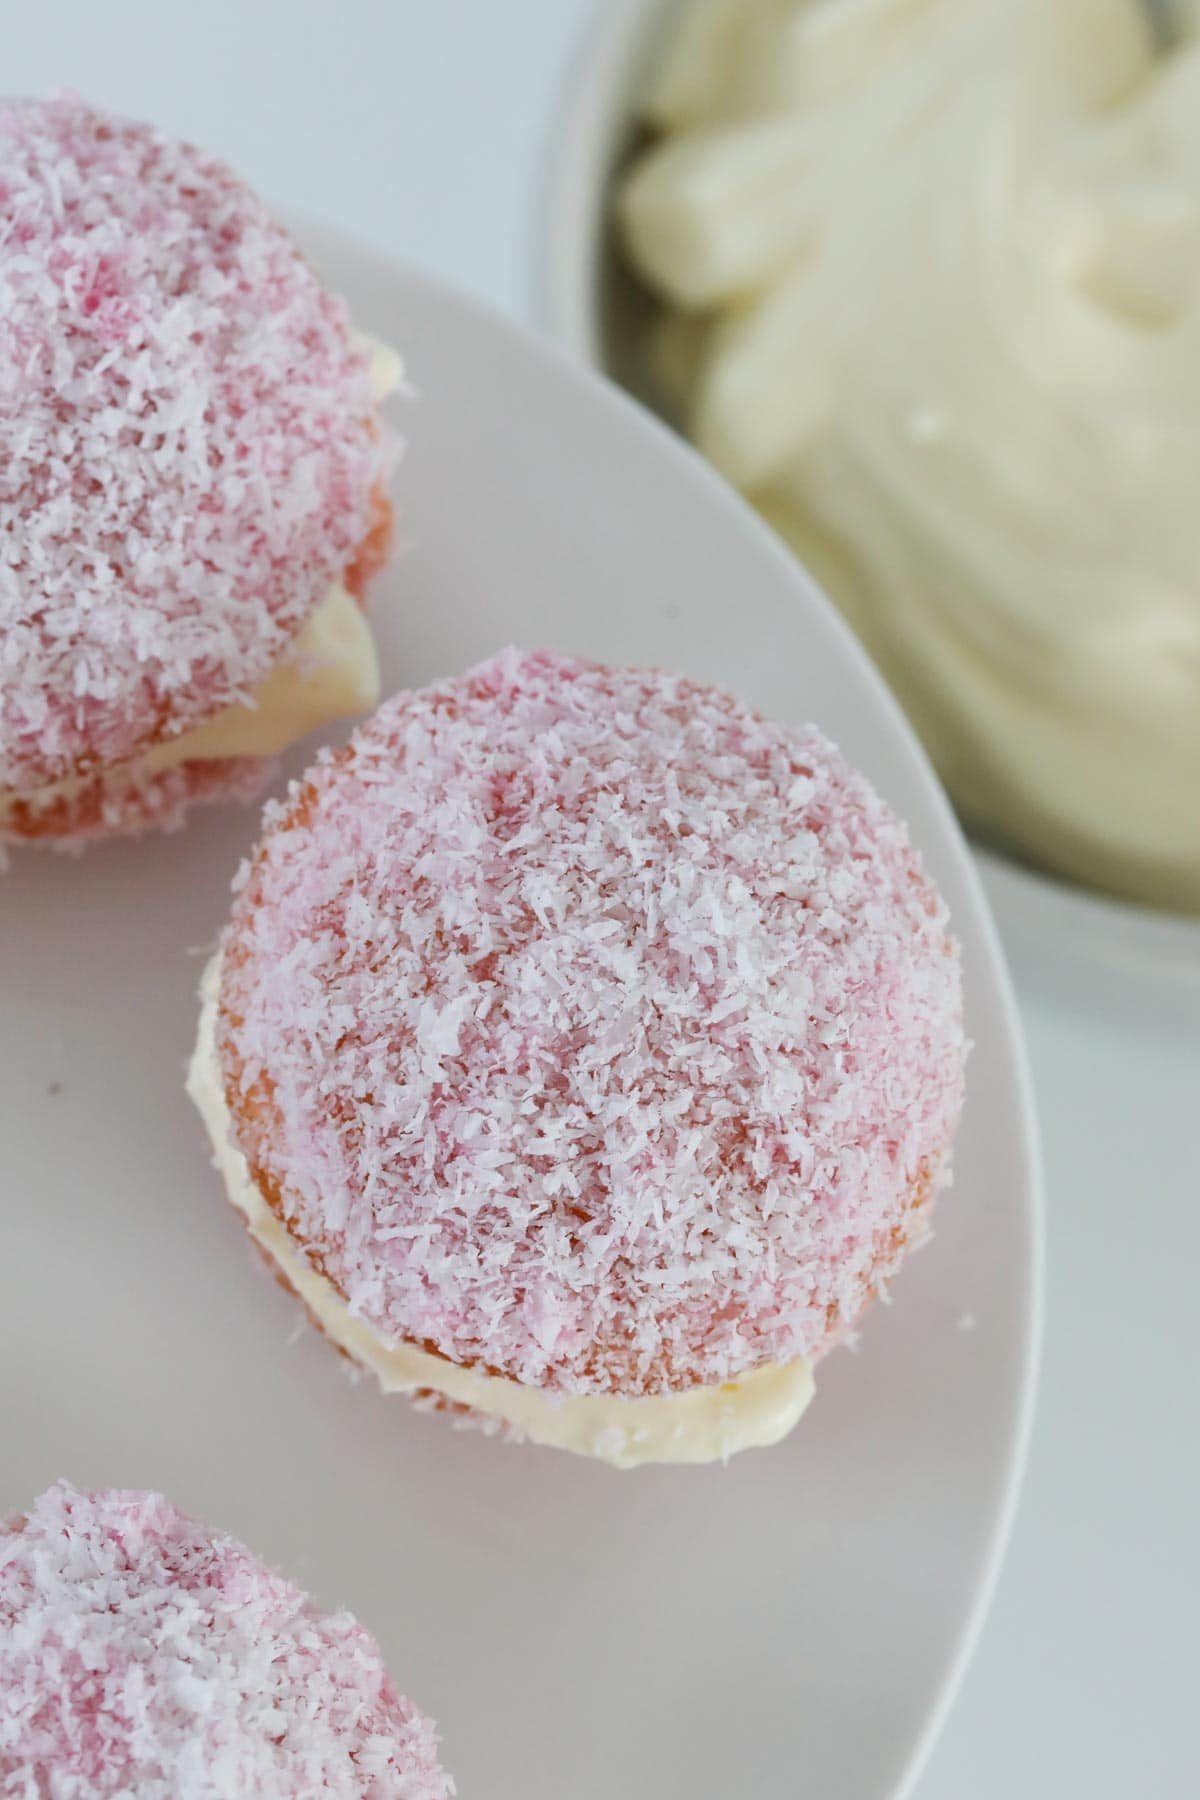
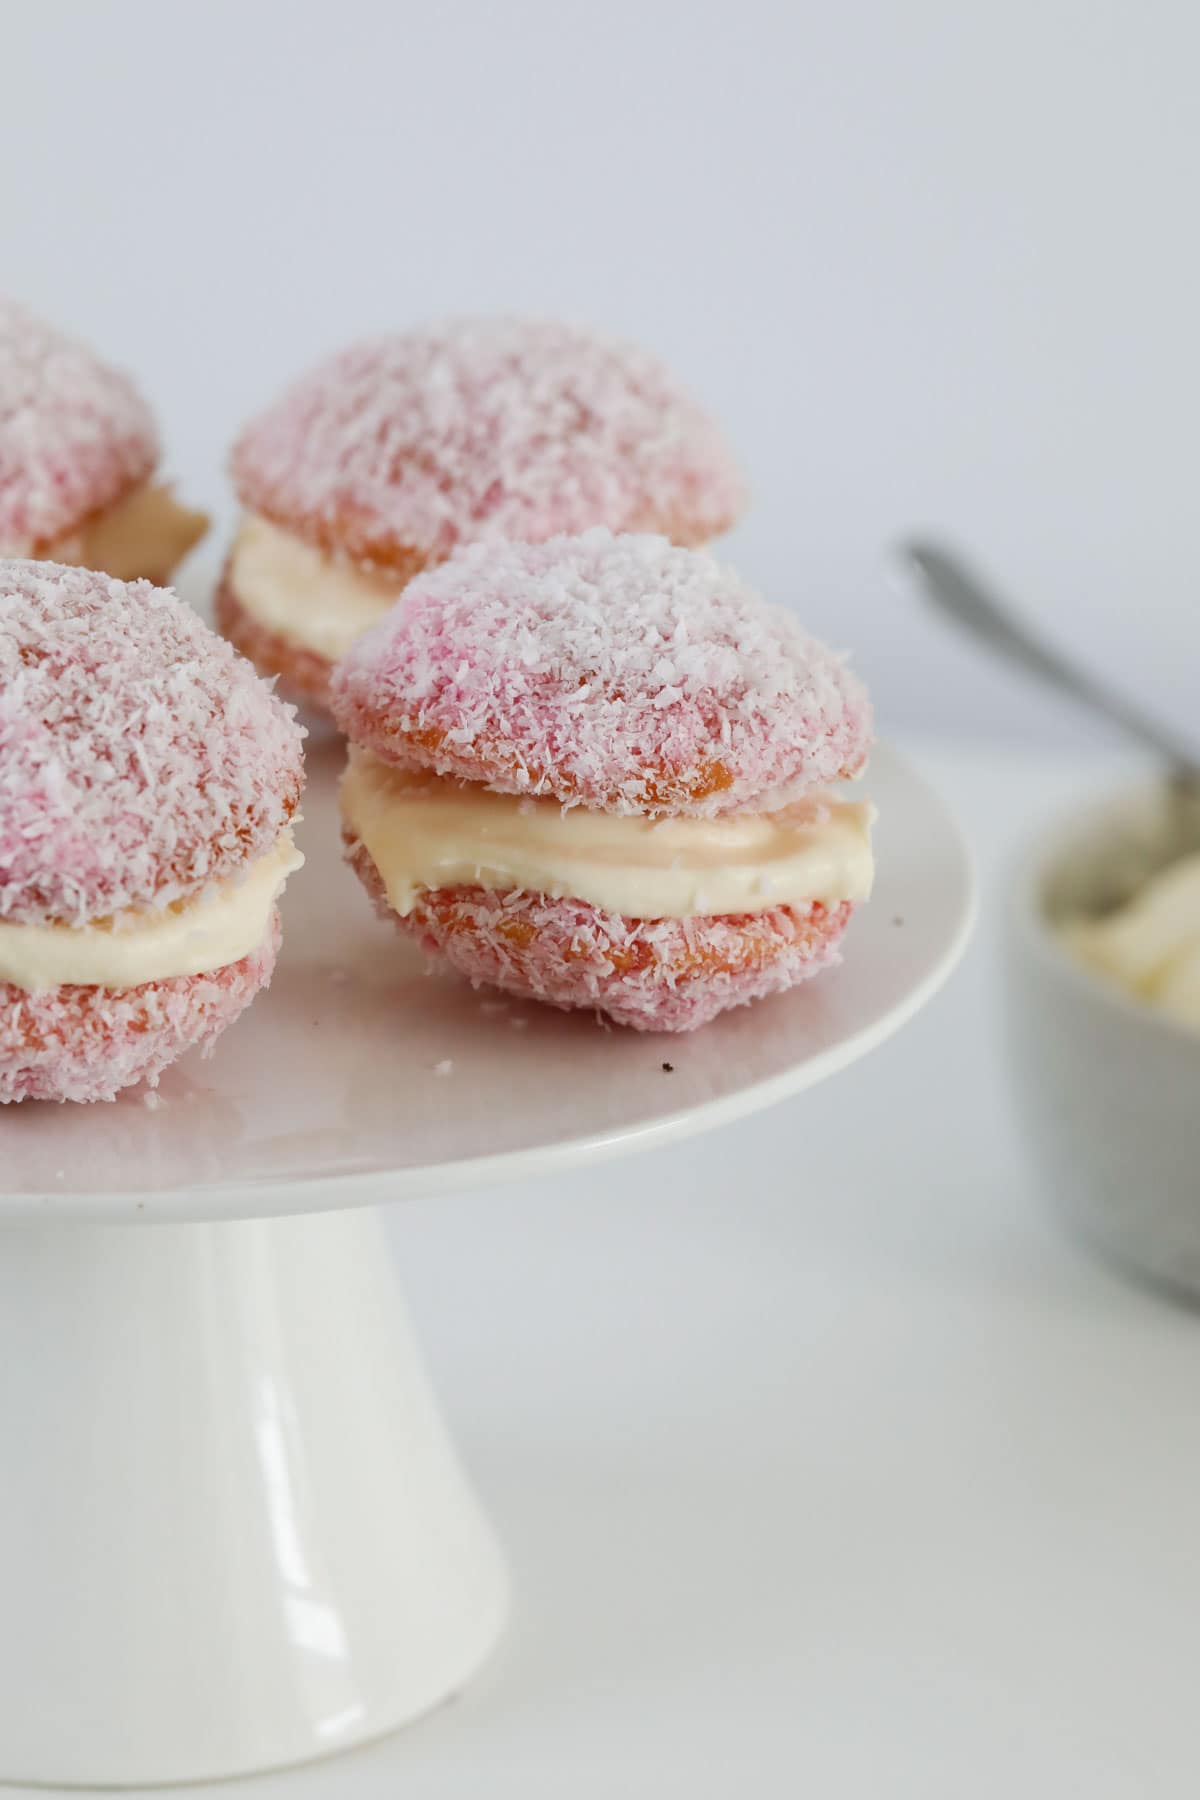
    Step 6 - Add The Whipped Cream

    Place whipped cream onto the flatter side of one cake and sandwich together with another. Serve.

    Unfilled jelly cakes on a wire rack.

    Expert Tips

    • Jelly cakes are best served on the same day that you prepare them. Alternatively you can cook the cakes ahead of time and coat them in jelly/coconut and then fill with whipped cream on the day.
    • Classically, raspberry jelly crystals have been used to make jelly cakes, however you can use any jelly flavour you like.
    • Allow the jelly to thicken for 1-2 hours in the fridge before dipping the cakes in (this will help the jelly to hold onto the cakes better). Do NOT allow the jelly to set - it should be thickened only.
    • Use desiccated coconut (not shredded) to coat the cakes.
    • Do not store the jelly cakes in the fridge as they will dry out. Store unfilled cakes in an airtight container at room temperature and then fill with whipped cream on the day of serving.
    • This recipe is not suitable for freezing.
    Jelly cakes filled with cream.

    FAQS

    Can I use a different flavour of jelly?

    Absolutely! Traditionally jelly cakes are made with raspberry jelly, but there's any flavour jelly will be delicious!

    Can I make jelly cakes without a Thermomix?

    Yes you can! You can find the conventional method for jelly cakes here.

    How long do jelly cakes last?

    Jelly cakes are best made and eaten on the same day. If making the jelly cakes ahead of time, prepare the cakes and store at room temperature in an airtight container for 1-2 days and then add the whipped cream on the day of serving.

    Jelly and cream cakes on a white plate.

    Related Recipes

    If you love baking (and eating!) sweet cakes and cupcakes, we think you'll enjoy these delicious recipes too!

    • Thermomix Vanilla Cake
      Thermomix Vanilla Cake
    • Light and fluffy fruit cupcakes.
      Thermomix Strawberry Cupcakes
    • An overhead shot of a piece of almond topped cake.
      Gluten-Free Thermomix Lemon & Ricotta Cake
    • An overhead shot of chocolate cupcakes with frosting.
      Thermomix Chocolate Cupcakes

    SHOP OUR RANGE OF THERMOMIX COOKBOOKS

    Browse our collection of hardcopy Thermomix cookbooks here.

    There's everything from family dinners to kids snacks, desserts to cookies, slices to Christmas recipes, cocktails to chocolate recipes and more!

    Image of 13 ThermoBliss recipes books on a marble look background.
    Jelly cakes filled with cream.

    Thermomix Jelly Cakes

    Old fashioned Thermomix Jelly Cakes made from soft vanilla cakes covered in raspberry jelly and coconut then filled with whipped cream.
    4.75 from 4 votes
    Print Pin Rate
    Course: Dessert
    Cuisine: sweet
    Prep Time: 15 minutes minutes
    Cook Time: 20 minutes minutes
    Chill time: 2 hours hours
    Total Time: 2 hours hours 35 minutes minutes
    Servings: 12 cakes
    Calories: 369kcal
    Author: Lucy & Lauren
    Cost: $5

    Equipment

    • Thermomix
    • Oven

    Ingredients

    • 85 g packet raspberry jelly crystals
    • 80 g butter softened
    • 110 g caster sugar
    • 1 teaspoon vanilla extract
    • 1 egg
    • 160 g milk
    • 130 g self-raising flour
    • 280 g desiccated coconut
    • 240 g whipped cream see notes
    Prevent your screen from going dark

    Instructions

    • Preheat oven to 175 degrees celsius (fan-forced). Lightly grease 2 X 12 hole patty pan tins and set aside. 
    • Prepare the jelly (as per the packet instructions) and place into the fridge for 1-2 hours or until slightly thickened. 
    • Meanwhile, place butter and sugar into the Thermomix bowl and and mix for 15 seconds, Speed 5.
    • Add the vanilla extract, egg, milk and self-raising flour and mix for 10 seconds, Speed 7.
      Scrape down sides of mixing bowl with spatula, then mix for a further 10 seconds, Speed 7 or until smooth.
    • Divide the mixture between the patty pan holes, filling to just below the top. 
      Bake in the preheated oven for 10 - 12 minutes or until lightly golden and a skewer inserted into the middle comes out clean. 
      Allow to cool in the tins for 5 minutes before transferring to a wire rack to cool completely. 
    • Dip each cake into the jelly mixture (one at a time - using a slotted spoon).
    • Coat with the coconut by tossing together in a bowl. 
    • Place a spoonful of whipped cream on top of one of the jelly cakes and sandwich together with another. 
      Place into the fridge to set. 

    Notes

    RECIPE NOTES
    • Jelly cakes are best served on the same day that you prepare them. Alternatively you can cook the cakes ahead of time and coat them in jelly/coconut and then fill with whipped cream on the day.
    • Classically, raspberry jelly crystals have been used to make jelly cakes, however you can use any jelly flavour you like.
    • Allow the jelly to thicken for 1-2 hours in the fridge before dipping the cakes in (this will help the jelly to hold onto the cakes better). Do NOT allow the jelly to set - it should be thickened only.
    • Use desiccated coconut (not shredded) to coat the cakes.
    • Do not store the jelly cakes in the fridge as they will dry out. Store unfilled cakes in an airtight container at room temperature and then fill with whipped cream on the day of serving.
    • This recipe is not suitable for freezing.

    Nutrition

    Calories: 369kcal | Carbohydrates: 32g | Protein: 5g | Fat: 26g | Saturated Fat: 20g | Cholesterol: 45mg | Sodium: 104mg | Potassium: 190mg | Fiber: 4g | Sugar: 19g | Vitamin A: 345IU | Vitamin C: 1mg | Calcium: 47mg | Iron: 1mg
    Tried this Recipe? Share it Today!Mention @Thermobliss or tag #Thermobliss!

    YOU MIGHT ALSO LIKE

    • Christmas pudding decroated cheesecake balls.
      Thermomix Peppermint Christmas Cheesecake Balls
    • Poppyseeds on top of a savoury ham and cheese scoll.
      Thermomix Ham and Cheese Scrolls
    • Whole Orange Cake dusted with icing sugar sitting on a white plate.
      Thermomix Whole Orange Cake
    • Collage of healthy recipes to make in a Thermomix.
      Healthy Thermomix Recipes
    « Thermomix Lemon and Poppy Seed Cake
    Veggie Packed Thermomix Chunky Bolognese »

    Reader Interactions

    Comments

    1. Amber says

      May 07, 2020 at 3:26 pm

      Was this meant for mini cupcake tins? Or 1x 12 cupcake tin?. I wasn’t even able to fill one 12 cupcake tray. So thought maybe half fill but that wasn’t enough either?.

      Reply
      • Lucy says

        May 07, 2020 at 6:02 pm

        Hi Amber, patty pan tins are used for this recipe (they're lower and flatter than cupcake tins).

        Reply
    4.75 from 4 votes (4 ratings without comment)

    Leave a Reply Cancel reply

    Your email address will not be published. Required fields are marked *

    Recipe Rating


    Primary Sidebar

    Hi, We're Lauren and Lucy! We're two mums who love to cook and want to show you how easy it is to make delicious family meals, baking treats and lunch box snacks in your Thermomix..

    More about us →

    Thermomix Christmas Recipes

    • Baked gingerbread biscuits on a wire rack.
      The Best Thermomix Gingerbread Recipe
    • Shards of chocolate reindeer inspired bark.
      Thermomix Reindeer Bark
    • Side view of Brandy Custard in a black bowl sitting on a wooden board. In the background is a bottle of brandy.
      Thermomix Brandy Custard
    • Round shortbread biscuits on a white cake stand.
      Thermomix Shortbread

    Thermomix Midweek Meals

    • Cooked Pasta bake with a couple of scoops removed, a gold spoon is sticking out to the side.
      Thermomix Beef and Vegetable Pasta Bake
    • A slice of egg and bacon quiche.
      Thermomix Egg & Bacon Quiche
    • Overhead view of a large spoon scooping up a Chicken Parma Ball.
      Thermomix Chicken Parma Balls
    • Overhead view of Bowl of Thermomix Zucchini Pea and Bacon risotto sitting on a black hand towel with a gold fork next to it. in the background is a zucchini and a white bowl with cheese in it.
      Thermomix Zucchini, Pea and Bacon Risotto

    Thermomix Lunch Box Fillers

    • Egg and bacon pastries.
      Thermomix Egg & Bacon Quiches
    • Glazed cinnamon and apple scrolls.
      Thermomix Apple & Cinnamon Scrolls
    • A bowl of chia, currant and weet-bix balls.
      Thermomix Weet-Bix Balls
    • Front side view of Two slices of Orange butter cake on a white plate. in the background is the rest of the cake on a white serving platter.
      Thermomix Orange Butter Cake Recipe

    Popular Thermomix Cookbooks

    • Complete set o 16 ThermoBliss recipe books.
      ThermoBliss Complete Cookbook Set | 16 Books
    • Front cover images of ThermoBliss 4 book snack and lunch box set.
      ThermoBliss Lunch Box and Kids Snacks Cookbook Bundle | 4 Books
    • A bundle of Thermomix Cocktails and Entertaining Cookbooks.
      Thermomix Entertaining and Cocktails 1, 2 & 3 Cookbook Bundle
    • Image of ThermoBliss Month of Thermomix Dinners 3 Book Bundle Set.
      A Month of Thermomix Dinners 1, 2 & 3 Bundle

    Footer

    ↑ back to top

    About

    • Privacy Policy
    • About Us
    • Terms Of Use

    Newsletter

    • Sign Up for emails and updates

    Contact

    • hello@thermobliss.com

    Please note the content including images and recipes contained within the ThermoBliss website and recipe books are protected by copyright 2024. Adding and/or sharing of content from the ThermoBliss website or recipe books to third party websites or platforms is prohibited.

    Copyright © 2024 ThermoBliss

    Copyright 2024 Brunch Pro on the Brunch Pro Theme

    Manage Cookie Consent
    To provide the best experiences, we use technologies like cookies to store and/or access device information. Consenting to these technologies will allow us to process data such as browsing behavior or unique IDs on this site. Not consenting or withdrawing consent, may adversely affect certain features and functions.
    Functional Always active
    The technical storage or access is strictly necessary for the legitimate purpose of enabling the use of a specific service explicitly requested by the subscriber or user, or for the sole purpose of carrying out the transmission of a communication over an electronic communications network.
    Preferences
    The technical storage or access is necessary for the legitimate purpose of storing preferences that are not requested by the subscriber or user.
    Statistics
    The technical storage or access that is used exclusively for statistical purposes. The technical storage or access that is used exclusively for anonymous statistical purposes. Without a subpoena, voluntary compliance on the part of your Internet Service Provider, or additional records from a third party, information stored or retrieved for this purpose alone cannot usually be used to identify you.
    Marketing
    The technical storage or access is required to create user profiles to send advertising, or to track the user on a website or across several websites for similar marketing purposes.
    Manage options Manage services Manage {vendor_count} vendors Read more about these purposes
    View preferences
    {title} {title} {title}

    Rate This Recipe

    Your vote:


    A rating is required
    A name is required
    An email is required

    Recipe Ratings without Comment

    Something went wrong. Please try again.