Make your own Thermomix Sourdough Loaf with our simple step-by-step recipe using starter, flour, water and salt.
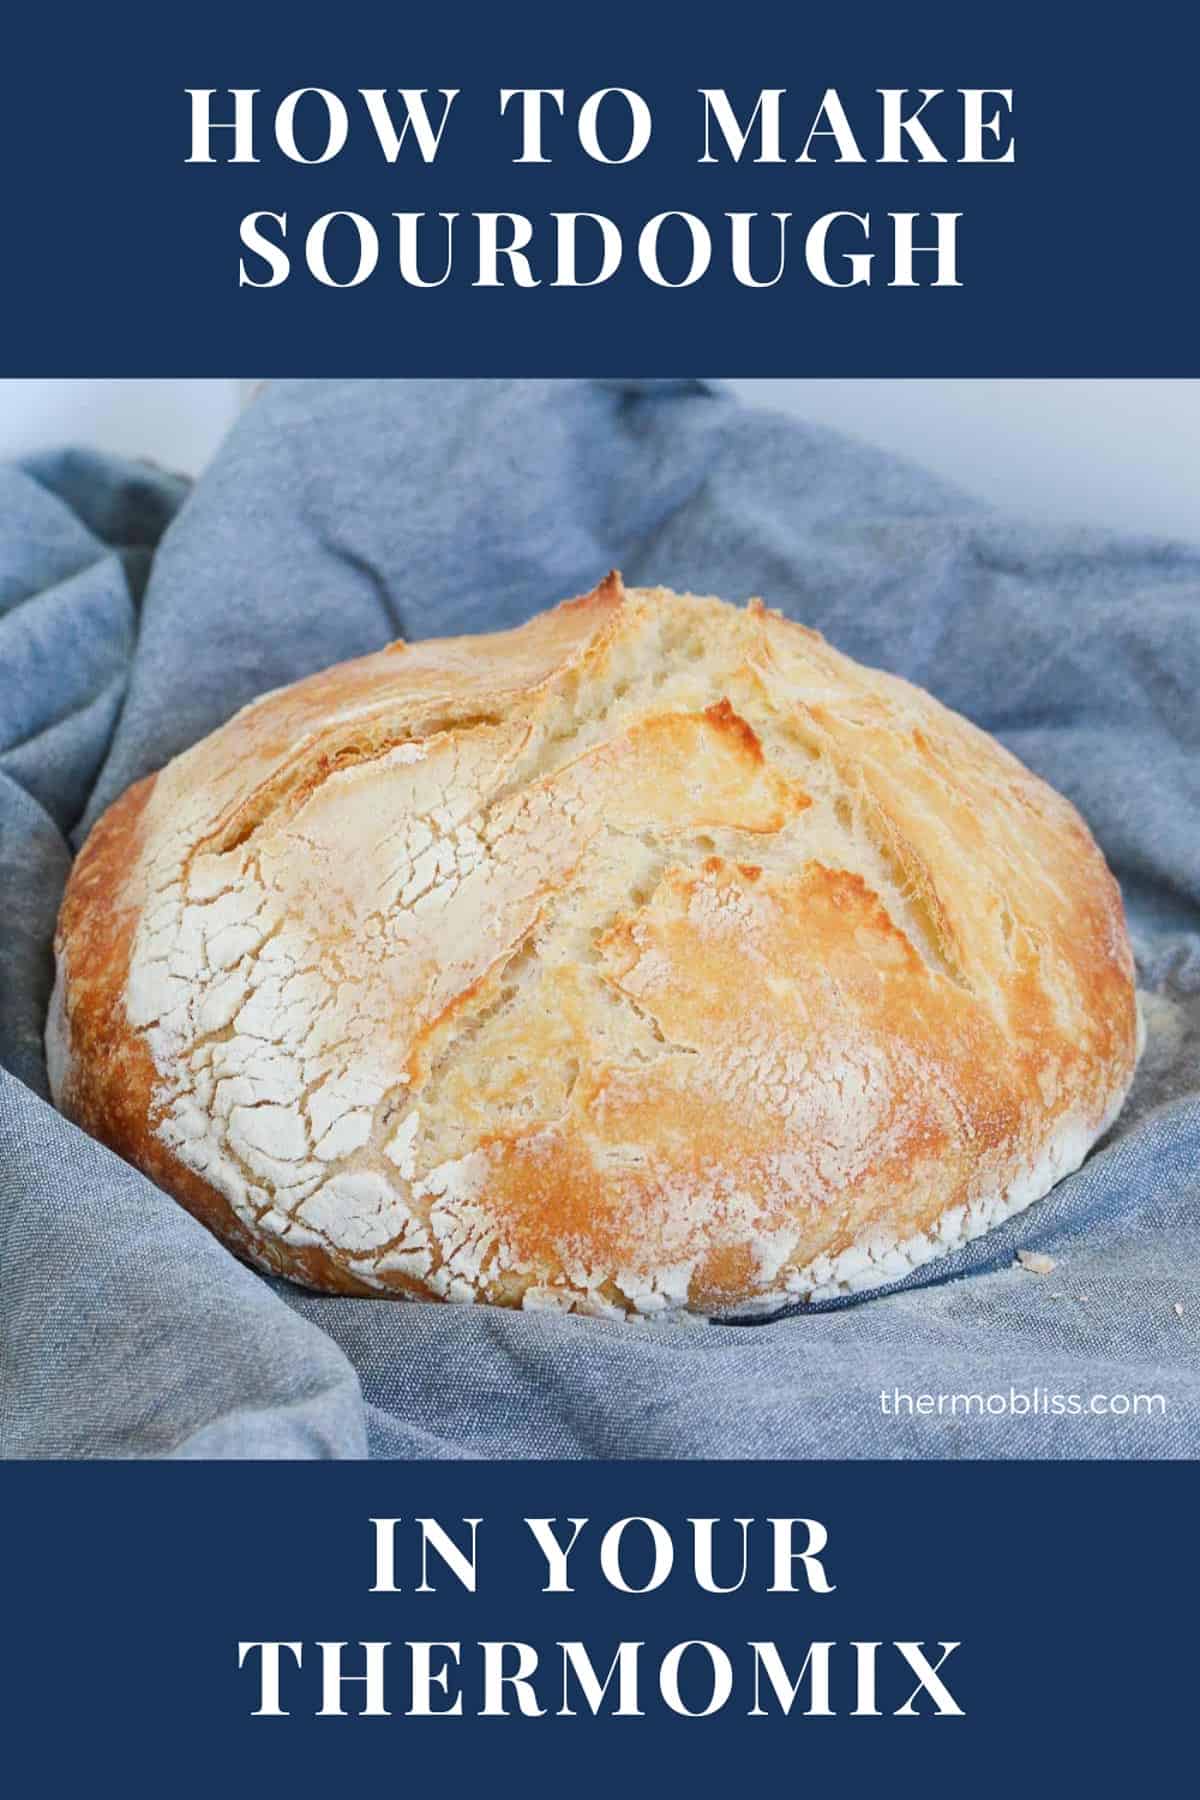
It has certainly been the year of the sourdough! In what has become the biggest baking trend, it's ALL about nurturing your sourdough starter and making it into delicious sourdough loaves.
What You Need
To make a loaf of sourdough using your Thermomix, you'll need:
- sourdough starter (get some starter from a friend or make your own)
- Bakers flour or strong bread flour
- salt
- water
Proving The Dough
It's important to allow the dough to prove twice before baking.
First Prove
Place the dough into a lightly greased Pyrex bowl or a ThermoServer. Cover with a lid or tea towel and allow to rest at room temperature for 4 hours.
After 4 hours, knock the dough back down to remove the air and form into a tight ball.
Second Prove
Place the dough ball back into the bowl or Thermoserver, cover with a lid or tea towel and allow to prove for an additional 3-4 hours.
Note: Alternatively (and for an even better sourdough), you can do the second prove by placing the covered bowl into the fridge overnight.
Cooking The Sourdough
Pyrex Bowl Method
Place the dough onto a lightly dusted baking tray.
Use a very sharp knife to create tiny slits in the top of the dough.
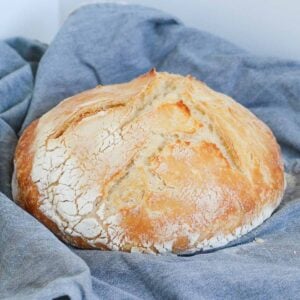
Place a pyrex bowl over the top of the dough (to create a dome with the bread inside) and bake according to the instructions in the recipe card below.
Steam Oven Method
If you don't have a pyrex bowl, then you can place a tray of water in the base of the oven to create steam.
Place the dough onto a lightly dusted baking tray.
Use a very sharp knife to create tiny slits in the top of the dough.
Place the baking tray with the dough on the shelf above the water tray and bake according to the instructions in the recipe card below.
Tips For Making Thermomix Sourdough
Look after your starter - you need to take care of your starter and feed it! If you're baking every 3-4 days, then keep your starter at room temperature and feed it daily. If you're only planning to bake once a week, keep your starter in the fridge and remove it the day before you plan to use it.
Use a very sharp knife or old school razor blade - when cutting tiny slits into your loaf before baking.
Freeze - sourdough freezes beautifully. I like to bake two loaves and freeze one of them.
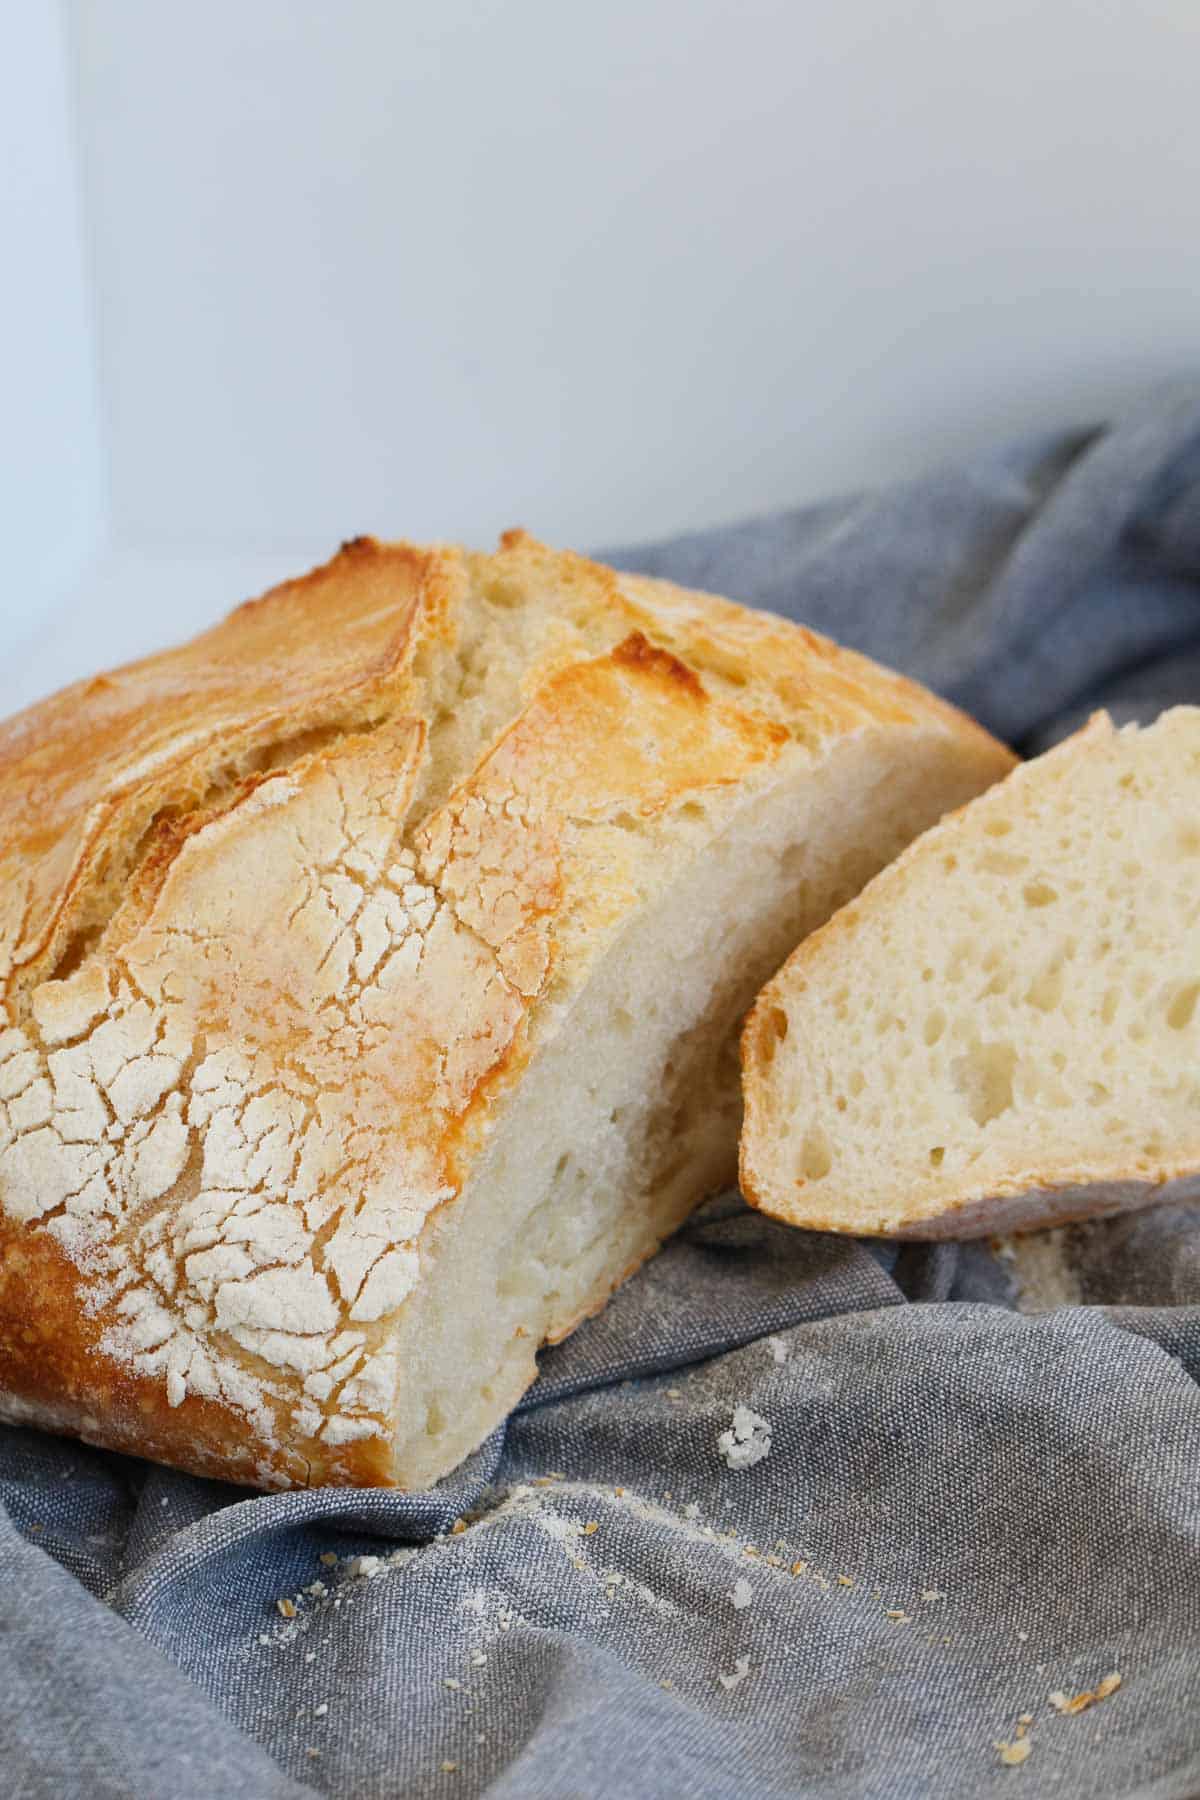
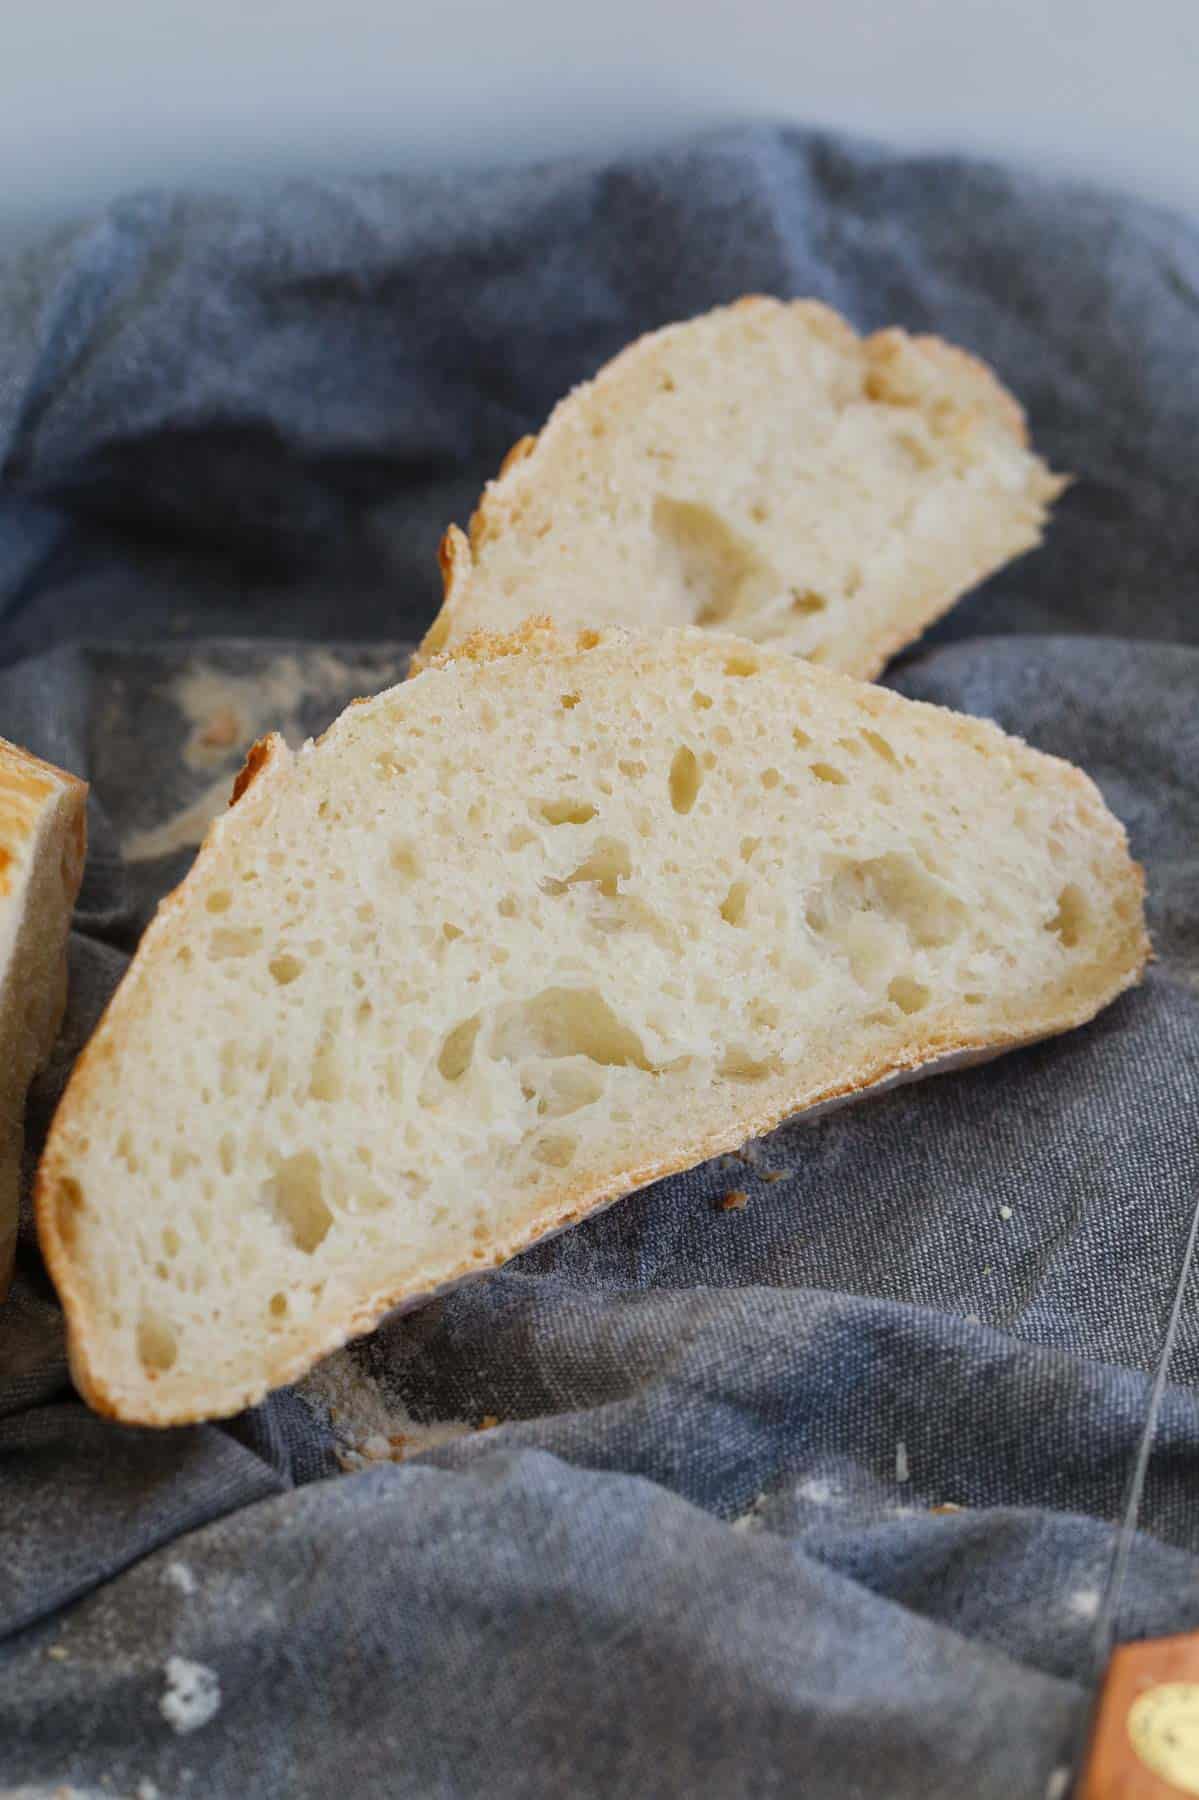
Cutting the bread - as delicious as warm bread straight from the oven is... allow it to cool for approximately an hour before slicing. This allows the bread to hold it's shape when cut.
More Thermomix Bread Recipes
If you love making breads and rolls in your Thermomix, then these recipes are for you!

Thermomix Sourdough Loaf
Equipment
- Thermomix
- Oven
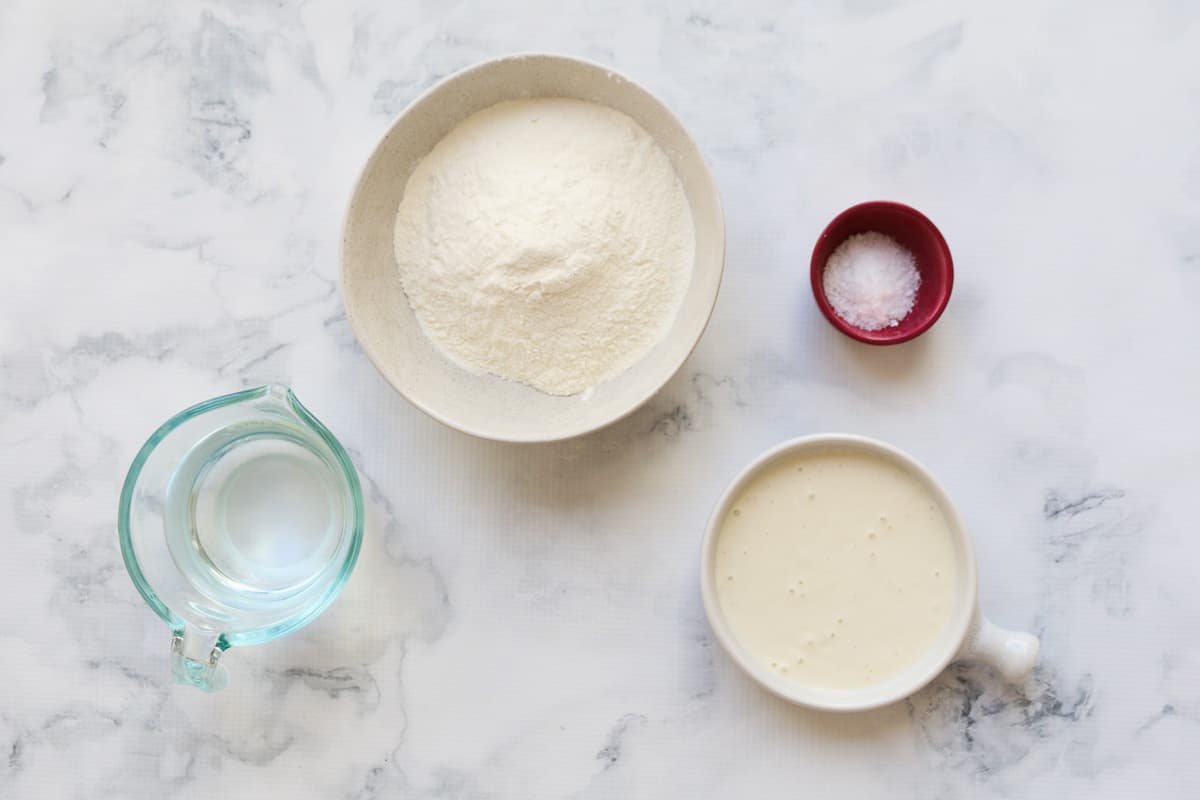
Ingredients
- 400 g Bakers flour or strong bread flour
- 5 g salt
- 230 g water
- 160 g sourdough starter
Instructions
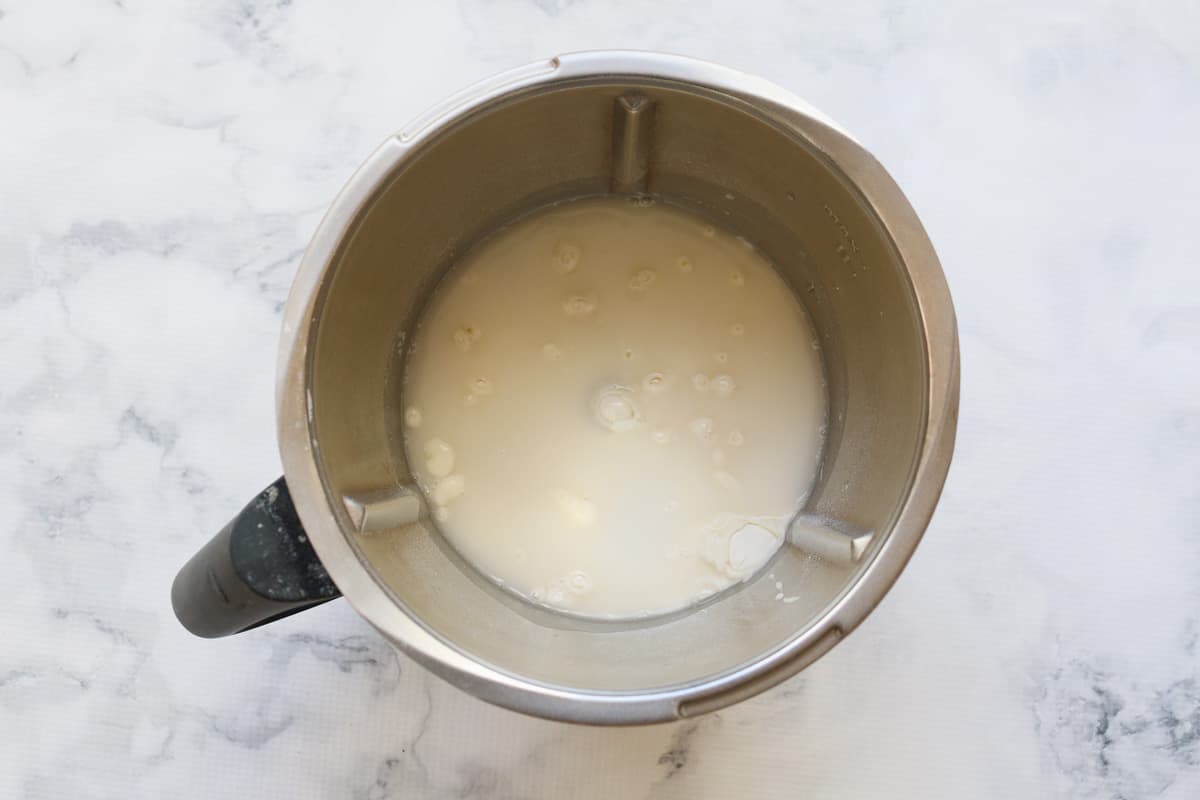
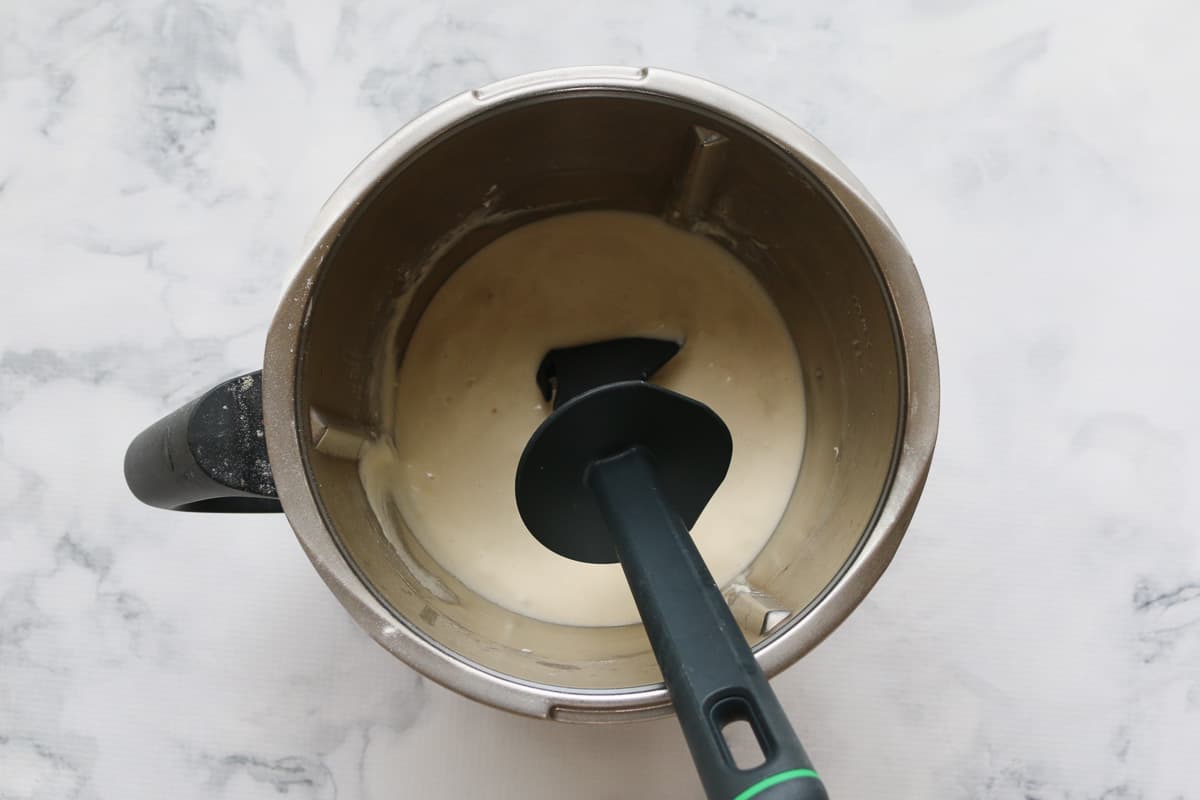
- Place the flour, salt, water and sourdough into the Thermomix bowl. Knead for 10 minutes of kneading/Interval function. The mixture will be very sticky at this stage - this is perfect.
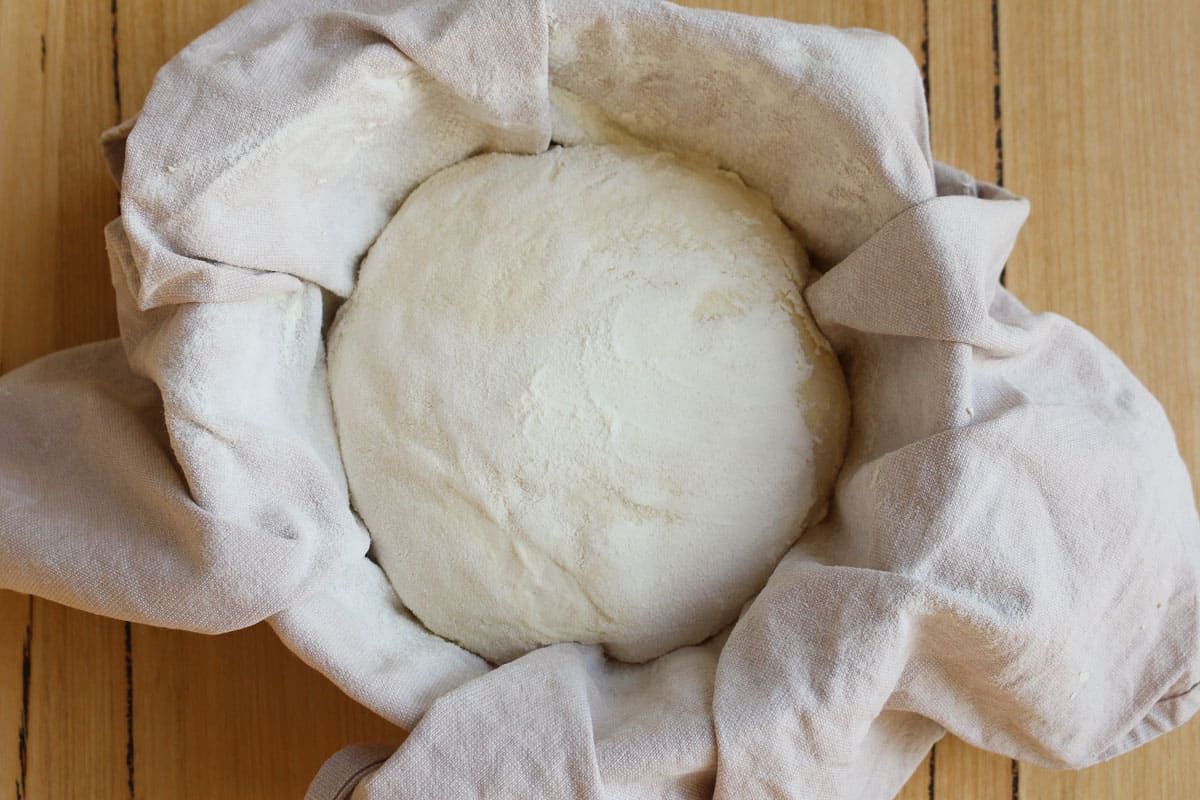
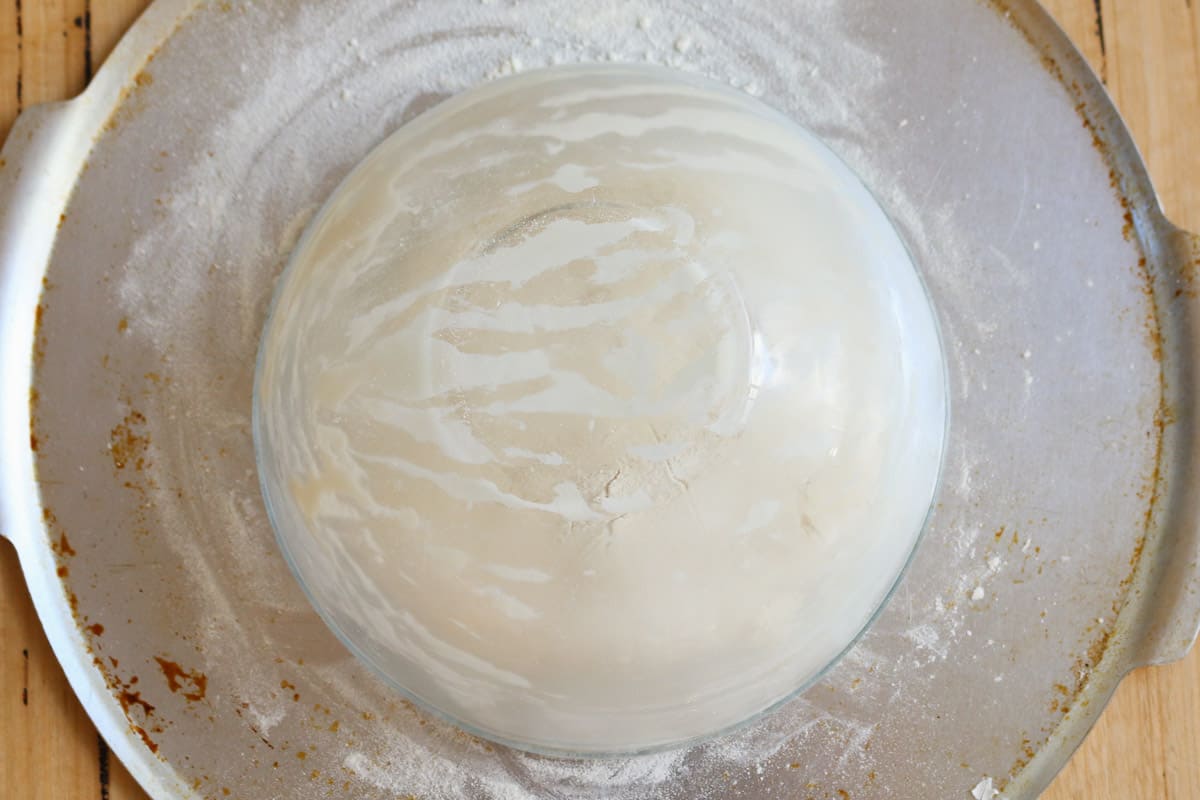
- Use a spatula to scrape the sticky dough into a greased bowl. Cover and allow to prove for 4 hours at room temperature.
- On a lightly floured board, knock the air out of the dough and form into a tight ball. Return to the greased bowl, cover and allow to prove for another 4 hours (for best results, cover and place into the fridge overnight to prove.
- Preheat the oven to 210 degrees celsius (fan-forced) or 230 degrees celsius (non fan-forced).
If using a pyrex bowl
- Lightly flour a flat baking tray.
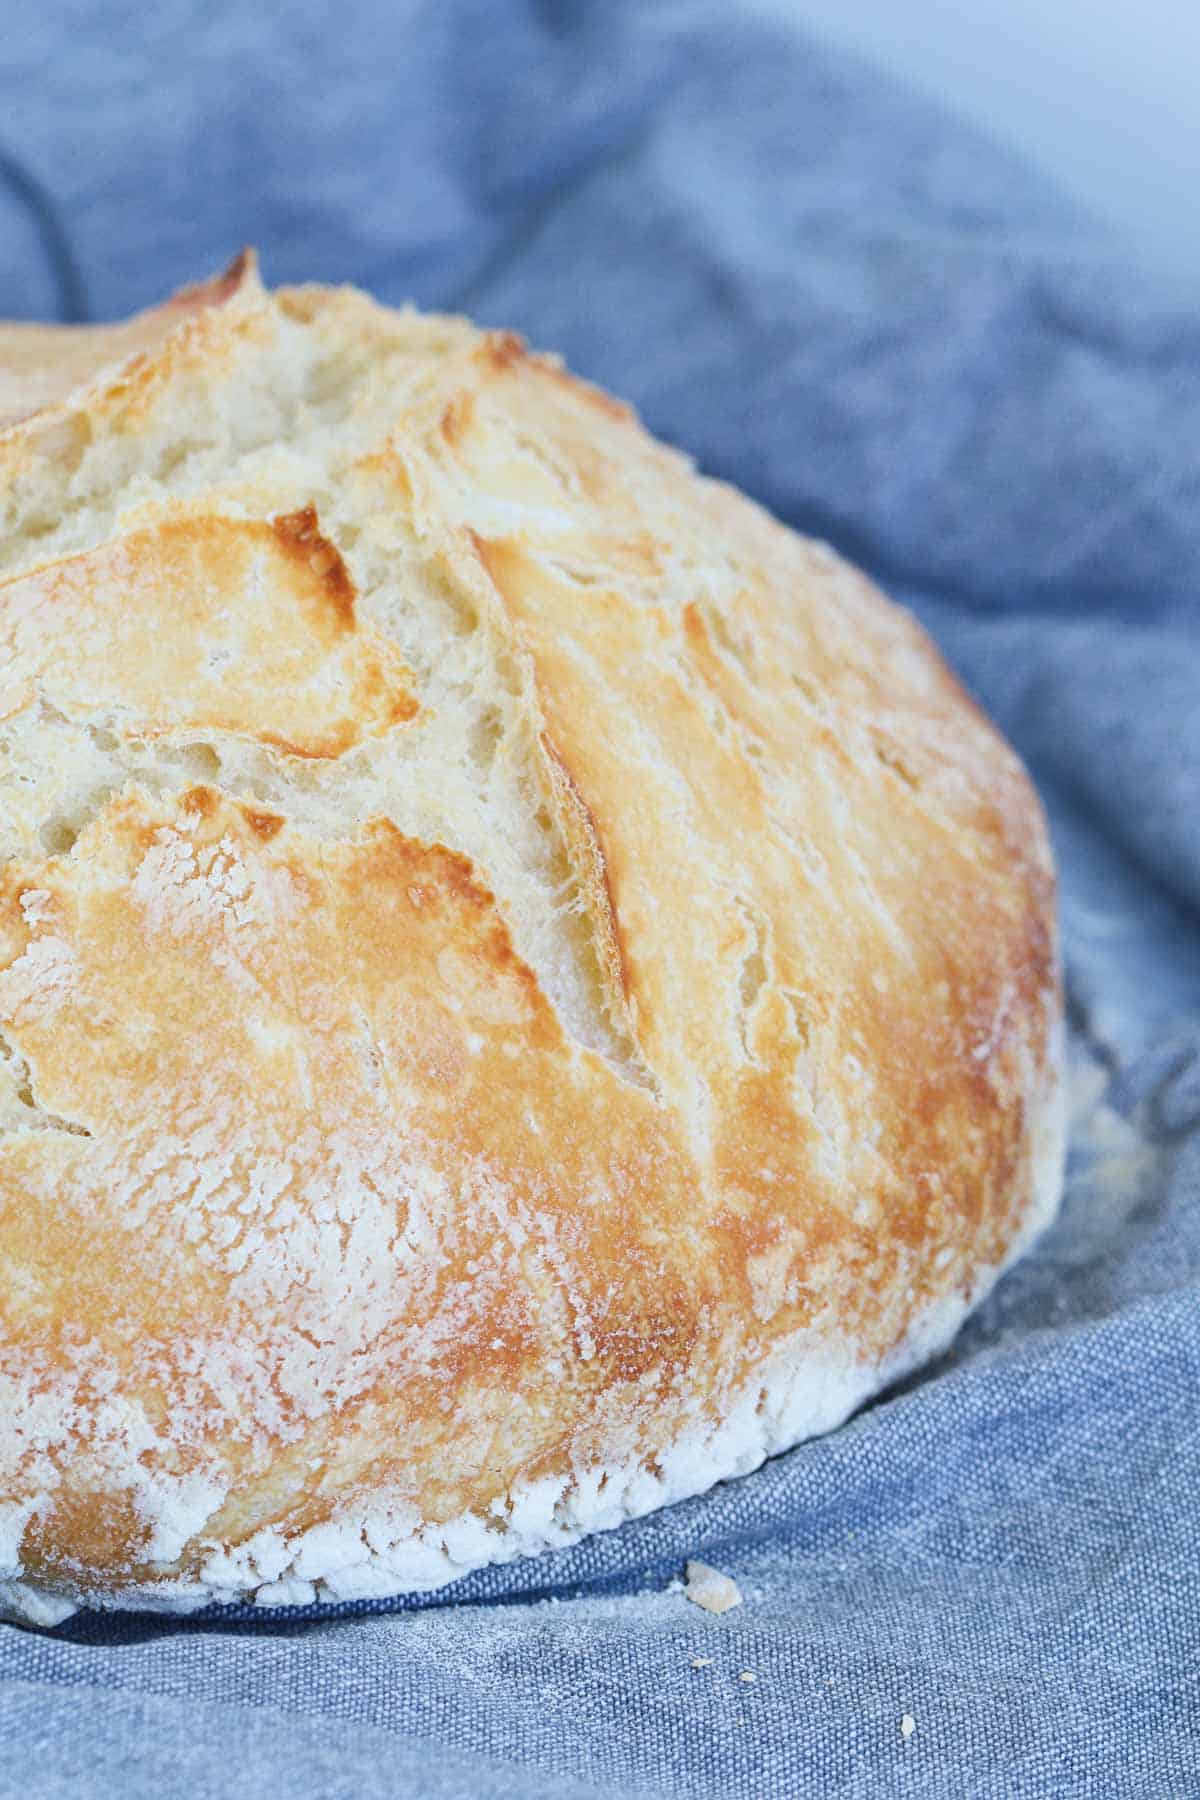
- Place the dough onto the centre of the tray and cut a couple of tiny slits with a very sharp knife on the top of the dough. Place the pyrex bowl over the top of the dough to form a dome.
- Cook for 25 minutes and then very carefully remove the pyrex bowl and cook for a further 25 minutes or until a crust has formed and the loaf sounds hollow when tapped.
- Allow to rest and cool before cutting.
If using a water tray
- If you don't have a pyrex bowl, you can place a tray of water on the bottom shelf in the oven to create steam.
- Place the dough onto the centre of the tray and cut a couple of tiny slits with a very sharp knife on the top of the dough.
- Place the tray on the shelf above the water tray and cook for 30-35 minutes or until a crust has formed and the loaf sounds hollow when tapped.


Janet Watson says
May I know what your temperature is set as for the first 4 hours proving. I live in tropical Queensland. Thank you.
Deborah Dodge says
Comes out of the oven perfect every time. Even works in the camp oven 😊
Lucy says
Fantastic!
Renea Shaw says
How long was the camp oven cook and at what temp?
David Willshire says
why not leave the dough in the Thermomix bowl to prove, knock back and prove again, and then tip it out onto some baking paper and pop it into the Dutch oven? No hands need even touch the dough...
Jacqui says
I started my sourdough journey with this recipe and then got confused by looking at other recipes. After a fair few failures, I came back to this one and it works perfectly every time.
Lucy says
We're so happy to hear that!
Judy says
Just made my first batch of dough from this recipe and Im leaving it to prove overnight. For those that have used a Dutch oven did you preheat it first ?
Thank you in advance.
Bianca says
Hi, hoping to try this soon. On the instructions it says knead for 10 minutes on kneading/interval function. Is this the dough setting?
Also, those that baked in a Dutch oven - do you pre heat the Dutch oven?
Lauren Matheson says
Hi Bianca, yes this is the dough function on a TM6
Chiara says
If you have the TM6, yes it's the 'dough' function for Kneading.
Jane says
Oh my goodness, made my very first sourdough loaf today with the starter I created, I'm so proud of myself! Only change I made was to start the baking in a cold oven. I'll be doing this often, thank you!!
Lucy says
Fantastic!
Cassie says
I have been trying and perfecting a sourdough recipe for months now. It was fine but not perfect, which annoyed me immensely 😅. Thought I'd give your recipe a go as everything else I've tried from your site has been amazing. OH MY GOD! Why didn't I try sooner! I proved over night and baked in my Dutch oven. It's the best sourdough I've made so far, plus so much easier for me to do with a baby! Thank you!
Kate Hofmeister says
I’ve spent the last few years trying to make the perfect sourdough, with too many failures to count. This mornings loaf is perfection! Cooked in a Dutch oven - thank you !
Lucy says
Fantastic!
Julia M says
Worked perfectly. No constant needing to fold and stretch. No having to “read” the dough. Turned out so well. This is now my go to recipe.
Jessica Bayl says
This recipe is brilliant- the only reason I make sourdough! My personal experience is to use a rye flour starter- it is way more active than a normal white flour one (sometimes it smells alcoholic it’s so fermented!) Once I switched to rye for the starter and just normal white flour for the recipe, I haven’t had a single failed sourdough. Thanks for this recipe!
Lucy says
That's fantastic to know!
Deborah says
Thanks for this easy to follow recipe. Finally found the courage to try baking SD. And it was a great success with my first attempt.
Karen McAllister says
Fabulous result - it’s taken 8 weeks to get here but my first real success. I used Multigrain Flour and a Dutch Oven.
Tash says
That sounds amazing!! Thanks for the review 🙂
Kerrie says
Used protein rich bread flour, proofed overnight in fridge. I doubled the amount of salt for flavour and the result was outstanding. Let it stand at room temp for about an hour before I cooked it in a cast iron dutch oven with lid on at 230C for 25 minutes then 10 minutes with lid off at about 200C. This is the easiest and most successful recipe I have come across. My family loved this bread.
Tash says
That's great feedback - thank you!
Nicki Bate says
Excellent recipe! I’ve tried several and this produces sourdough bread to equal my local artisan bakery!
I slow proved overnight in fridge, left out for 1 hour to bring to room temperature. Then cooked at 230 fan for 15 mins and 180 fan for 20 mins. Threw 4 ice cubes in at the start. Siemens oven.
Lucy says
That is absolutely fantastic to hear!!
Claire says
Perfect. Did o’night fridge prove and water in bottom of oven.
Lucy says
Fantastic!!!!